Geraniums in Need

I don’t deserve my houseplants.

In college I bought two geraniums at a plant sale. I’m reasonably sure I’m watering one of them in this short film my friends and I made in 2008.

some_text

I since gave one to my dad. It’s beautiful and lush and is living out its days on the front porch. The other one stayed with me, and I’ve been treating it with an attitude that could very generously be called laissez-faire.

Here it is.

some_text

It’s been wasting away in the window of our living room for a few years. This past spring I finally got it together to give it a dash of fertilizer, which inspired it to grow this long tentacle off to the right.

To its credit, it’s been blooming more or less constantly all this time. I’ve been hoping to collect some seeds, but while I’ve gotten a few fluffy spikes from the spent flowers, no actual seeds have appeared.

some_text

Deciding I owed it to this plant to try and make things right, I took a few simple but decisive steps. First of all, I cut off the tentacle. It was the newest growth, but it was unsustainable. It could barely hold itself up and was only going to get longer.

For curiosity’s sake, I stuck it in a bucket of dirt to see if I could get it to take root.

some_text

I removed all the flowers (and, since, a few of the leaves) to help it focus its energy on root-growing.

some_text

I trimmed up the main plant a bit and gave both containers a big dose of kelp meal and water. I set them in the dappled shade for a few days, then moved them to fuller sun.

Now it’s been a little over a month and, against all odds, both plants are alive and kicking.

some_text

I’m especially impressed with the tentacle which, with four leaves to its name, has produced a big clutch of flowers and buds.

some_text

If I’d known this thing was going to make it, I might’ve taken a little more care planting it – like cutting it down or sticking it in better soil that wasn’t infested with mulberry seeds.

some_text

I’m not about to mess with now, though. I’ll give it some more time either to establish or exhaust itself, and then I’ll take stock.

some_text

The main plant is looking much better, too. It’s still on the spindly side, but it’s a lot greener and blooming more vigorously.

some_text

I’d say Project Geranium was a success. They have another good month or two outside to build up their strength, so hopefully it’s only up from here.

some_text

If they hold on long enough, they just might get to star in another movie.


Rugosa Rose Propagation

I just got back from vacation with my family. I trooped down to the public library for essentials like work and Game of Thrones, but for the most part I’ve been without internet.

Now I’m back with the comforting blanket of pervasive wifi and a fierce desire to grow Rugosa Roses.

some_text

Rugosa Rose, also called Rugged Rose or Beach Rose, grows all over the island my family vacations on. It smells amazing. A few years ago my parents put two small plants in their garden. They’re on course to take over the house in a few years, so my dad had no problem sending me home with a few cuttings.

some_text

I’ve never propagated roses, but after hastily reading a single google result I decided I was good to go.

I read that my cuttings should be 6 to 8 inches long, with a withered flower on the end. As luck would have it, the branches my dad gave me were covered in just-passed flowers, so I clipped off as many 8 inch lengths as I could find.

some_text

I cut off the lower leaves to make a long bare stem of new growth, ending in one or two sets of leaves and single flower.

some_text

These were some productive branches – I ran out of small pots before I ran out of flowers.

some_text

My inadequate research has led me to believe that new growth propagates better than old growth. Since I have so much old growth and don’t really know what I’m doing, though, I’m giving it a go with the big branches, too. I made a new 45 degree cut at the base of each one because of an unfounded belief that this is better.

some_text

I removed the lower growth and stuck each branch in a big pot. It almost looks like I have real, healthy plants and not just branches jammed in the ground.

some_text

Just for the heck of it I planted a couple of those flowerless lower branches, too.

some_text

With everybody planted, I gave them a thorough soaking. Apparently the name of the game now is keeping the cuttings moist. I read that covering them in plastic bags helps, but it’s been so hot recently that I’m worried I’d roast them that way. Instead I’ve been spraying them down daily, never letting the soil dry out.

some_text

In all I have 13 cuttings – some old growth and some new, some deadheaded and some not. (I have to imagine deadheaded is better, since they’re devoting energy to roots instead of seeds, but we’re learning here).

some_text

With this many test subjects, something is bound to take, right?

Lilac Wine

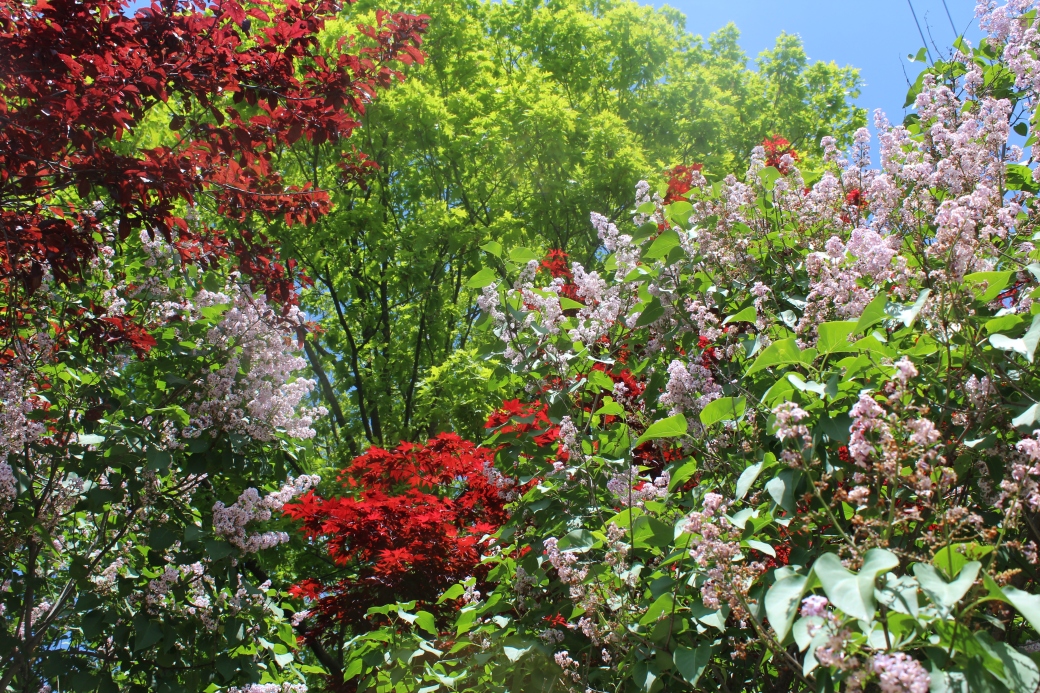
The lilacs are in full bloom in Providence.

I never realized how many lilac bushes were around until I started looking for them, but it seems like they’re everywhere. I stumbled across this recipe last summer, long after I’d missed my chance. I’m timing it right this time.

IMG_4493.JPG

I considered trawling the city and snipping blossoms here and there from people’s yards. They’re usually drooping over the sidewalk, and who would miss a few flowers? That’s more sneaking than I’m used to, and with a recipe that calls for nearly a gallon of blossoms, that’s a lot of trooping around.

Luckily the community garden has a huge lilac bush that I felt much easier about taking from. My fellow beekeeper Kim actually started it in a pot in her kitchen 12 years ago. It’s come a long way since then. And since our garden is organic (and I did find the odd worm picking through the flowers) I feel reasonably confident that I won’t be making pesticide wine.

some_text

I didn’t want to clean out the bush of its flowers, so I spread my harvesting over two and a half trips, trying to take only the most open sprays. This is one harvest’s worth, bunched together into a super spray.

some_text

The thing about lilacs is that its sprays are actually made up of scores of tiny individual flowers. I became intimately aware of this fact as I pulled each and every one off of its stem.

some_text

I have gazed into the abyss, and it smells amazing.

some_text

After destemming my first day’s flowers, I sealed the bag and put it in the freezer to keep them from wilting.

some_text
This worked better than I could have hoped. They kept their shape and (mostly) their color. They look like they belong on top of a cake.

some_text

A few days later I repeated the process and may have made a huge mistake. Instead of starting a new bag, I just threw my fresh flowers on top of my old frozen ones. An hour out of the freezer and in my lap did the frozen flowers no favors – they thawed into a nasty brown mass.

some_text
All the flowers here are frozen – can you tell which are from the first day and which are from the second?

some_text

The brown flowers notwithstanding, they really were beautiful. I was worried the brown ones would spoil the whole batch, but I didn’t have enough volume without them and I was so sick of destemming sprays by this point. I reasoned with myself that all the flowers would lose their color once they thawed, and these had just had a head start. Against my own better judgment I used both brown and purple flowers.

Sometimes it doesn’t feel like a real project unless I’m needlessly jeopardizing the whole thing.

some_text
I boiled 7 pints of water and dumped it over the flowers to make a lilac “tea.” I’ve found a few recipes for lilac wine, and they all recommend letting this tea sit for 48 hours. I’ve also found quite a few comments on these recipes complaining that 48 hours of sitting turned their lilac tea to rotten mush. I can believe it – two days is a long time to leave wet flowers in the dark. I gave my tea 24 hours and called that more than enough time. How strong does this tea need to be, anyway?

some_text

I was happy to see that most of the flowers had turned brown, but a little unnerved that all of them hadn’t…

some_text

I ran my tea through a sieve to separate liquid from solid. Is the tea purple? Lord no. It’s an amber color that looks, for lack of a better word, like tea.

some_text

I put my tea in a fermentation bucket and added everything but the yeast. This included a crushed Campden tablet that would sterilize the must over the course of another 24 hours. I also added a teaspoon of yeast nutrient and enough sugar for my hydrometer to read 1.160. I was just a little short on sugar and made up for it in honey. This is the first wine I’ve made by adjusting the sugar to the correct amount instead of blindly adding the number of cups the recipe calls for.

It only took me a year of winemaking to get my act together.

What I don’t have, however, is a way to measure acidity. Some recipes call for 2 lemons’ worth of juice, while others call for 2 tablespoons of juice, the equivalent of about half a lemon. Remembering the horrible astringency of my cucumber wine, I erred on the tablespoon side of things.

I hope I made the right call.

some_text

I mixed all these ingredients together and let them sit under a towel. After 24 hours I sprinkled a 5 gram package of Champagne yeast over the surface and replaced the towel.

some_text

The next morning I gave the must a good stir and was met with bubbles. Fermentation is definitely under way. The color is still brown but not un-purple. I’d call it a mauve.

More importantly, it smells wonderful. I gave it just a splash of honey, but it’s really coming through. Besides that, it has a floral scent that’s surprisingly delicate and is blending really well with that classic fermentation smell. I have very high hopes.

some_text

Since I’ll have to wait a whole year to make this again if it’s any good, I might have to strike while the iron’s hot and snatch up enough flowers for another batch.

some_text

Maybe pay the neighbors’ gardens a visit…

Spider Plant Magic

Winter is here with a vengeance. It’s been unseasonably mild, but the honeymoon is over and we’re finally getting some real cold and snow.  This is now the only way I can leave the house.

20160208_113528

My spider plant must not realize this, though, because it’s flowering! I noticed it was putting out a long shoot and thought for sure it would make another baby spider. I was excited, since all the previous spiders had been ripped off by the cat.

20160208_132111_HDR

Instead I’ve got a long series of buds, two of which have already opened. There are a couple grassy strands at the end, too, and I won’t be surprised if they do turn into a baby spider.

20160208_131933

I’ve had this plant since I was a sophomore in college, and I can’t recall it ever flowering before! Whether this is a special event or I’ve just never looked at the right time, I don’t know. Nor do I know if spider plants are self pollinating, but I’m going to go at it with a Q-tip regardless and hope for the best.

20160208_132014

These are exciting times we live in.