Happy as a Bee

I was pretty worried about the bees.

We moved them in on a cold, wet day, and the days after just got colder and wetter. We’d planned to peek in on them on Saturday, but because of the cold we pushed it back to Sunday, which was also cold. And wet.

It was a bad week for bees all around.

IMG_4156

Despite the weather, we had to check on our queen. My parents were visiting, so my dad acted as photographer and my mom, to her credit, spent her Mother’s Day standing in the drizzle watching me play with bees.

I did make her brunch afterward.

IMG_4163

The bad weather had me worried. I’d gone down the day after installation and didn’t see a single one. Normally after moving into a new home, the workers will fly around and around the entrance orienting themselves. The temperature was in the 40s, though, when no sane bee would leave her home. It made sense not to see them, but I didn’t like that I couldn’t.

IMG_4172

I put my ear up against the side of the hive – I thought that if I could hear buzzing, I’d at least know they were alive in there. But I couldn’t hear a thing. I was prepared for the worst.

IMG_4166

But I didn’t need to be! The bees are not only alive, they’re productive! They’ve already started drawing out comb!

IMG_4169

The queen is alive and has been naturally released from her little cage. We spotted her crawling around on a frame.

IMG_4170

They haven’t taken very much of the syrup – the jar was still mostly full. We’re not overly worried, though, since we started them with a few frames of pollen and honey from last year. It makes sense that they’d want to eat that before sugar water.

IMG_4181

Since it was raining, we closed up shop as soon as we found the queen. One of these days it’ll be nice enough to do a real inspection. For the time being, we confirmed everything we needed to – the queen was free, she’d been accepted, and the workers were working. We put the syrup jar back in place and popped the lid on top.

IMG_4175

I was down just this afternoon, and the bees were flying around happily. They weathered the storm and should have a warm, sunny week ahead of them.

If you’re in the garden, stop by and say hi!

IMG_4301

From a safe distance, of course.

The Bees Are in Their Bee House

You heard it here first – the bees are hived and happy.

Early this morning the bees were in Georgia, their home state. Then they were loaded into the back of a truck and driven to Wood’s Beekeeping Supply and Academy, where we picked them up.

20160504_163508

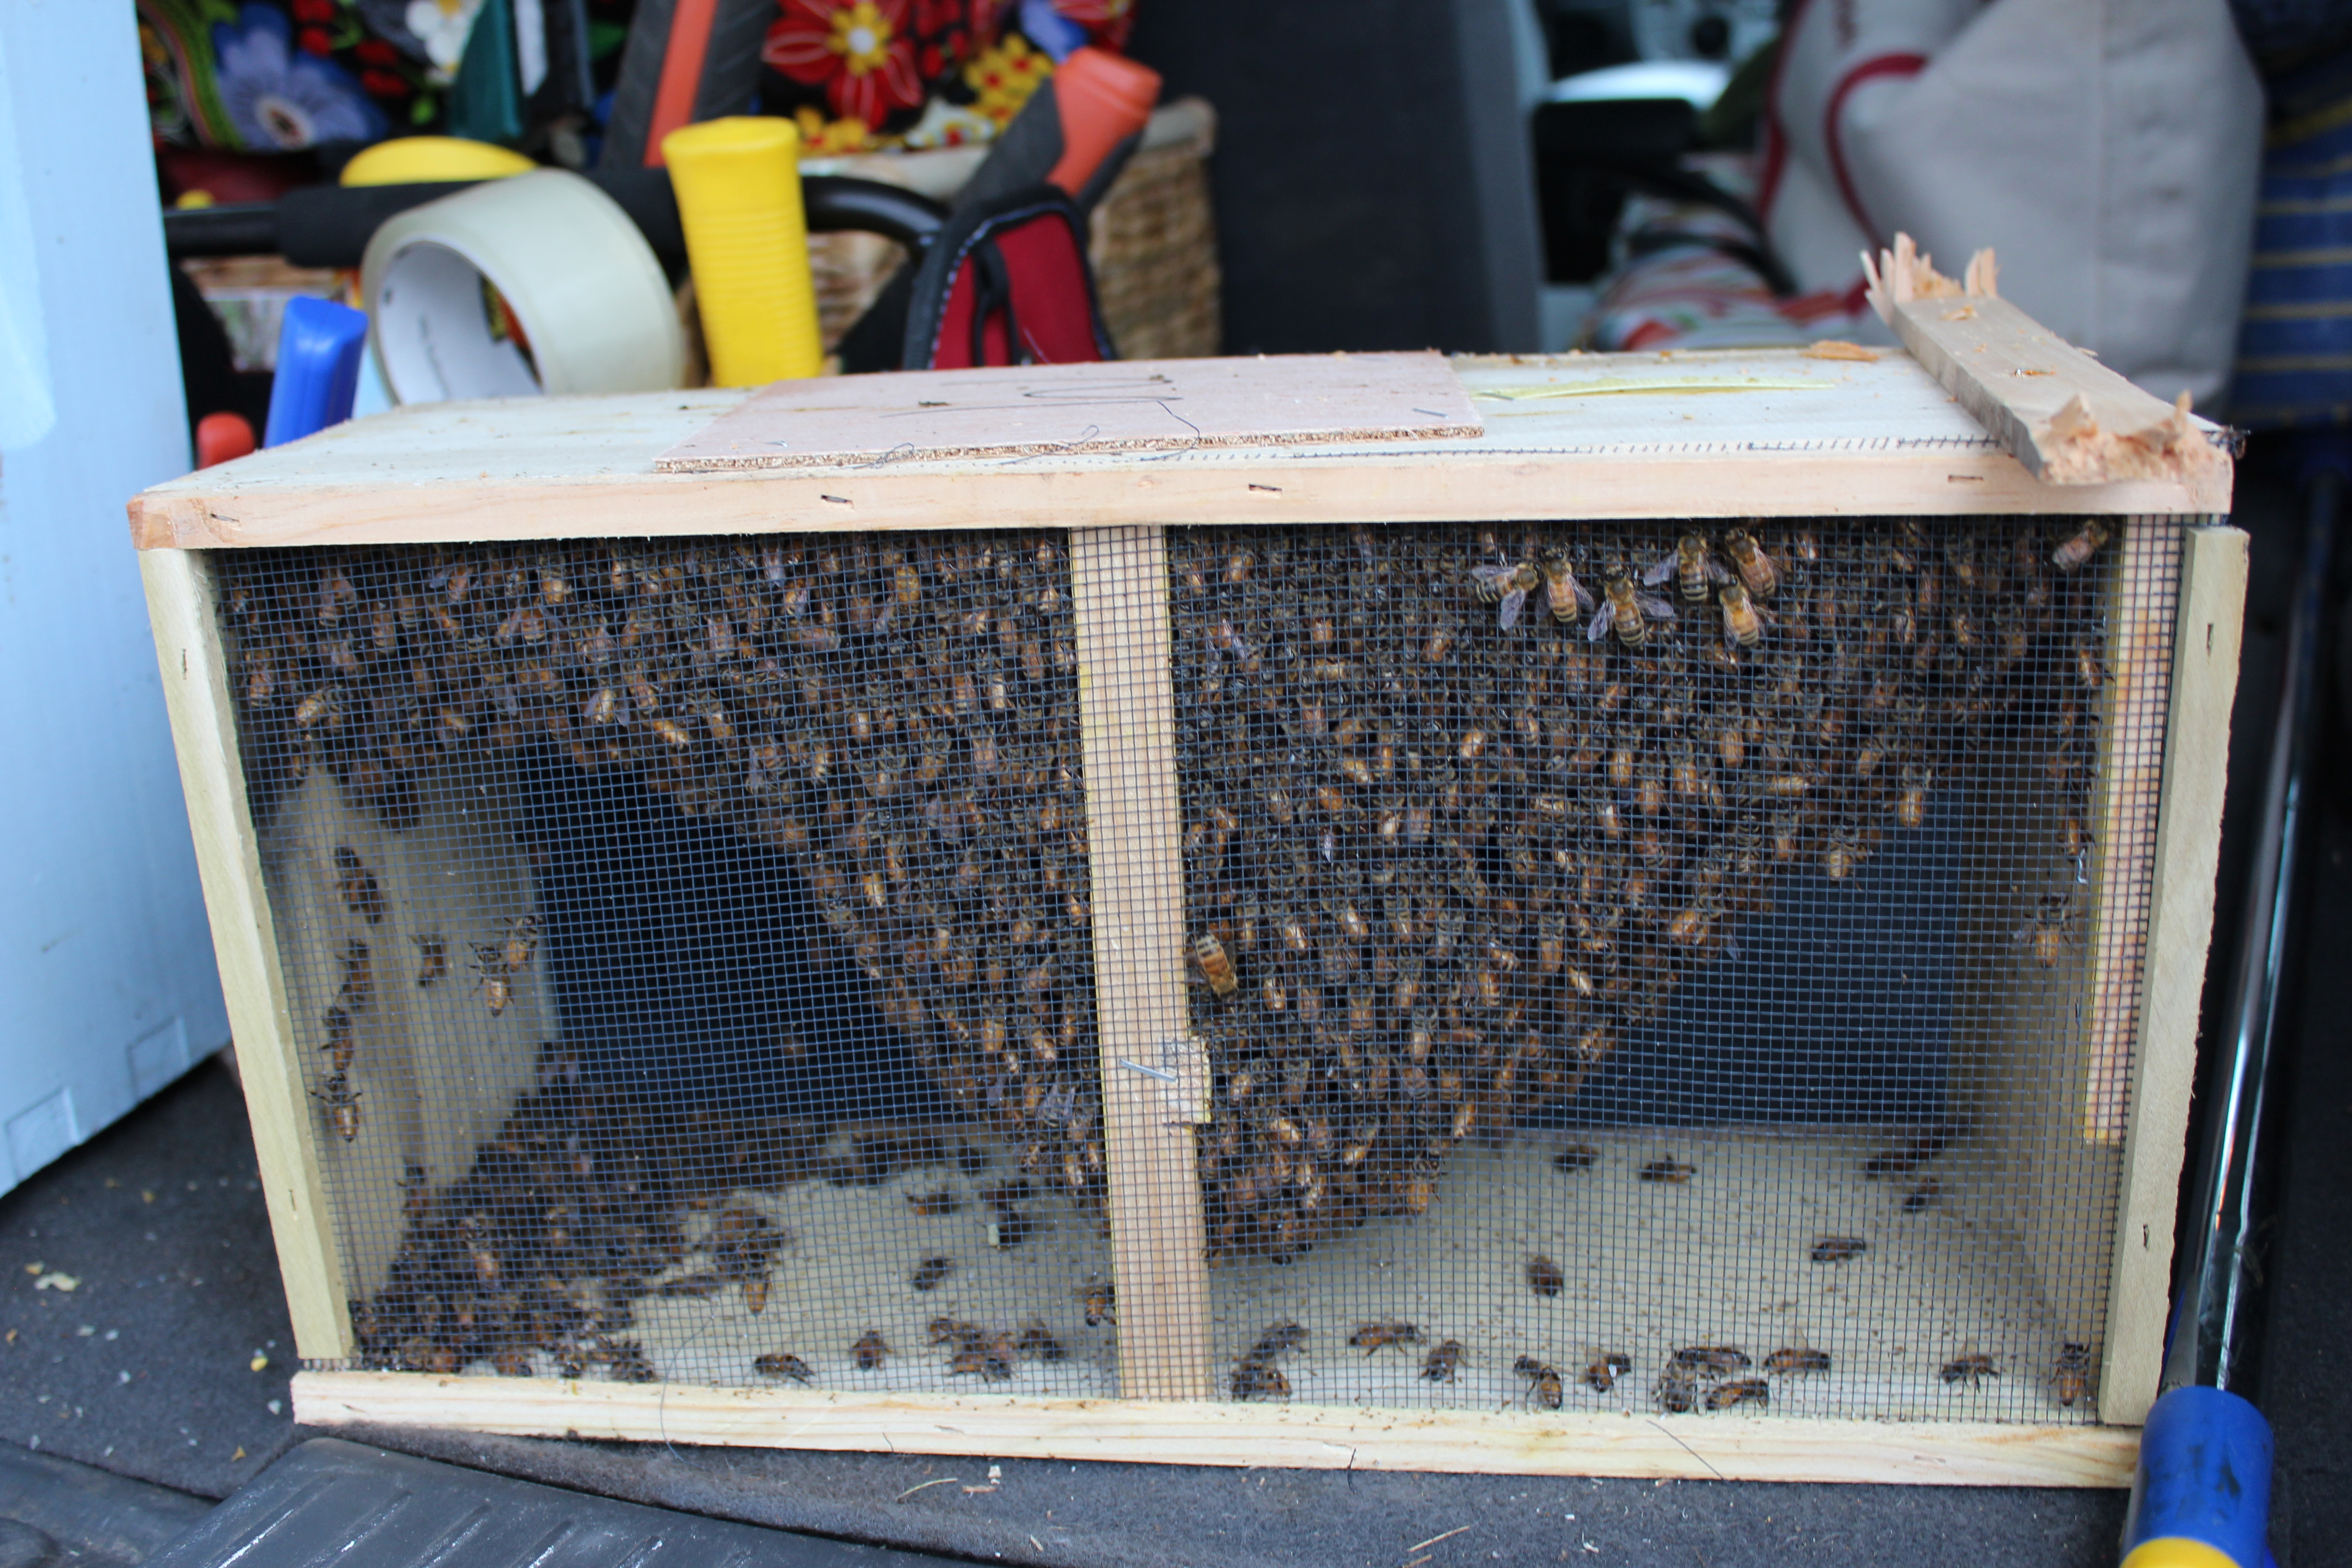
Here they are! Three-thousand happy little guys. I’m just kidding – they just got shaken out of their hives to travel 2,000 miles to a cold, wet place. They’re probably far from happy.

IMG_4126

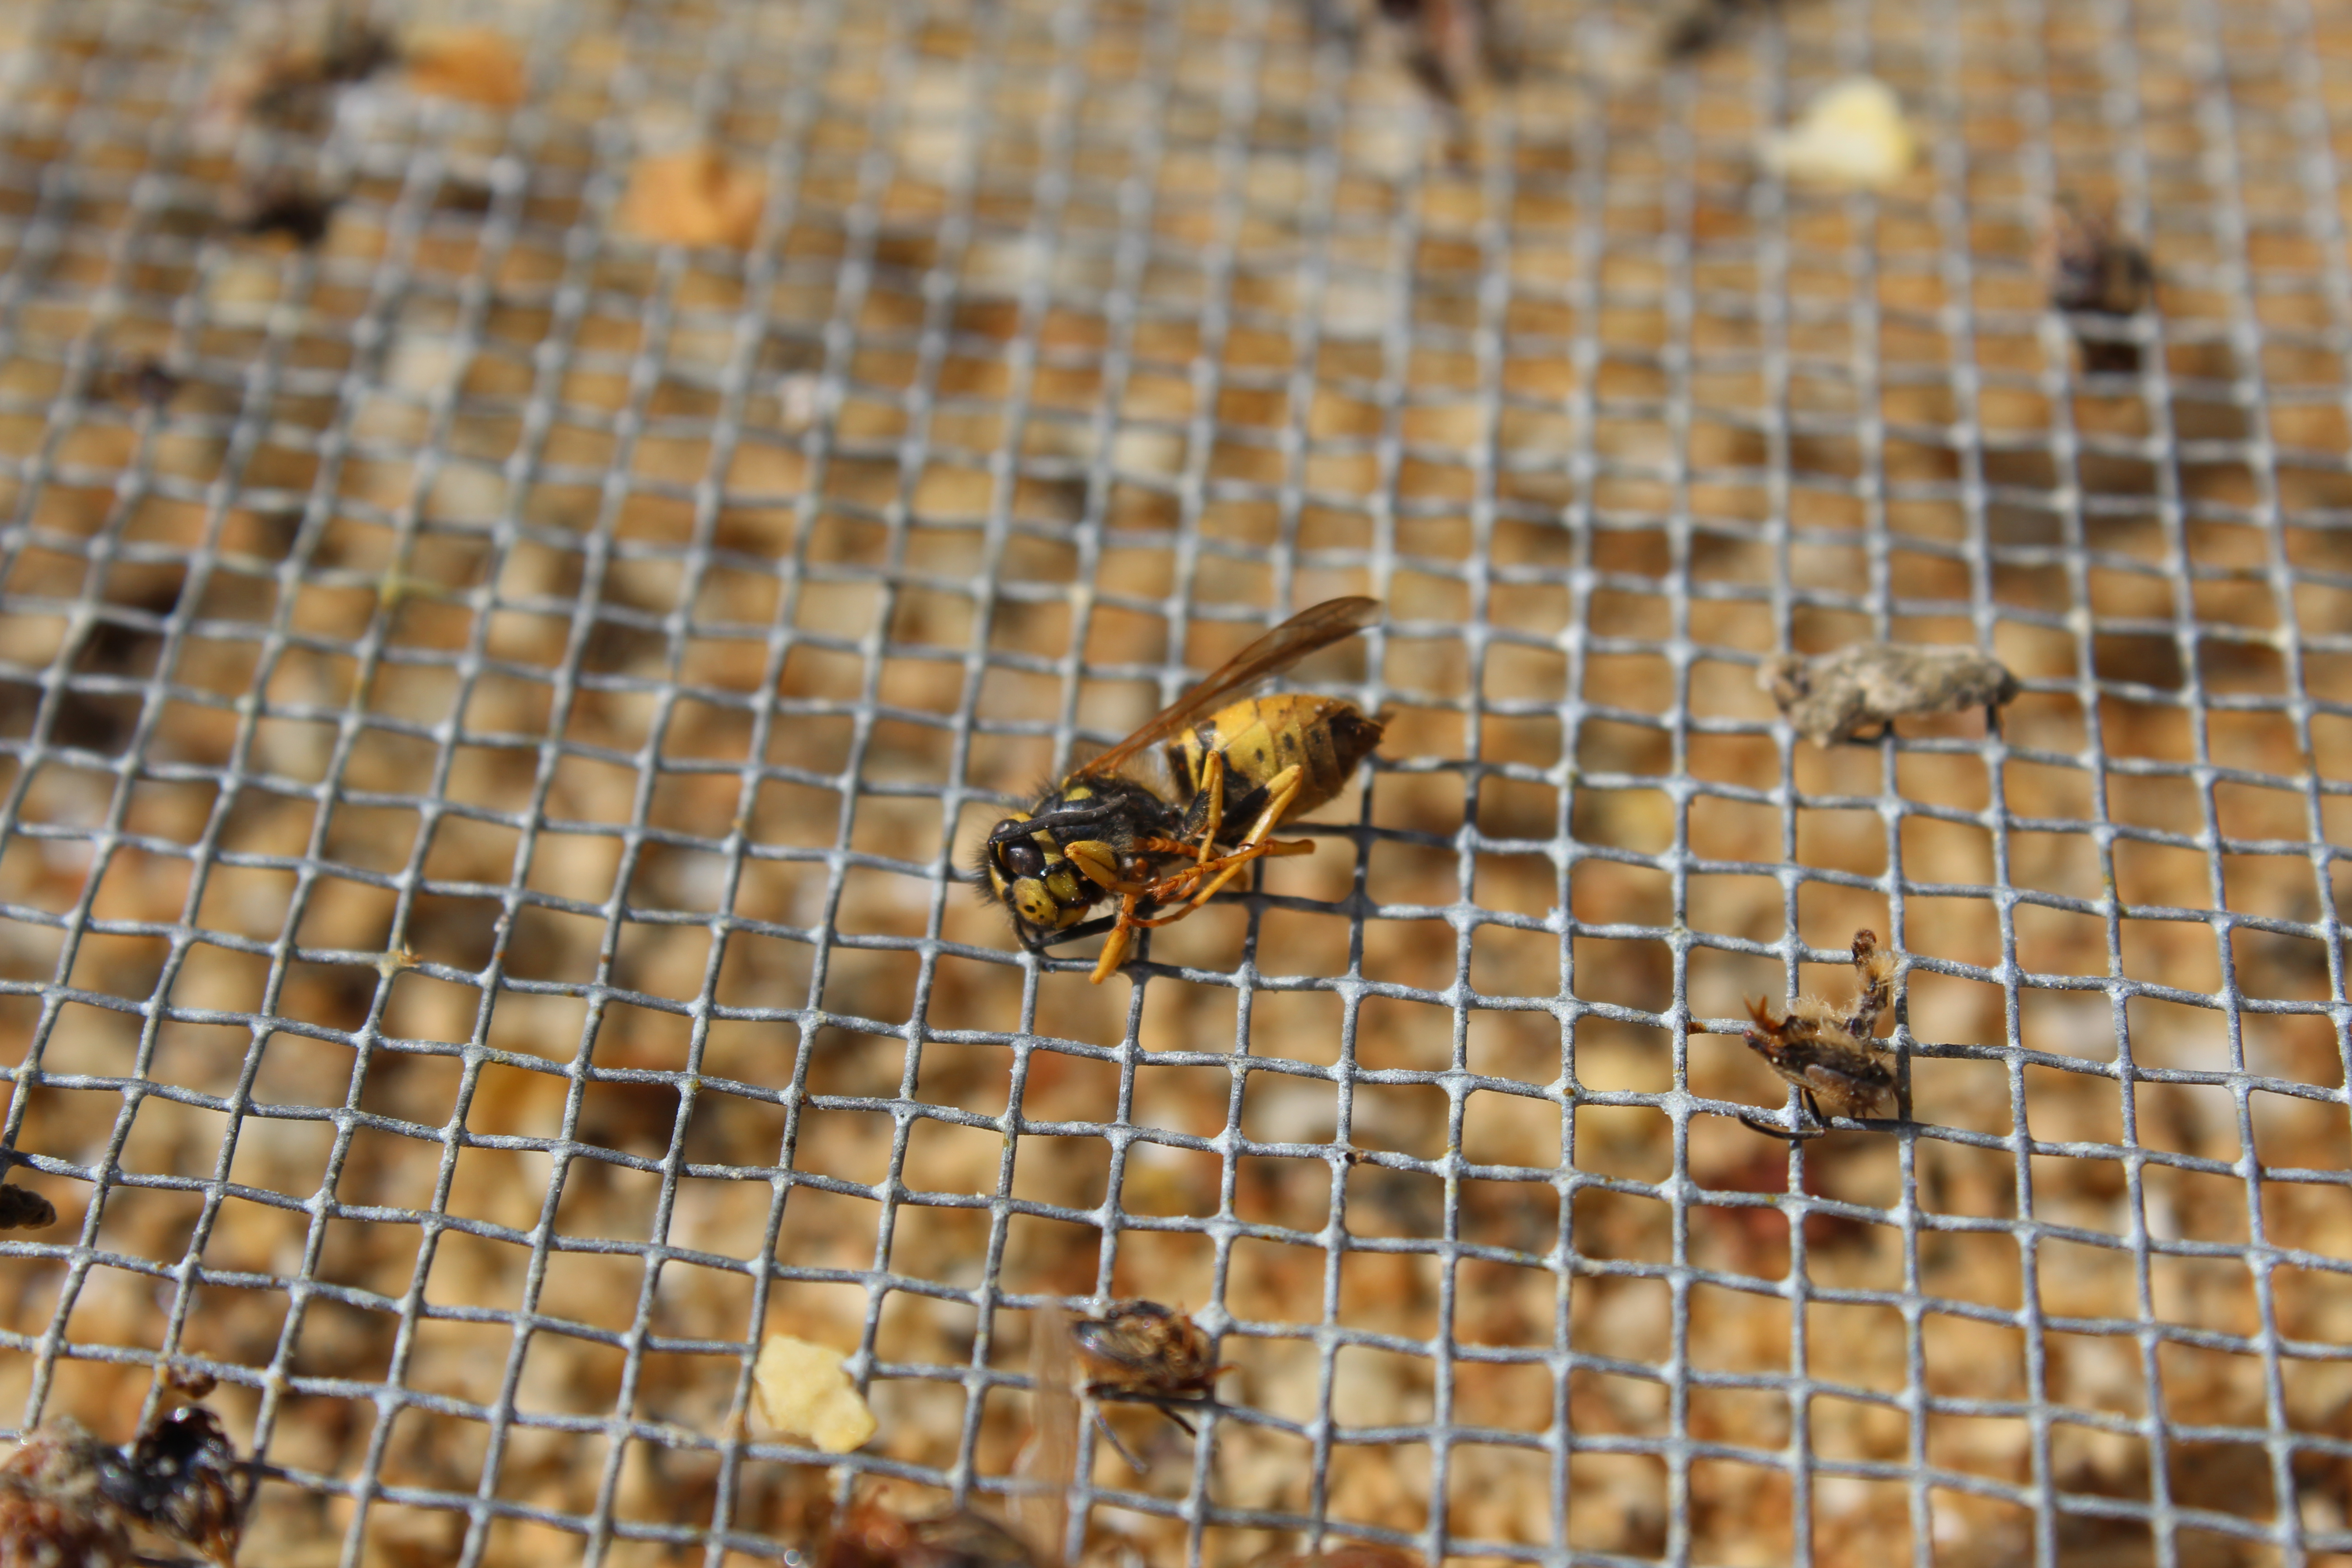
These six in particular must have spent the entire trip clinging to the outside of the package.

IMG_4127

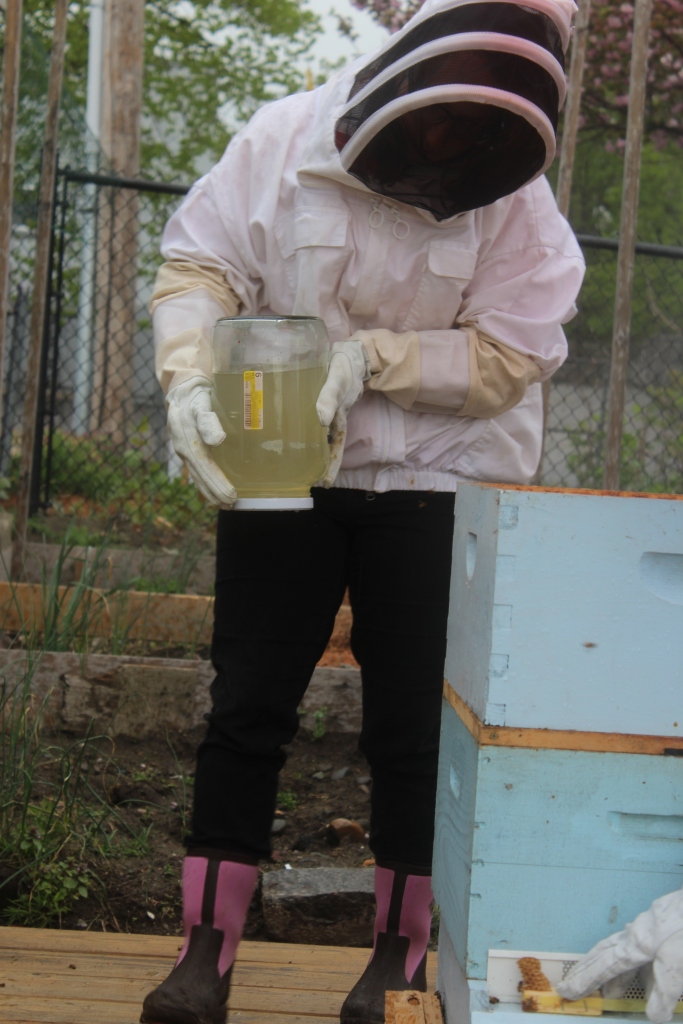
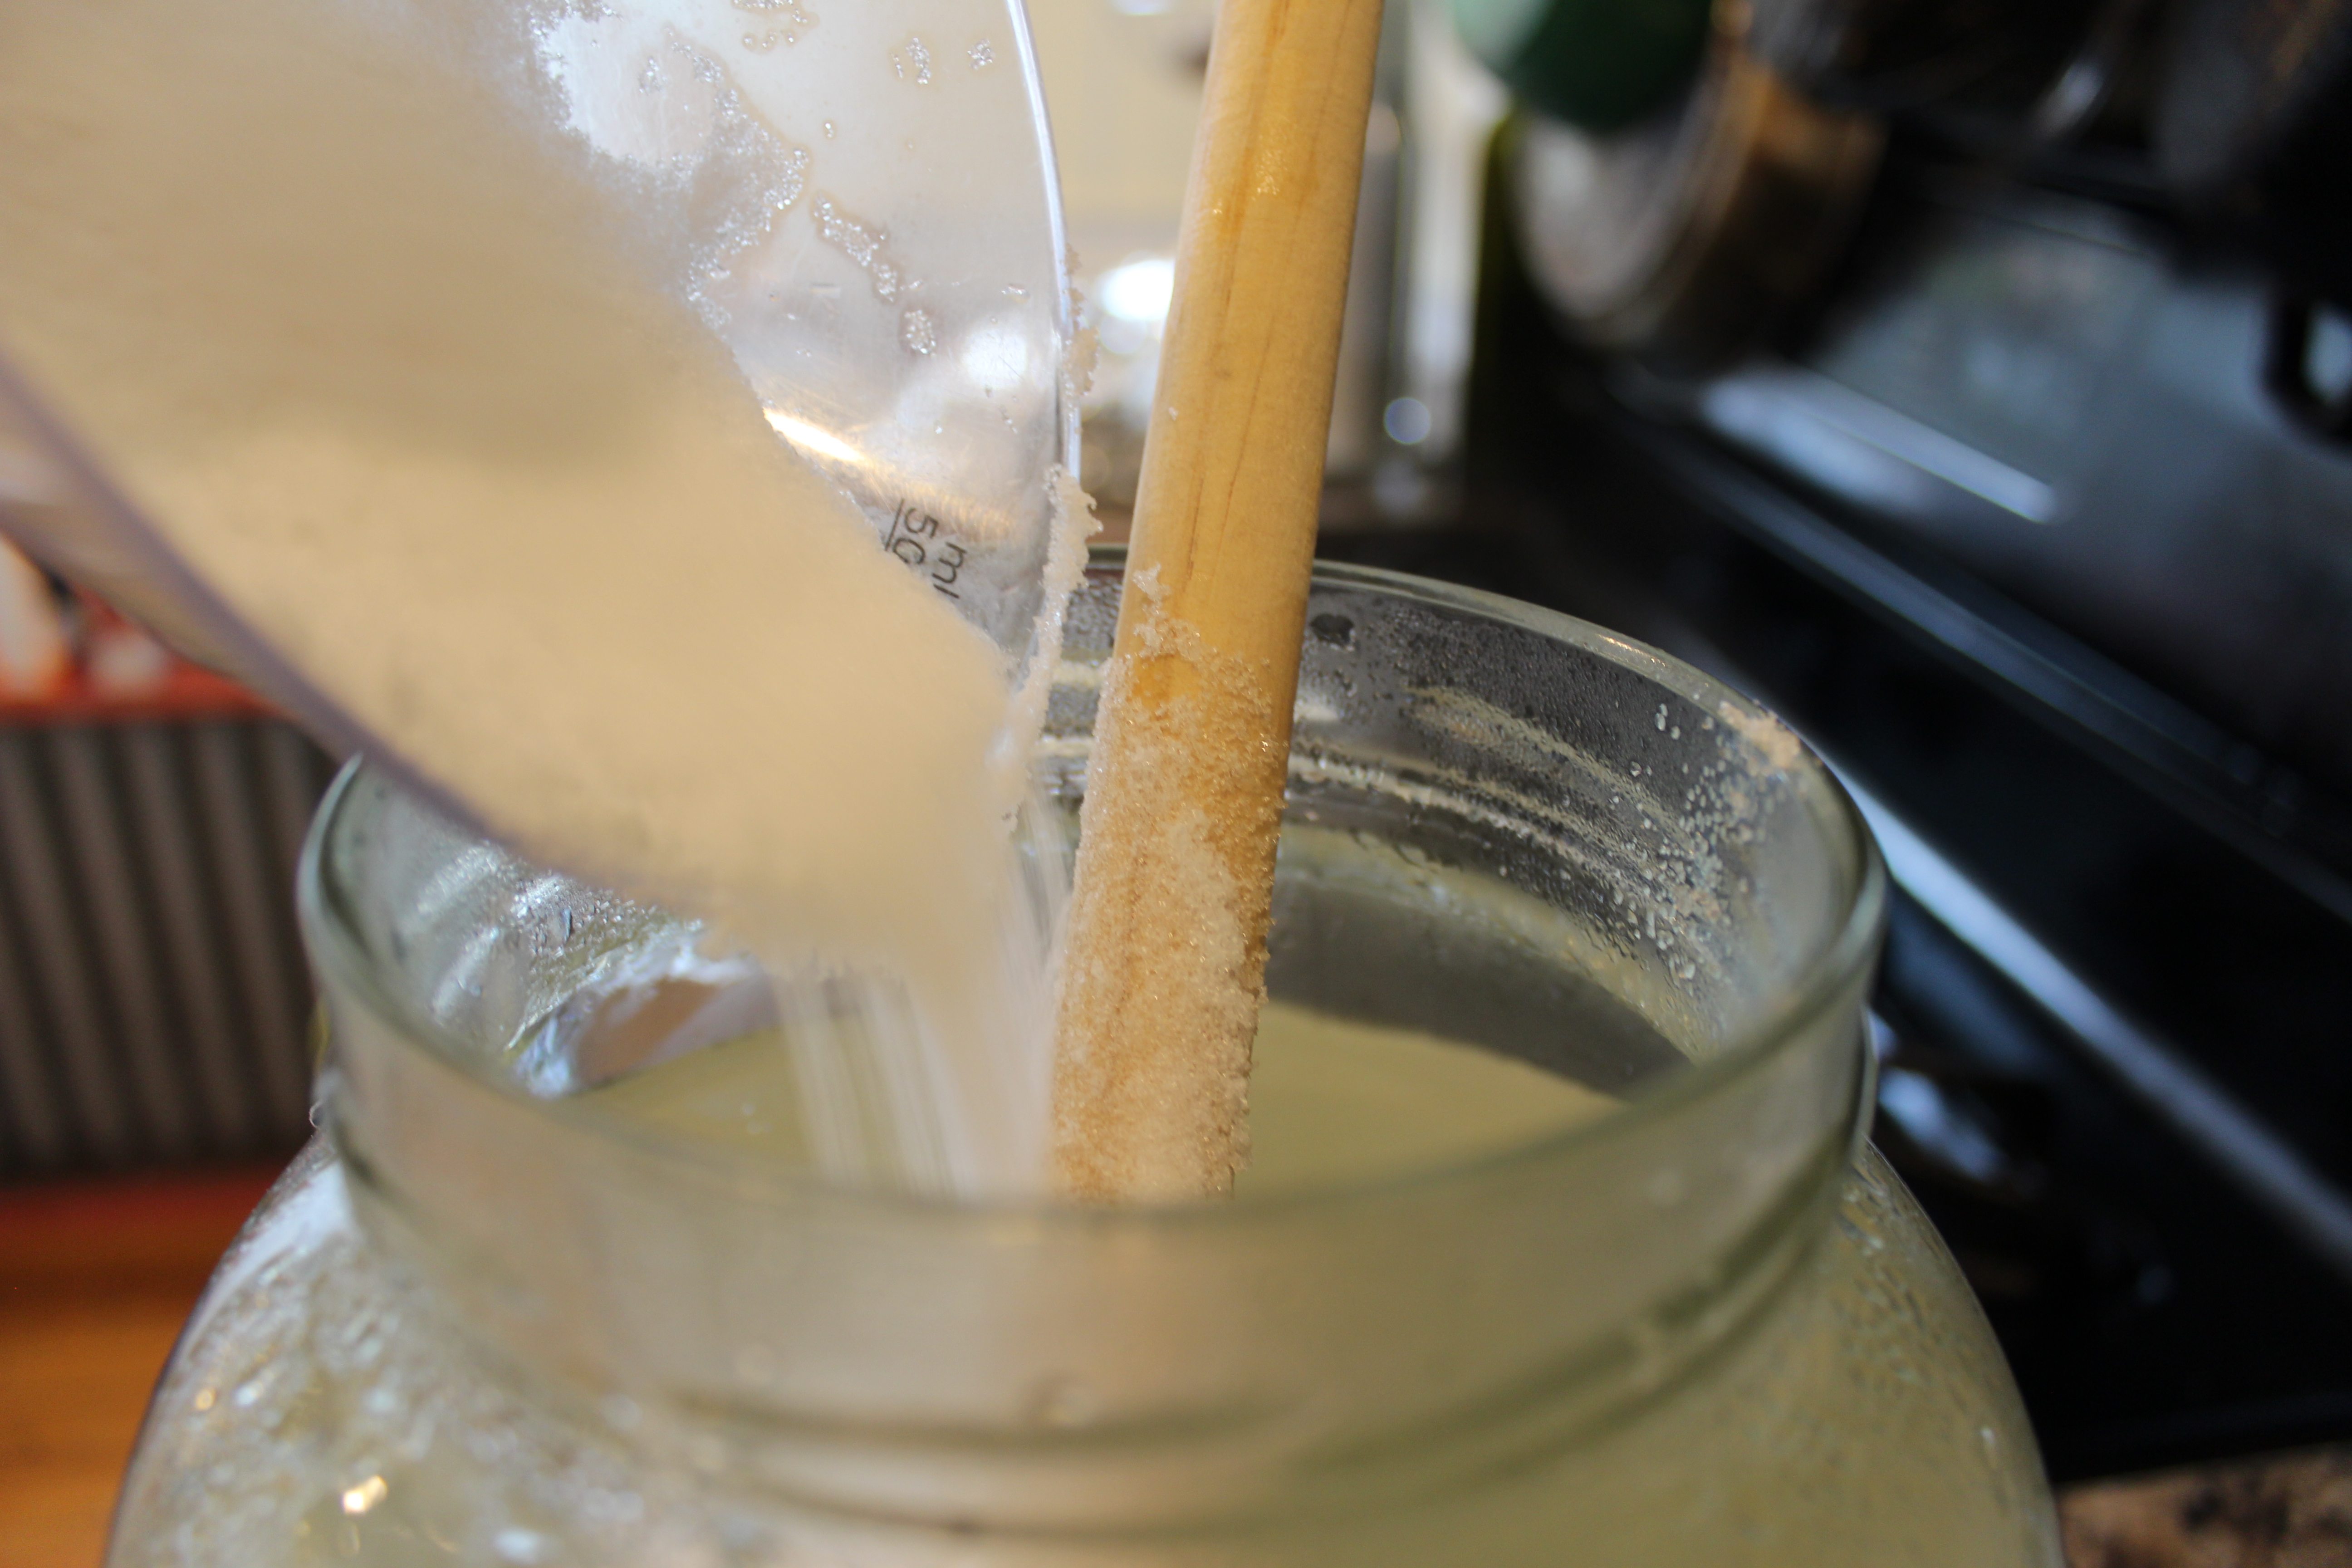
The weather was threatening rain all day, and as luck would have it the heavens opened just as we picked our bees up. We wanted to get them in, though, so we worked very quickly. I poked some holes in the lid of my bee syrup jar. We turned it over, and after a few seconds of dripping, the vacuum seal held. The bees will be able to pull the syrup out when they want it, but it won’t just drip all over them.

IMG_4123

Finally it was go-time. David grabbed the bees and we booked it over to the hive.

IMG_4129

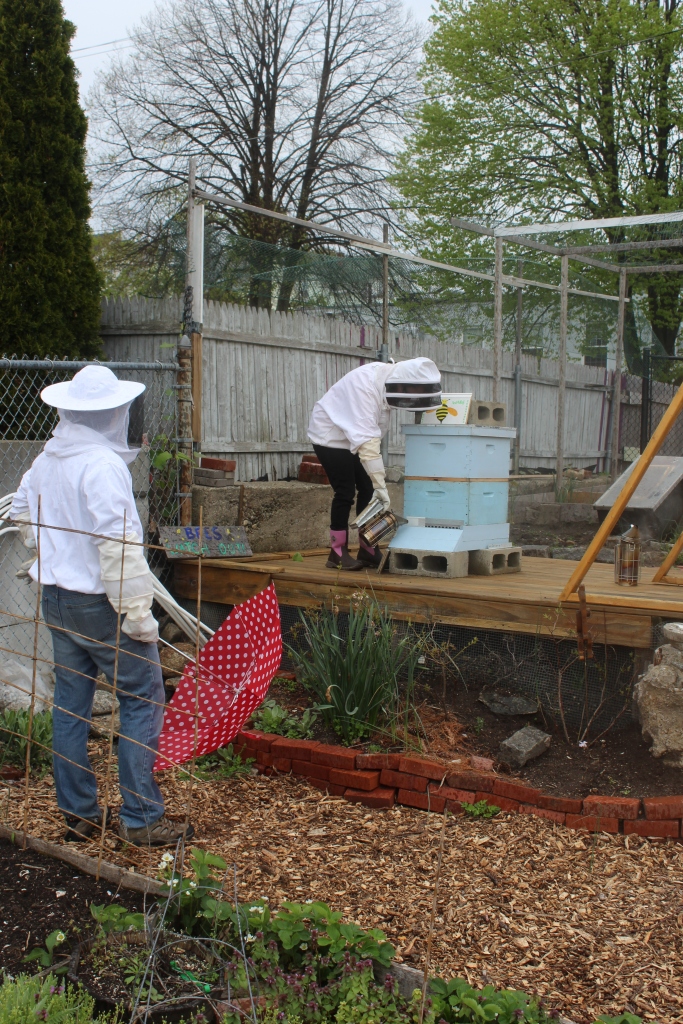
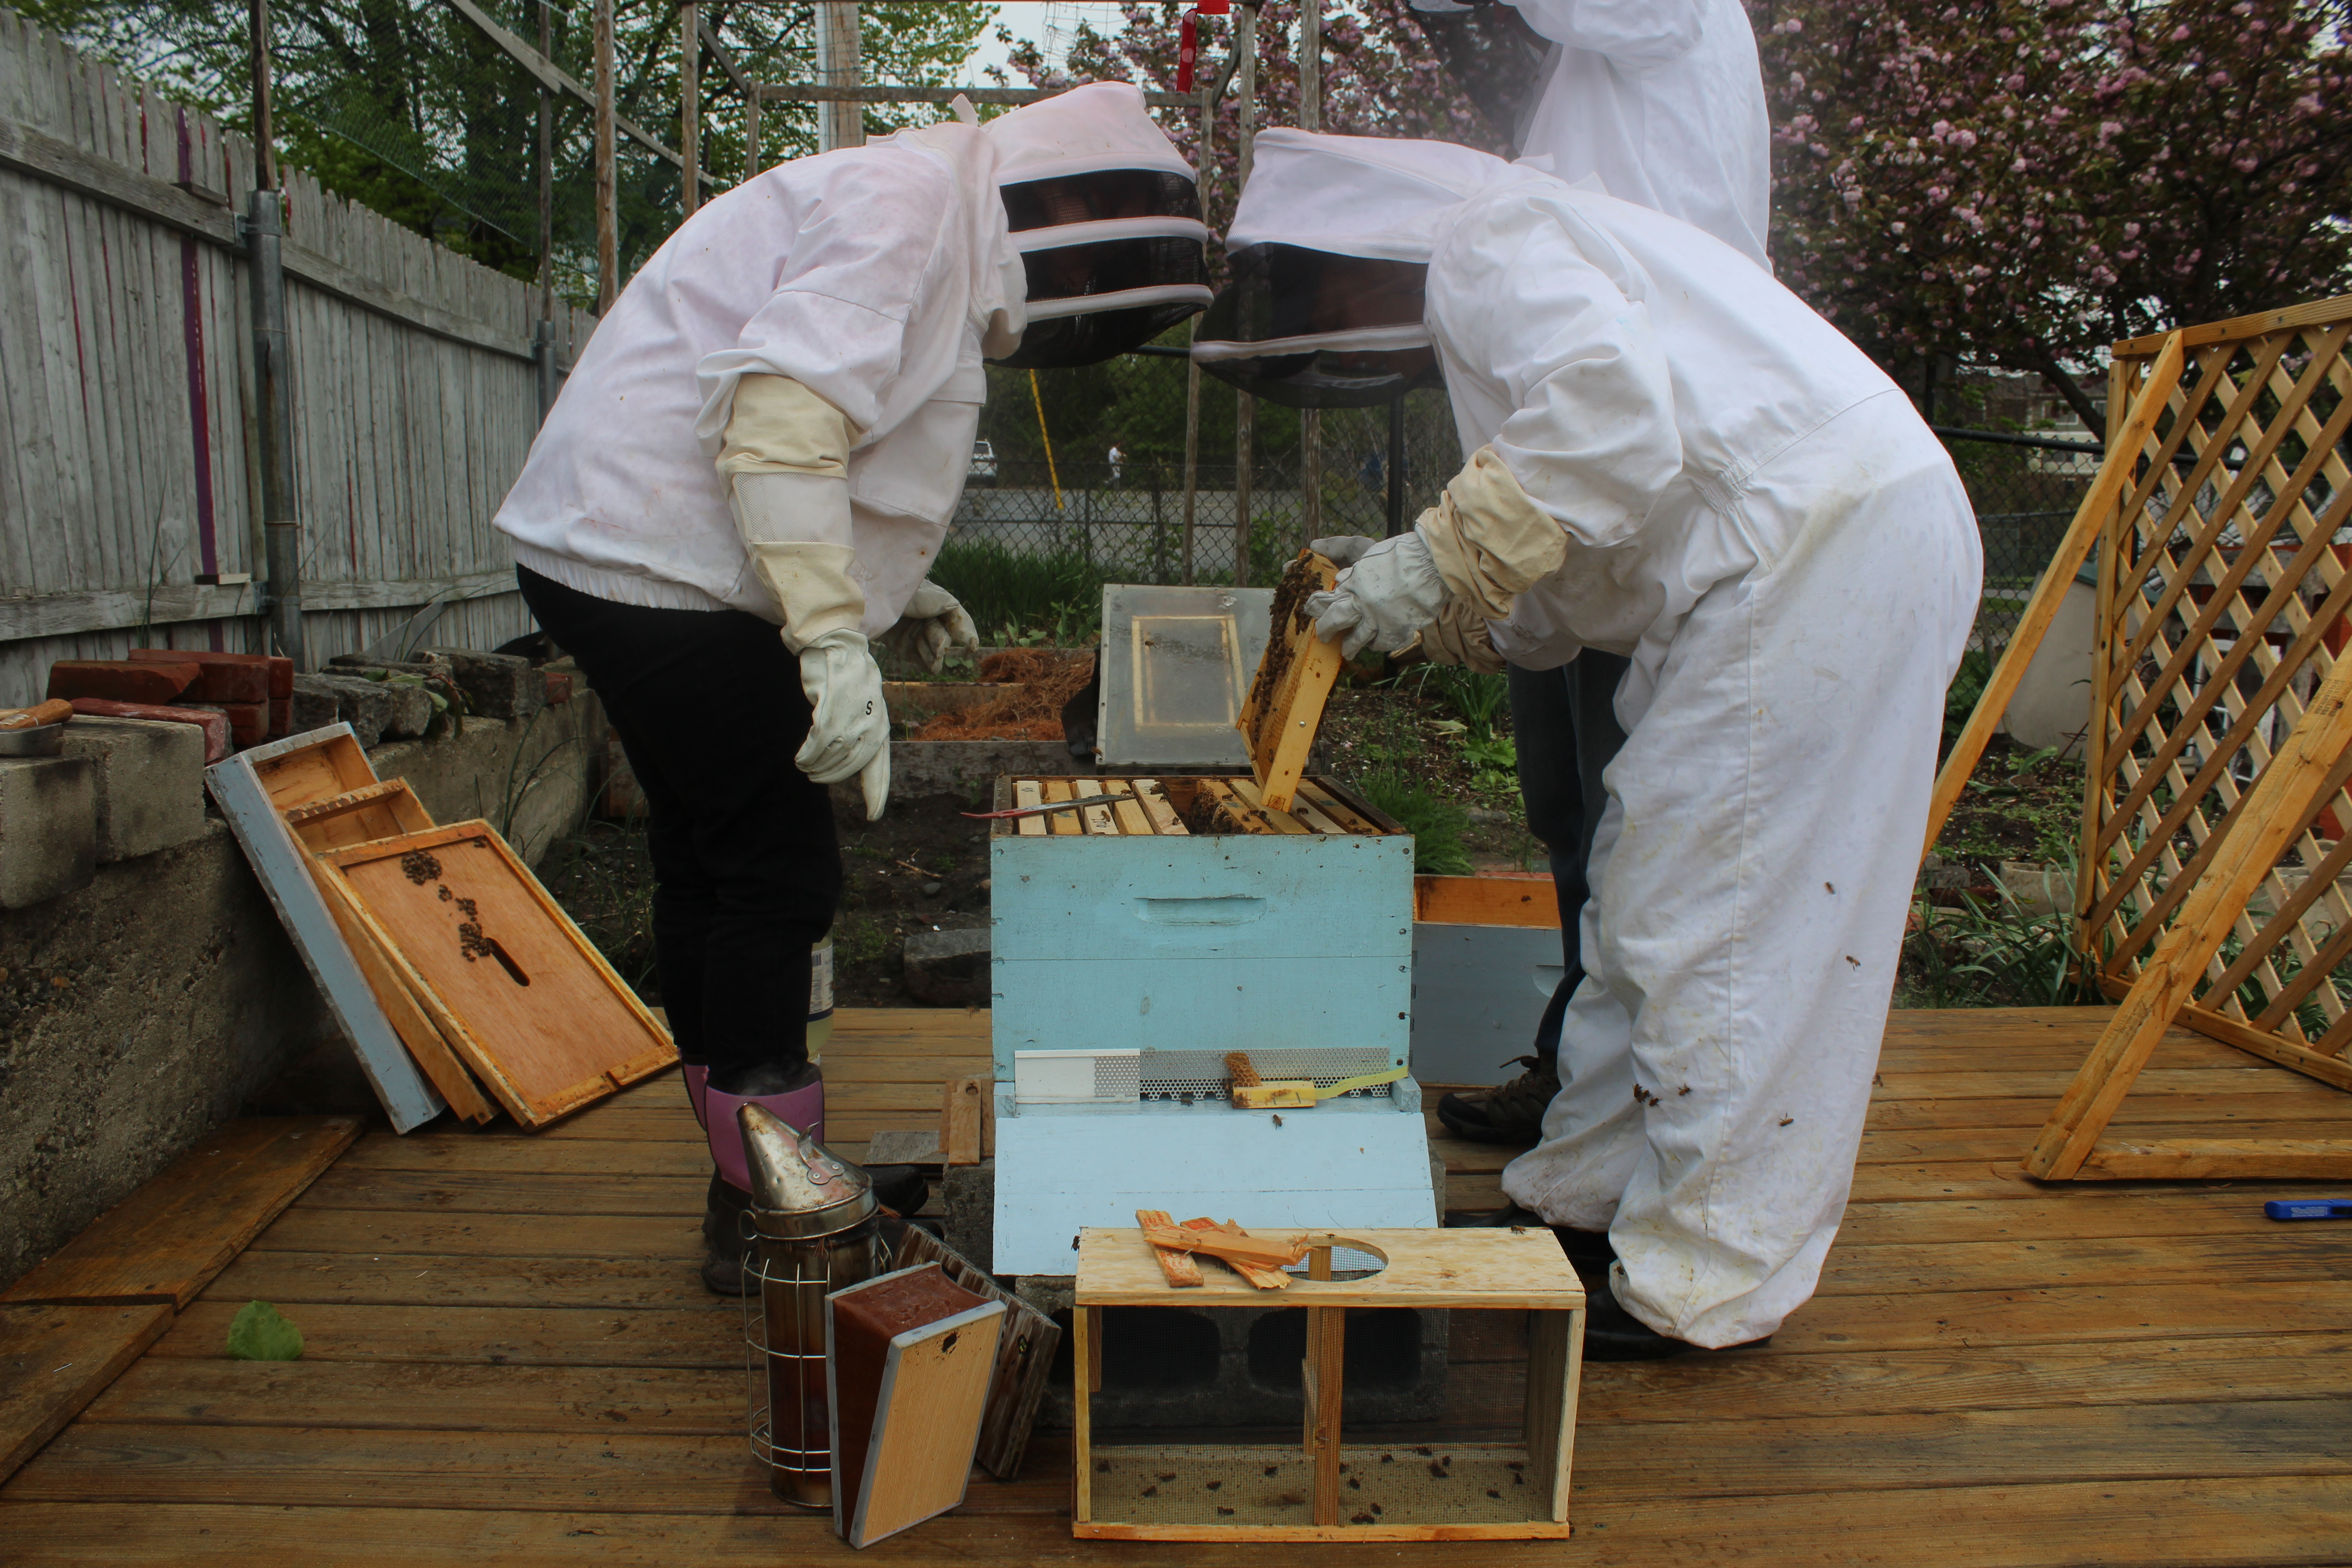
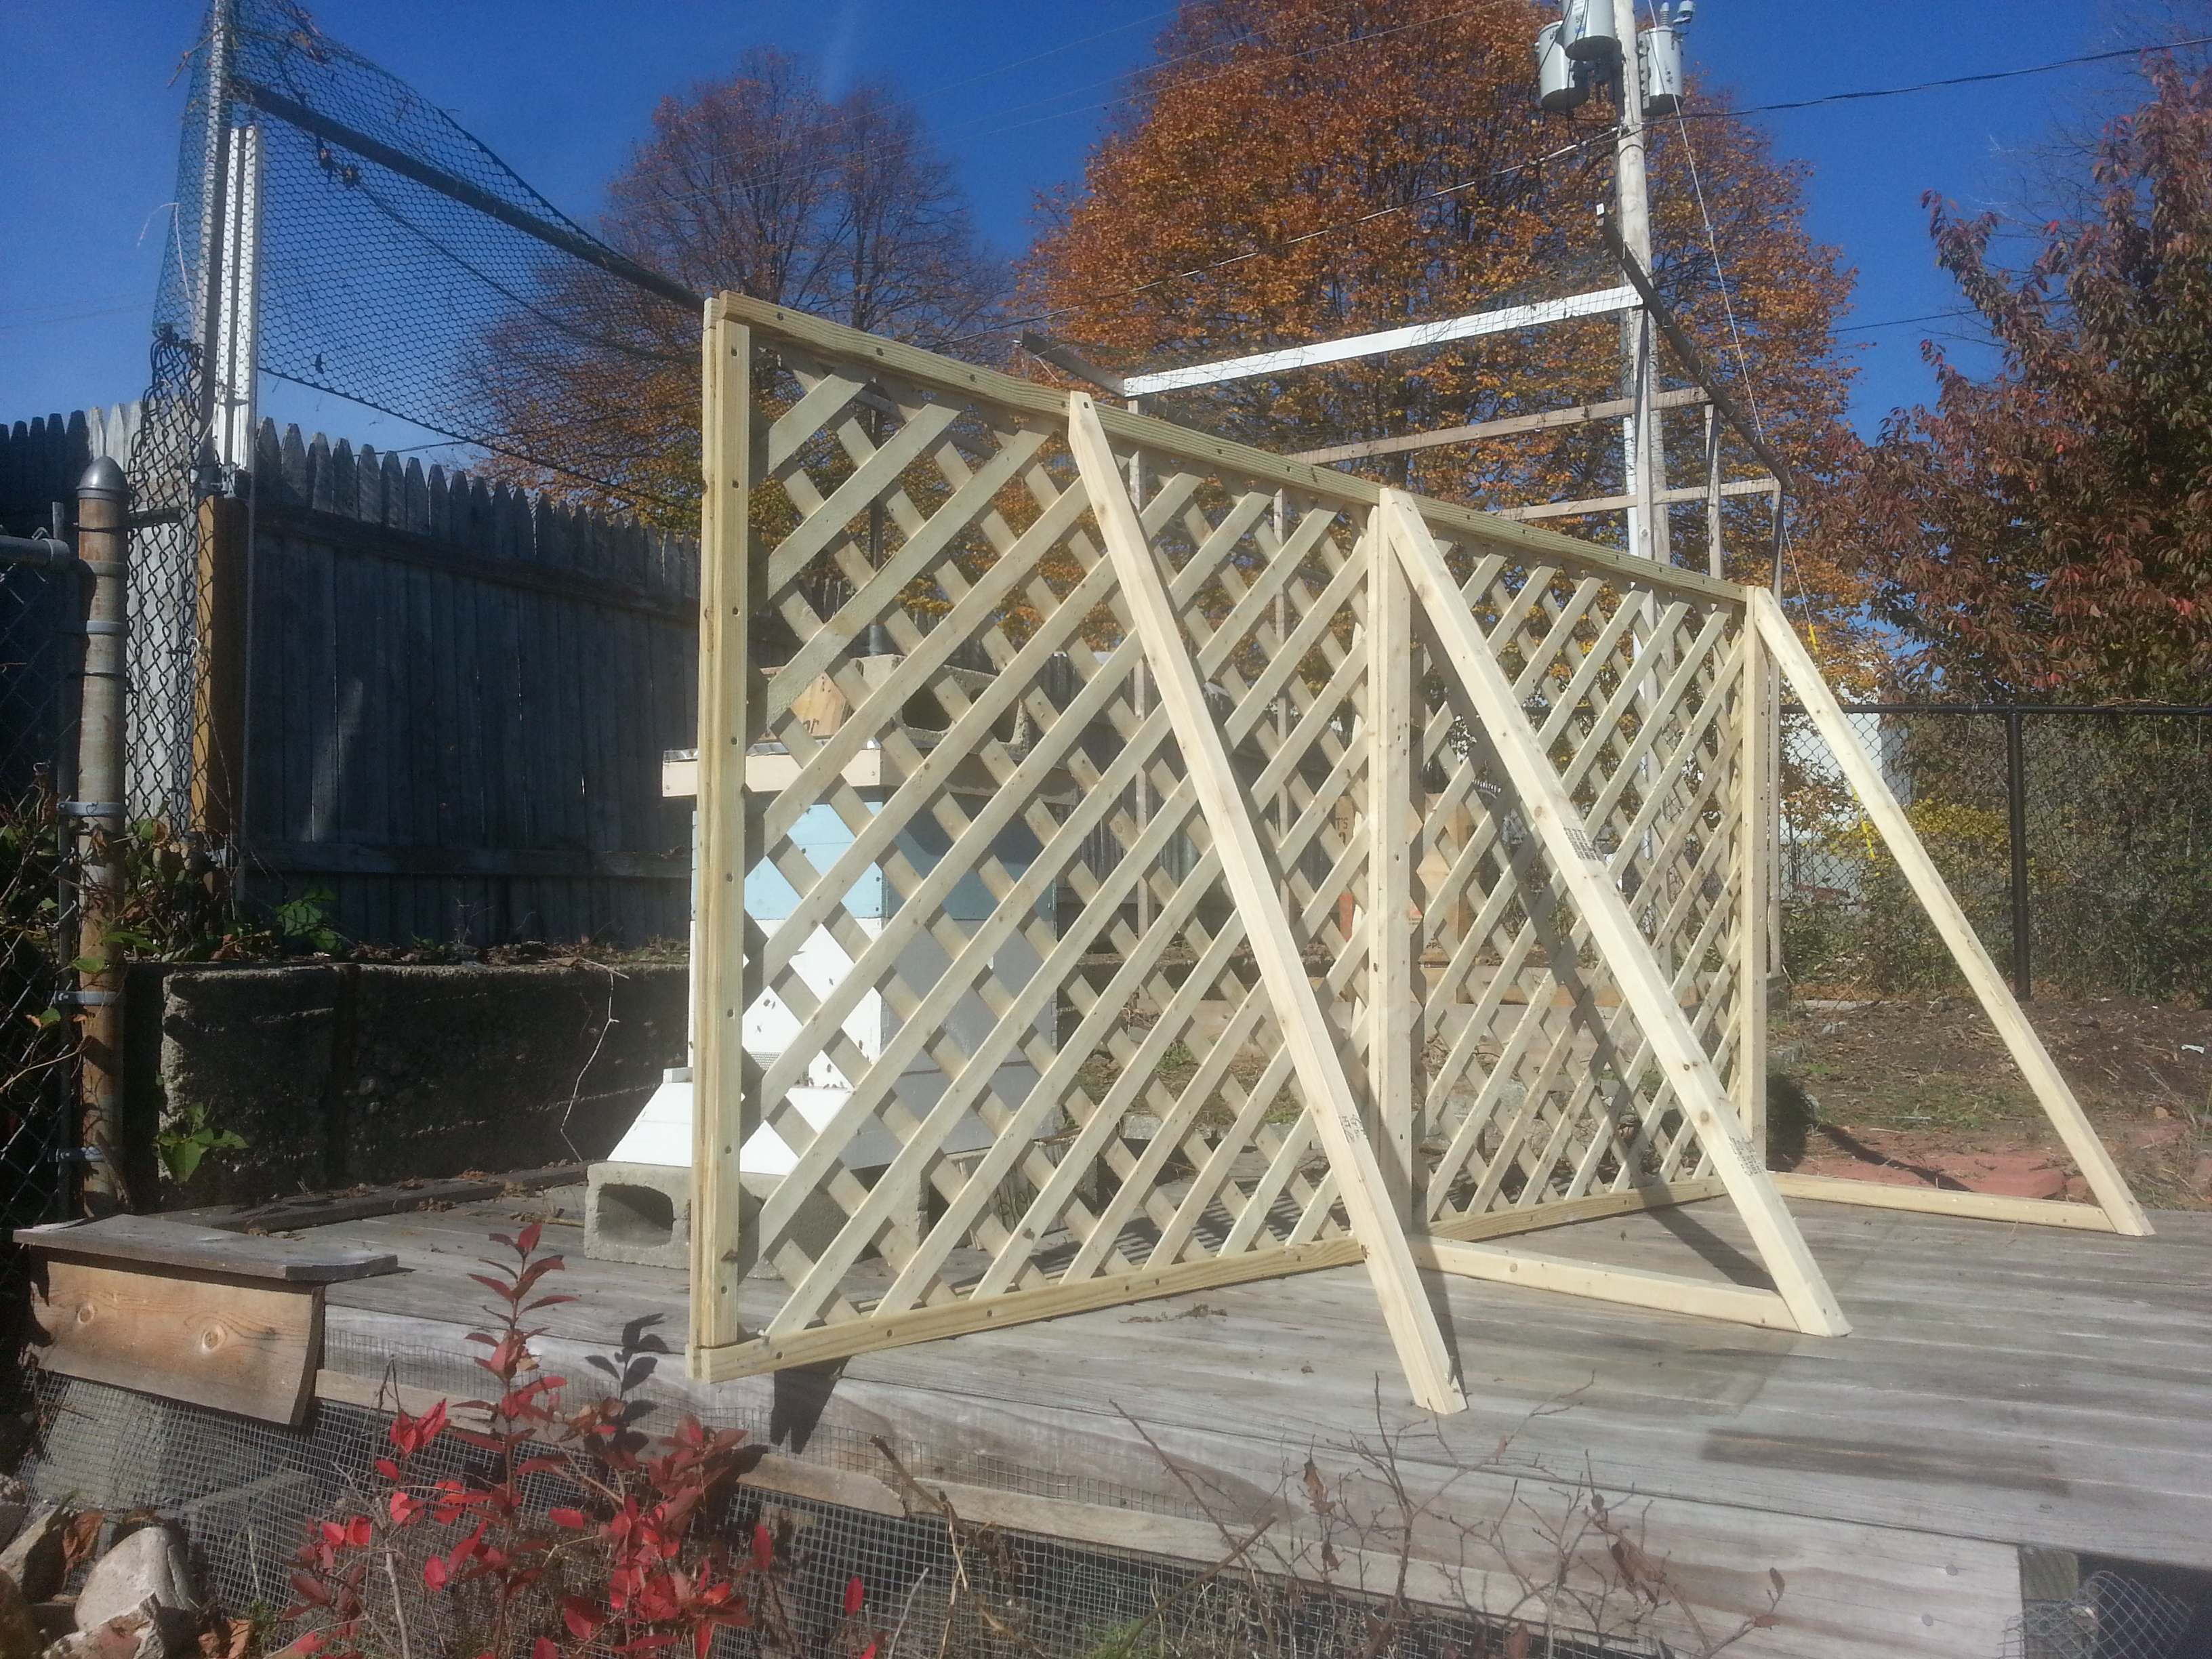
We set them up in our state of the art weatherproof environment.

IMG_4137

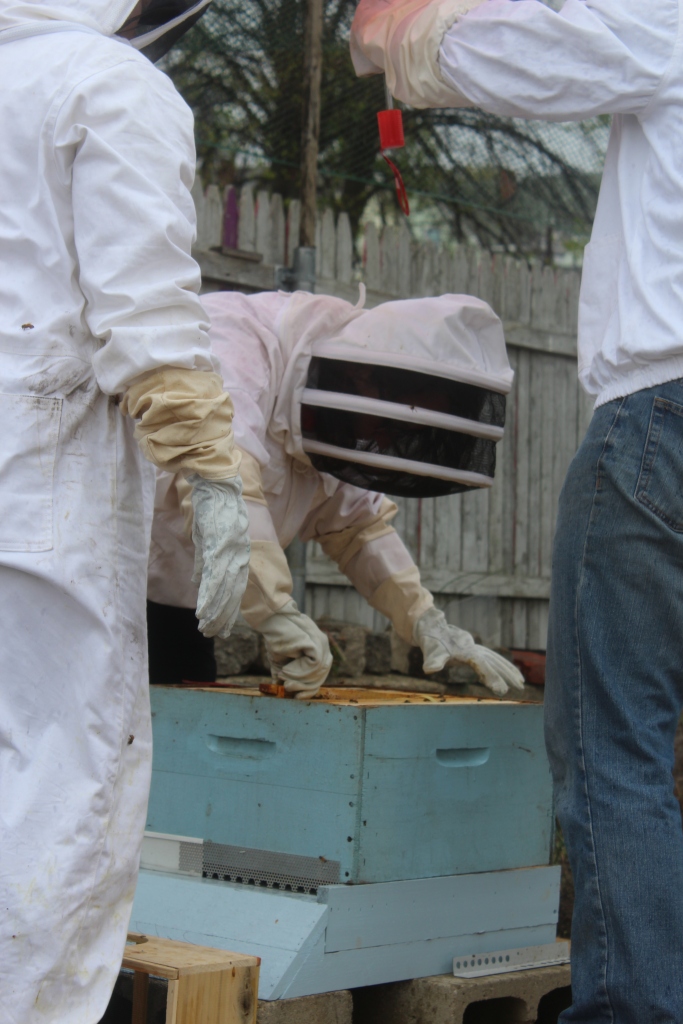
And we set to work. Technically I was in charge of this installation, though Kim had my back. Using the hive tool I pried open the lid of the package and pulled out the syrup can. The bees travel with a can of syrup so they stay fed on the road. That’s why they’re so clustered around the top of the package.

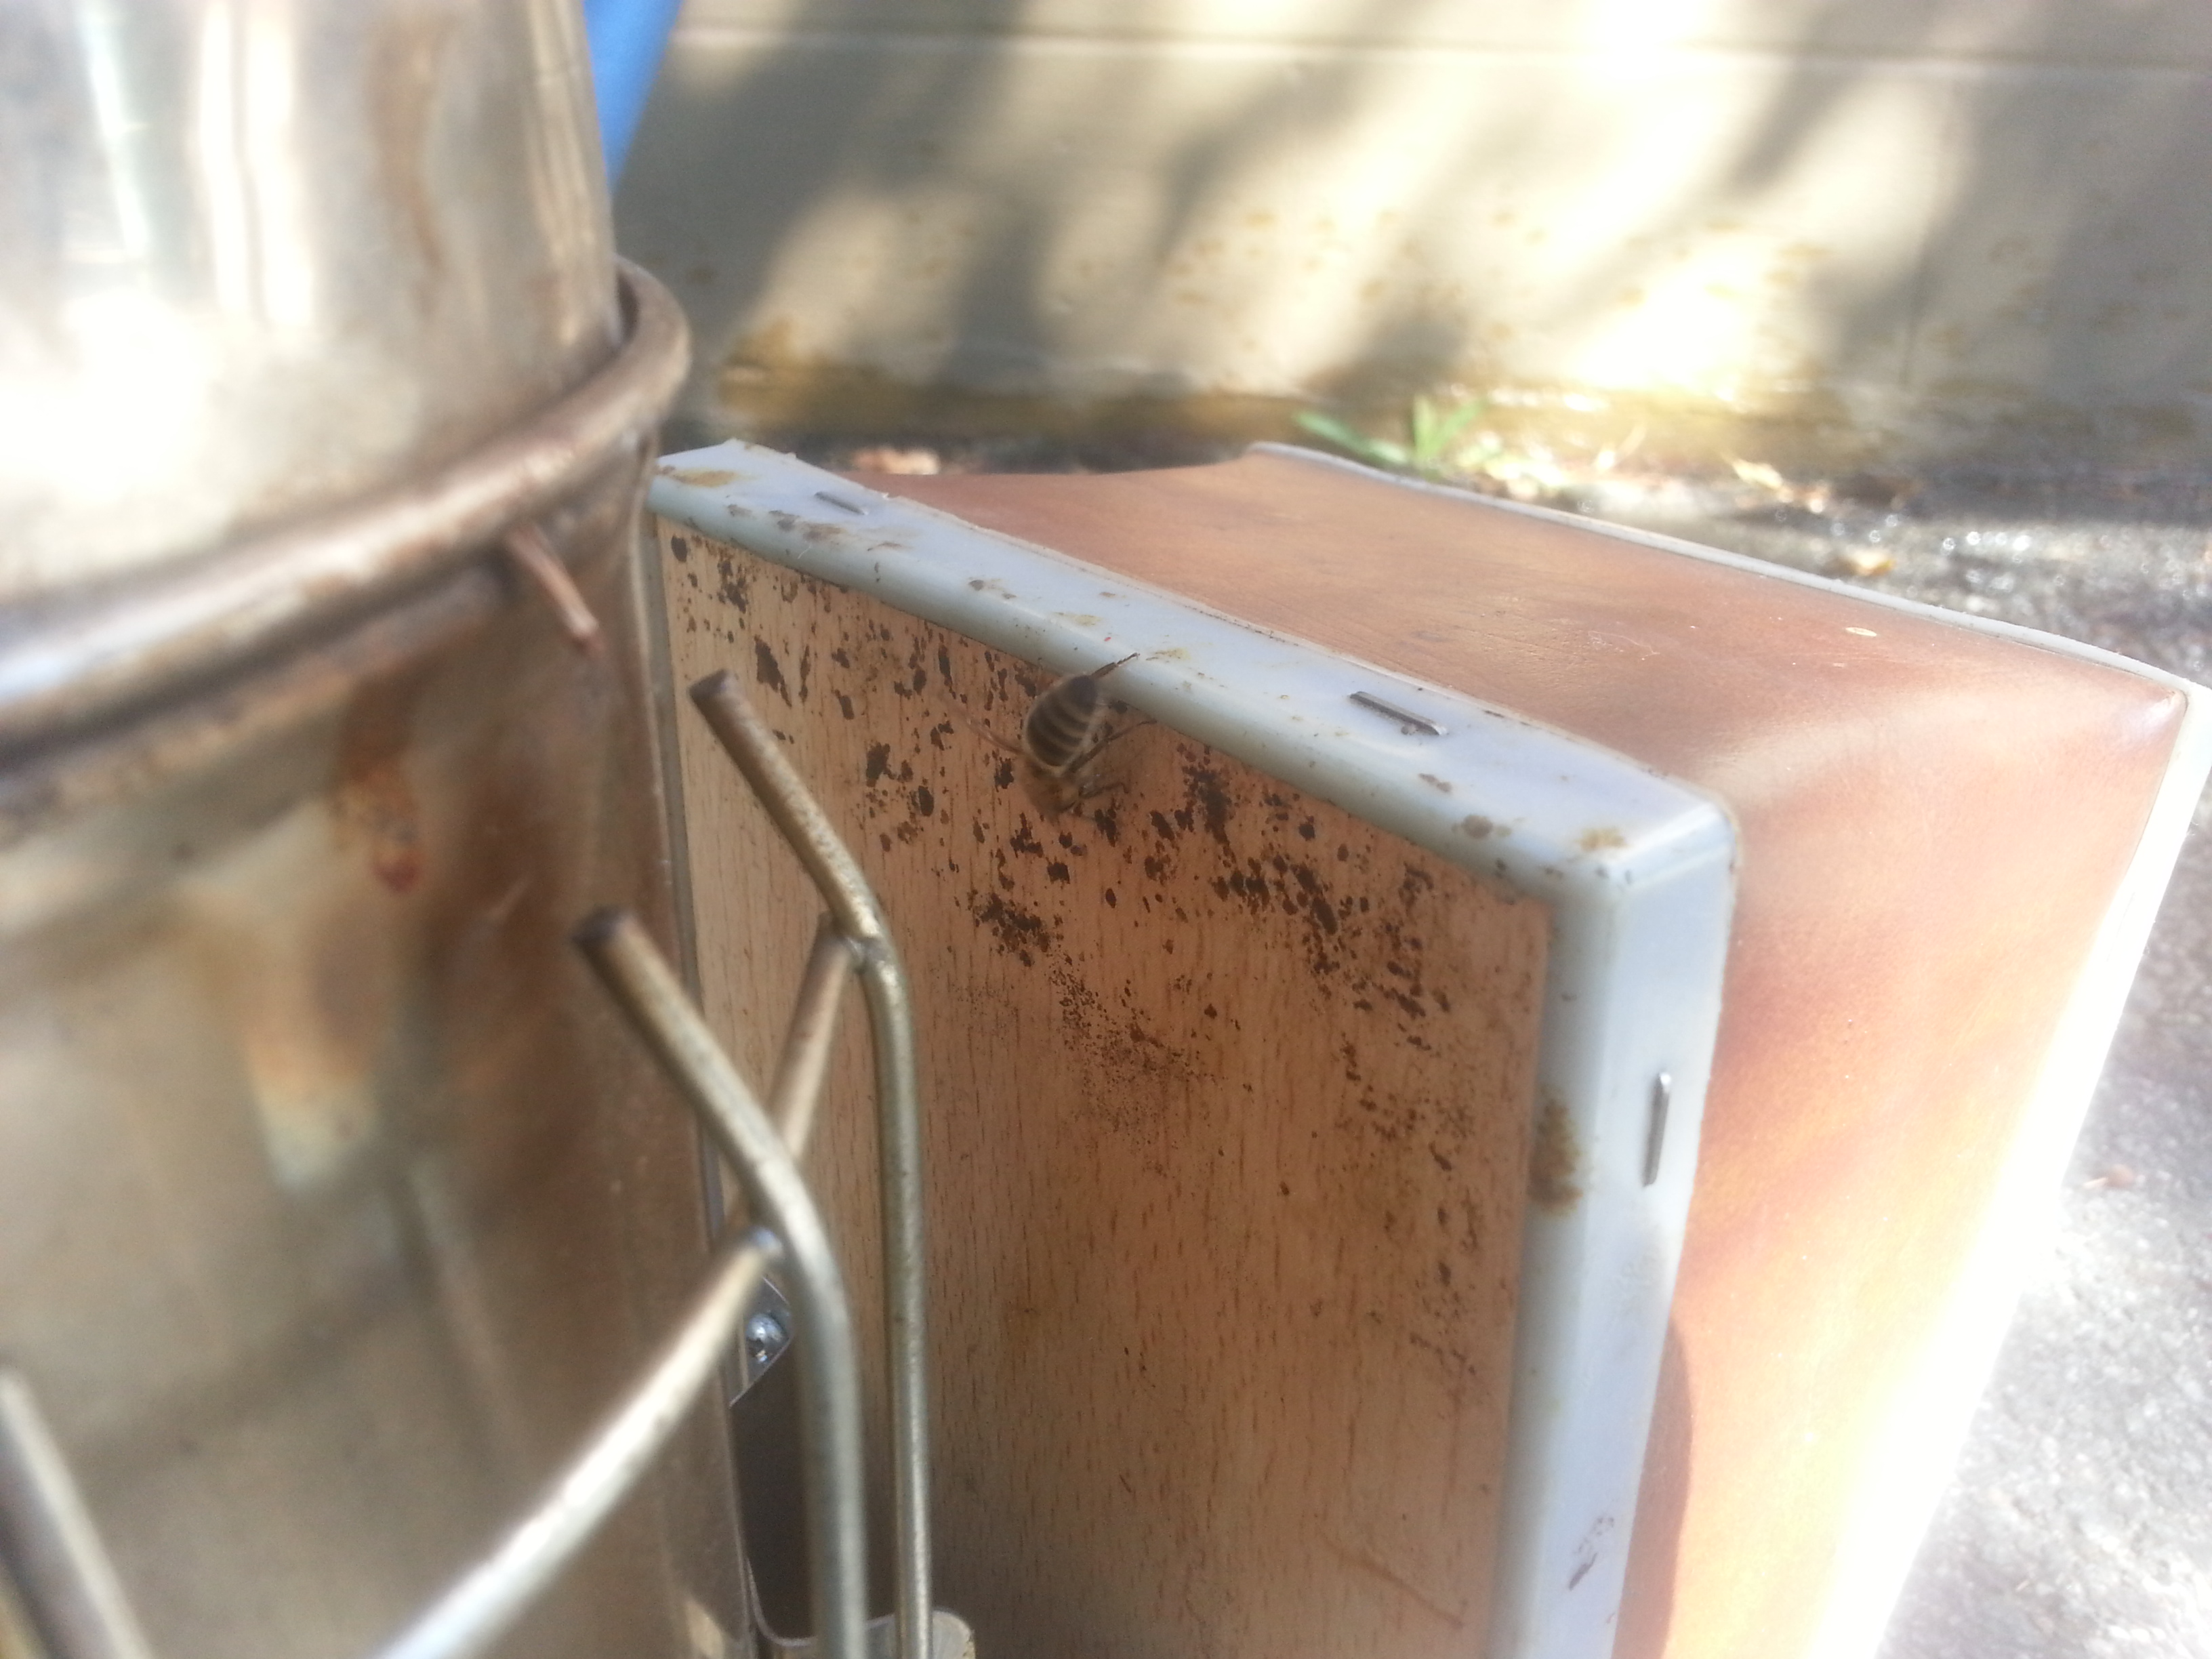
With the can out of the way, I could get to the queen. She travels in a much smaller mesh cage with a handful of attending bees.

IMG_4134

She has to be kept separate because the bees in her package aren’t actually part of her colony. Queens are reared separately and put into these cages with a few bees who’ve grown up with and know her. But the 3,000 others are miscellaneous bees from other colonies. They’re literally shaken into the package and given a queen at random.

Bees don’t take kindly to random queens – in fact they go out of their way to kill them. That’s the reason for the separate queen cage (that, and making her easy for us to find). If she weren’t kept physically separate from the strange worker bees, she’d be dead before they left Georgia. Give her a few days, though, and she can spread her queeny pheromones and adopt this new colony as her own.

The key is keeping her in the cage inside the hive, so the colony can’t kill her before they get used to her. The cage comes with a pre-drilled hole in the side, plugged up with a cork. We pulled the cork out to reveal a second plug made of candy. Bees can’t chew through cork, but they’ll jump at the chance to eat some candy. The process takes a few days’ time – just long enough for them to fall under the queen’s sway. By then the queen will have a clear path out of her cage and a hive full of loyal subjects.

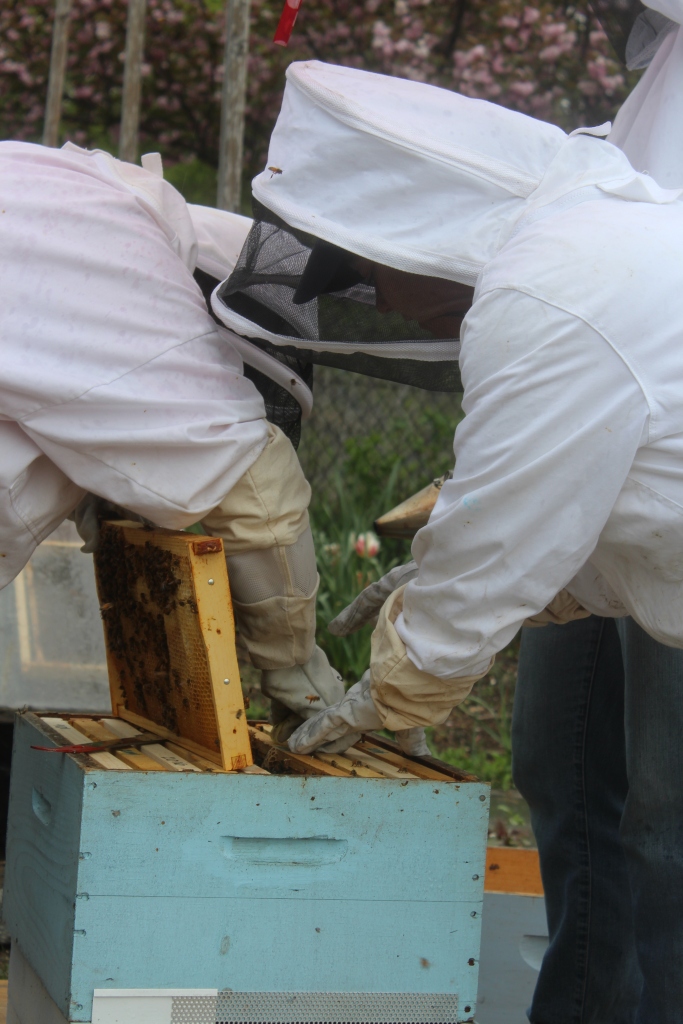
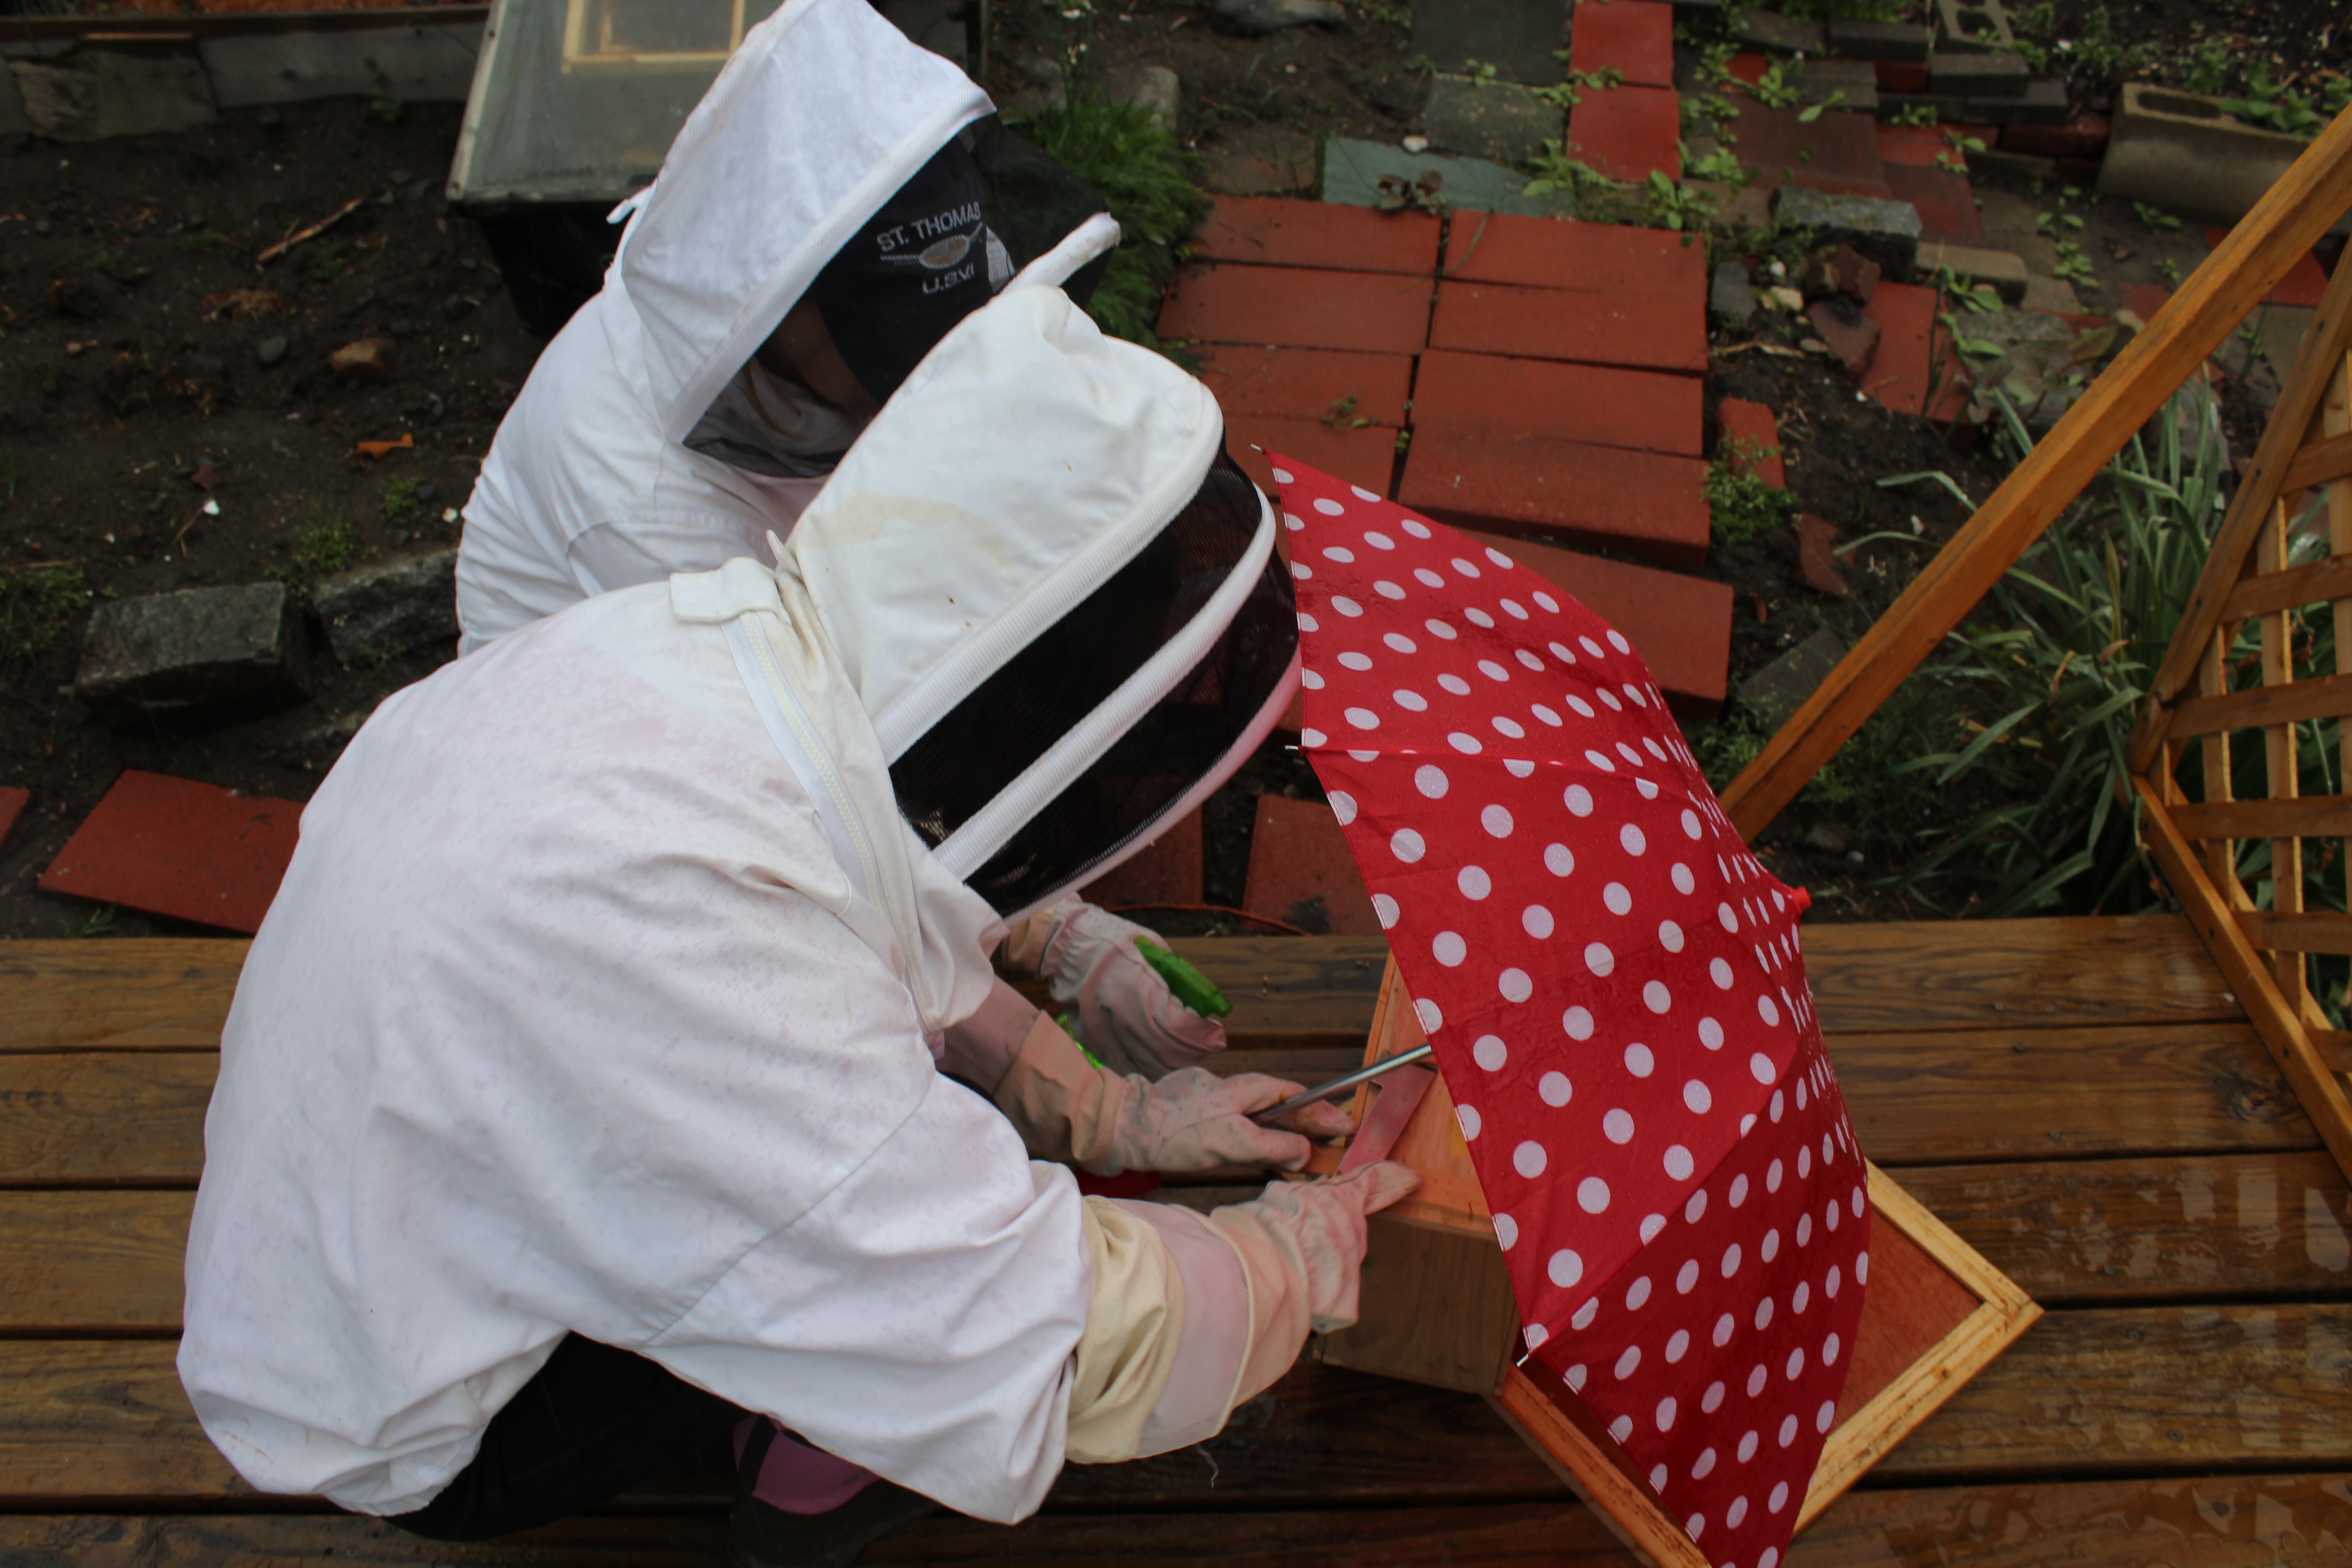
I hung the queen cage between two frames in the hive by nailing the attached yellow ribbon to the top of a frame. You can clearly see our queen in the topmost circle with a big white dot of paint on her back.

IMG_4140

The queen in place (you can see the yellow ribbon laid across the frames), it was time to dump everybody else into their new home. I took three frames out of the center of the hive body to make room. We sprayed the bees with some bee syrup to calm them down (because they focus their attention on grooming) and clump them together (because they’re really sticky). Since it was a cold day, we went very light on the syrup so as not to chill them.

Also to help the clumping process, I gave the package a gentle but firm whack against the deck to knock them all down onto each other.

IMG_4147

And then I shook them out. That’s all it takes – a little bit of shaking and maneuvering, and the majority of them dropped out through that hole and into the hive.

I very gently replaced the frames (don’t want to squish the bees below!) and put the inner cover on. On top of the inner cover we placed a second deep hive body to surround the inverted bee syrup feeder (lifted up on pieces of wood to give the bees room to get to the holes) and the package. Not all of the bees came out, and they’d have a very bad time left out in the cold and the rain. We covered everything up with the telescoping outer cover and got out of there.

On Saturday we’ll go back in to check on the queen and make sure she’s been released and welcomed. If she hasn’t been released, we’ll let her out. If she hasn’t been welcomed, we’ll panic and try to find another queen.

IMG_4144

Until Saturday, it’s all up to the bees. I hope they’re warm tonight.

Bee Syrup

The bees are coming tomorrow!

The dandelions and most of the trees are in full bloom here already, but it’s good to give the bees some low hanging fruit to eat, at least until they get settled in and draw out all their comb.

What I’m affectionately calling bee syrup is just white sugar and water, mixed together at a 1:1 ratio. To facilitate mixing, I’m boiling the water first.

IMG_4069

And pouring it into a big old jar. This jar used to hold 4 lbs. of olives and is just the right size to hold 10 cups of water…

IMG_4084

Mixed with 10 cups of sugar.

IMG_4094

The solution that I got has a wonderful viscosity to it – check out those ripples that form in the wake of the spoon!

IMG_4103

My bee syrup is made, and now I’m just waiting for it to cool. Tomorrow I’ll use a hammer and a small nail to poke a few holes in the lid. This way, we can turn the jar upside down and rest it on top of the frames in the hive. A vacuum seal formed by turning the jar over should keep the syrup from all leaking out of the holes at once – instead the bees will be able to draw it out through the holes when they need it. We’ll surround it with an empty deep hive body and put the lid on top to prevent robbing from other bees. Basically our hive tomorrow will have two boxes – one for bees and one for food.

IMG_4108

I’m not putting any holes in the lid until I get this thing transported to the garden, though. Covered in syrup is no way to start a hive installation.

It’s Bee Time Again

I have good bee news and I have bad bee news.

The bad bee news is that our colony from last year is dead. They didn’t make it through the winter. On the first truly warm day of spring, I went down to the garden to check on them. They should have been flying all over, enjoying the sun and reorienting themselves.

They weren’t.

A few days later we got all suited up just in case and opened the hive.

IMG_2044

It was totally empty!

There weren’t just dead bees – there were no bees. Honestly this was one of the best case scenarios (coming in at a long second to living bees). I was having horrible visions of thousands of dead bees rotting in the hive. Instead of a disgusting job of scraping bee slime out of the hive, we had pristine frames and a whodunnit on our hands.

IMG_1995

Our screened bottom board had a few dead wasps on it, and our first thought was that the bees had been overrun by them. If that had been the case, though, there would have been bee corpses everywhere.

IMG_1976

The wasps weren’t killers – they were just opportunists. They must have come in after the hive was abandoned to steal the remaining honey. An unoccupied hive is an amazing find if you’re a wasp, unless you’re this poor little guy, who somehow died in the act of theft.

IMG_2056

My friends Will and David had come along, and we shed our veils and coats and did a thorough inspection of the hive.

IMG_1989

In spite of the wasps, there were still patches of honey. One or two frames were still pretty heavy with it. We’ll put these in the hive to give the new bees a head start.

IMG_2038

Some frames will not be going back in. When the colony disappeared, the wasps weren’t the only opportunists to set up shop. The wax moth is a particularly gross pest drawn to beehives. These moths lay their larvae in honey comb – when the larvae hatch they tunnel through the comb and leave behind this distinctive webbing. Their favorite food (because they are so gross) is the skin of bio material left behind in the cells when a baby honeybee emerges. They craw from cell to cell, gorging themselves on this skin.

IMG_2011

A strong colony should be able to fight off wax moths without a problem. They’re mostly a hazard when you store used comb that’s full of tasty brood skin but unguarded by bees.

IMG_2029

We found this webbing in a few of the frames. We won’t be reusing this comb, but we will save the wax. We gouged out the webbing (because who wants that?) and put the frames in our solar wax melter.

IMG_2008

What else did we find? Nothing much. A single cell of hot pink honey. Maybe one bee went off the grid and harvested a melting Skittle.

IMG_2060

A sad sight – a lone bee, about to be born but with no one left to take care of it.

IMG_2039

And a gorgeous display of packed pollen in different shades.

IMG_2066

So what happened to the bees? They didn’t starve, or freeze, or get murdered. If they had, we’ve have the bodies. Kim and I went to the Rhode Island Beekeepers Association meeting to talk to the experts, and the prevailing opinion is that Varroa mites are to blame.

Varroa mites are usually to blame when it comes to honeybee problems, especially here in the north where overwintering is so difficult as it is.

We didn’t treat aggressively enough for mites in the fall, so as winter wore on, the mites’ numbers increased. Bees with high mite infestation are much more susceptible to disease. Just like with everything else, bees’ attitude toward disease is very self-sacrificing. On a warm day, infected bees would have flown away from the hive to die, hoping to prevent the spread to other bees in the colony. But it was spreading anyway, and these sacrificial flights happened again and again until literally no one was left.

But I said I had good bee news, too, and I do! We’re moving on and learning from our mistakes, and we have new bees on their way! On Wednesday we’ll be picking up a package from Georgia – a little mesh box containing a queen and about 3,000 bees.

This will be the foundation for our new colony.

Honey Take Two

Everything’s coming up bee.

We went into the hive recently to check on the state of the honey box, and we were shocked to see that it was almost full. These bees are not playing games when it comes to preparedness. It’s bad news for the impending winter, but it’s good news for honey!

20151012_115907

We threw in a triangle board and a shim and waited a few days. In that time the bees not only abandoned the honey box, they also set to work on filling in the shim with comb. I’ve been reading a lot about Bee Space lately. It’s the distance we leave between frames so we can pull each out individually without ripping through comb. About a centimeter, it’s the magic distance at which bees won’t fill things in. Bees are all about filling things in – any less than a centimeter is patched up with propolis to prevent drafts. Any more than a centimeter, as we can see here, is fair game for expansion and will be filled in with comb. They built all of this over the course of a weekend. Bees don’t get time off.

20151012_115939

We made off with the honey box, just like last time. With all that burr comb we had to break apart to get inside, though, this theft was a little messier. Some of the equipment got sticky, and the bees were wise to it. As I was putting out the smokers, this little guy was frantically cleaning up a thumbprint of honey.

20151012_121758

Soon after collecting the honey, we had one heck of a storm. The bees stuck it out like champs, but we were so afraid the hive would get toppled. The fact that we’d just removed the honey box and a foot of height may be what saved us. In order to sleep a little easier, we put up this windbreak. The hive is already nicely protected to the west by a picket fence, and the lattice is at an ESE angle that should break up any gusts coming up the river.

20151031_115211

With the hive secure, we could turn our attention to more important things. Like honey! The bees had really done a stellar job collecting, and had filled and capped almost all ten frames.

knife

There were, sadly, a few casualties.

20151103_180315

We made sure to get another hot knife. It uncaps frames like a dream. I did drip a drop of honey from it onto my hand, however, and I got decent burn from it. I’m a little worried the heat may affect the quality of our honey…

knife2

Heat notwithstanding, the honey is gorgeous. It’s so dark and rich it’s impossible to see through. Here it is dripping its way through our filter. Only in the thinnest spots, with the light shining straight through, does it approach a color I might be willing to call “honey.”

20151103_183612

We’re pretty excited about it.

20151103_180437

The garden is pairing with a fabulous and very locally-driven restaurant for a cooking class later this month. Kim is speaking at the class and I, purely by chance, won two free tickets to it in the garden’s fundraising raffle. Some may claim nepotism. I’m claiming that I put close to $30 worth of tickets in the cup. I also put my blood sweat and tears into this class, meticulously filling twenty little 3 oz bears to be given as favors.

bear

The honey is the most impressive when you look at it next to the batch we harvested in the summer. I have almost a full jar because I’m a hoarder and can’t bear the thought of it disappearing forever. Both jars were collected from the same hive in exactly the same spot, but two months apart: the jar on the right on August 10th and the jar on the left on October 12th. The difference is, as far as I know, purely floral. Spring and summer mean delicate light flowers like pea and squash blossoms, but late summer and fall mean rougher, darker flowers like Black Eyed Susans and sunflowers.

20151110_110152_HDR

Am I making all this up? Maybe. But whatever the reason, this honey is so dark it’s almost black, and it tastes, I swear, like elderflowers. The summer stuff was great, but this is a world apart.