Bug Soup, or Wax Collection Gone Wrong

I had big plans.

I was going to harvest pounds of extra wax from our beehive. I was going to have candles for days.

But it wasn’t to be.

Basically, what I did was make bug soup and then throw it away very carefully.

This is my tale of woe.

some_text

A while ago our poor spare frames were overrun with wax moth. It’s just what happens when you leave used frames unprotected. I’ve heard that a strong colony will clean up infested frames without a problem, but I didn’t quite have the faith to put it to the test. Instead, I brought them home to salvage the wax.

some_text

I pulled all the wax from the frames and got a pretty impressive pile.

some_text

My main concern was with filtering the bugs. Because yes, this wax was riddled with wax moth larvae. I decided to melt it down in a pot of water, bugs and all, and filter it in its liquid state.

Beeswax burns extremely easily, so rather than melting it directly on the bottom of the pan, I thought I’d let it dissolve into the water, strain it, and let it separate back out as it cooled.

Simple, right?

some_text

As the wax melted, I managed to fit all ten frames’ worth into the pot. After letting it stew for a while, it was time to strain it into molds.

some_text

I rubber banded a few layers of cheesecloth over the tops of some plastic containers. In this tiny sample, we can see three gently simmered wax moth larvae.

some_text

This was a horrible job. Beeswax sticks to everything it touches and is famously hard to clean up. I was forever setting down cardboard and running out of space and sacrificing utensils.

To make matters worse, it was extremely hot. The pot was hard to handle, and I learned the hard way that some plastic is less heat-tolerant than others.

some_text

I finally managed to get four containers full of strained wax water. I set them outside to cool off. The cat went out to investigate and came back wax-dipped.

some_text

I left the containers out overnight while I googled how to remove wax from a cat. (If you don’t word your search carefully, you get very different results).

In the morning I went out to investigate.

Oh boy.

One was knocked over. They were all full of rainwater.

some_text

And while my hopes of the wax separating and rising to the top did technically play out, it wasn’t all I’d dreamed it would be.

some_text

This is it. My entire harvest. It weighs 0.65 ounces.

img_7460

So what went wrong? I think it was the filtering. While I managed to keep the bugs out of the final product, I kept most of the wax out with them. It all clung together on top of the cheese cloth, and the wax molecules that snuck through with the water were purely coincidental.

A decent amount also wound up on the cat.

If I ever do this again (and to do so will take a tremendous amount of courage), I’m implementing a strict no-bug policy. Maybe there’s a good way to filter them out, but I sure don’t know it.

Stay tuned for a post about making a single votive candle.

A Mothy Day

I had every intention of checking on the bees. I’d gotten the smoker out and everything. When I went to open the plastic bin we keep the bee suits in, however, I found some unwelcome guests. They were everywhere, and the bee checking had to be postponed.

img_6977

It wasn’t hard to find the source of the problem. We were storing the bee suit bin on top of another bin with some old frames of comb in it. And those frames, wouldn’t you know it, were completely full of wax moths.

img_7009

Wax moths are a perpetual threat if you’re storing used comb without bees to protect it. Fans of the blog may remember that our hive was infested with wax moths last spring, after it was abandoned. Wax moths are rarely a problem in active hives, because the bees will drive them out before they can take hold. But if the comb is unprotected, like in the empty hive or the shed, moths are almost certain to move in.

img_7006

Despite their name, wax moths don’t actually eat wax. A frame of unused foundation in the same bin was untouched. What the moths like is the thin, protein-rich skin that’s left behind on the cell walls by the bee larvae when they emerge as fully formed bees. Think of it like a bee amniotic sac. Moths lay their eggs in the wax, and those eggs hatch into grubs that burrow through the wax, feeding on these old protein skins.

Because they’re disgusting.

img_6989

I thought the bin we were keeping the frames in was tight enough to keep the moths out. I thought wrong. Here you can see a few of those little grubs on the move.

img_7003

And here are some adult moths.

img_6981

Will and I dragged the bins outside to clear them out. We wiped out all the bugs and their bizarrely stretchy webbing.

img_7021

The moths clearly started in the bin with the frames, but they’d been migrating. I found a few little cocoons in the bee suits.

img_7025

I picked off all the cocoons I could find and shook everything out. For good measure, I took the suits home and washed them. I sprayed the bins down with the hose and let them dry in the sun. I’m pretty sure we’re moth-free.

img_7028

As we were working, a few of the bees came over from the hive to see what we were up to. This one found a single globule of honey on one of the frames.

img_6999

Some others flocked to the honey that dripped out of the frames onto the ground. They will have drunk as much as they could hold, then carried it back to the hive to store.

img_7049

This wasp showed up for the free food, too.

img_7040

So what became of the frames? I didn’t want to keep them around so full of moths, but I couldn’t stand the idea of throwing away all that good wax. I brought the frames home and tried to render the wax in my kitchen.

img_7035

Stay tuned for that tale of hardship and woe.

Beeing Along Nicely

Last week we went in to check on the bees and take stock. Things are looking good, though we did notice this beautiful and disgusting phenomenon underneath the hive. Some opportunistic spider has set up shop under our screened bottom board. Maybe he’s after mites, maybe he’s after bees. Whatever he was after, what he got was all that nasty debris that’s fallen down out of the hive. Poor guy.

some_text

We swept out the cobwebs and opened up the hive. My last time in I’d taken off a “full” honey super and replaced it with a new one. Unfortunately, the full one was none too full, and the new one is filling up slowly.

some_text

So where is that honey? Turns out a lot of it is in the top hive body. Whoops. This deep frame is totally capped.

some_text

As is this one.

some_text

The capped honey has such a satisfying, smooth look to it. I genuinely don’t know what this little huddle of bees is up to. Since the honey is all capped, I don’t think there’s any work to do in this part of the frame. They’re probably talking to each other, but about what? If anyone has a guess, I’d love to hear it!

some_text

This frame is closer to the center of the box, and it’s much busier. The very top right corner has some capped honey, but the bulk of the frame is full of brood. Some of it is capped, but you can just make out the white grubs in a few of the uncapped cells. You can also clearly see a drone with his big eyes and body, a third of the way from the top. Winter is coming, and this poor guy doesn’t have much time left. Pretty soon he’ll be too much trouble to feed and will be driven from the hive.

some_text

We managed to spot the queen, busy laying in one of the middle frames. The white thing is the remnant of one of our Hop Guard strips, with another week and a half left in its 30 day period of effectiveness. I’m no expert, but it looks to me like its effective days have passed. I’d read about Hop Guard I and the need to replace it when it dries out, but I was under the impression that Hop Guard II (what we’re working with) was an improved version that would last for the full 30 days.

Whelp. In a few days the month-long period will actually be up, and I’ll do another mite count to see if it’s been effective or not.

some_text

This strip isn’t as empty, but it looks pretty dried out. In fact, it looks like the bees have covered it up with wax… I have to say I’m skeptical that this is doing much. On the plus side, our mite count was so low to begin with that it may not even matter. But we won’t know anything for sure until we take stock of the current mite population. If worse comes  to worst, we can always treat again in the fall.

some_text

No great changes were made during this inspection, but we got a good sense of where we stand.

We know that the bees are storing just as much honey in the hive body as in the honey supers. Next time we go in, we’ll take a couple of those full deep frames and swap them for empty ones. We’ll get some honey, and hopefully the queen will lay in the empty frames. In the meantime we’ve left both honey supers on top of the queen excluder, so with any luck they’ll fill those up some more.

We’ve seen that the queen is healthy and still laying and doesn’t seem to have been hurt by the mite treatment. Unfortunately, we’ve also seen that the mite treatment may not be living up to its potential. Only time will tell on that front.

In any event, the colony itself seems healthy and productive. The bees’ numbers have soared since we got them in the spring, and just like last year’s colony they’re extraordinarily cooperative.

some_text

I’m coming up on two years of beekeeping without being stung.


Mite Fight

It’s hot out. So hot that I’ve been afraid to go into the hive. The last thing I need is to pass out face first in a pile of bees.

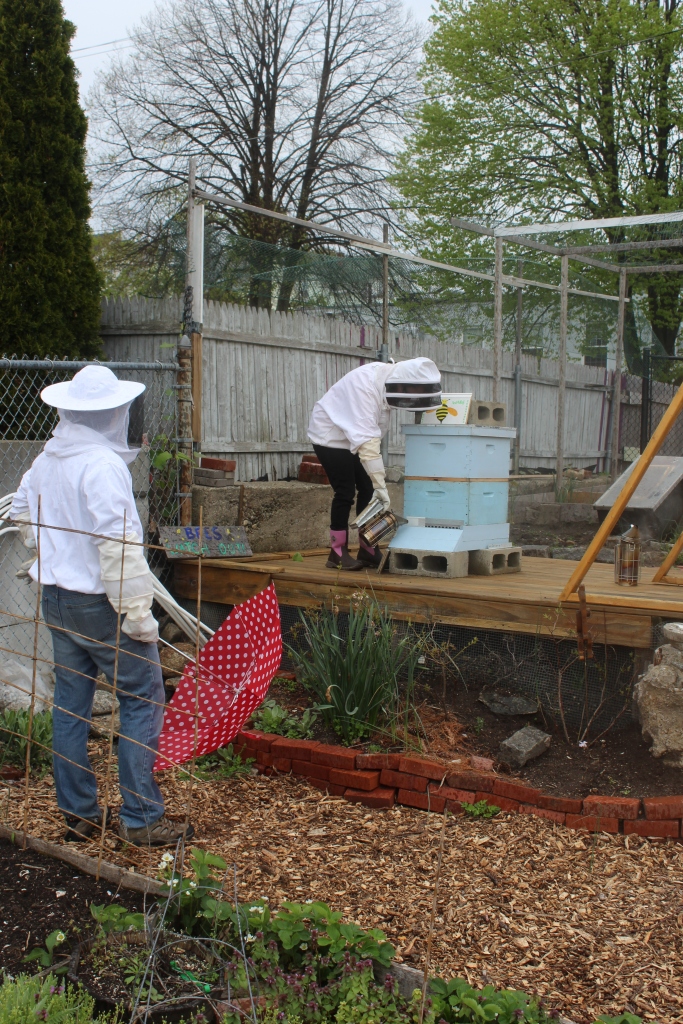
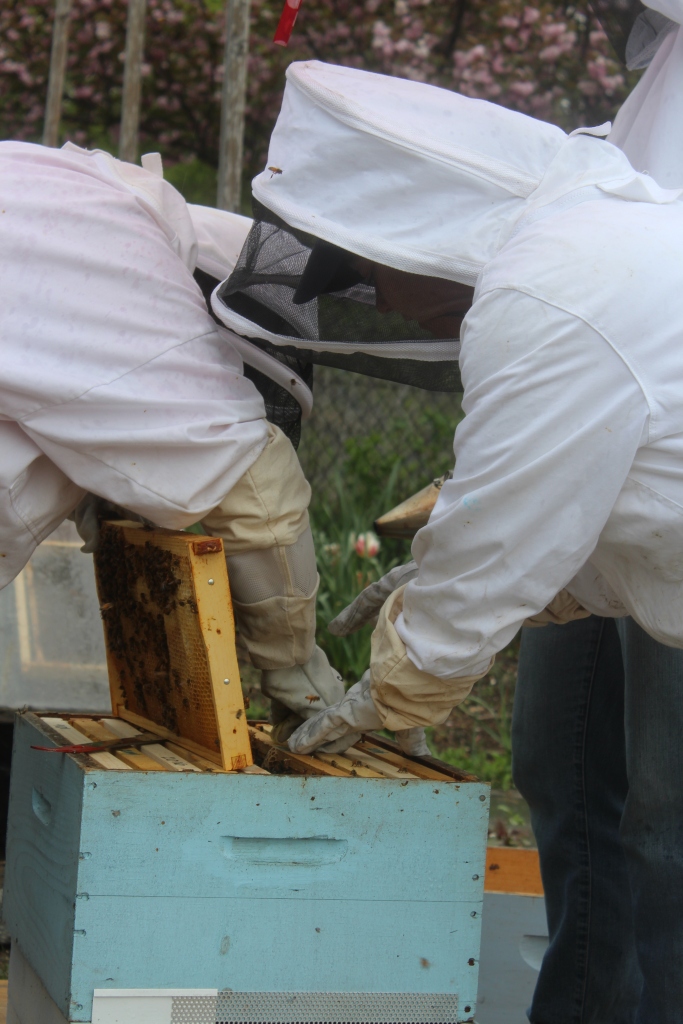
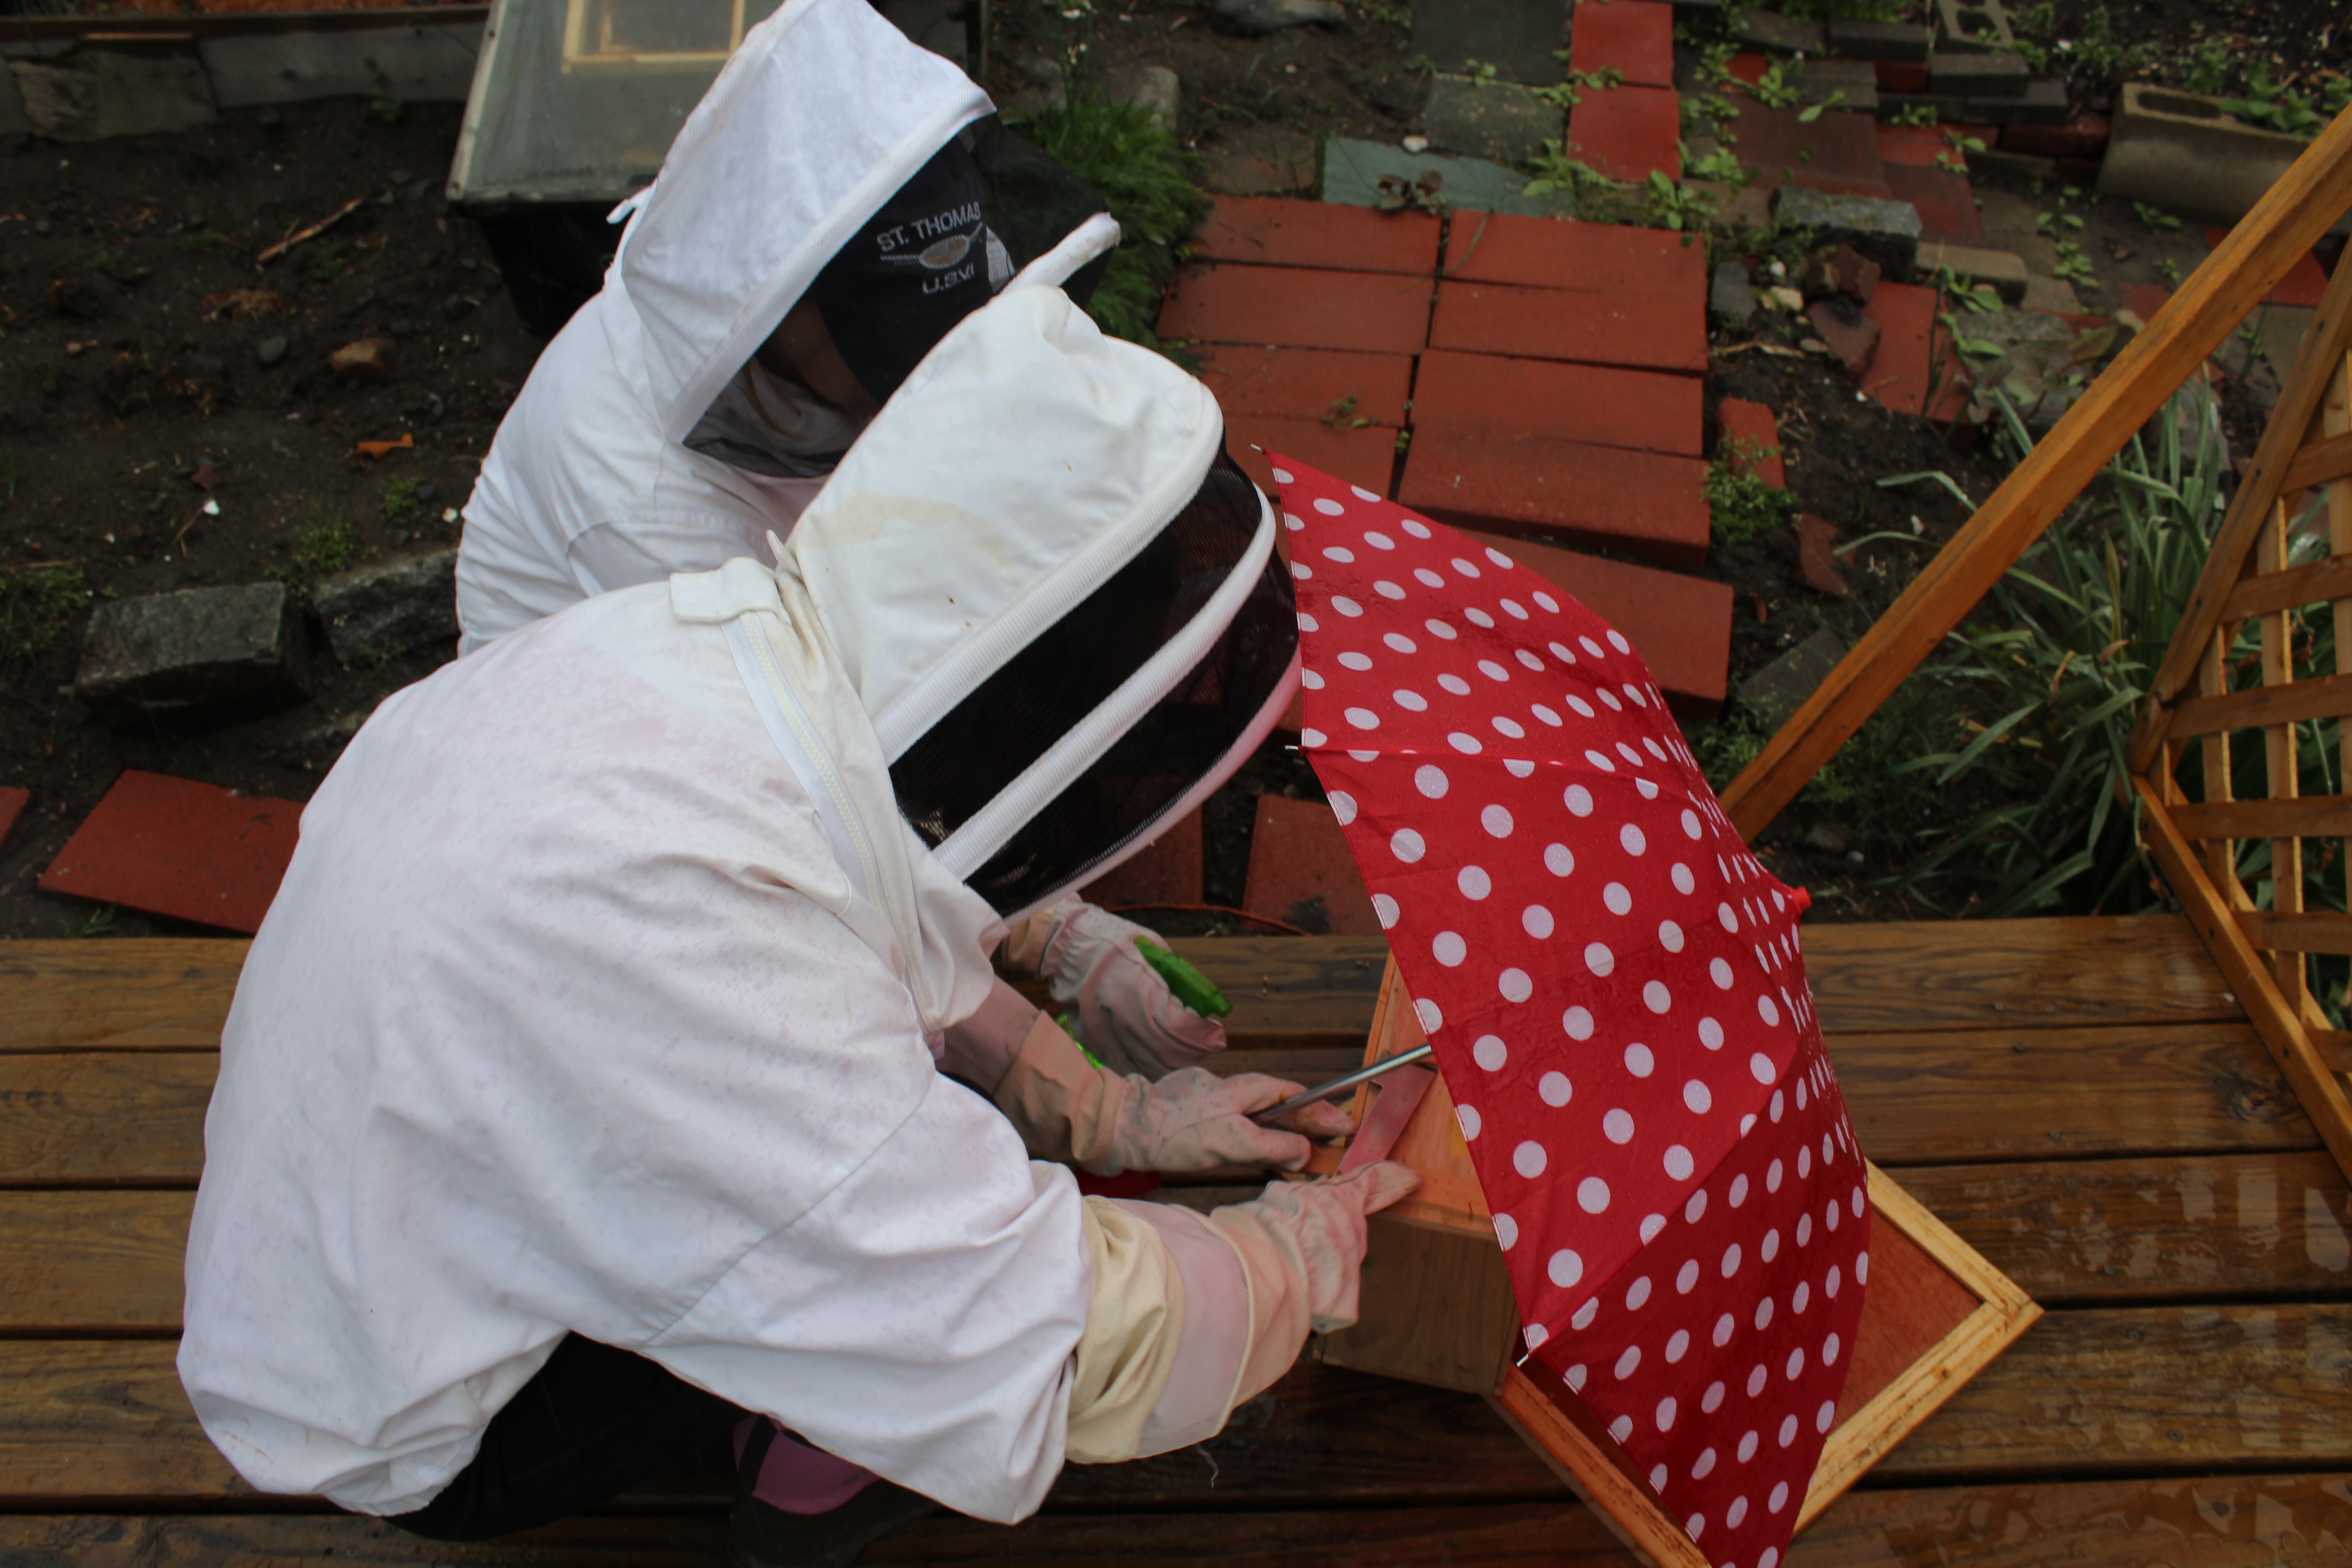
This morning, before the sun got too high, I went down to the hive to do some much-needed maintenance. Since I have the body of a weak and feeble woman, I brought along my boyfriend Ben to do the heavy lifting.

It was his first time going into the hive, and he was a little nervous.

some_text

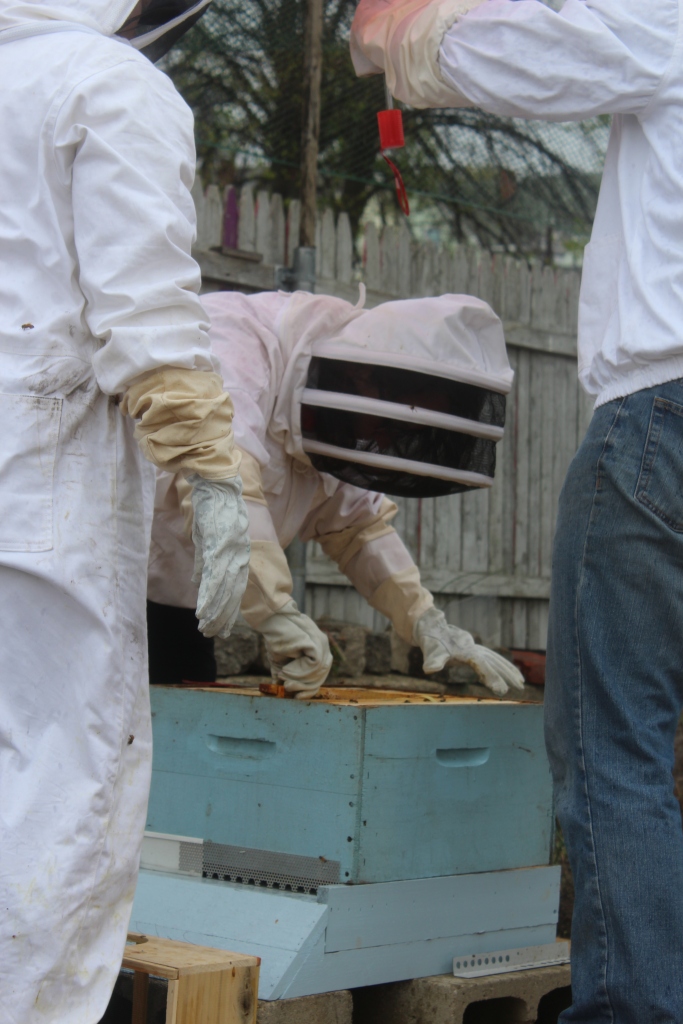
Our first order of business was to replace the honey super. Last week we’d put a triangle board under the honey super to clear the bees out. The triangle board gives them an easy way out of the super, but an almost impossible way back in. It’s really effective if you want a bee-free honey super, but I was worried that if we left it too long they might get crowded and be in danger of swarming.

They did look tightly packed through the screen of the triangle board, but it may just have been early enough in the morning that the foragers hadn’t left for the day yet.

some_text

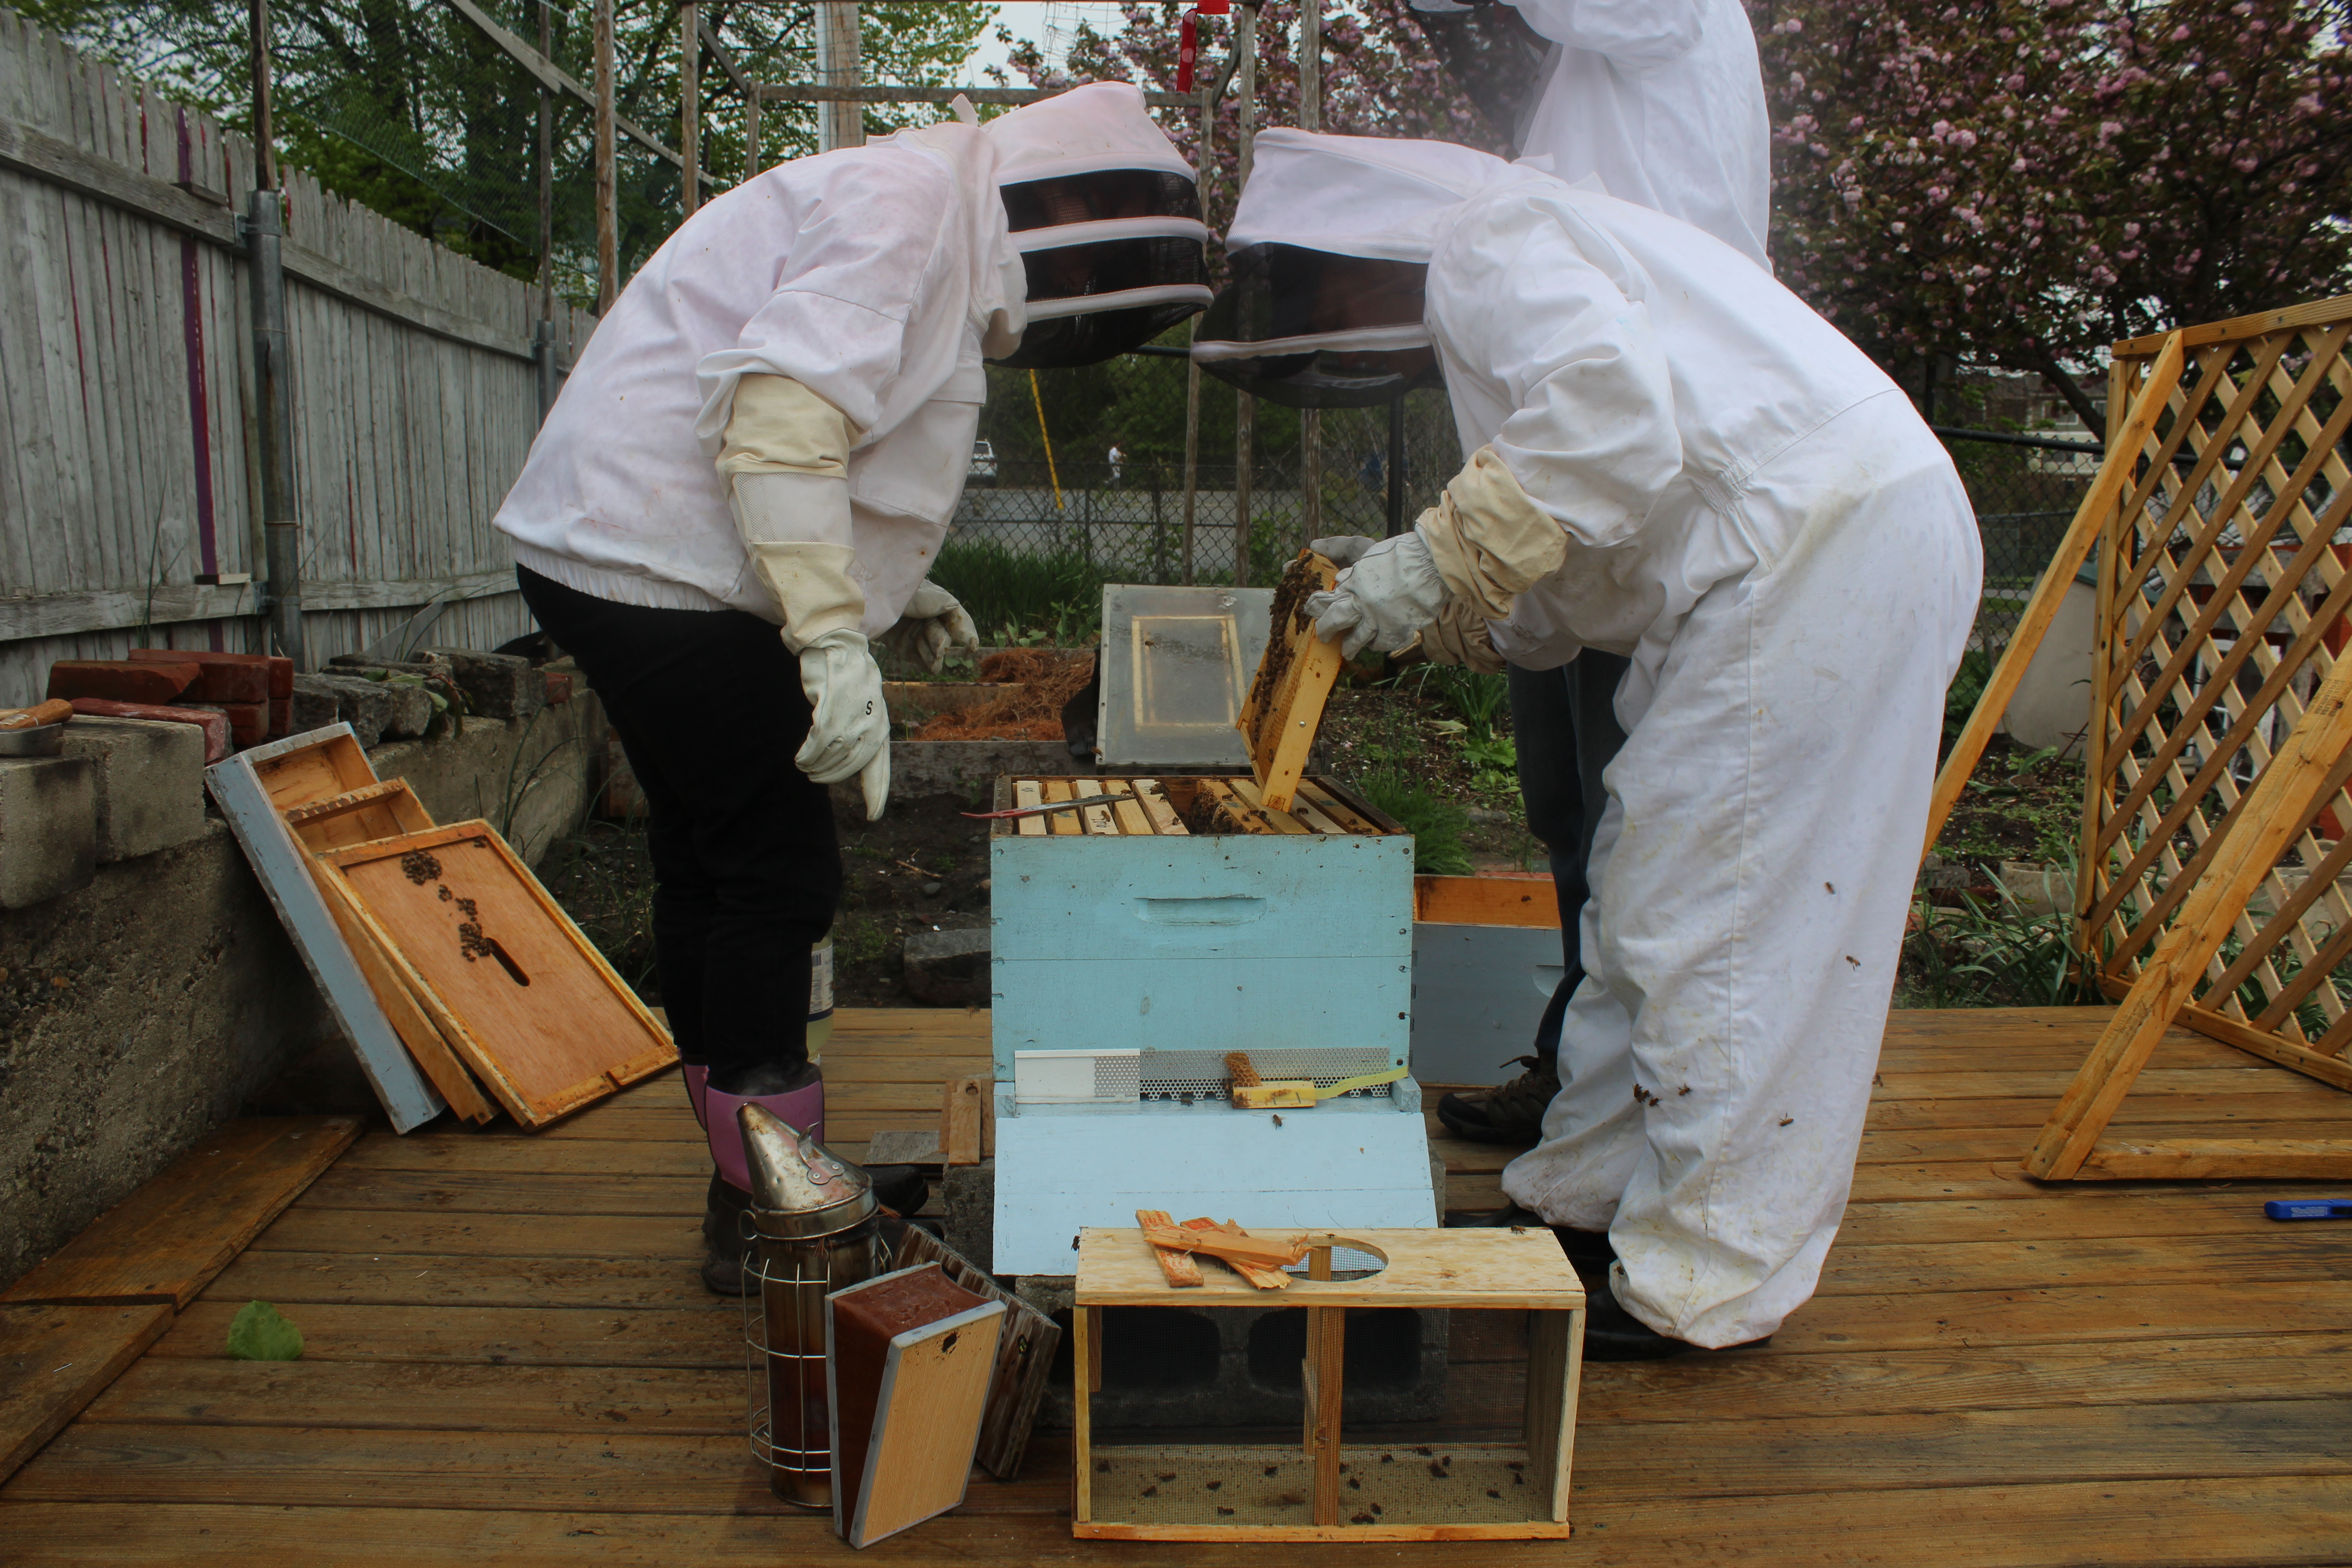
We removed the honey super and set it a few hundred feet away so the bees wouldn’t steal it right back from us. Then I removed the triangle board.

some_text

I removed most of it, anyway. The bees sealed it tightly to the frames below with propolis and wax, and a whole side of the triangle pulled free of its nails when I lifted it off. This is coming out of their wages.

some_text

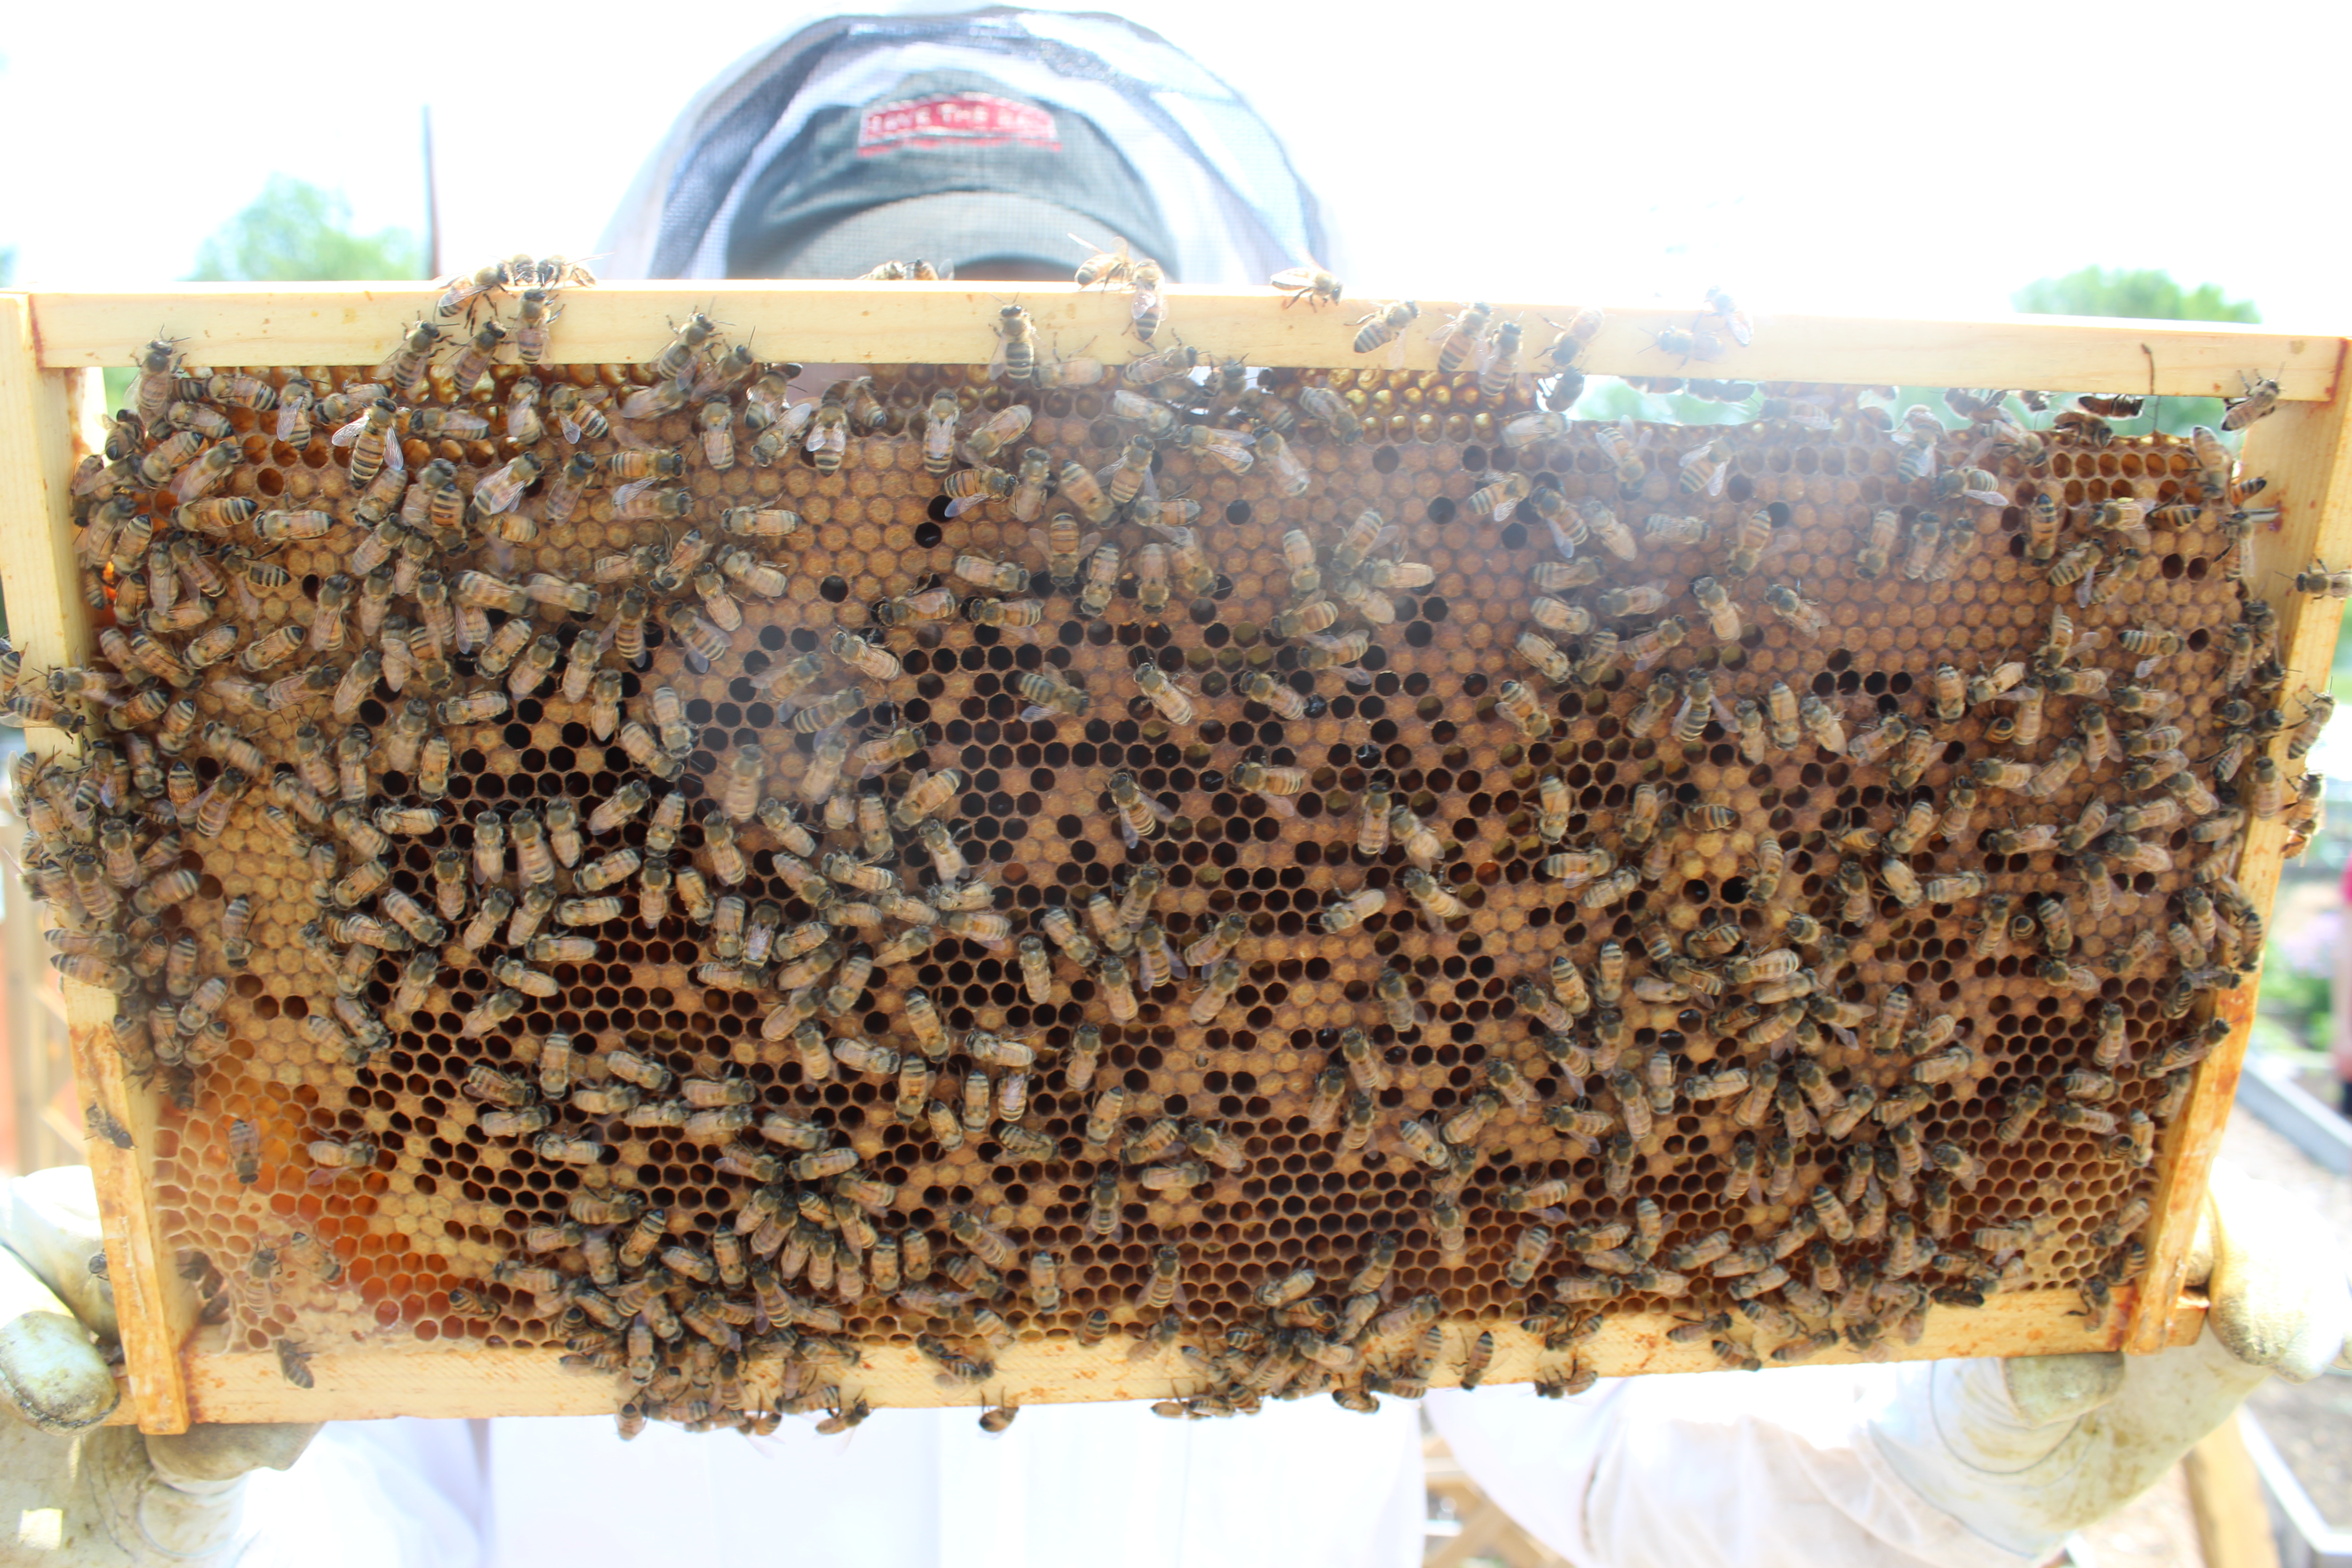
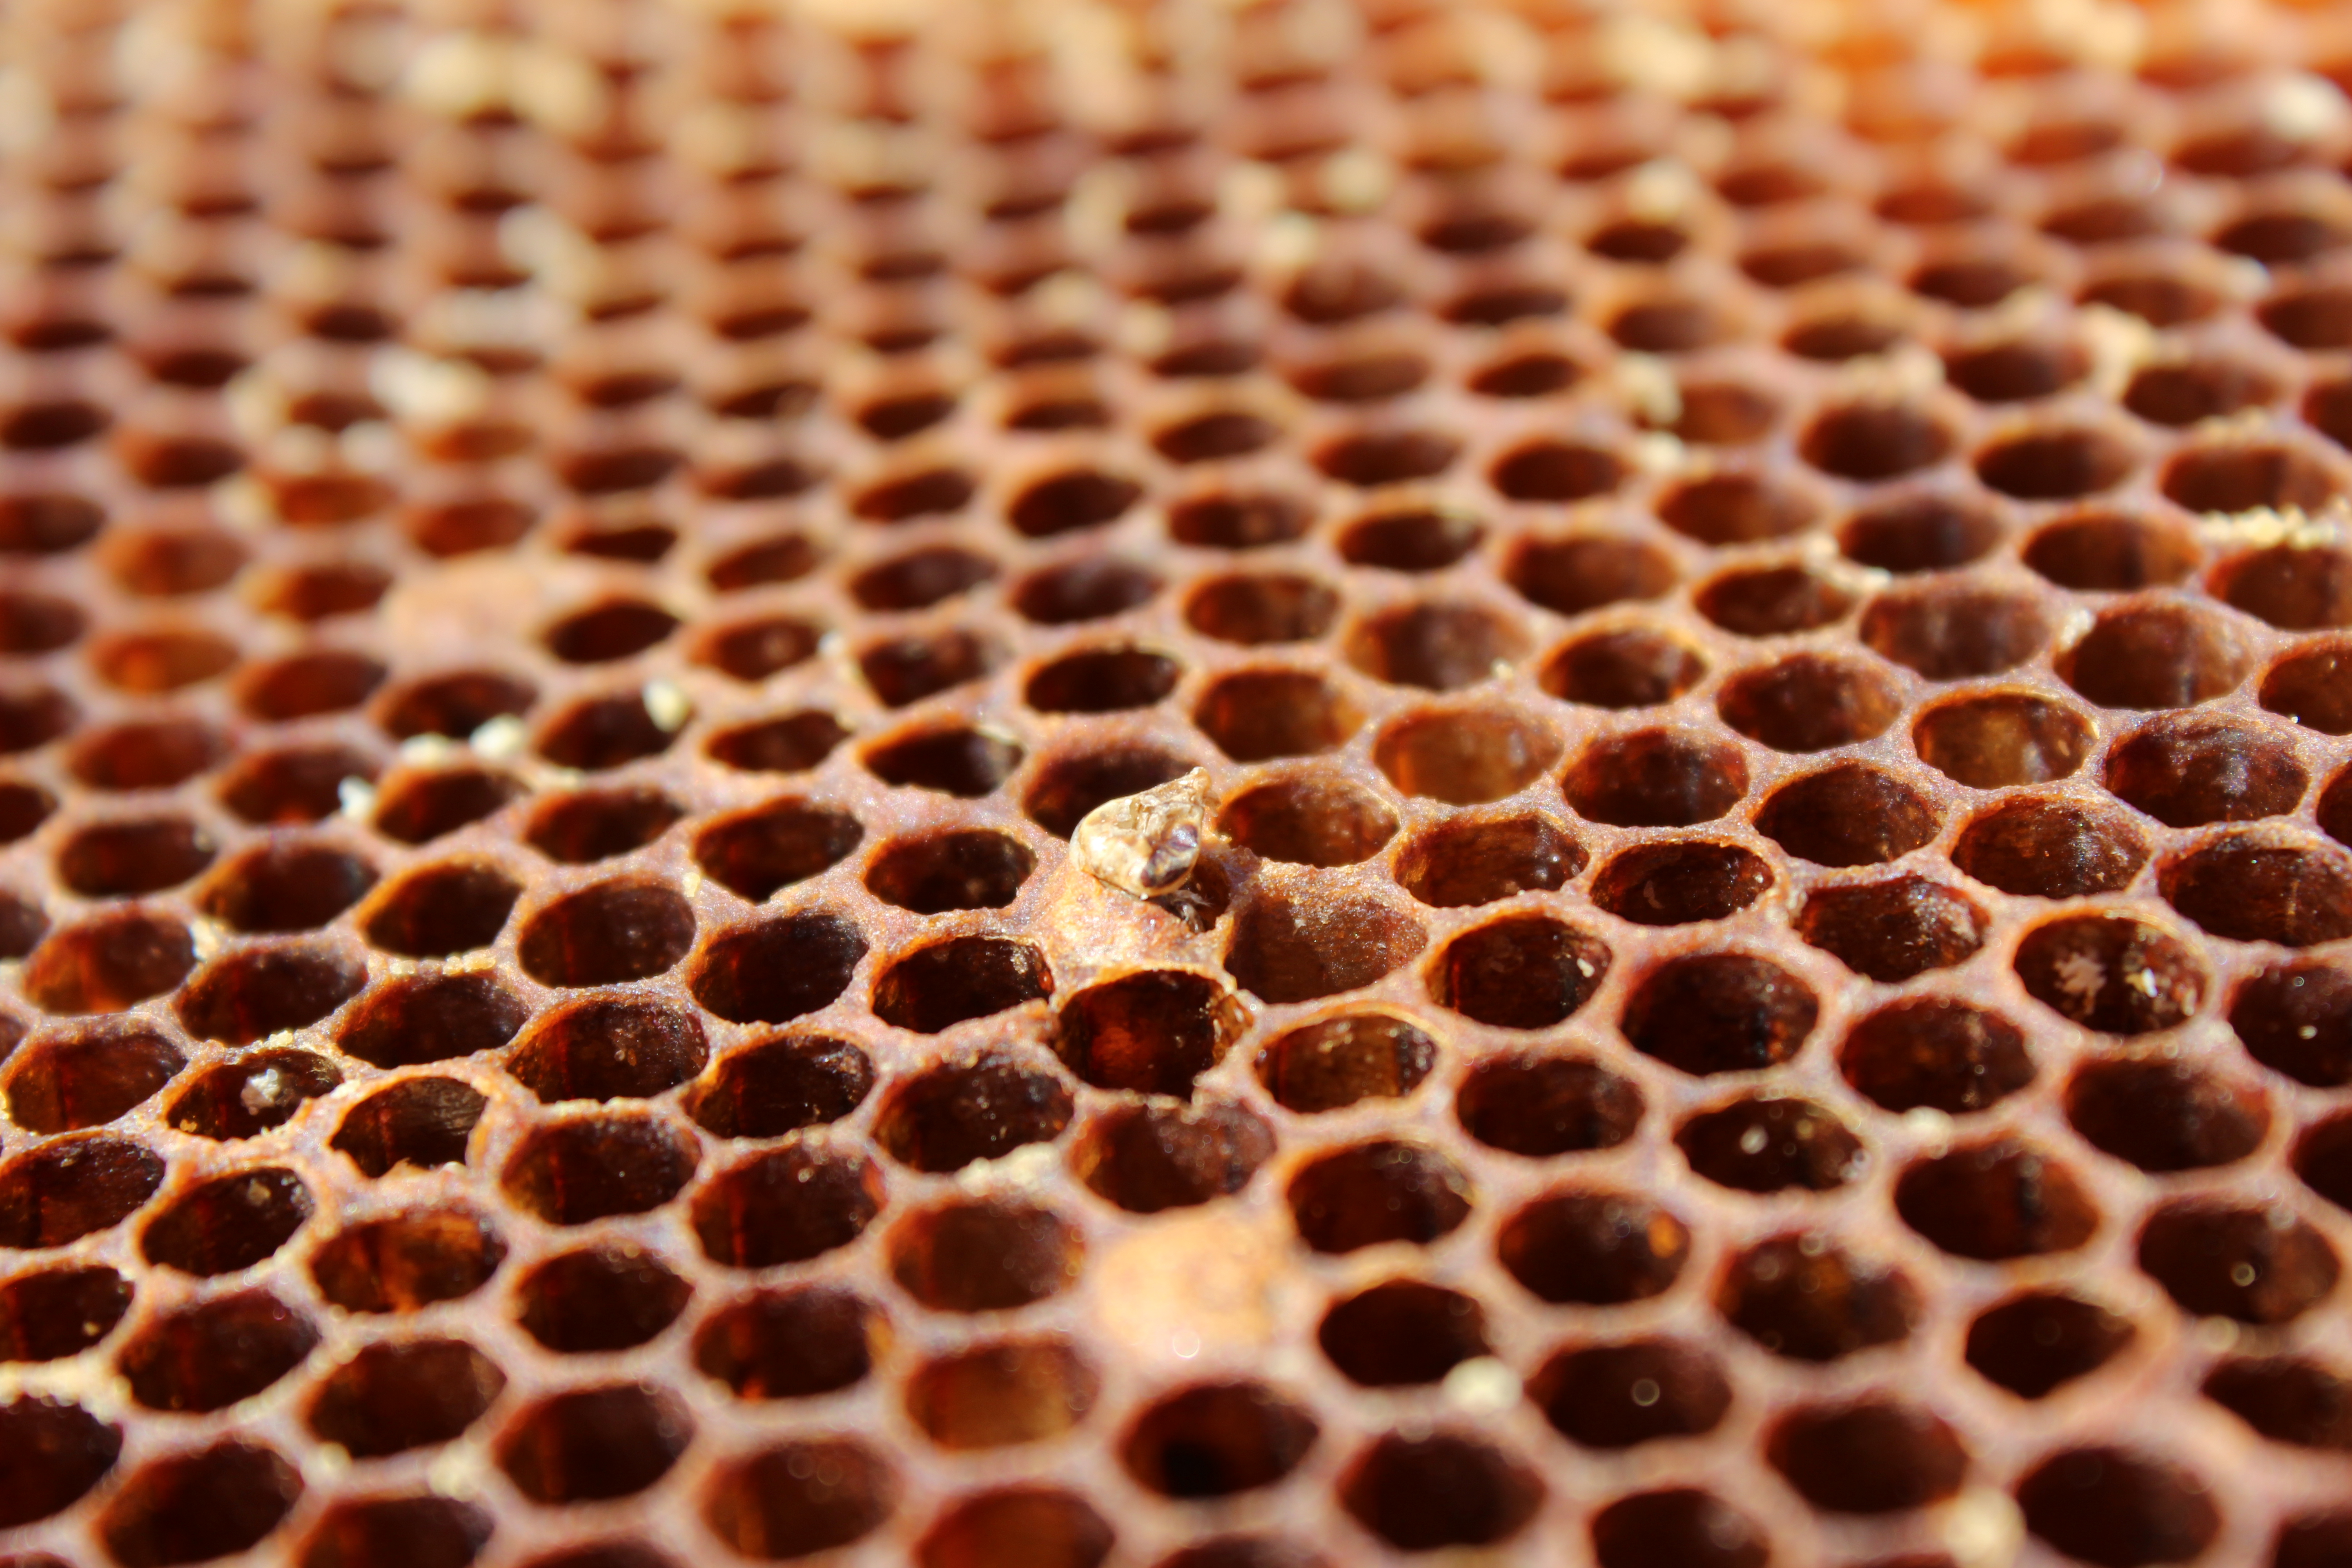
I was determined to do a successful sugar shake mite check this time, since my last attempt… left something to be desired. I shuffled through the top hive body frames for one full of brood. It took me four frames, because the first three were solid capped honey! It’s a good thing we didn’t leave the triangle board any longer – it seems like they’ve really been stocking up.

When I finally found a brood frame, I gave it a good shake over a pot. The bees dropped in, and I knocked them all into one corner and scooped ’em up in my measuring cup. I got a slightly shy half cup, which I dumped into a mason jar and set aside for later.

some_text

Today we went for the slightly unorthodox method of treating for mites before testing to see if we needed to do it. Is this responsible beekeeping? Nope. But the day was getting hot and the bees were getting ornery, and it was a lot easier to test the bees in the shade after closing up the hive. For philosophical musings on why this probably is okay, hold out til the end of this post.

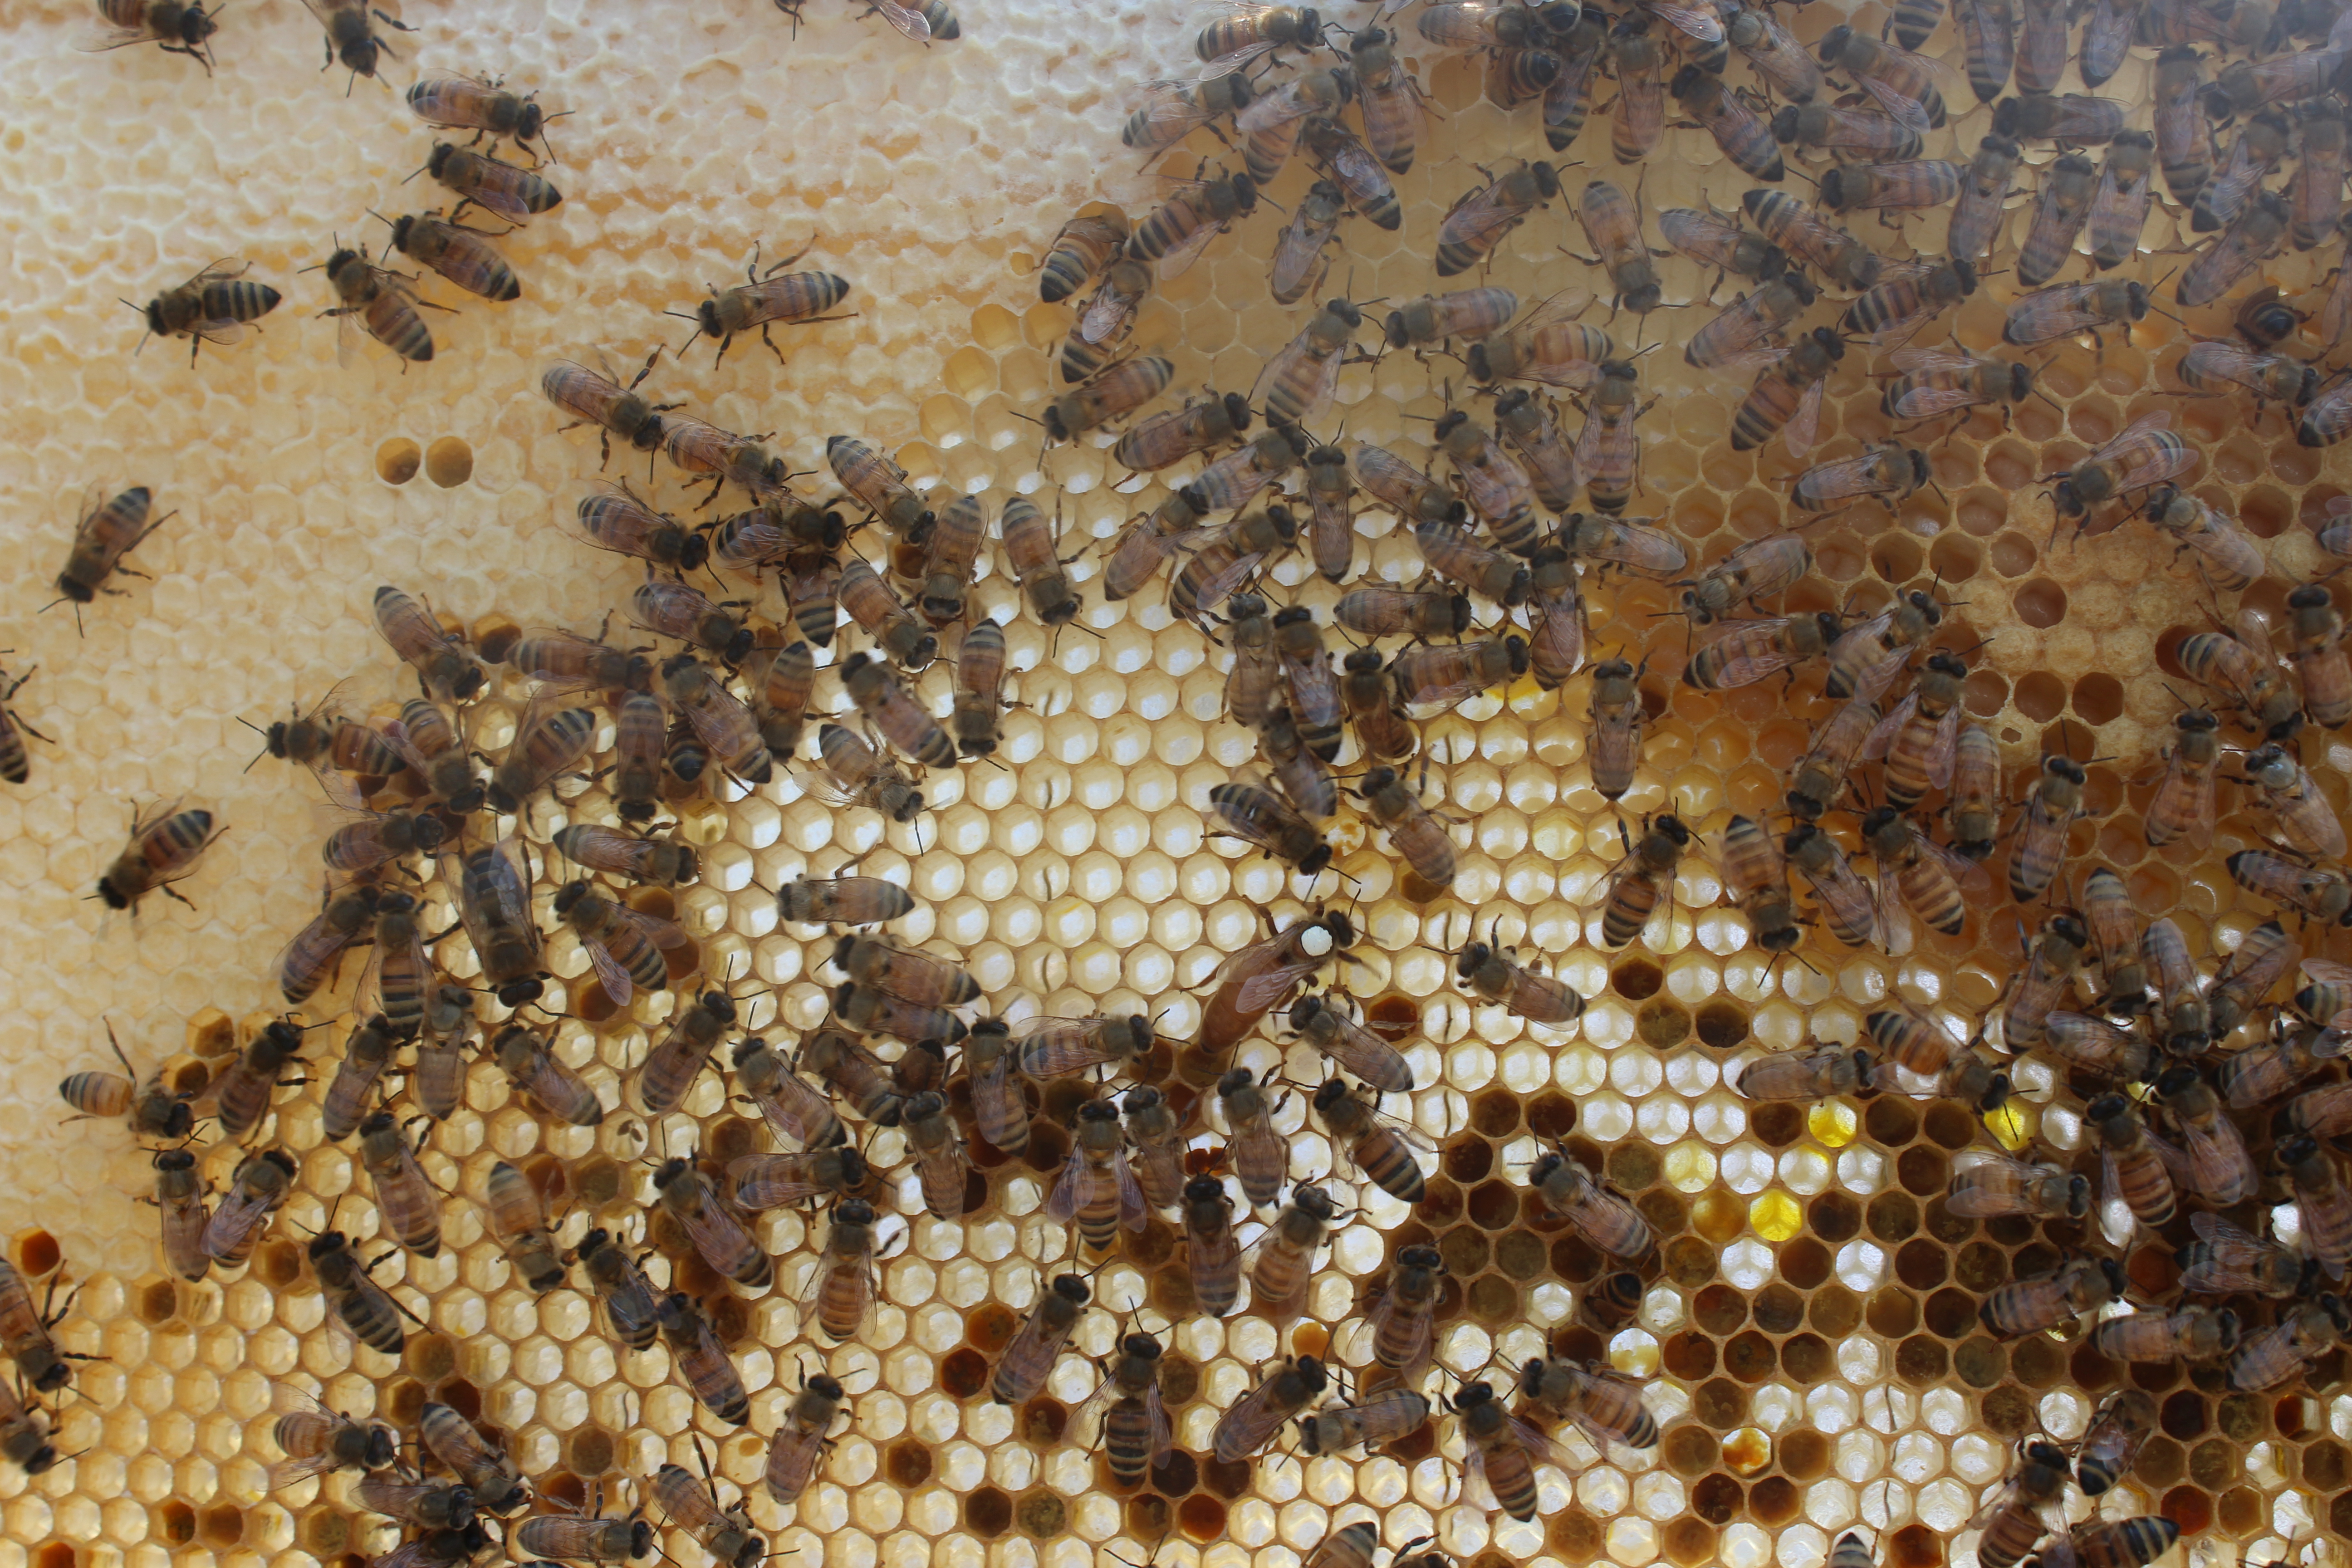
We dug deeper and lifted off the top hive body, because the mite treatment has to be applied to both. A while ago we put a shim between the two, hoping for some cool burr comb. The bees have been playing along, making this very cool structure that’s about the width of the frames but almost perpendicular to them.

some_text

I cleared away the burr comb and applied the Hop Guard. What it is is a pack of foot-long cardboard strips soaked in something with the consistency and messiness of hot molasses. This stuff oozed everywhere. The packaging is covered in warnings about getting on your skin, but by the end of the day I had it all over my hands and legs. (That being said, I washed it right off and seem to be fine. I don’t condone eating a spoonful of the stuff, but the danger may be over-hyped).

The instructions said to apply two strips per 10 frame hive body, draped 4 inches apart over two central frames. There they are!

some_text

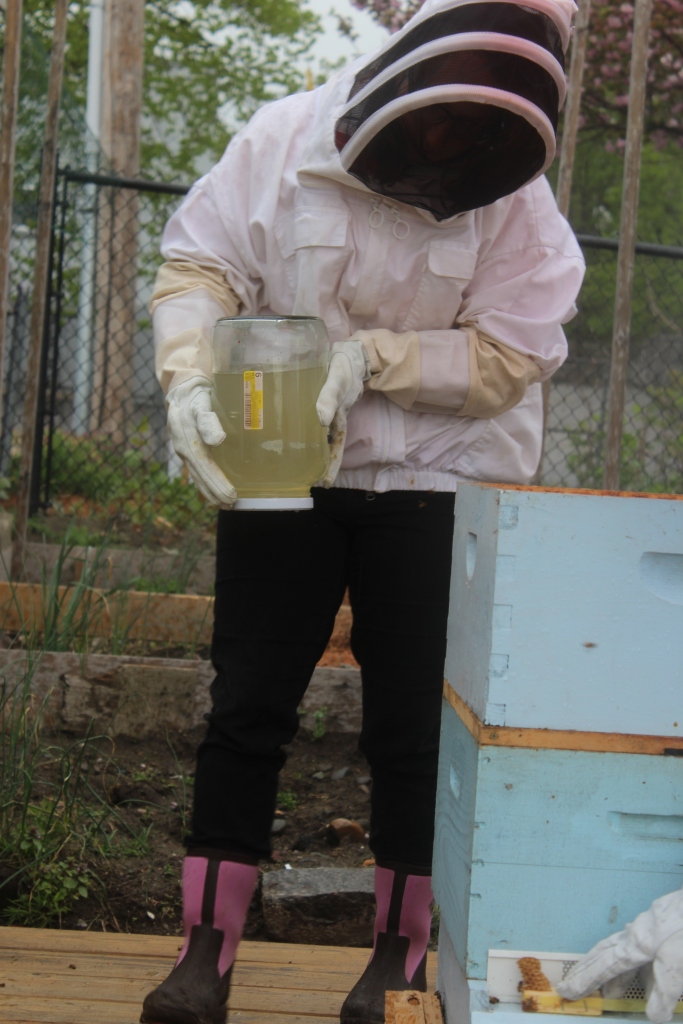
We replaced the second hive body and draped two more strips in that one. Then we topped it off with the queen excluder and a fresh honey super to catch the fall honey flow. We closed up the hive and beat it out of there. All that was left was to give those bees in the jar a good shake.

some_text

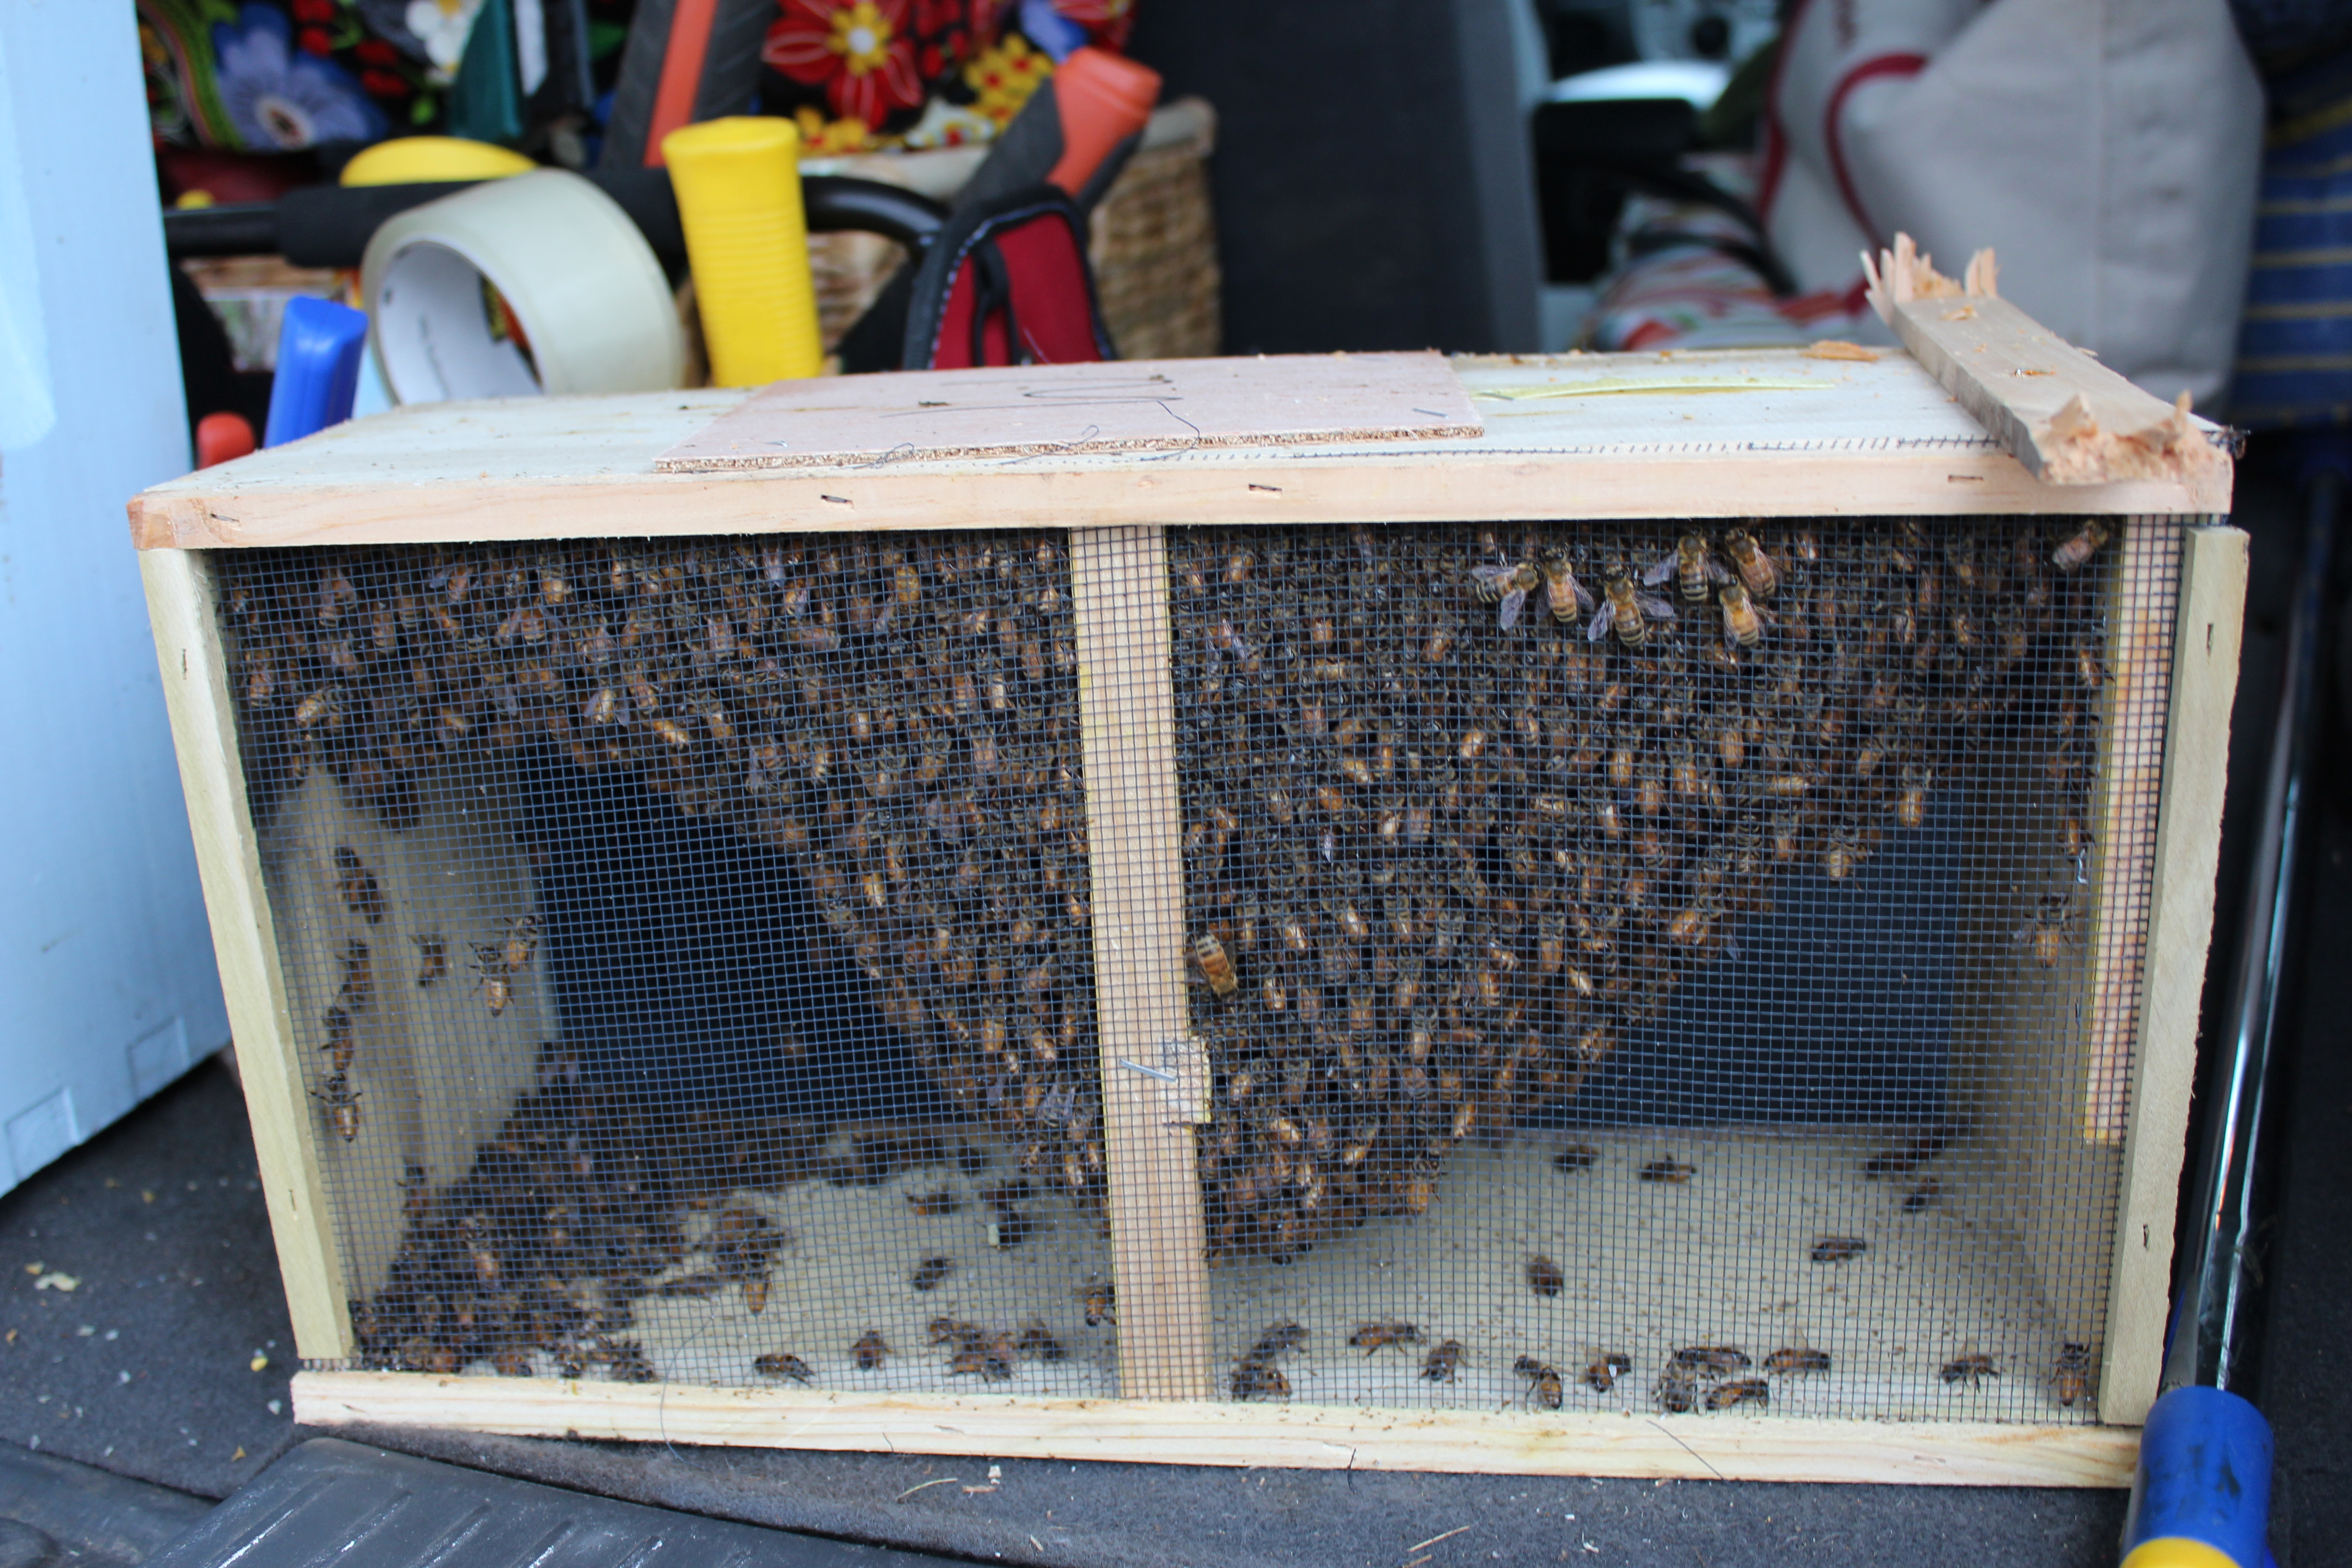
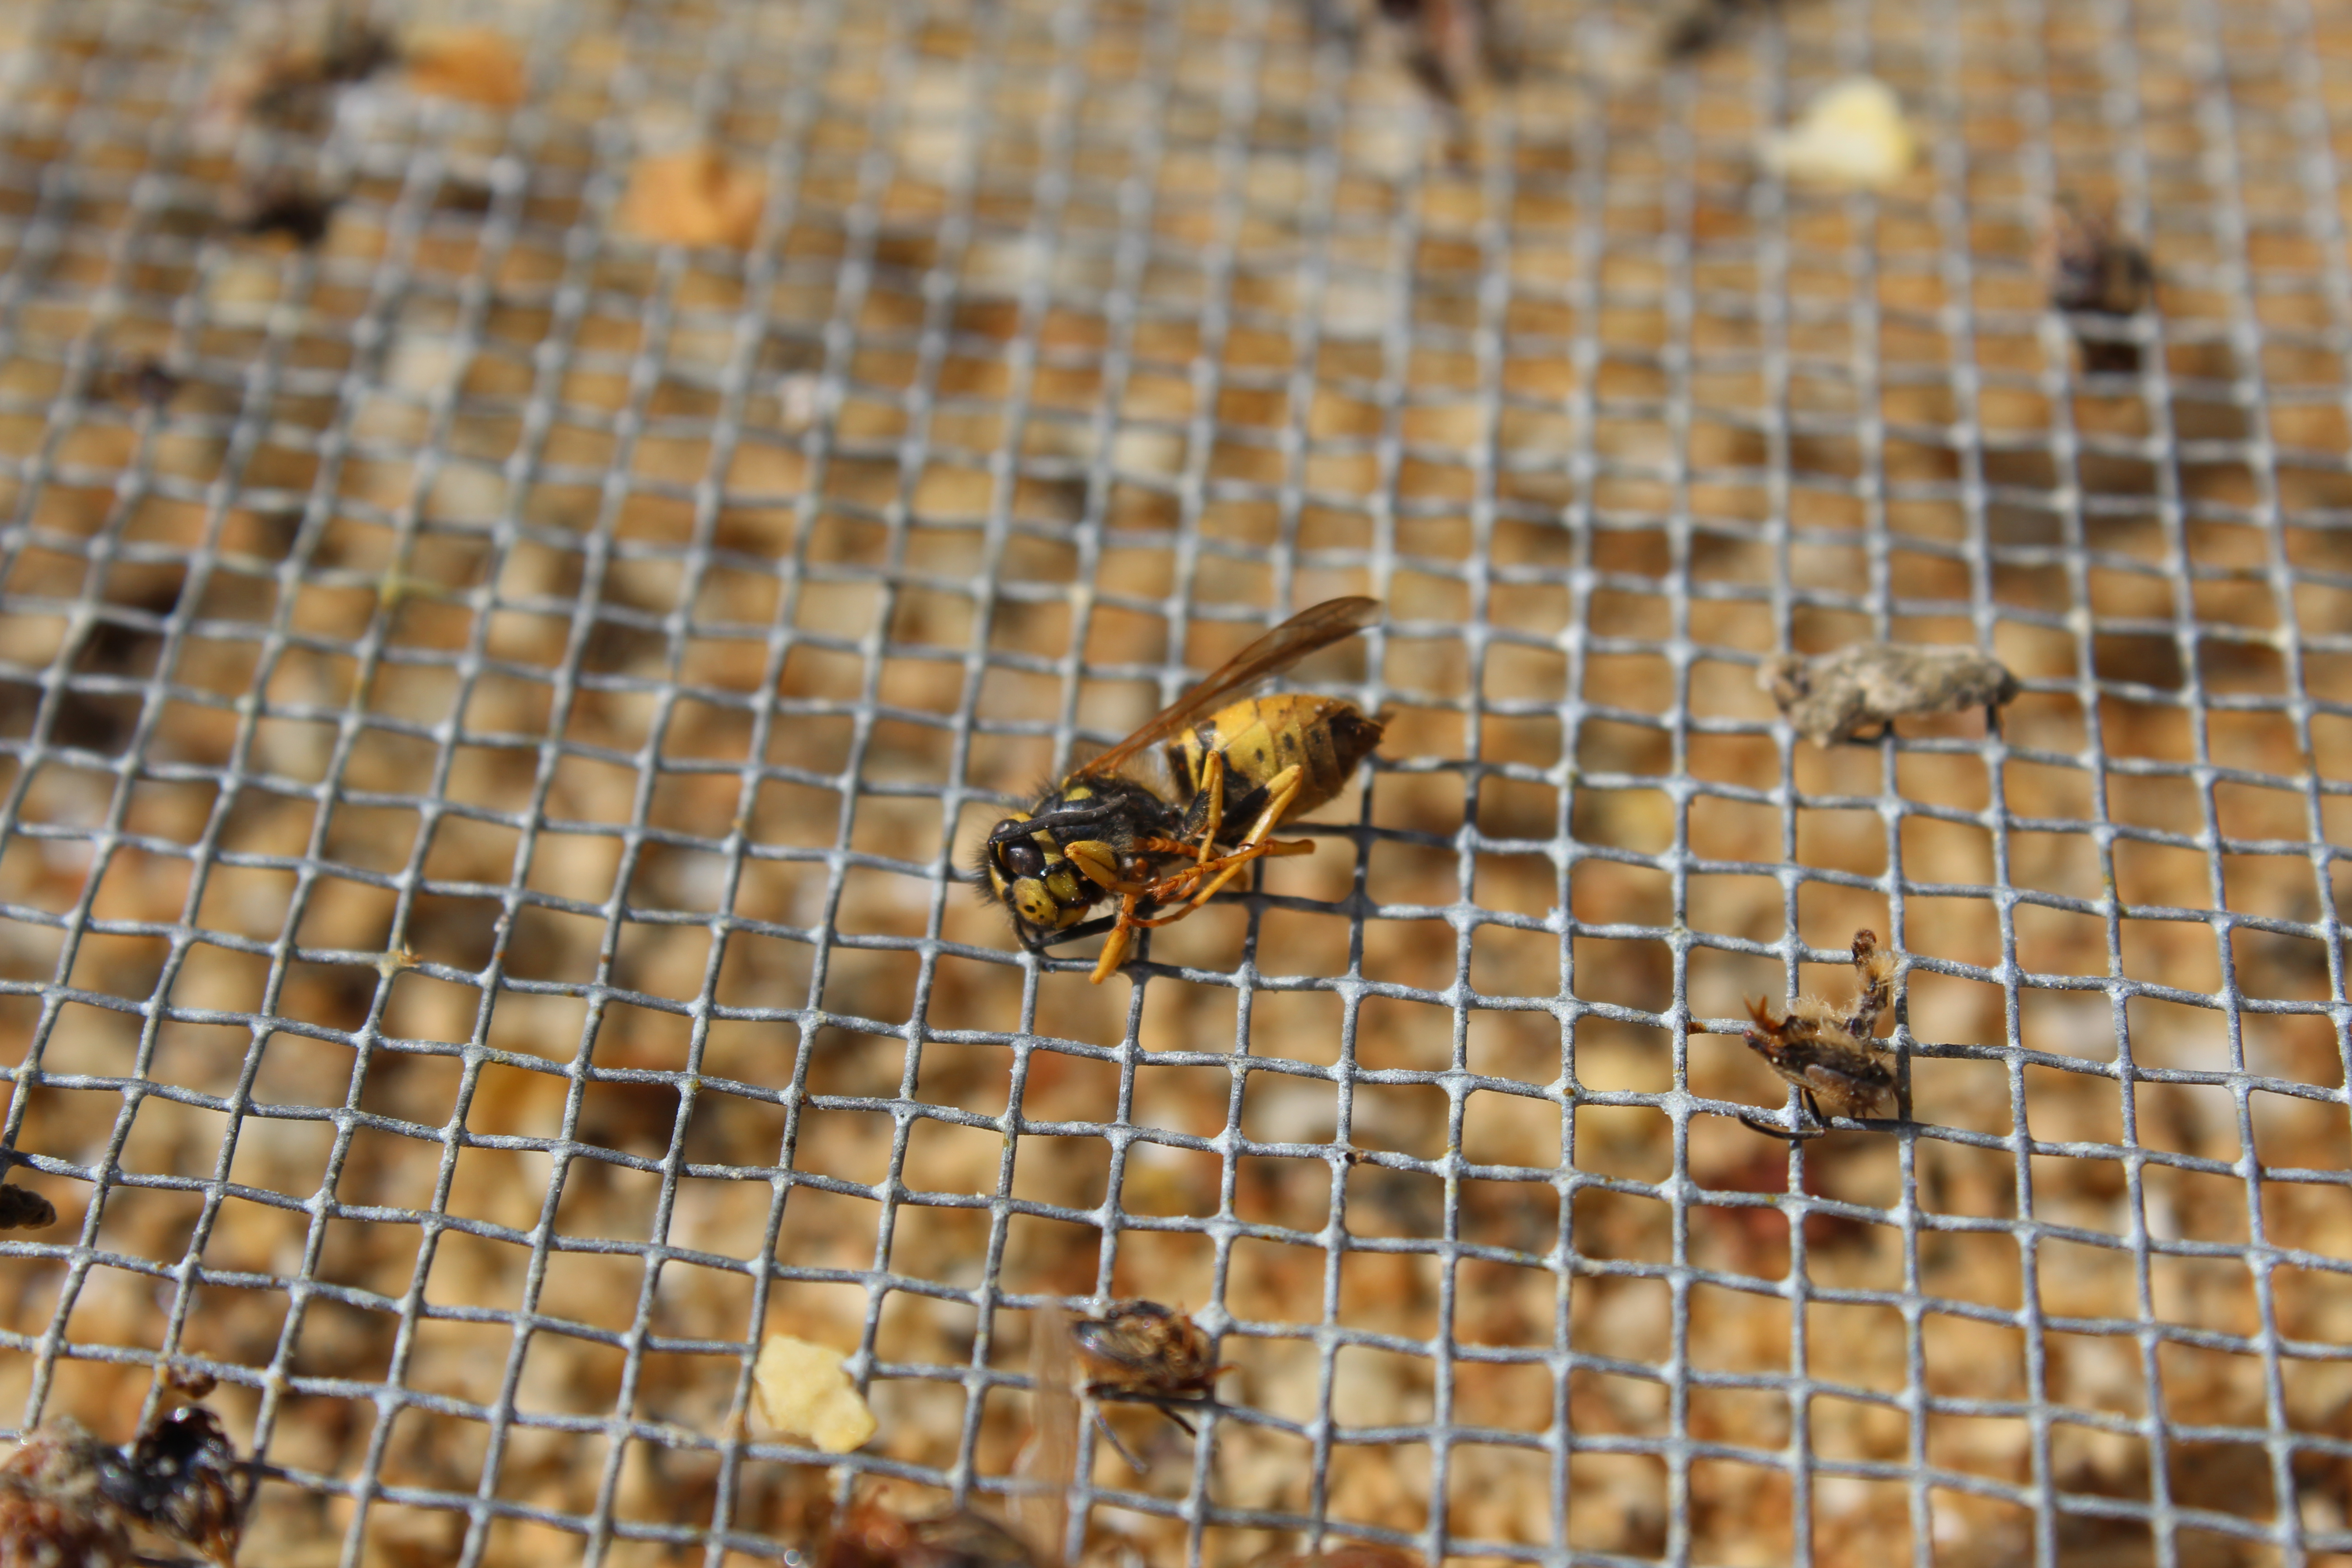
The round piece of screen I was given at bee school fit perfectly into a wide mouthed canning jar. The mesh in the screen is just the right size to let mites out and keep bees in.

some_text

Even if the bees really want to get out.

some_text

We dumped a few tablespoons of powdered sugar through the screen and shook the jar up for a couple minutes. It was a like a grotesque snow globe.

some_text

Once the bees were good and coated, we turned the jar on its end and shook it hard over a white piece of paper.

some_text

Between the white paper and the white sugar, the dark mites stand out pretty well.

some_text

Reasonably well, at least. Can you spot the one in this picture? Zoomed in this much, he’s actually hard to distinguish from the tiny sugar clumps’ shadows. He’s in the horizontal middle, just south of the vertical middle. If you look very closely you can see his little legs in the air.

some_text

In case you were worried, no bees were killed in the testing of these mites. They were a little dazed, to be sure, but they came out of it okay.

some_text

I dumped them out right next to the hive. Once they got their bearings, they should have flown right back into the hive. They’ll have a wild story to tell their friends as they get licked clean. This day will pass into bee lore, and the powdered sugar will probably be turned into honey.

some_text

So how many mites did we find? 4. From a sample of 300 bees, that’s an infestation rate of 1.33%. For this time of year, that’s actually remarkably low. In all honesty, we probably could have held off a while on treating. Given the way it went, though, I’m glad we did.

The thing is, all hives have mites, and the reasons to delay treatment hold a little less sway over us than usual. A lot of treatments are toxic to humans, meaning it’s a good idea to continually test mite levels while collecting honey, then harvest the honey and treat only when the mites get out of hand. Hop Guard, on the other hand, supposedly does not contaminate the honey, so there’s no need for strategic timing.

Another reason to wait is that mite treatment can be pretty hard on bees. If by some chance your mite levels never get high enough to have to treat, it’s better not to treat. Supposedly Hop Guard is gentler than other products, though, so it should be okay.

We got burned by mites last year, so we want to go in guns blazing this time. Our number one priority is getting these bees through the winter, and hopefully this knocks their mite levels low enough that they stand a fighting chance.

some_text

It was a good and productive day. It was only a little sweltering, and Ben survived his first bee excursion. He says he even had fun.

Tales of Bees Past

A few weeks ago we went into the hive to check on the bees’ progress, but I never got around to writing about it. This means, incidentally, that almost every bee you’re about to see is dead of old age by now.

Even this one.

some_text

This is as spooky as beekeeping blogs get.

IMG_6104

We went in to check on the state of things and, if the state was good, to add a honey super. Until this point we’ve been letting the bees focus on building up their numbers. Once they get established, however, it’s time to start concentrating on honey production.

some_text

We opened up the top hive body and took a look. This frame against the outside wall was still bare.

some_text

A little farther in, though, production was in full swing. We’d put a shim between the two hive bodies, hoping the bees would build some interesting burr comb to fill in the empty space. And they did! Here’s some of it, hanging off the bottom of the frame.

some_text

This next frame has hardly any burr comb – the structures hanging off the bottom are 100% bee. And that white arc across the top is all capped honey.

some_text

Since the bees seemed to be moving right along (and running out of room), we plopped our honey super on top, with the queen excluder (the metal screen in my hands) between it and the hive bodies. This will keep the queen laying in the hive bodies and allow the workers to store honey in the honey super.

some_text

Some beekeepers don’t believe in them, but anything that keeps grubs out of your honey sounds good to me.

some_text

The bees are still happy and healthy. (At least they were last time we checked). Soon we’ll be going back in to scope out the honey and the mite population.

I hope they haven’t gotten too used to us being gone.

A Trip to Bee Town

Another day, another glowing bee report!

We went into the hive again this weekend, and the bees couldn’t be doing better. This frame, taken from somewhere in the middle of the box, is almost completely covered in capped brood, with a band of capped honey in the top left corner.

IMG_4985

This one has more of a smattering of capped brood – maybe that means it’s older and a lot of the larvae on this frame have already emerged. Last time we inspected we spotted the queen but no brood, which meant she may not have mated yet. She clearly has now, which means her sole objective is egg laying. She has enough sperm stored up in her body (bees do it a little differently than we do) that she’ll never need to mate again. Barring a swarm, she’ll never even need to leave home.  IMG_4992

Just one frame over we found uncapped brood. Look carefully inside the cells. See those white C-shapes? Those nasty little maggotty things? Those are baby bees! If you look closely, you can see that they get progressively bigger from left to right. That means the queen worked her way from right to left and the larvae on the right are just that much older and, therefore, bigger. It takes just 21 days to go from a tiny egg to a fully formed bee, so every minute of development counts!

IMG_4983

This is the same frame, shifted slightly to the right. A lot of the larvae are big, and four of them have already been capped – those are the four cells around the middle that are opaque. The worker bees seal off the larvae with a layer of wax once they reach a certain size. In the sealed cell the larva will grow into a pupa, something that looks a lot more like a bee than these little grubs. Eventually she’ll become an adult and chew her way through the wax cap, ready to get to work. By mid-June all these gross little worms will be full-grown bees and all the bees in this picture will dead or on their last legs. Bee time moves fast.

IMG_4982

This progression from empty and capped brood to mostly open brood meant we were following in the queen’s tracks. She works methodically, laying from one frame to the next. And sure enough, there she was in the next frame. There’s a little bit of everything going on here. The whole left corner is a swath of capped honey. Coming in from the right is a patch of capped and soon-to-be capped brood. The white dotted queen is bustling around in the middle, above a really nice patchwork of pollen. The pollen will be mixed with honey into a tasty sludge called bee bread and fed to the brood.

IMG_4995

Bee colonies have personalities, just like any animal, and this one is nice and easy going… until we get too close to their queen. We can always tell we’ve pulled out her frame before we see her because the bees get more agitated and aggressive. No stings yet, but there’s a lot of movement and angry buzzing.

IMG_4997

It’s not all babies in beetown. This frame was extra heavy with uncapped honey. The honey starts out high in moisture and is left open to the air to evaporate. As it distills down, the bees combine it into fewer and fewer cells. Once they have a cell full of honey down around 18% moisture, they cap it with wax to stop it evaporating more. At this low moisture content, the honey won’t ferment and can be stored all through the winter. How do the bees know all this? Magic.

IMG_4976

Since the bees are doing so darn well, we made some big adjustments to their hive. We took away their jar of syrup. This is a bit of a controversial move, and a lot of beekeepers in the area are still feeding. There are flowers galore now, though, and our jar looked to have been emptied a while ago. We think they’ll be fine. In the place of the jar we added a second hive body with ten more frames. The bees haven’t quite filled out their current box (two or three frames are still empty) but they’re moving fast and it’d be such a shame to overcrowd them and cause a swarm.

We put a shim between two boxes. It’s just a square of wood two inches high with a hole drilled in it. This should give the bees a little more ventilation and room to come and go.

IMG_5003

We also removed our entrance reducer – this big piece of mesh that keeps out opportunistic mice in cold weather and makes the hive more easily defensible for a new, weak colony.

IMG_5006

This is our entrance now, with plenty of room for foragers to come and go. I really hope our colony’s tough enough to defend all this new open space. We’re probably going to put in a moderate entrance reducer until they build up their numbers some more. For the time being, they seem to be enjoying the new easy landing. Check out the two foragers with loaded pollen pockets! There are obviously at least two pollen sources coming in right now – one golden yellow and one bright orange.

IMG_5022

Here’s another from the yellow source touching down after a flight. She’ll go inside, hand her pollen off to the house bees, and probably turn right around to make another trip. Unless another bee gives her a hot tip about an even better or closer pollen source.

IMG_5021

Like that cool bright orange stuff.


Progress

The bees are kicking it into top gear. Late last week we took advantage of the sudden good weather to do an impromptu inspection. It was very nice not to have to hold an umbrella over the hive the whole time.

The first thing we noticed was that a good third of the syrup was missing – you can see a few droplets here on the inner cover, but most of it has gone into the bees and been converted into much needed energy. This means the bees have been munching away and working hard to draw their wax frames out into livable comb.

some_text

When we lifted the inner cover, we found the bees more or less clustered around the middle few frames. Eventually they’ll work their way out into all ten and will have to be given a second box to make way for expansion. For the time being, though, population is low and momentum is going to take a while to build.

We gave them a half and half mix of new frames (like the one being lifted here) and old frames. The old frames were drawn out into cells by bees of the past, while the new frames hold virtually flat sheets of wax that these bees will have to draw out themselves.

some_text

Here’s a nice bundle of bees on a new frame. What they’re doing is building up on the hexagonal imprint on the wax foundation we gave them to create a wall of cells in the classic honeycomb shape. Where do they get the wax? From nowhere pretty. The workers eat honey (or for many of them right now, sugar water) to give themselves energy. They then exude tiny bits of wax through glands in their sides. They (or maybe some close friends) scoop up these little bits in their mouths and chew them to warm them up to malleability. Then they spit it out and work it into the existing wax, expanding the honeycomb by a little more.

This process is repeated countless times by countless bees to make a perfect, highly uniform pattern.

some_text

Up close you can see how the honeycomb is starting to take on a 3-D shape. The cells have gotten deep enough that some bee has decided to store a single serving of pollen. Are these bees with their heads in the cells working to build them out more or bringing in more pollen? I’m not sure.

some_text

The old frames have a completely different look to them. For one thing, the wax has turned a dark yellow to brown from the countless bee feet that have passed over it. For another thing, the cells are already at full size, so the bees on these frames can focus on storage instead of wax making.

some_text

Even so, they’ve been making some wax. The chunk in the top middle is a hunk of burr comb, which the bees make to fill in spaces they deem too open. What are these bees up to? The ones with their heads in the cells are most likely depositing pollen or honey for storage. The others could be doing any number of jobs. Maybe they’re talking about the hottest new nectar source.

some_text

As usual, one of the main goals of this inspection was to find the queen and make sure she was alive and happy. When we picked up our third or fourth frame the bees got much more agitated, and sure enough it was because we’d exposed the queen. I took this picture that looks like it would have been fantastic if I’d managed to focus the camera. Just look at that sunlight seeping through! The queen, though fuzzy, is the large, light yellow bee in the center with the white dot on her back.

Try squinting – it looks almost passable.

some_text

Since everyone was so upset about about us bothering their queen, we decided to leave them alone after this. We didn’t see eggs, but that doesn’t mean they’re not there. And even if they’re not, that may just mean the queen has yet to go on her mating flight. She’s had some bad weather keeping her indoors.

But now the sun’s out and spring and love are in the air, so she should be able to go out and find a dozen nice gents to kill as she sucks their semen into her body where it will be stored for several years.

some_text

Isn’t nature beautiful?

Happy as a Bee

I was pretty worried about the bees.

We moved them in on a cold, wet day, and the days after just got colder and wetter. We’d planned to peek in on them on Saturday, but because of the cold we pushed it back to Sunday, which was also cold. And wet.

It was a bad week for bees all around.

IMG_4156

Despite the weather, we had to check on our queen. My parents were visiting, so my dad acted as photographer and my mom, to her credit, spent her Mother’s Day standing in the drizzle watching me play with bees.

I did make her brunch afterward.

IMG_4163

The bad weather had me worried. I’d gone down the day after installation and didn’t see a single one. Normally after moving into a new home, the workers will fly around and around the entrance orienting themselves. The temperature was in the 40s, though, when no sane bee would leave her home. It made sense not to see them, but I didn’t like that I couldn’t.

IMG_4172

I put my ear up against the side of the hive – I thought that if I could hear buzzing, I’d at least know they were alive in there. But I couldn’t hear a thing. I was prepared for the worst.

IMG_4166

But I didn’t need to be! The bees are not only alive, they’re productive! They’ve already started drawing out comb!

IMG_4169

The queen is alive and has been naturally released from her little cage. We spotted her crawling around on a frame.

IMG_4170

They haven’t taken very much of the syrup – the jar was still mostly full. We’re not overly worried, though, since we started them with a few frames of pollen and honey from last year. It makes sense that they’d want to eat that before sugar water.

IMG_4181

Since it was raining, we closed up shop as soon as we found the queen. One of these days it’ll be nice enough to do a real inspection. For the time being, we confirmed everything we needed to – the queen was free, she’d been accepted, and the workers were working. We put the syrup jar back in place and popped the lid on top.

IMG_4175

I was down just this afternoon, and the bees were flying around happily. They weathered the storm and should have a warm, sunny week ahead of them.

If you’re in the garden, stop by and say hi!

IMG_4301

From a safe distance, of course.

The Bees Are in Their Bee House

You heard it here first – the bees are hived and happy.

Early this morning the bees were in Georgia, their home state. Then they were loaded into the back of a truck and driven to Wood’s Beekeeping Supply and Academy, where we picked them up.

20160504_163508

Here they are! Three-thousand happy little guys. I’m just kidding – they just got shaken out of their hives to travel 2,000 miles to a cold, wet place. They’re probably far from happy.

IMG_4126

These six in particular must have spent the entire trip clinging to the outside of the package.

IMG_4127

The weather was threatening rain all day, and as luck would have it the heavens opened just as we picked our bees up. We wanted to get them in, though, so we worked very quickly. I poked some holes in the lid of my bee syrup jar. We turned it over, and after a few seconds of dripping, the vacuum seal held. The bees will be able to pull the syrup out when they want it, but it won’t just drip all over them.

IMG_4123

Finally it was go-time. David grabbed the bees and we booked it over to the hive.

IMG_4129

We set them up in our state of the art weatherproof environment.

IMG_4137

And we set to work. Technically I was in charge of this installation, though Kim had my back. Using the hive tool I pried open the lid of the package and pulled out the syrup can. The bees travel with a can of syrup so they stay fed on the road. That’s why they’re so clustered around the top of the package.

With the can out of the way, I could get to the queen. She travels in a much smaller mesh cage with a handful of attending bees.

IMG_4134

She has to be kept separate because the bees in her package aren’t actually part of her colony. Queens are reared separately and put into these cages with a few bees who’ve grown up with and know her. But the 3,000 others are miscellaneous bees from other colonies. They’re literally shaken into the package and given a queen at random.

Bees don’t take kindly to random queens – in fact they go out of their way to kill them. That’s the reason for the separate queen cage (that, and making her easy for us to find). If she weren’t kept physically separate from the strange worker bees, she’d be dead before they left Georgia. Give her a few days, though, and she can spread her queeny pheromones and adopt this new colony as her own.

The key is keeping her in the cage inside the hive, so the colony can’t kill her before they get used to her. The cage comes with a pre-drilled hole in the side, plugged up with a cork. We pulled the cork out to reveal a second plug made of candy. Bees can’t chew through cork, but they’ll jump at the chance to eat some candy. The process takes a few days’ time – just long enough for them to fall under the queen’s sway. By then the queen will have a clear path out of her cage and a hive full of loyal subjects.

I hung the queen cage between two frames in the hive by nailing the attached yellow ribbon to the top of a frame. You can clearly see our queen in the topmost circle with a big white dot of paint on her back.

IMG_4140

The queen in place (you can see the yellow ribbon laid across the frames), it was time to dump everybody else into their new home. I took three frames out of the center of the hive body to make room. We sprayed the bees with some bee syrup to calm them down (because they focus their attention on grooming) and clump them together (because they’re really sticky). Since it was a cold day, we went very light on the syrup so as not to chill them.

Also to help the clumping process, I gave the package a gentle but firm whack against the deck to knock them all down onto each other.

IMG_4147

And then I shook them out. That’s all it takes – a little bit of shaking and maneuvering, and the majority of them dropped out through that hole and into the hive.

I very gently replaced the frames (don’t want to squish the bees below!) and put the inner cover on. On top of the inner cover we placed a second deep hive body to surround the inverted bee syrup feeder (lifted up on pieces of wood to give the bees room to get to the holes) and the package. Not all of the bees came out, and they’d have a very bad time left out in the cold and the rain. We covered everything up with the telescoping outer cover and got out of there.

On Saturday we’ll go back in to check on the queen and make sure she’s been released and welcomed. If she hasn’t been released, we’ll let her out. If she hasn’t been welcomed, we’ll panic and try to find another queen.

IMG_4144

Until Saturday, it’s all up to the bees. I hope they’re warm tonight.

It’s Bee Time Again

I have good bee news and I have bad bee news.

The bad bee news is that our colony from last year is dead. They didn’t make it through the winter. On the first truly warm day of spring, I went down to the garden to check on them. They should have been flying all over, enjoying the sun and reorienting themselves.

They weren’t.

A few days later we got all suited up just in case and opened the hive.

IMG_2044

It was totally empty!

There weren’t just dead bees – there were no bees. Honestly this was one of the best case scenarios (coming in at a long second to living bees). I was having horrible visions of thousands of dead bees rotting in the hive. Instead of a disgusting job of scraping bee slime out of the hive, we had pristine frames and a whodunnit on our hands.

IMG_1995

Our screened bottom board had a few dead wasps on it, and our first thought was that the bees had been overrun by them. If that had been the case, though, there would have been bee corpses everywhere.

IMG_1976

The wasps weren’t killers – they were just opportunists. They must have come in after the hive was abandoned to steal the remaining honey. An unoccupied hive is an amazing find if you’re a wasp, unless you’re this poor little guy, who somehow died in the act of theft.

IMG_2056

My friends Will and David had come along, and we shed our veils and coats and did a thorough inspection of the hive.

IMG_1989

In spite of the wasps, there were still patches of honey. One or two frames were still pretty heavy with it. We’ll put these in the hive to give the new bees a head start.

IMG_2038

Some frames will not be going back in. When the colony disappeared, the wasps weren’t the only opportunists to set up shop. The wax moth is a particularly gross pest drawn to beehives. These moths lay their larvae in honey comb – when the larvae hatch they tunnel through the comb and leave behind this distinctive webbing. Their favorite food (because they are so gross) is the skin of bio material left behind in the cells when a baby honeybee emerges. They craw from cell to cell, gorging themselves on this skin.

IMG_2011

A strong colony should be able to fight off wax moths without a problem. They’re mostly a hazard when you store used comb that’s full of tasty brood skin but unguarded by bees.

IMG_2029

We found this webbing in a few of the frames. We won’t be reusing this comb, but we will save the wax. We gouged out the webbing (because who wants that?) and put the frames in our solar wax melter.

IMG_2008

What else did we find? Nothing much. A single cell of hot pink honey. Maybe one bee went off the grid and harvested a melting Skittle.

IMG_2060

A sad sight – a lone bee, about to be born but with no one left to take care of it.

IMG_2039

And a gorgeous display of packed pollen in different shades.

IMG_2066

So what happened to the bees? They didn’t starve, or freeze, or get murdered. If they had, we’ve have the bodies. Kim and I went to the Rhode Island Beekeepers Association meeting to talk to the experts, and the prevailing opinion is that Varroa mites are to blame.

Varroa mites are usually to blame when it comes to honeybee problems, especially here in the north where overwintering is so difficult as it is.

We didn’t treat aggressively enough for mites in the fall, so as winter wore on, the mites’ numbers increased. Bees with high mite infestation are much more susceptible to disease. Just like with everything else, bees’ attitude toward disease is very self-sacrificing. On a warm day, infected bees would have flown away from the hive to die, hoping to prevent the spread to other bees in the colony. But it was spreading anyway, and these sacrificial flights happened again and again until literally no one was left.

But I said I had good bee news, too, and I do! We’re moving on and learning from our mistakes, and we have new bees on their way! On Wednesday we’ll be picking up a package from Georgia – a little mesh box containing a queen and about 3,000 bees.

This will be the foundation for our new colony.