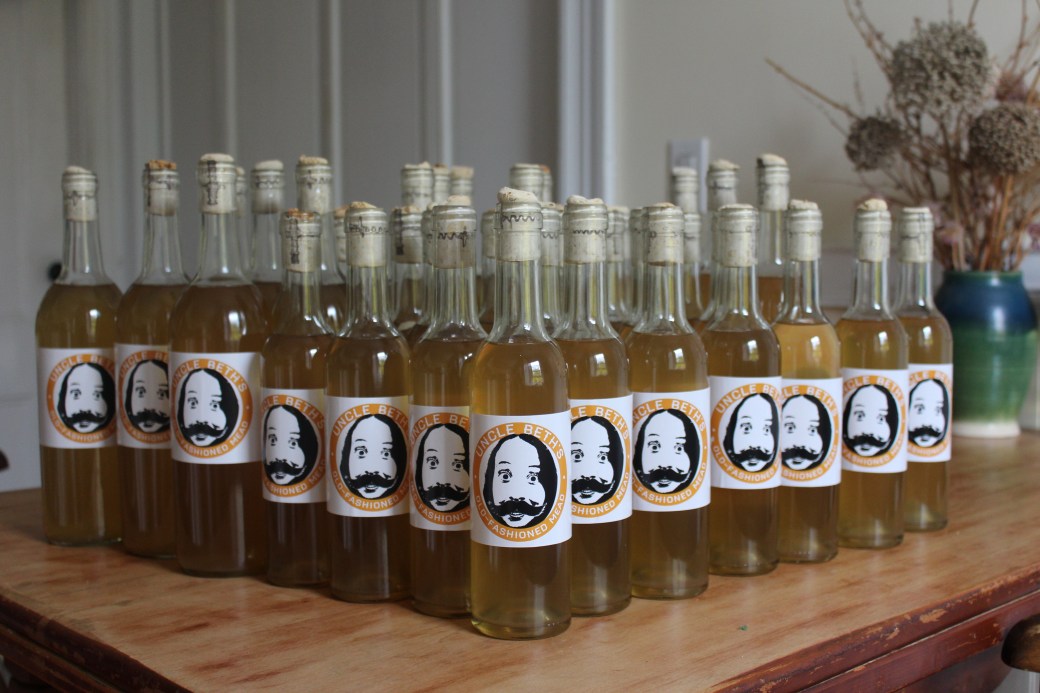
New labels and matching bottles in 750 and 375 ml. Uncle Beth’s Old-Fashioned Mead is movin’ up in the world.
New labels and matching bottles in 750 and 375 ml. Uncle Beth’s Old-Fashioned Mead is movin’ up in the world.
I’ve been experimenting with heirloom vegetables this year. Part of my inspiration is a desire to connect with the past. Another part is a desire to connect with my work. Earlier this year I wrote a series of articles about heirloom seeds for Gardening Know How. One of those articles was on the Crapaudine beet, the oldest known cultivated beet in the world.
Wanting to back up my writing with hands-on experience, I got my own Crapaudine seeds and planted them in the garden in April. After a few months, three of them had gotten big enough to pull.
The seeds all came from the same packet, but one of these things is not like the other ones…

The two rough beets are more like what I was expecting – I’d read that the skin would be tough and barky, possibly with a secondary root. This made sense to me, as if it were a missing link between the wild roots our ancestors ate and the fully cultivated ones we grow today.
Maybe that beautiful smooth one is just the kind of mutation that got us where we are today.
Or maybe I don’t know a thing about beet evolution.

I cut open the perfect beet (it was perfect on the inside, too) and laid all three out on a baking sheet.

I roasted them at 350 F for well over an hour, checking them every now and again with a fork. Once they were done, I tried to peel them.

I’d read that if they’d been roasted long enough, the beets would slip easily out of their tough skins. This was not especially true. Peeling these things was hard and messy. If anything, the flesh sloughed away from the skin, turning to mush if it wasn’t held very delicately.
I think peeling before cooking would have been the way to go.

Once I managed to get to the flesh, it tasted pretty darn good. It was sweet and earthy, with a grainy texture that did make it seem more “primitive” than a modern beet. But maybe that’s just my imagination.
I have another batch getting big in the ground – I’m interested to see how many look authentically ancient.
Fans of the blog might remember that we treated our colony for mites back in August with Hop Guard, a newly legal concoction derived from the hops plant that’s supposed to kill varroa mites while going easy on the bees.
Fans of natural mite treatment might be hoping for good news.
Well…

After the designated 30 days it takes for Hop Guard to work its magic, I opened up the hive to take a sample for testing. You test samples because mites are so small and dispersed, it’s almost impossible to tell at a glance if you have an infestation.
Bearing that in mind, check this out. The brown dots the blue arrows are pointing to are varroa mites, clinging to the backs of their host bees. Being able to spot two of them so easily is a bad sign.
The red arrow is pointing to a worse sign, though. This bee almost certainly has deformed wing virus, a disease that’s almost always connected with a heavy mite infestation.

Here’s another shot of the deformed wing bee. She probably won’t live longer than 48 hours, and she’ll likely be driven from the hive before then. Bees don’t offer much in the way of healthcare, and will evict sick members of the colony to try to prevent outbreaks.

With lowering hopes, I scooped a half cup sample of bees into a jar. My assistants for the day were my boyfriend Ben and his brother Matt, who was visiting from New York. I like to think this was just as exciting as anything the big city has to offer.
We dumped some powdered sugar on the bees and shook them up. Then we inverted the jar so the sugar and the mites would slip through the mesh lid onto a piece of paper. Before treating with Hop Guard, we counted 4 mites in our sample. So by now we ought to have fewer…

Oh.

Oh boy. I counted up to 38 and got lost.
So did the Hop Guard work? It sure doesn’t seem like it.
Has the mite population literally grown ten times? …Maybe. When taking a sample for a mite test, it’s important to select bees from a frame of uncapped brood. (The mites grow primarily on the bee larvae, so their population is always densest in brood comb). When I took my pre-treatment sample, I used a capped brood frame, which means most of the mites were sealed away under wax. (In other words, I screwed up). This time I used an uncapped frame, meaning I got the technique right, but the numbers were bound to be artificially higher.
But ten times higher is a lot. Particularly after treatment. If the hop guard knocked the mite population down at all, it wasn’t much.

So what do we do now? We treat again. But not with Hop Guard. Hop Guard had its chance. We’ve already installed some strips of Apivar, a tried and true chemical application that by all accounts should do the job.
In a few weeks we’ll check again and see if it has.
2016 was the year of heirloom vegetables. Way back in March I bought a pile of heirloom seed packets, including one for Kajari melon. Kajari is an Indian heirloom melon that I chose because it has a short time to maturity and because it looks cool. I started some inside and planted them out too early, so they disintegrated in the cold. In June I replaced them with seeds sown directly in the ground. The vines took off, and by late August I had a single ripe melon. It did indeed look cool.

At least from some angles it did. From other angles it was clearly rotting. I tried to let it ripen on the vine and left it too long. It was about the size of a tennis ball and tasted horrible.

The vines kept growing and, among the three of them, they managed to produce one more fruit, about four times the size of the first. I picked it green to save it from an impending frost and left it on the kitchen table to ripen. After about a week of being poked and prodded by my housemates (it even spent a few days wrapped up in a ribbon) it turned a satisfying orange color.

I undid the ribbon and sliced the melon in half. The flesh was firm but juicy and smelled great.

Unfortunately a lot of the space inside was taken up by seeds. I scooped them out, washed and dried them, and stored them away for next year. At $4.50 per 15 seed packet at Baker Creek, I could start a racket.

All told, I got a shy bowl’s worth of fruit. Was it good? Yes! It was sweet and juicy, with a slight vegetable aftertaste I’ve never noticed in a melon before. Like it was 6 parts melon but 1 part squash. I liked it – it felt earthy and satisfying.
But was it worth seven months of waiting? Maybe not.

Rhode Island is a tough place to grow melons. It can technically be done, but it ain’t easy and it ain’t guaranteed. Our summers just aren’t quite long enough. I did enjoy this one melon, though, so I’ll probably give it another shot. I’ll try to time my spring transplants better so I don’t have to resow in the summer.
Who knows? Maybe I’ll even get three melons.
A girl can dream.
I had big plans.
I was going to harvest pounds of extra wax from our beehive. I was going to have candles for days.
But it wasn’t to be.
Basically, what I did was make bug soup and then throw it away very carefully.
This is my tale of woe.

A while ago our poor spare frames were overrun with wax moth. It’s just what happens when you leave used frames unprotected. I’ve heard that a strong colony will clean up infested frames without a problem, but I didn’t quite have the faith to put it to the test. Instead, I brought them home to salvage the wax.

I pulled all the wax from the frames and got a pretty impressive pile.

My main concern was with filtering the bugs. Because yes, this wax was riddled with wax moth larvae. I decided to melt it down in a pot of water, bugs and all, and filter it in its liquid state.
Beeswax burns extremely easily, so rather than melting it directly on the bottom of the pan, I thought I’d let it dissolve into the water, strain it, and let it separate back out as it cooled.
Simple, right?

As the wax melted, I managed to fit all ten frames’ worth into the pot. After letting it stew for a while, it was time to strain it into molds.

I rubber banded a few layers of cheesecloth over the tops of some plastic containers. In this tiny sample, we can see three gently simmered wax moth larvae.

This was a horrible job. Beeswax sticks to everything it touches and is famously hard to clean up. I was forever setting down cardboard and running out of space and sacrificing utensils.
To make matters worse, it was extremely hot. The pot was hard to handle, and I learned the hard way that some plastic is less heat-tolerant than others.

I finally managed to get four containers full of strained wax water. I set them outside to cool off. The cat went out to investigate and came back wax-dipped.

I left the containers out overnight while I googled how to remove wax from a cat. (If you don’t word your search carefully, you get very different results).
In the morning I went out to investigate.
Oh boy.
One was knocked over. They were all full of rainwater.

And while my hopes of the wax separating and rising to the top did technically play out, it wasn’t all I’d dreamed it would be.

This is it. My entire harvest. It weighs 0.65 ounces.

So what went wrong? I think it was the filtering. While I managed to keep the bugs out of the final product, I kept most of the wax out with them. It all clung together on top of the cheese cloth, and the wax molecules that snuck through with the water were purely coincidental.
A decent amount also wound up on the cat.
If I ever do this again (and to do so will take a tremendous amount of courage), I’m implementing a strict no-bug policy. Maybe there’s a good way to filter them out, but I sure don’t know it.
Stay tuned for a post about making a single votive candle.
I had every intention of checking on the bees. I’d gotten the smoker out and everything. When I went to open the plastic bin we keep the bee suits in, however, I found some unwelcome guests. They were everywhere, and the bee checking had to be postponed.

It wasn’t hard to find the source of the problem. We were storing the bee suit bin on top of another bin with some old frames of comb in it. And those frames, wouldn’t you know it, were completely full of wax moths.

Wax moths are a perpetual threat if you’re storing used comb without bees to protect it. Fans of the blog may remember that our hive was infested with wax moths last spring, after it was abandoned. Wax moths are rarely a problem in active hives, because the bees will drive them out before they can take hold. But if the comb is unprotected, like in the empty hive or the shed, moths are almost certain to move in.

Despite their name, wax moths don’t actually eat wax. A frame of unused foundation in the same bin was untouched. What the moths like is the thin, protein-rich skin that’s left behind on the cell walls by the bee larvae when they emerge as fully formed bees. Think of it like a bee amniotic sac. Moths lay their eggs in the wax, and those eggs hatch into grubs that burrow through the wax, feeding on these old protein skins.
Because they’re disgusting.

I thought the bin we were keeping the frames in was tight enough to keep the moths out. I thought wrong. Here you can see a few of those little grubs on the move.

And here are some adult moths.

Will and I dragged the bins outside to clear them out. We wiped out all the bugs and their bizarrely stretchy webbing.

The moths clearly started in the bin with the frames, but they’d been migrating. I found a few little cocoons in the bee suits.

I picked off all the cocoons I could find and shook everything out. For good measure, I took the suits home and washed them. I sprayed the bins down with the hose and let them dry in the sun. I’m pretty sure we’re moth-free.

As we were working, a few of the bees came over from the hive to see what we were up to. This one found a single globule of honey on one of the frames.

Some others flocked to the honey that dripped out of the frames onto the ground. They will have drunk as much as they could hold, then carried it back to the hive to store.

This wasp showed up for the free food, too.

So what became of the frames? I didn’t want to keep them around so full of moths, but I couldn’t stand the idea of throwing away all that good wax. I brought the frames home and tried to render the wax in my kitchen.

Stay tuned for that tale of hardship and woe.
My housemates wish I would stop fermenting things.
I’ve told them I don’t just ferment. Sometimes I bake cakes. Sometimes they’re good. Sometimes I feed them fresh, local, and organic vegetables and honey. I’ve told them to stop complaining.
But it’s true – I do ferment a lot of things. And this is one of those things.

A while ago I made borscht and found myself with most of a cabbage leftover. This prompted me to try one of the easiest fermentations that I’ve never actually done: Sauerkraut.
I cut up my cabbage and removed the core.

Then I chopped the rest into fine strips and threw the strips in a bow with 1 1/2 tablespoons of kosher salt.

I smashed it all around with my hands for about ten minutes. Perhaps ‘smashed’ is too strong a word. The recipes I’ve come across online are fond of the word ‘massage.’ After ten minutes of gentle massage, the cabbage released a lot of its water and became wilted.

I plopped my wilted cabbage into a jar, tamping down with my hand after each plop to release air bubbles and more liquid.

I covered the whole thing with a kale leaf to protect it from the air, and weighted it down with a jam jar full of water. The name of the game with sauerkraut seems to be keeping it out of contact with the air with a layer of water. At the moment the water released naturally from the cabbage is a little sparse. I may have to add more.

I rubber banded a piece of fabric over the whole jar to keep critters away and stuffed it away in a cupboard. The pictures of that weren’t very glamorous, though, so I’ll leave you with beautiful shot of my sauerkraut to be.

In a few days it should be ready to eat.
Last week we went in to check on the bees and take stock. Things are looking good, though we did notice this beautiful and disgusting phenomenon underneath the hive. Some opportunistic spider has set up shop under our screened bottom board. Maybe he’s after mites, maybe he’s after bees. Whatever he was after, what he got was all that nasty debris that’s fallen down out of the hive. Poor guy.

We swept out the cobwebs and opened up the hive. My last time in I’d taken off a “full” honey super and replaced it with a new one. Unfortunately, the full one was none too full, and the new one is filling up slowly.

So where is that honey? Turns out a lot of it is in the top hive body. Whoops. This deep frame is totally capped.

As is this one.

The capped honey has such a satisfying, smooth look to it. I genuinely don’t know what this little huddle of bees is up to. Since the honey is all capped, I don’t think there’s any work to do in this part of the frame. They’re probably talking to each other, but about what? If anyone has a guess, I’d love to hear it!

This frame is closer to the center of the box, and it’s much busier. The very top right corner has some capped honey, but the bulk of the frame is full of brood. Some of it is capped, but you can just make out the white grubs in a few of the uncapped cells. You can also clearly see a drone with his big eyes and body, a third of the way from the top. Winter is coming, and this poor guy doesn’t have much time left. Pretty soon he’ll be too much trouble to feed and will be driven from the hive.

We managed to spot the queen, busy laying in one of the middle frames. The white thing is the remnant of one of our Hop Guard strips, with another week and a half left in its 30 day period of effectiveness. I’m no expert, but it looks to me like its effective days have passed. I’d read about Hop Guard I and the need to replace it when it dries out, but I was under the impression that Hop Guard II (what we’re working with) was an improved version that would last for the full 30 days.
Whelp. In a few days the month-long period will actually be up, and I’ll do another mite count to see if it’s been effective or not.

This strip isn’t as empty, but it looks pretty dried out. In fact, it looks like the bees have covered it up with wax… I have to say I’m skeptical that this is doing much. On the plus side, our mite count was so low to begin with that it may not even matter. But we won’t know anything for sure until we take stock of the current mite population. If worse comes to worst, we can always treat again in the fall.

No great changes were made during this inspection, but we got a good sense of where we stand.
We know that the bees are storing just as much honey in the hive body as in the honey supers. Next time we go in, we’ll take a couple of those full deep frames and swap them for empty ones. We’ll get some honey, and hopefully the queen will lay in the empty frames. In the meantime we’ve left both honey supers on top of the queen excluder, so with any luck they’ll fill those up some more.
We’ve seen that the queen is healthy and still laying and doesn’t seem to have been hurt by the mite treatment. Unfortunately, we’ve also seen that the mite treatment may not be living up to its potential. Only time will tell on that front.
In any event, the colony itself seems healthy and productive. The bees’ numbers have soared since we got them in the spring, and just like last year’s colony they’re extraordinarily cooperative.

I’m coming up on two years of beekeeping without being stung.
Back in May I started 5 gallons of strawberry wine. It’s September now, which means it’s time to bottle!
Actually according to my post-it, I should have bottled back in July. But a little extra ageing never hurt anybody.

I siphoned all the wine into my huge bucket. I had hoped that using extra strawberries during fermentation would leave some residual sweetness, but I hoped wrong. It was extremely dry.

I like sweet wine, and I think the strawberry really benefits from the sweetness, so I mixed up some honey in warm water and added it as the wine was siphoning.

I put in 5 Campden tablets and 2 1/2 tsp potassium sorbate to keep the yeast from going after the new sugar source.

With a bucket full of wine, I started bottling.

My parents drink more than I do (though that’s not saying much), and they diligently save their empty bottles for me. I like the motley look.

The bottles full, it was time to cork. Technically, I have a corker. In the strictly legal definition of the word, I do. It is, however, terrible. With one hand you have to squeeze two handles together to compress the cork, and with the other you have to press down on a lever to drive it into the bottle. All while not shooting your open bottle of wine off across the room. I tried to use it myself. I really did, and I just didn’t have the strength. My roommate Will stepped up to the plate and just barely managed it. What a man!
My birthday’s coming up, and I think I know what to ask for.

It was a real struggle, but we got there in the end with 8 regular bottles and 8 double-wides. I’ll have to order up some new labels.

I think I’ll call it Uncle Beth’s Fancy-Ass Wine
Storm’s comin!
New England has been battening down for Tropical Storm Hermine. So far she hasn’t brought much more than a dreary break in the stunning fall weather, but Monday had some high winds that got me worried about the fruit in the garden. The perimeter fence has a few big old concord grape vines that belong to no one in particular. This year I decided (with the garden manager’s permission, mind you) that at least some of them belong to me. So I braved the pre-Hermine gusts and rescued the ripest ones.
I didn’t weigh at the time, but I’d guess I picked about ten pounds.

My initial plan was to make a big batch of wine. The king of concord grape wine is Manischewitz, which I’ve always had a soft spot for because it tastes just like grape juice. I followed that logic and asked myself: wouldn’t it be nicer just to have grape juice?
Yes it would.
My parents have made grape juice for years. I think it might be my grandmother’s recipe. The jars line a shelf in the basement, and a couple always get brought up for Christmas and Thanksgiving. Gosh is it good. The ingredients, emailed by my mom, are:
And that’s it! Since it’s not fermented, it has to be processed in the canner. I heated up a bunch of quart jars to sanitize them.

I dealt with the jars one at a time. I removed one from the canner, dumped in the sugar and grapes, and filled it almost to the top with boiling water. The water turned out to be the limiting factor, since my kettle only held three jars’ worth.

The jar full, I fitted the screw top lid and put it back in the canner. Once all the jars were done, I added more water so the jars were completely submerged. I raised the heat to a hard boil, put the lid on the canner, and processed for 20 minutes. During those 20 minutes I made an unsettling discovery – my canner is so big it has to straddle two burners, and with the water high enough to cover the quart jars, it spills over the sides… straight onto the open gas flames below. Twice I had to turn off a burner when the flame went out completely. I can’t imagine this is good for the stove, and it sure wasn’t good for my peace of mind. Maybe I’ll have to invest in an outdoor camp stove.

I processed two batches, making for a dozen jars and 3 gallons of juice. At this point I ran out of quart jars (and patience watching for gas leaks). I had about 3 1/2 pounds of grapes left, so I mixed them up with some sugar and yeast. We’ll have about a gallon of knockoff Manischewitz after all!
There are three distinct layers in the jars, but I have it on good authority from my mom that this is normal: “Do not stir or shake the juice. You’ll think you’ve screwed up because the grapes and sugar will sit in the bottom. As times passes, the grapes will move, the sugar dissolve, and the juice turn pink/red.”
Well, my grapes are on the top. Hopefully that doesn’t matter.

Of the twelve jars, one didn’t seal properly for some reason. Since I can’t store it, I’ll just have to drink it. I shook it up to mix in the sugar and poured a glass. It’s not as dark or as strong as the goal, but the taste is perfect. Three gallons may not be enough.

Glass courtesy of Endless Brewing, my beloved hometown brewery. Go see them and tell them I sent you. You probably won’t get a free beer, but you’ll almost definitely get a smile of recognition. And the beer is worth it.
