Beer Beer Beer

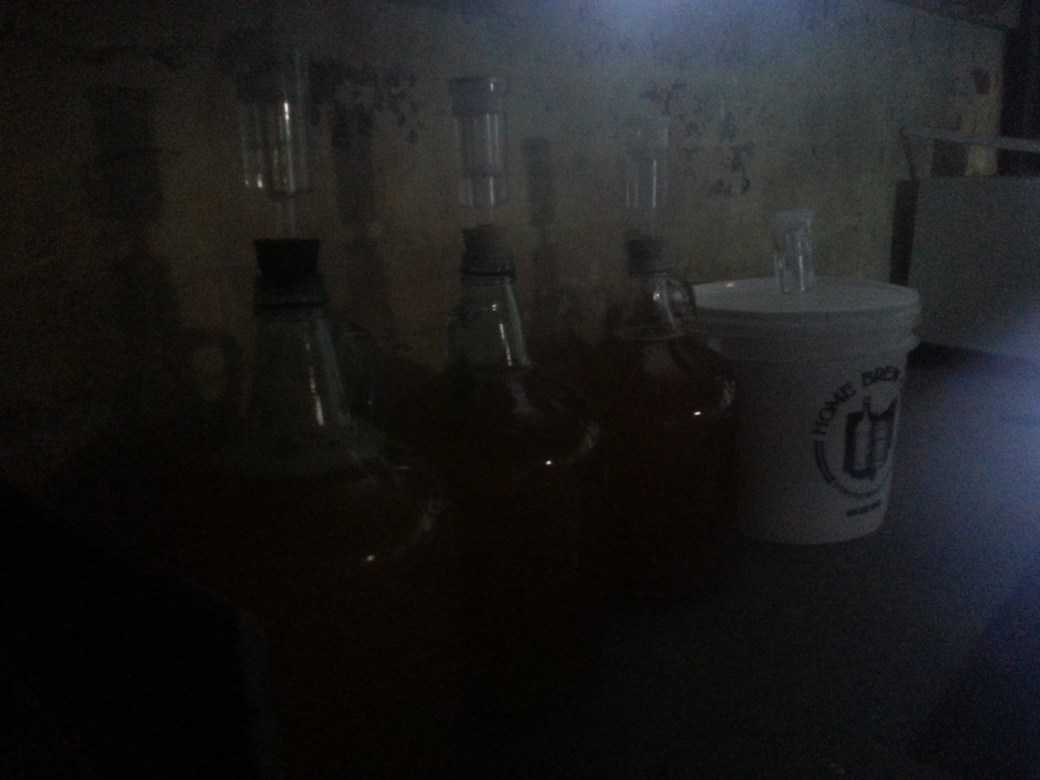
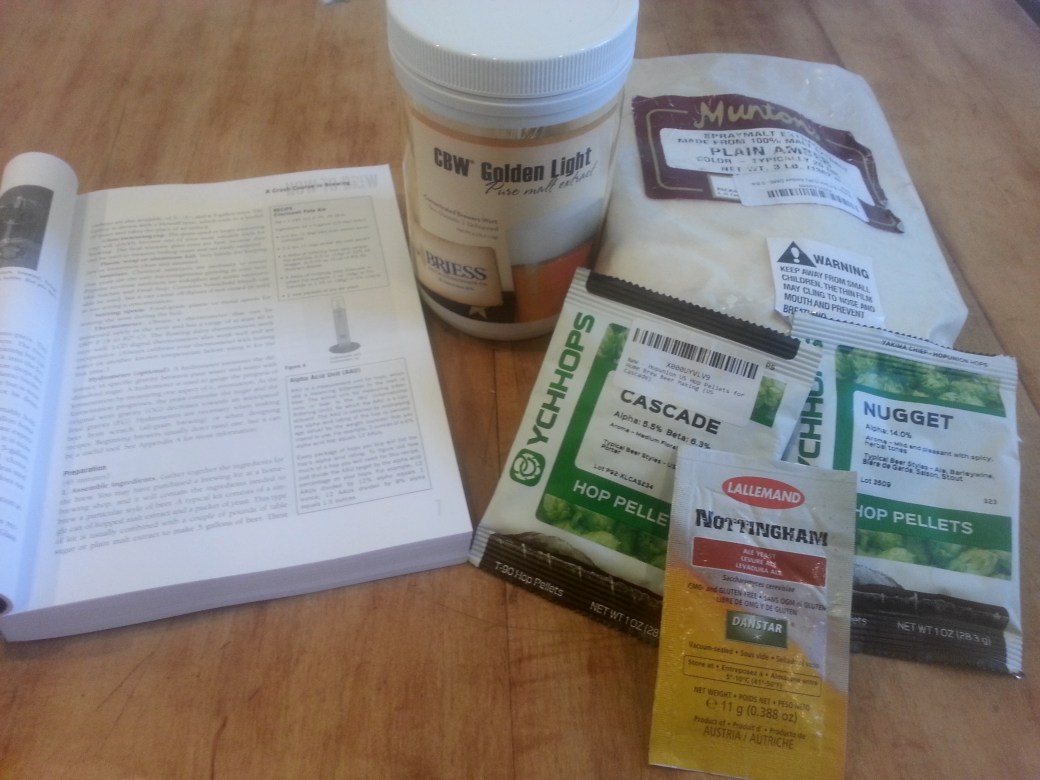
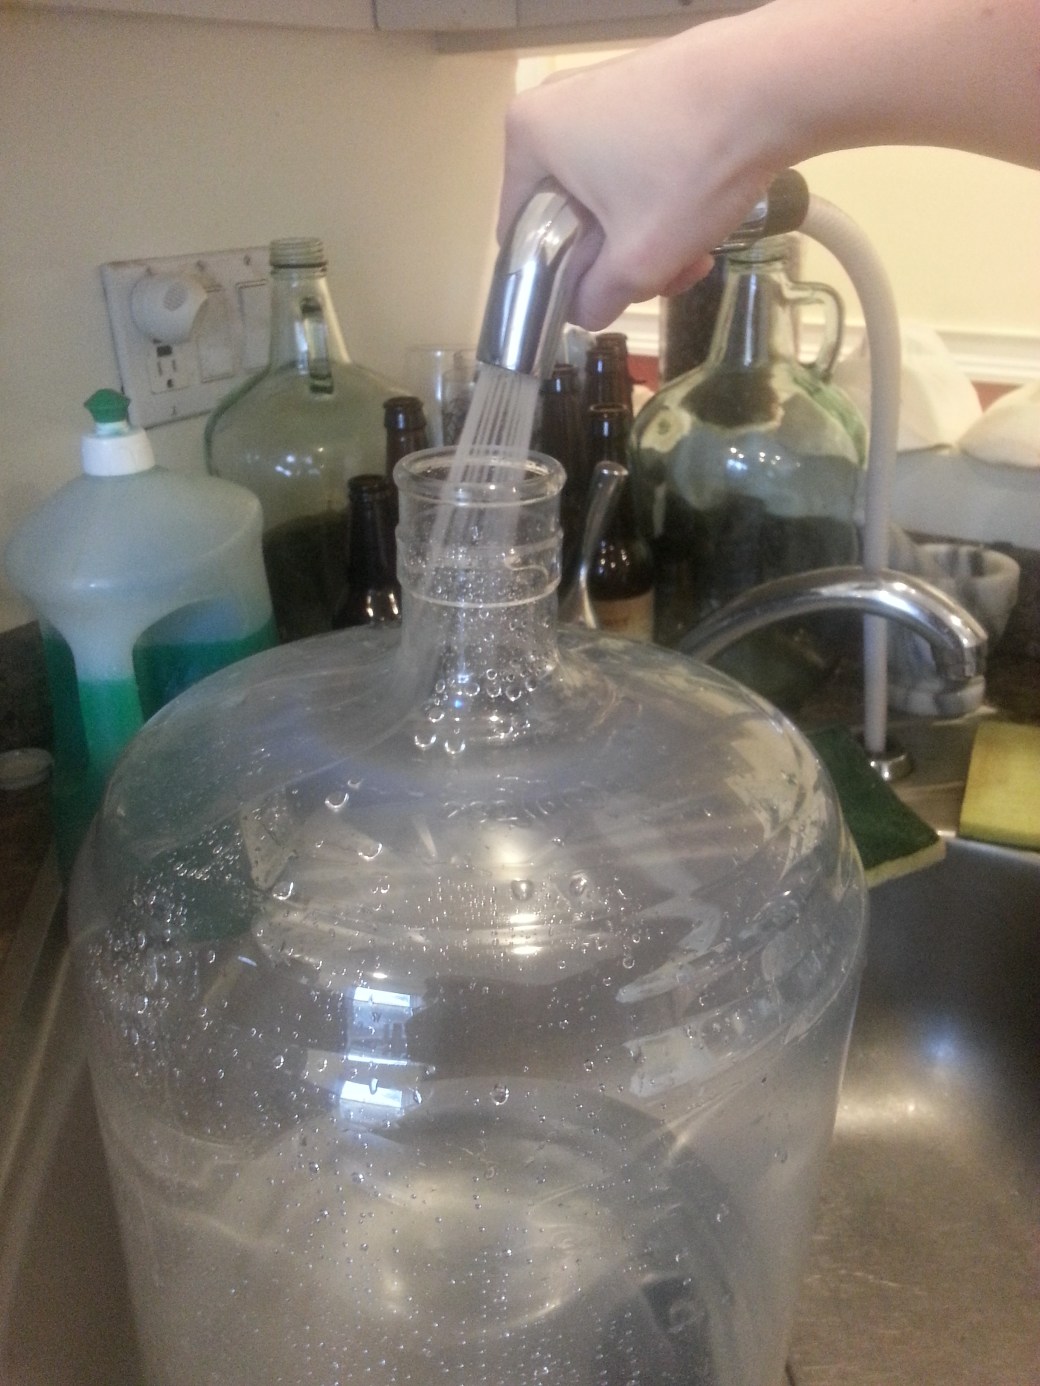
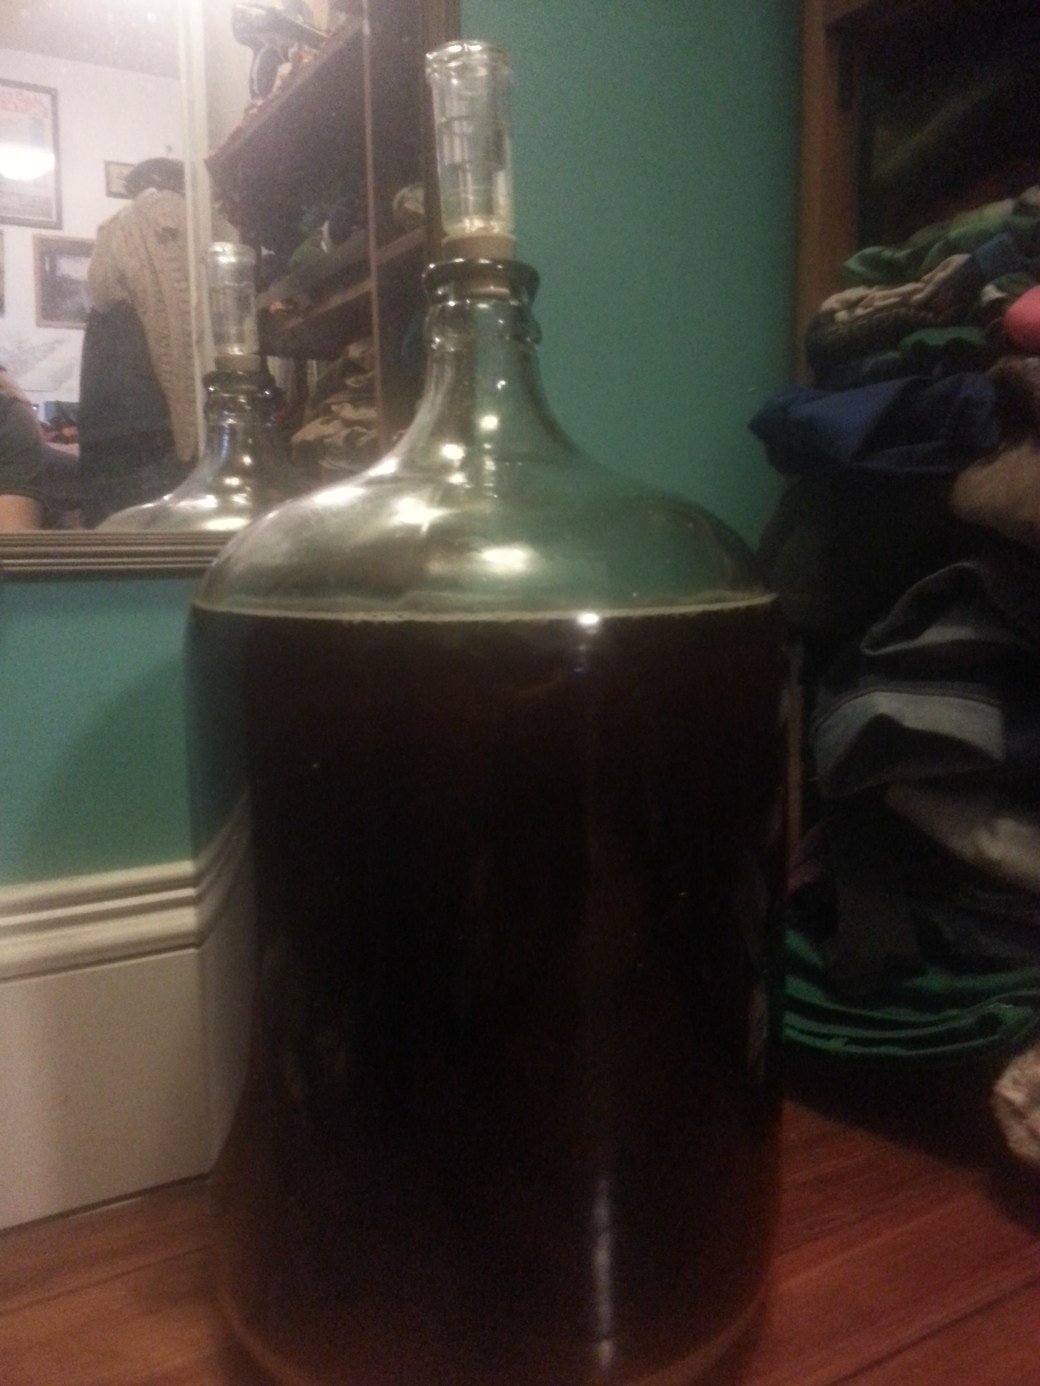
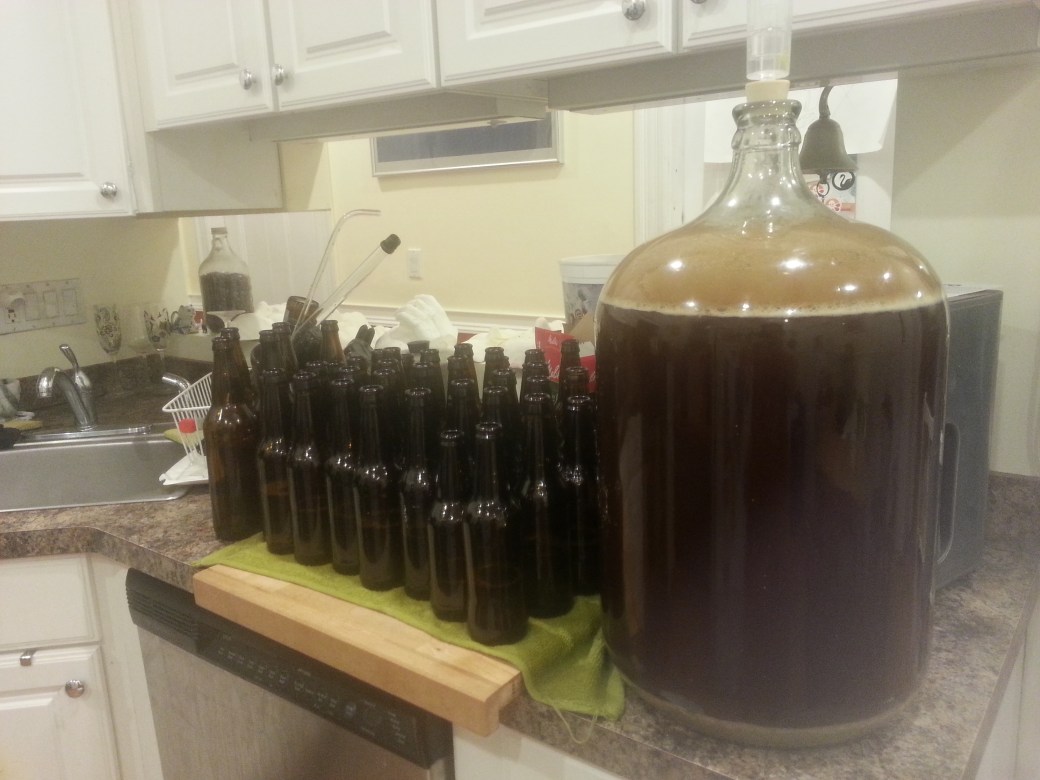
Two weekends ago I set out to bottle my amber ale. The recipe called for ten days of fermentation in the primary fermenter. I’d given it thirteen. If anything, I was worried I was behind. So I scrounged up about fifty bottles and sanitized them, and I found someone big to lift the carboy up onto the counter.

And then I actually looked at the beer.

20160123_171006

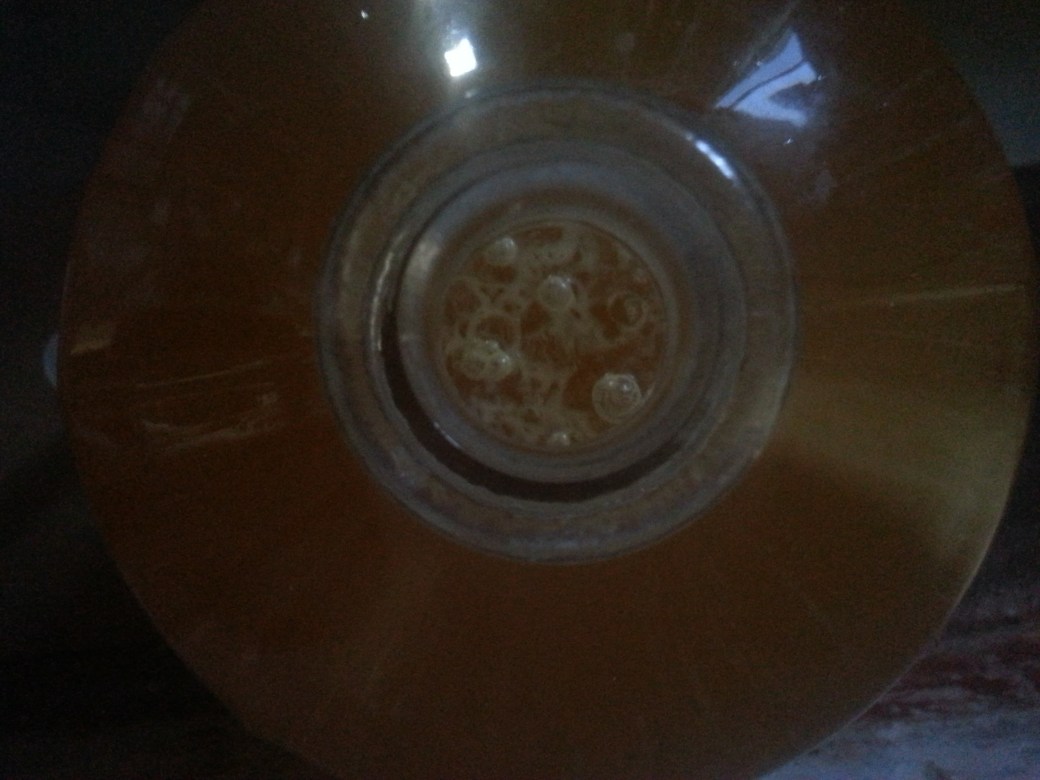
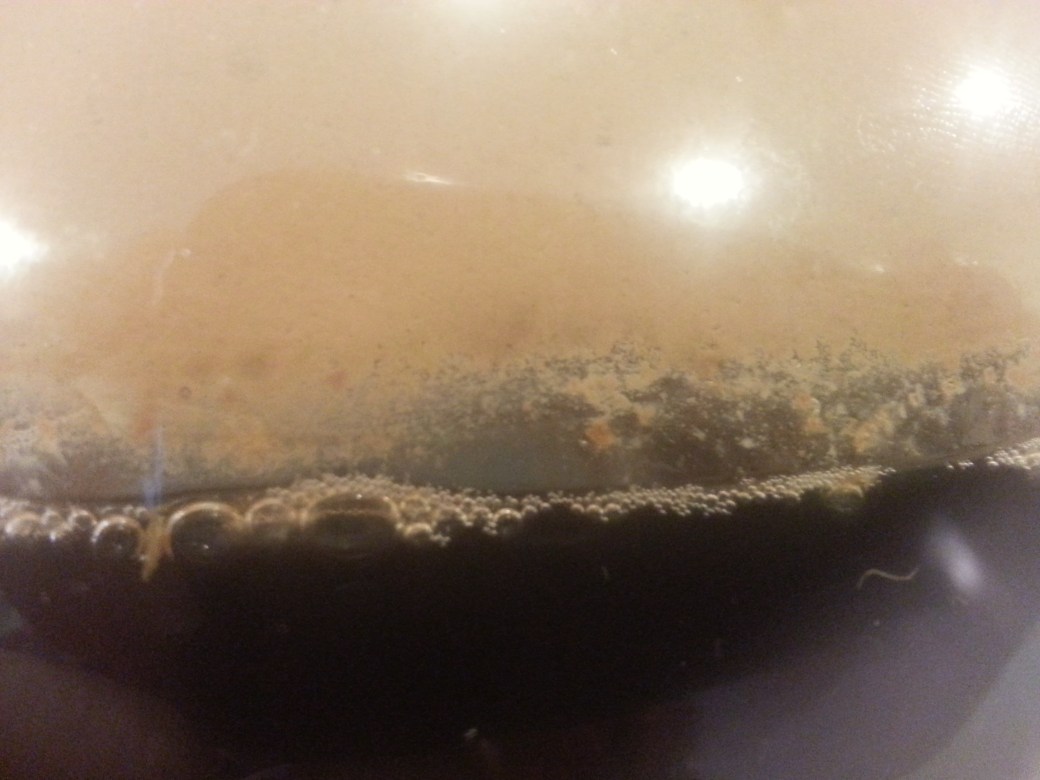
It was still bubbling. Quite a lot. The krausen had fallen, and there was a lot of trub on the bottom, but there was also a very, very steady upward movement of tiny bubbles. It was just like the mead that I’d decided would be impossible to bottle.

But I wanted so badly to bottle this beer. I’d scrubbed and sanitized the bottles. I’d schlepped the carboy out of the closet. I’d prepared mentally. But it really, really looked like it was still fermenting.

I read the forums – they said to wait. I called my friend Joe who actually knows what he’s doing – he said to wait. I polled my roommates – they didn’t know the specifics, but they were in favor of doing whatever wouldn’t result in exploding bottles. Namely, waiting.

And so, with a heavy heart, I waited. I dumped all the sanitizer and I wedged the carboy back in its corner of the closet, and I waited… until today!

20160123_170900_HDR

I waited ten more days in all. If anything, I probably should have racked it to a secondary fermenter, but I never anticipated it taking so long. My best guess is that the cold weather is to blame. Since the house is so cold, and we never did get the PID controller space heater working, the yeast may have just been working at a cooler temperature and, therefore, more slowly. At any rate, the extra time seemed to have done it good. There were, if we’re being totally honest, still a few bubbles. But it was nothing like last time, so I declared it to be Good Enough.

20160203_101751

The bottles had been biding their time around the sink – I sanitized them and finally reclaimed that counter space for mankind.

20160203_102606_HDR

One by one I filled the bottles with sanitzer and gave them a good shake. I always use Star San, famed for its sanitizing foam. This was a good instance of that foam coming in handy – only a little bit of liquid (supposedly) sanitizes a whole bottle.

20160203_103936_HDR

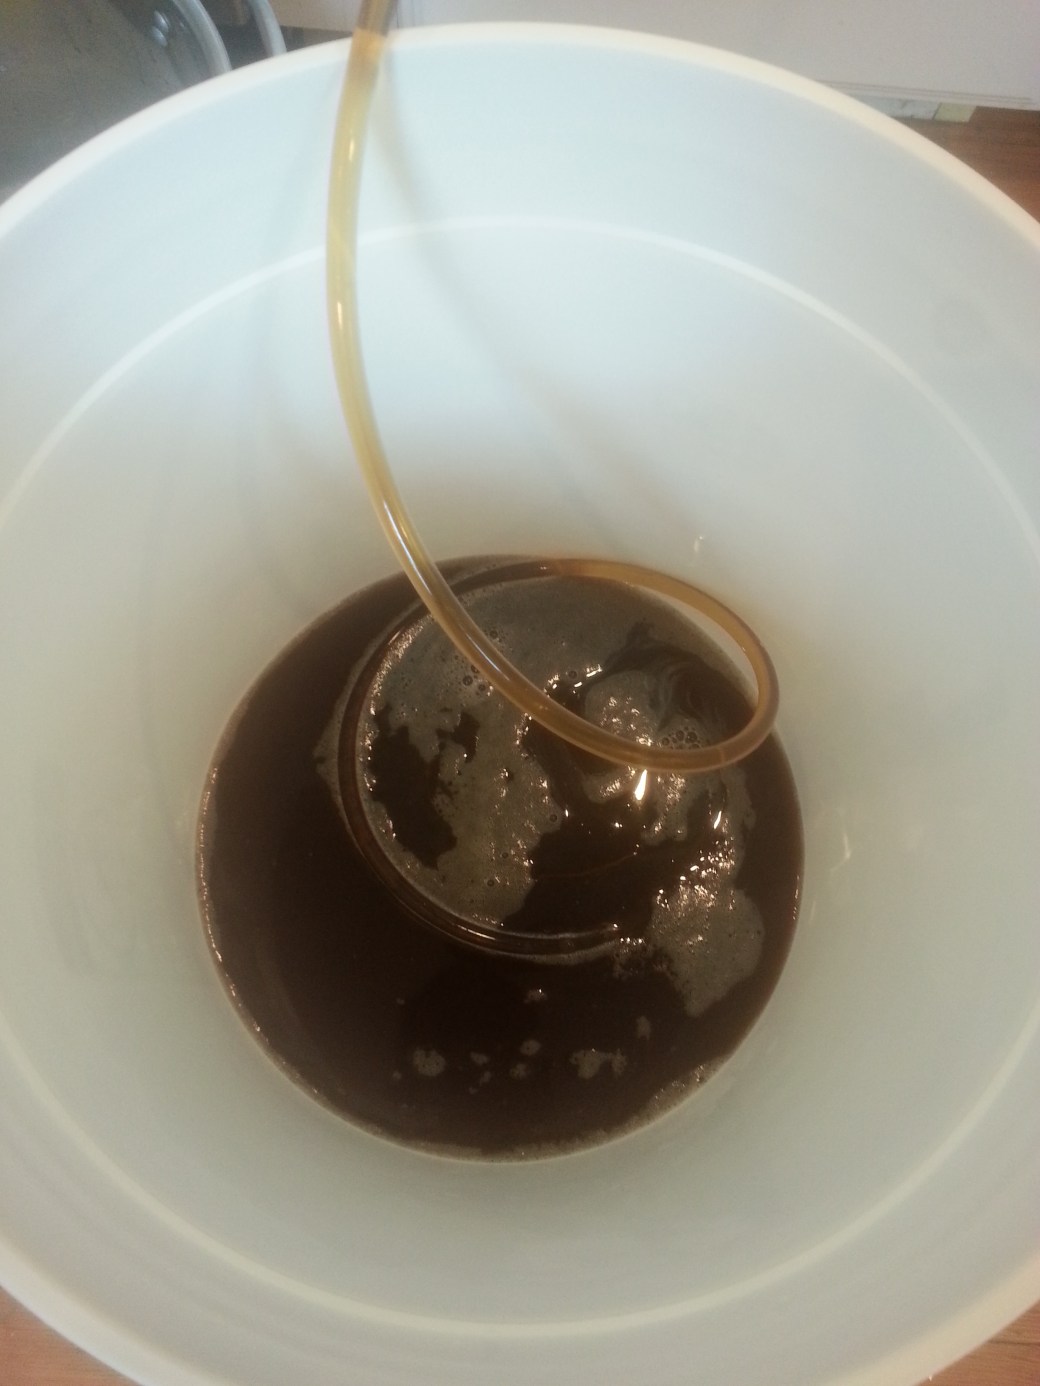
My tall auto siphon had given me so much trouble racking the mead, but I needed to use it again. Thankfully, I managed to find a length of tubing that fit and was not kinked all to hell. With a little cutting and finagling, I managed to fit it onto my auto siphon. It worked like a charm.

I’ve read about methods for racking beer without picking up the trub. These include swirling, starting the siphon in a separate container, and trusting in the raised bottom. I’m sure these all work, but I’ve discovered a certain poetry in just jamming a knife in the top.

20160203_110737

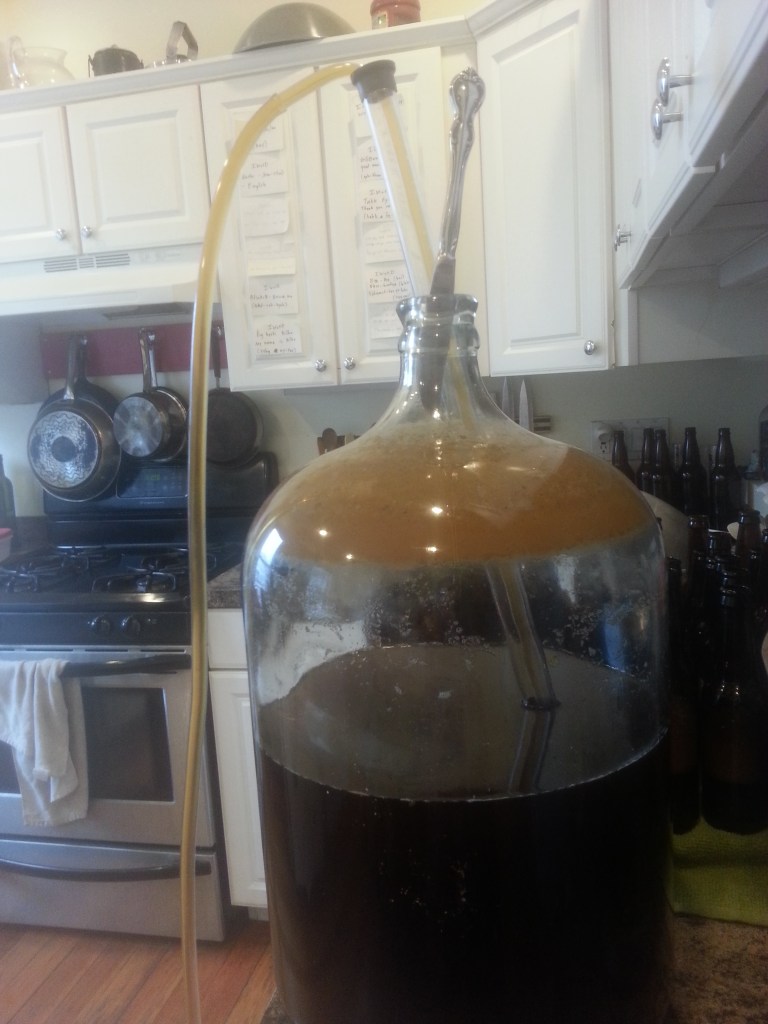
With my trusty knife method, the beer flowed smoothly and quickly down into the priming bucket, the bottom of the siphon resting safely just above the trub. As it flowed, I dissolved 2/3 of a cup of sugar in 2 cups of water and poured it gently into the beer. This should get the yeast motivated just enough to carbonate the beer in the bottles.

20160203_110447

Once all the beer was in the priming bucket, I gave it a few stirs to incorporate the sugar and hefted it up onto the counter. Onto the other end of my great new tube, I attached a bottling wand. This bottling wand either came from a Craigslist stranger or my dad – I inherited a lot of miscellaneous equipment from both. I’d never used it before because wouldn’t fit with my small auto siphon. I used it today for the first time and Good God Almighty is it convenient. It’s a ten inch stiff plastic tube with the simplest but best little gizmo on the end. If the gizmo is pressed against a hard surface, like the bottom of a bottle, it allows the beer to flow through it freely. If it’s not touching a hard surface, however, it forms a seal that stops the flow. This means the moment a bottle is full, you can lift the wand and stop the flow, only starting it again when it’s in the next bottle. It’s so smooth and simple and I’m never ever going back.

20160203_115856

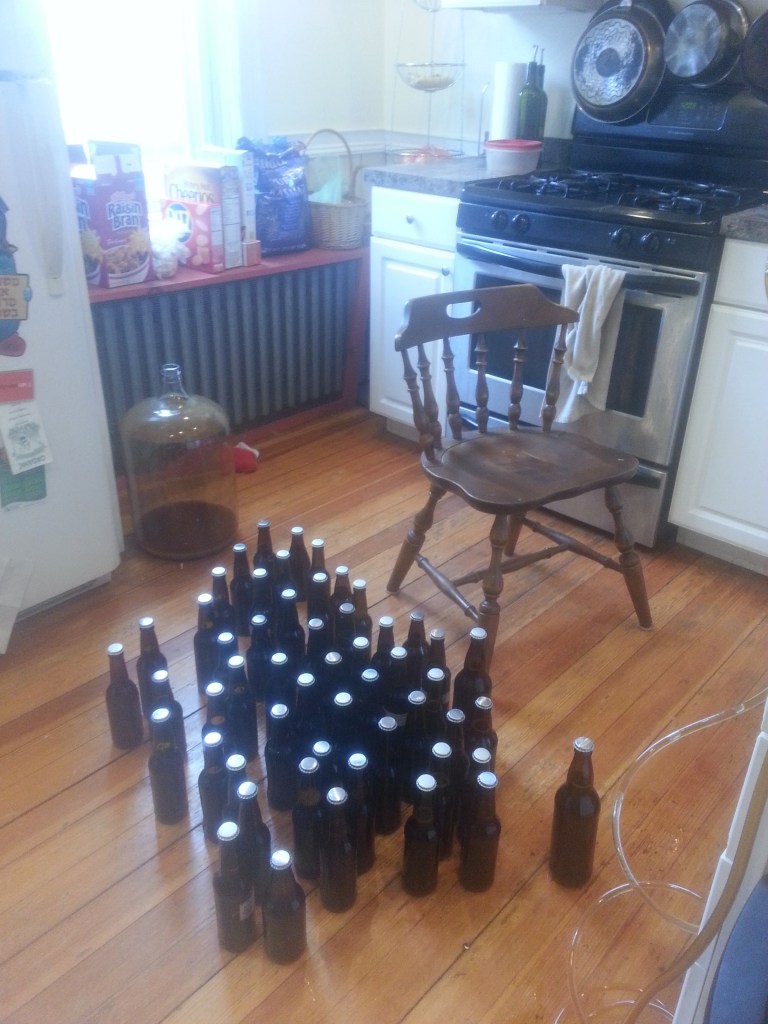
So how many bottles does 5 gallons of beer make? Here we have 50 regular bottles, plus 2 bombers, plus one more I managed to fill from the dregs after this picture was taken. That brings us to a grand total of 55. All that remains is to let them sit in the dark and carbonate.

20160203_121021

But how does it taste? Really, genuinely good. I sucked the remains out of the tubing while I was cleaning, and I was very pleasantly surprised. It’s not too sour, and it’s not too boozy. It tastes like a real, very flat beer, which is precisely what it should taste like. Barring some crisis in the next few weeks (of which there could be many) I think I may have a huge amount of perfectly passable beer.

20160203_122504

I just hope it doesn’t explode.

When Good Mead Goes Bad

Die-hard fans may remember that I started a five gallon batch of mead back on October 30th, also known as three months ago. Well… it’s still bubbling. I don’t think it should still be bubbling.

20160128_105202_HDR

There’s not much airlock activity, but there’s a constant flow of tiny bubbles travelling up the side of the carboy, like in a glass of champagne. Something is clearly still happening in there.

I racked this mead away from the lees right before Thanksgiving, but I’m wondering now if enough yeast is still present to keep the fermentation going past its welcome. I hope so, because the other option is that something strange has started growing in there.

20160128_105541

That theory really has me worried, because recently some little guys have appeared on the surface. Is it mold? I don’t know, but the prospect of five gallons of honey vinegar is more than I can bear. I can’t bottle the stuff while it’s still bubbling, but it can’t stay here.

Because the universe is an uncaring place, I don’t have any other five gallon carboys. There’s a spare six-gallon kicking around, but that would leave too much headspace. What I do have are three one gallon jugs and a two gallon bucket. They’ll have to do.

20160128_105750

For the job I have a brand new long auto siphon and, to go with it, some horrible old kinked tubing. It turns out it’s all I have that will fit the cool new siphon. And since I have no hope of lifting this carboy up off the ground, I have to pump it all manually. The result is an intermittent jet stream through a tube that fluctuates between wide open and barely passable. This is not ideal.

20160128_110328_HDR

To call it oxidizing would be an insult to understatements.

20160128_112858

The sheer volume of bubbles I’m pumping to this mead makes the danger of an extra gallon of headspace seem stupid. But I’m committed, so I soldier on. I finally get all five gallons into their new containers in a very poorly lit corner of the basement. Only time will tell if they keep on bubbling or grow new strange lumps or do something else worrying. At least now they’re split into four samples that may behave differently from each other.

20160128_113656

Once everything is safely stowed away, I actually taste the stuff. I should probably have done this first, but once the racking fever took me I couldn’t stop. All that’s left are the dregs that got awfully yeasty on the trip up the stairs, but even so I’d give the flavor a confident rating of Not Bad. It’s strong, but not vinegary. Given a little time to settle and, God willing, quit fermenting, I think it could still be good.

I just hope all that oxidation doesn’t ruin it.


Toasty

Our house is cold. Really, really cold. It’s a combination of bad insulation and windows that never shut quite right. And in a closet with its own window and no radiator, the beer is fermenting in what is probably the coldest corner of all.

My amber ale did not start bubbling its first night. It still wasn’t really bubbling the next morning, either, and I had a sinking feeling it was just too cold for the yeast. Ben, always up for an electronics project, suggested a fix.

Quite a while ago he and our friend Phil made a Sous Vide machine by attaching a slow cooker to a PID (proportional integral derivative) controller. The PID essentially regulates the temperature of the slow cooker, turning it on when it gets too low and shutting it off when it gets too high. This lets you keep the slow cooker at a constant temperature. Fill the thing with water, submerge a bag full of chicken, and you can cook at a low, slow, constant temperature until the meat is almost falling apart. It worked, and the chicken was definitely tender.

Ben had the idea to attach the PID to a space heater and set it to 65F. The closet would be the water bath, and the beer would be the chicken, if you want to keep talking in Sous Vide terms.

He rigged the whole thing up and set it on the floor of the closet, on top of a pizza stone for safety’s sake. It seemed to work, but then it got hot in places it shouldn’t have. Like the electrical cord.

So we unplugged it.

We plugged it back in a week later, and it promptly blew a fuse. So much for hacking.

And the beer started fermenting on its own anyway. Turns out all it needed was some time.

Almost Soap

We’re riding soap straight to the top.

Independent of me, Ben made a snazzy educational video explaining how soap works on a molecular level. He explained his little heart out, and the video was picked up by the outreach website of the scientific publishing company Elsevier.

Soon we’ll be the most over-educated soap blogging power couple on the internet.

Though it hasn’t led me to fame and fortune yet, I’m still working away at my Castile soap, hoping that if I follow all the directions it won’t burn my skin off.

It’s been two days, so it’s time to unswaddle the soaps from their towel and pop them out of the mold.

20160119_231216_HDR

They have a definite plastic wrap pattern that would probably not fly in the commercial sphere. They’ve also lost the vivid yellow olive oil color they had before. But they are more or less set up.

20160119_231408_HDR

They’re set up, but far from hard. They popped easily enough out of the mold, but even with the gentle push that took, I started to put my fingers through the two in the back. They’re apparently still caustic, so I wore gloves again. I had every intention of wearing goggles, but it wasn’t until after I’d finished that I realized they’d spent the entire process on top of my head. Oh well. There wasn’t much cause for splashing anyway.

20160119_231518_HDR

I put them in a paper bag and stashed them away in the closet to begin the curing process. I’m supposed to leave them there, turning them regularly, for six weeks. They smell basically like olive oil, which isn’t surprising as that’s mostly what they are.

20160119_231906

Six weeks from now I can finally pretend I’m an Ancient Greek beauty rubbing my skin with oils in the bathhouse. I’ll let you know how it goes.

More Beer

I’m making beer now just to move these ingredients out of my cupboard. It’s getting out of hand in there. The real culprit is the twelve pounds of grain I bought last weekend, but I don’t have a pot big enough to handle it yet. There’s an 8 gallon stockpot with my name on it somewhere between China and here, but since it hasn’t arrived yet I’m sticking with extract recipes I can brew in three gallon batches and then dilute.

20160116_155806_HDR

Of course, when I start working with five or six gallons at a time, I’ll really have no hope of lifting anything by myself. This time, at least, I was smart enough to stop filling at the three gallon mark and was able to schlep water around like the independent woman I am.

20160116_160144_HDR

The recipe du jour was Cincinnati Pale Ale, the recommended starter beer in John Palmer’s How to Brew. First I dumped in 2.5 pounds of amber dry malt extract (DME to the pros). For whatever reason it didn’t sink into the water as spectacularly as last time, and I was very disappointed. But the show went on.

20160116_160701

I mixed in the DME and turned the stove on full blast. As it was heating, I ran a hot bath for 3.3 pounds of amber liquid malt extract (LME). Why 3.3 pounds? Because that’s what the recipe says, and that’s the amount I’ve found it sold in by two separate brands, now. I suspect a conspiracy.

Once it was warmish, I added it to the wort and heated it up to a boil.

20160116_160921

Before the boil started, I had to do some high math. The recipe called for 6 AAUs of bittering hops. The recommendation was 12% Nugget. I bought myself some Nugget, but they were 14%. This means they’re just a tad bitterer than the recommended. For my last batch I fudged the amounts, but I thought I’d do it right this time. To calculate how much hop to use, you’re supposed to divide the target AAUs (in this case 6) by the AA percentage of the stuff you’ve bought (in this case 14). This came out to 0.42 oz of 14% hops (as opposed to 0.5 oz if it had been 12%). Perfect.

Here’s the thing. A difference of 0.08 oz is scarcely a difference at all. I should know because I weighed it out. I started with 0.5, then picked the hop pellets off the scale one at a time until it went down to 0.45. Then I kept picking them off until I hit 0.4. My scale doesn’t have the precision for 0.42, it turns out. So I threw a few pellets back on top of 0.4 and called it even.

20160116_163605_HDR

I added the Nugget hops at the start of the boil. With some time to kill until the next hop addition, I decided to check in on my long-neglected wines. The pear wine from A Sudden Windfall seemed more or less ready, so I took advantage of the already-mixed sanitizer and set to work bottling it. In the end I got twelve bottles of something that tastes a little like pear and a lot like ethanol. The recipe says to let it age in the bottles now for a year – we’ll see if that happens.

I got so caught up in my bottling that I lost track of time and forgot to measure out my carefully calculated 0.9 oz of Cascade hops. At the 45 minute mark, I panicked and just threw the whole 1 oz packet in. So much for math.

20160116_172733_HDR

I cooled the wort down and pressured Ben into helping me aerate it. The mouth of this carboy was big enough to fit my funnel, so we had a much easier time getting the wort into it. I was a fool, though, and put the extra water in first. This got the wort and foam a little closer to the top than intended. A lot closer, in fact. There were some casualties. I will not do the water first again, and I’m not sure what compelled me to do it this time.

20160116_184353

With most of the wort in the carboy, I added my hydrated yeast. I cleaned up the floor and got the hired help to move it into the closet with last weekend’s specimen. That one seems to be doing well – the krausen (pro term for big foamy mass of yeast and gunk on top) has more or less fallen. According to the recipe, I should be bottling it any day now. Maybe I will.

20160116_192016_HDR

Or maybe I’ll just keep accumulating carboys until my closet is no longer my own.


Yes, I’ve Seen Fight Club

Was there a rule about blogging about soap making? I can’t remember. But I guess I’m breaking it.

I asked Ben for soap making supplies for Christmas. He wrapped each piece individually and gave me an unwrapping order, so the first thing I opened in front of my poor parents was two pounds of lye.

I told them I had a body to take care of.

20160117_164533

I was genuinely nervous about working with lye. It feels slippery to the touch because it’s starting to turn you into soap. I don’t want to be soap. I wore big gloves and goggles and tried not to breathe, and I was fine. The cutting board, however, was not.

20160117_172824

I was so careful to use non-reactive materials. It never occurred to me that non-reactive wouldn’t also mean non-burnable.

I set out to make one pound of Castile soap. Why Castile? Because it has three whole ingredients. My book’s absolutely basic recipe calls for olive, coconut, and castor oils, plus lye and water. Every time I open this book I discover more things I don’t have. Castile soap is made out of olive oil, lye, and water, so out of necessity I’m promoting myself to lesson two.

I mixed five ounces of water with two ounces of lye. It heated right up. The name of the game is mixing the lye water with oil when both are at 110 degrees F, which means letting the lye mixture sit and cool.

20160117_164511

It also means heating the olive oil (1lb) a little too high and letting it cool down, too. As soon as I’d mixed the lye and water, I gave the oil two minutes in the microwave, and it came out at about 140F. I didn’t mean to overshoot so much, but it actually worked out perfectly, with both cooling to 110F at the same time.

20160117_164503

Once the two liquids were at 110F, I combined them in a small slow cooker pot. I bought a two quart slow cooker for hot process soap (this is cold process, by the by) and it was the perfect size. I’m not entirely clear on how much you can eat off of soap making equipment, but I’m trying to avoid it. I put the oil in first, then added the lye water in a thin stream while stirring. I wish I had photos, but it was a dangerous, two-handed business, and both of my two hands were covered in lye. So you’ll just have to rely on the vivid imagery of my words.

It got opaque. And yellow. Basically immediately. I mixed it for maybe five minutes with an immersion blender set to low, until it started to trace. “Trace” is a word that gets thrown around a lot in the things I’ve read, and not always with an explanation. Essentially it means that if you lift the blender out, the globs that fall off sit on the surface rather than reintegrating with the mixture. A bit like stiff peaks with meringue.

My goop tracing, I got out my little silicone mold. One pound of goop yields 8 bars, so I guess I’ve made 2 oz. soaps. I covered the mold in plastic wrap, set it on a cookie sheet, and wrapped it in a towel for warmth. I’m supposed to keep it like this for two days. Why? I don’t know. I’ll get back to you when I finish the book. Presumably the hardening process gives off heat which speeds up the hardening process, creating a feedback loop. The towel also keeps the cat from sticking his face in it, which is nice.

20160117_170749

After two days, I’ll turn the bars out of the mold and let them cure for six weeks. Curing is a magical process that transforms soap from caustic to soothing. I hope.

Let’s just say I won’t be using the first bar on my face.


Too Much Beer

No one in my house likes beer. But for some reason I’m producing gallon upon gallon of the stuff. I made a pilgrimage to the brew supply shop across town, the same place Ben and I got the pile of Merlot grapes. The owner was very friendly, though he did set me to work milling my own grain.

20160109_141152

I’ve been reading How to Brew by John Palmer. Its Amazon reviews are filled with nothing but praise. It’s also available (and nicely searchable) online in its first edition form. I discovered this after I’d  bought the paperback and (horribly searchable) Kindle versions. Oh well. It has a nice broad recipe section for any basic type of beer you might want to make with both all-grain and extract options. I bought enough grain to sink a ship, but for my first foray I attempted an amber ale made with a mix of liquid malt extract and dry malt extract.

The recipe called for three kinds of hops: 1/2 oz Centennial at 10%AA, 1 oz Mt. Hood at 7%AA, and 1 oz of Willamette at 5%AA. AA stand for alpha acids, the little guys that make hops so bitter. The shop had Centennial at 10.7%, Mt. Hood at 5.7%, and Willamette at 6%. The owner was of the opinion that the numbers were close enough I could just follow the recipe as-is. That was fine by me.

20160110_135243

I was looking to make five gallons of beer, which meant beginning with six gallons of water. I filled up my six gallon carboy and learned two things. First of all, at five foot two and with atrophied noodles for arms, I’m not well equipped for moving huge volumes of water. Thankfully I live with large men who lift things for fun. Once the water started making its way into the pot, however, I learned the second thing. My canner, the volume of which I’d always thought of as infinite, can only comfortably hold three gallons of liquid.

Oh.

20160110_140907_HDR

I put the rest of the water aside for later and set to work on the half that made it into the pot. With the water still cold, I dumped in four pounds of amber dry malt extract. I should have stirred to combine. I really should have. But watching the clumps of malt succumb to the water was fascinating.

20160110_141114_HDR

The water flowed across it along the paths of least resistance and it went down in chunks.

20160110_141119_HDR

Those clumps turned into a thousand slimy little dumplings that were a real pain to dissolve. The initial sinking was very cool to see, though, and I’d do it again!

20160110_141235_HDR

I turned the stove on and heated the wort. In the meantime I sat the liquid malt extract in a hot water bath to make it less viscous. Once the water was hot-ish, I poured the extract in. It tasted like a strange union of molasses and pet food. Like a fine dessert in Tudor England.

20160110_143043

It took longer than I anticipated to bring the wort to a boil, but we got there. At the start of the boil I added the Centennial hops. After half an hour the Mt. Hood hops went in, and then the Willamette at 45 minutes. I’m looking forward to doing some experiments with hop varieties and timings in the future.

20160110_154553

Once the boil was finished, I cooled it in an ice bath that just barely fit in the kitchen sink. When it hit 75F, I coerced Ben into aerating it for me. He poured the wort back and forth between the pot and a bucket from as high a level as seemed safe.

20160110_165331

I could probably have managed the three gallons on my own, but this way went a whole lot faster. He also proved indispensable for the next step – pouring the wort into the carboy through a precariously balanced set of funnels. I have no pictures of it because it was all hands on deck to keep the wort off the floor.

20160110_165354

Once the wort was transferred, I added my rehydrated yeast and the rest of the water. Disregarding all that foam from the aeration, it comes up roughly to the five gallon mark.

20160110_172014

In the end we got the thing muscled into the closet, where it will be living for the next ten days or so. It’s so unwieldy, and its resting time so much shorter than that of the mead (which is STILL fermenting!) that it seemed easier all round to keep it upstairs. I’ve put a big cardboard box over it to keep it out of the light.

20160110_234311_HDR

Now all that’s left is to wait, bottle, and make some friends who’ll drink it.

Christmas Crackers

I went home for Christmas, which meant more big baking projects. My favorite was one my dad started doing after I left home, meaning I’d never made it before. I’m talkin’ rosemary garlic crackers.

First we made a big harvest of the rosemary bush in the basement. No matter how much rosemary you pick, it always seems like too much.

20151226_161658

We added it and some diced garlic to a flour and salt mix.

20151226_162320

Olive oil to hold it all together.

20151226_162533

We split the dough into four balls and rolled them out a bit.

20151226_163022

We broke out the pasta maker. This was a gift for my dad when I was about five. We’ve made pasta with it a few times over the years, but it turns out pasta is a serious pain to make, not to mention one of the cheapest things you can buy in the store. So now it’s a cracker maker.

20151226_162004

We ran the dough through four times, each time on a thinner setting.

20151226_165014

We laid the flattened pieces out on parchment paper and baked them.

20151226_163518

And just a few minutes later had crisp, savory, rosemary garlic crackers. Best eaten compulsively in the dead of night when the rest of the house is asleep and there’s no harm in banging out just one more episode of Downton Abbey.

20151226_170325


Winter Is Probably Still Coming

The hoop house may have been a bust, but my cold hardy vegetables are none the wiser. The kale, chard, carrots, and beets are all growing happily.

A little too happily.

I haven’t done a big harvest in a while, and the kale has been getting away from me. My hope is that the hoop house will pull through this time and keep it alive into the winter, but I’m not putting any money on it.

20151205_155346_HDR

Instead, I’m freezing my leafy greens before New England gets a chance to. I’m not giving up entirely, so I left enough leaves that everybody should be able to keep growing, making for some strange shapes.

20151205_155338_HDR

I found myself with more loose leaves than I could ever carry in my arms. Luckily, I was lazy and never put away the containers from my poor doomed peppers and eggplants. I threw together some festive arrangements and headed home.

20151205_161624_HDR

Late season kale is a haven for little powdery bugs. I’d sprayed for it a few months ago, but the kale kept on living and the bugs eventually came back. I washed, leaf by leaf, until I was completely sick of kale. And then I washed for another hour or so.

20151205_164613_HDR

Meanwhile I boiled a big stockpot of water and, batch by batch, blanched my leaves for two minutes. This supposedly kills any microbes that might be hanging around. It also turns everything a healthy green.

20151205_174415_HDR

From the boiling water the leaves went straight into an ice water bath to halt the cooking process. From there they went into a colander and I went to the freezer to dig around for more ice.

20151205_174854_HDR

After the first batch of leaves, the water turned a distinctly orange color. Is this because kale is so high in iron? Er… yes. Let’s say that it is. Because I honestly have no better ideas.

20151205_174835_HDR

After draining the cooled leaves, I gave them a good squeeze to remove excess water and mould them into handy portions. No one wants a solid gallon of frozen chopped kale. I don’t care who they are or what they think they need.

20151205_183134_HDR

I let the leaf balls sit on their cookie sheets in the freezer over night. In the morning I had some very sturdy and very frozen balls of solid fresh leaf. I packed them away into freezer bags and stowed them in the freezer. In all, it was three or four hours’ work for an amount of vegetables that would cost me a few dollars at the store.

20151206_121849_HDR

No wonder people usually just buy food.


The Tragedy of the Hoop House

Remember my hoop house? Remember my palpable excitement and hope for summer vegetables well into the winter?

I remember, too.

20151019_102158_HDR

Sadly, it was not meant to be.

I think I severely overestimated the hoop house’s ability to store heat. I’d read so many warnings about overheating, I made sure to leave the ventilation flaps open when the sun was up. On the night of the first frost, I dutifully went down (after the sun had set) and closed things up snugly. It was dark, so I don’t know if my plants were already dead when I tucked them in for the night, but it’s a pretty striking image.

20151019_102318

In retrospect, it makes sense that if the air inside the hoop house is cold when you close it up at night, it’s not going to heat up much. Plants produce a tiny bit of warmth when they respire, but nothing like a breathing animal would.

I remember covering blueberry bushes with my dad to protect the blossoms from late spring frost, and I was under the impression that this would have a similar effect. I think the difference is that we draped sheets over the blueberries, making a barrier directly between the blossom and the cold air, blocking heat transfer. The hoop house is a big room, with lots of head space for cold air to swirl around.

We also covered the blueberries before the sun set.

The pepper plants, though wilted, still kept their vivid green color. I thought maybe they could be saved, until I actually touched the peppers.

20151019_102438_HDR

It was like squeezing a stocking full of Cool Whip. The slightest pressure made it distort, and I had to be careful not to put my thumb right through it. A stocking full of Cool Whip would have been sturdier.

The eggplant plants were stone dead, but the fruit fared better. I managed to salvage three small ones.

20151019_103146

I left the plants in the ground for a week in case of a miracle, but none came. The cold weather plants, of course, don’t know what all the fuss is about and have been doing fine. With any luck I can keep them going and the hoop house won’t be a total bust. Going all-in on greens and roots, I ripped out the frosted plants and sowed some seeds. They came right up! I have tiny lettuces.

20151103_122340

And tiny radishes. I’m a little worried about the shortening of days. Even if they’re warm enough, these guys may not have enough sunlight to grow. We’ll have to wait and see.

20151103_122232

Funnily enough, the plants that did survive were only an afterthought. I brought all my healthiest specimens down to the “safety” of the hoop house, but they wouldn’t all fit.

20151121_113637_HDR

The scragglers had to stay up by the house, where I hastily covered them with the leftover plastic the day before the frost to give them a fighting chance. I didn’t attach the plastic tightly, and they had air circulation all night. They also had something I never even considered: a shared wall with our house. They made it through the first frost and subsequent frosts with no problem.

20151121_113503_HDR

I even have a brand new baby pepper.