Waterworld

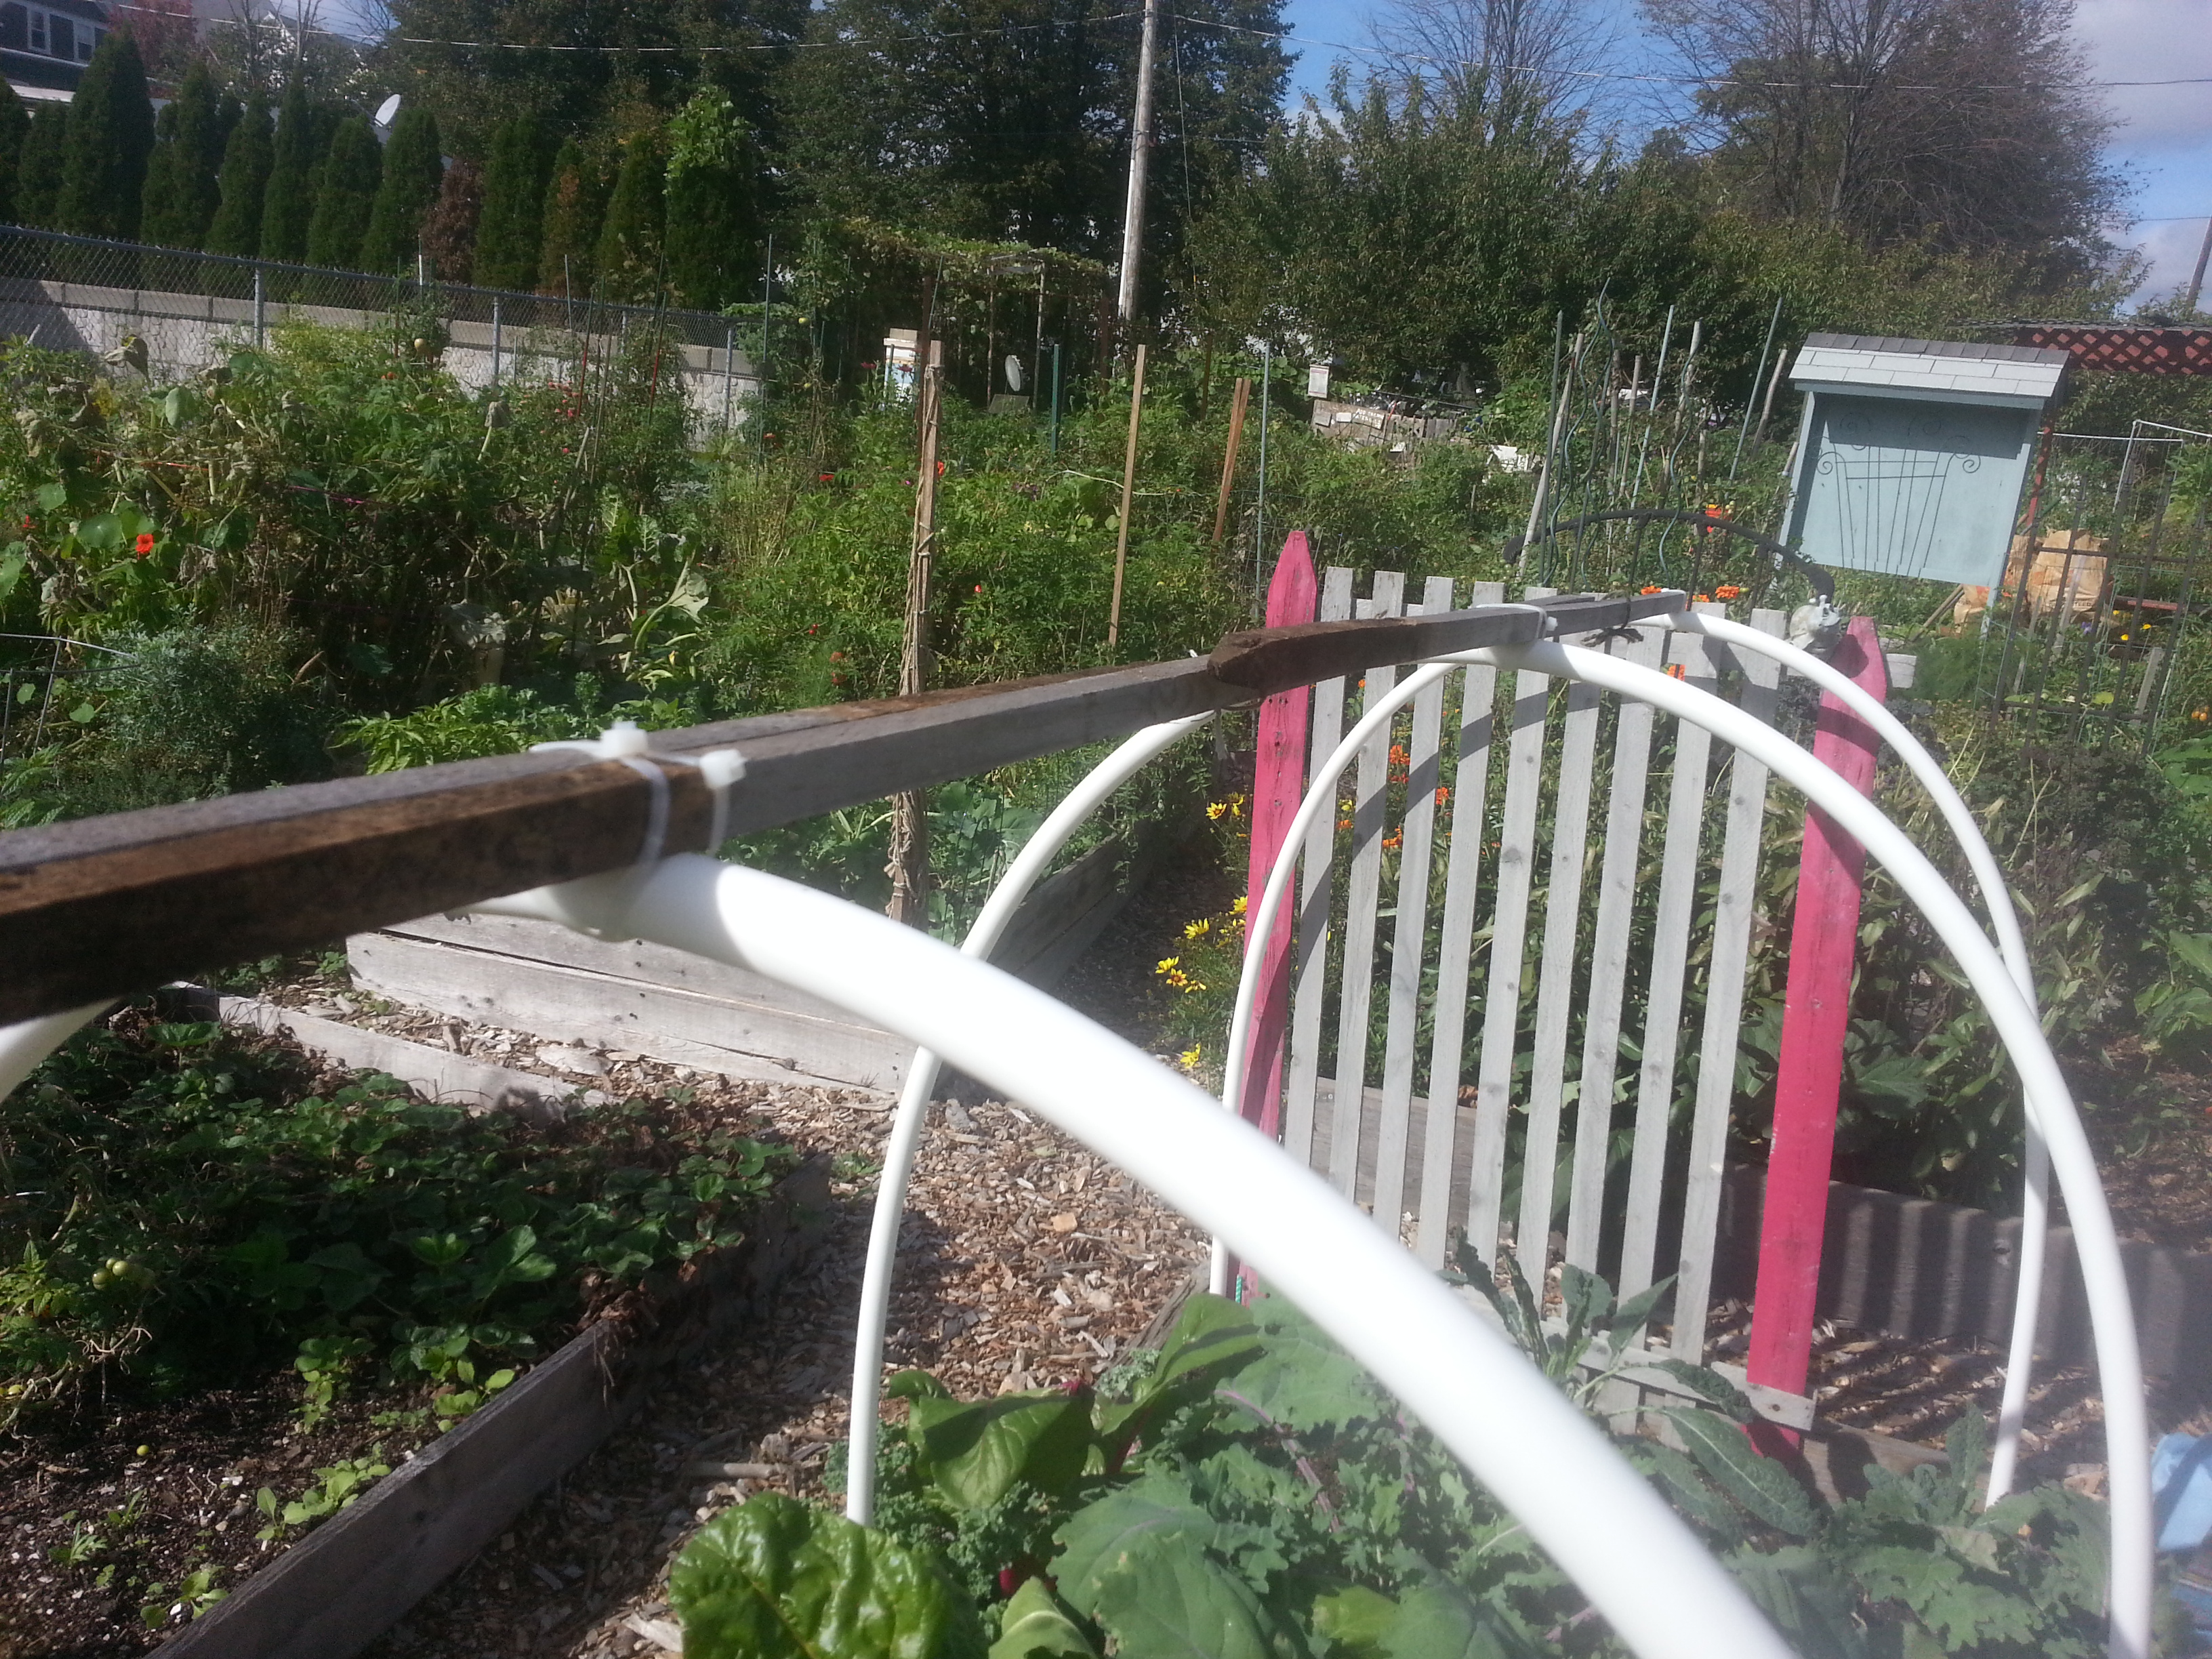
The hoop house has irrigation! Possibly.

There is a system in place that may prove itself in time. But time is running out! Today I caught these guys beating a quick retreat.

20151012_113212

Honestly, the irrigation is more important for me than for the plants. It’s a pain to open up that tent and water. And before long the city will turn off the water in the garden for the winter, meaning I’ll have to schlep water from home. It’s important for the plants because the easier things are, the less likely I am to skip a day or five and let them dry up.

Here’s a layout of the equipment as suggested by Ben, who’s a little more orderly than I am. We bought a 25-foot permeable hose that’s designed for slow-release, long distance watering. We also got two connectors that would thread into each other, and a bunch of rubber washers. Basically, we needed to create a tightly sealed passage through a hole in the bottom of the bucket leading into the hose. We just winged it in the garden hose section, but if you’re looking to have an easier time, this would probably do it.

Not pictured is Home Depot’s greatest marketing scheme, the trusty and unmistakable orange 5 gallon bucket. Maybe you don’t have them where you are, but they’re three dollars and versatile and in New England you can’t move for them.

20151011_114558_HDR

We drilled a hole through the bottom of the bucket and pushed one connector through with a washer attached, creating a seal inside the bucket. Another washer went on the outside, which you can see here.

20151011_115336

We screwed the two connectors together, tightening them to create a good seal.

20151011_115426

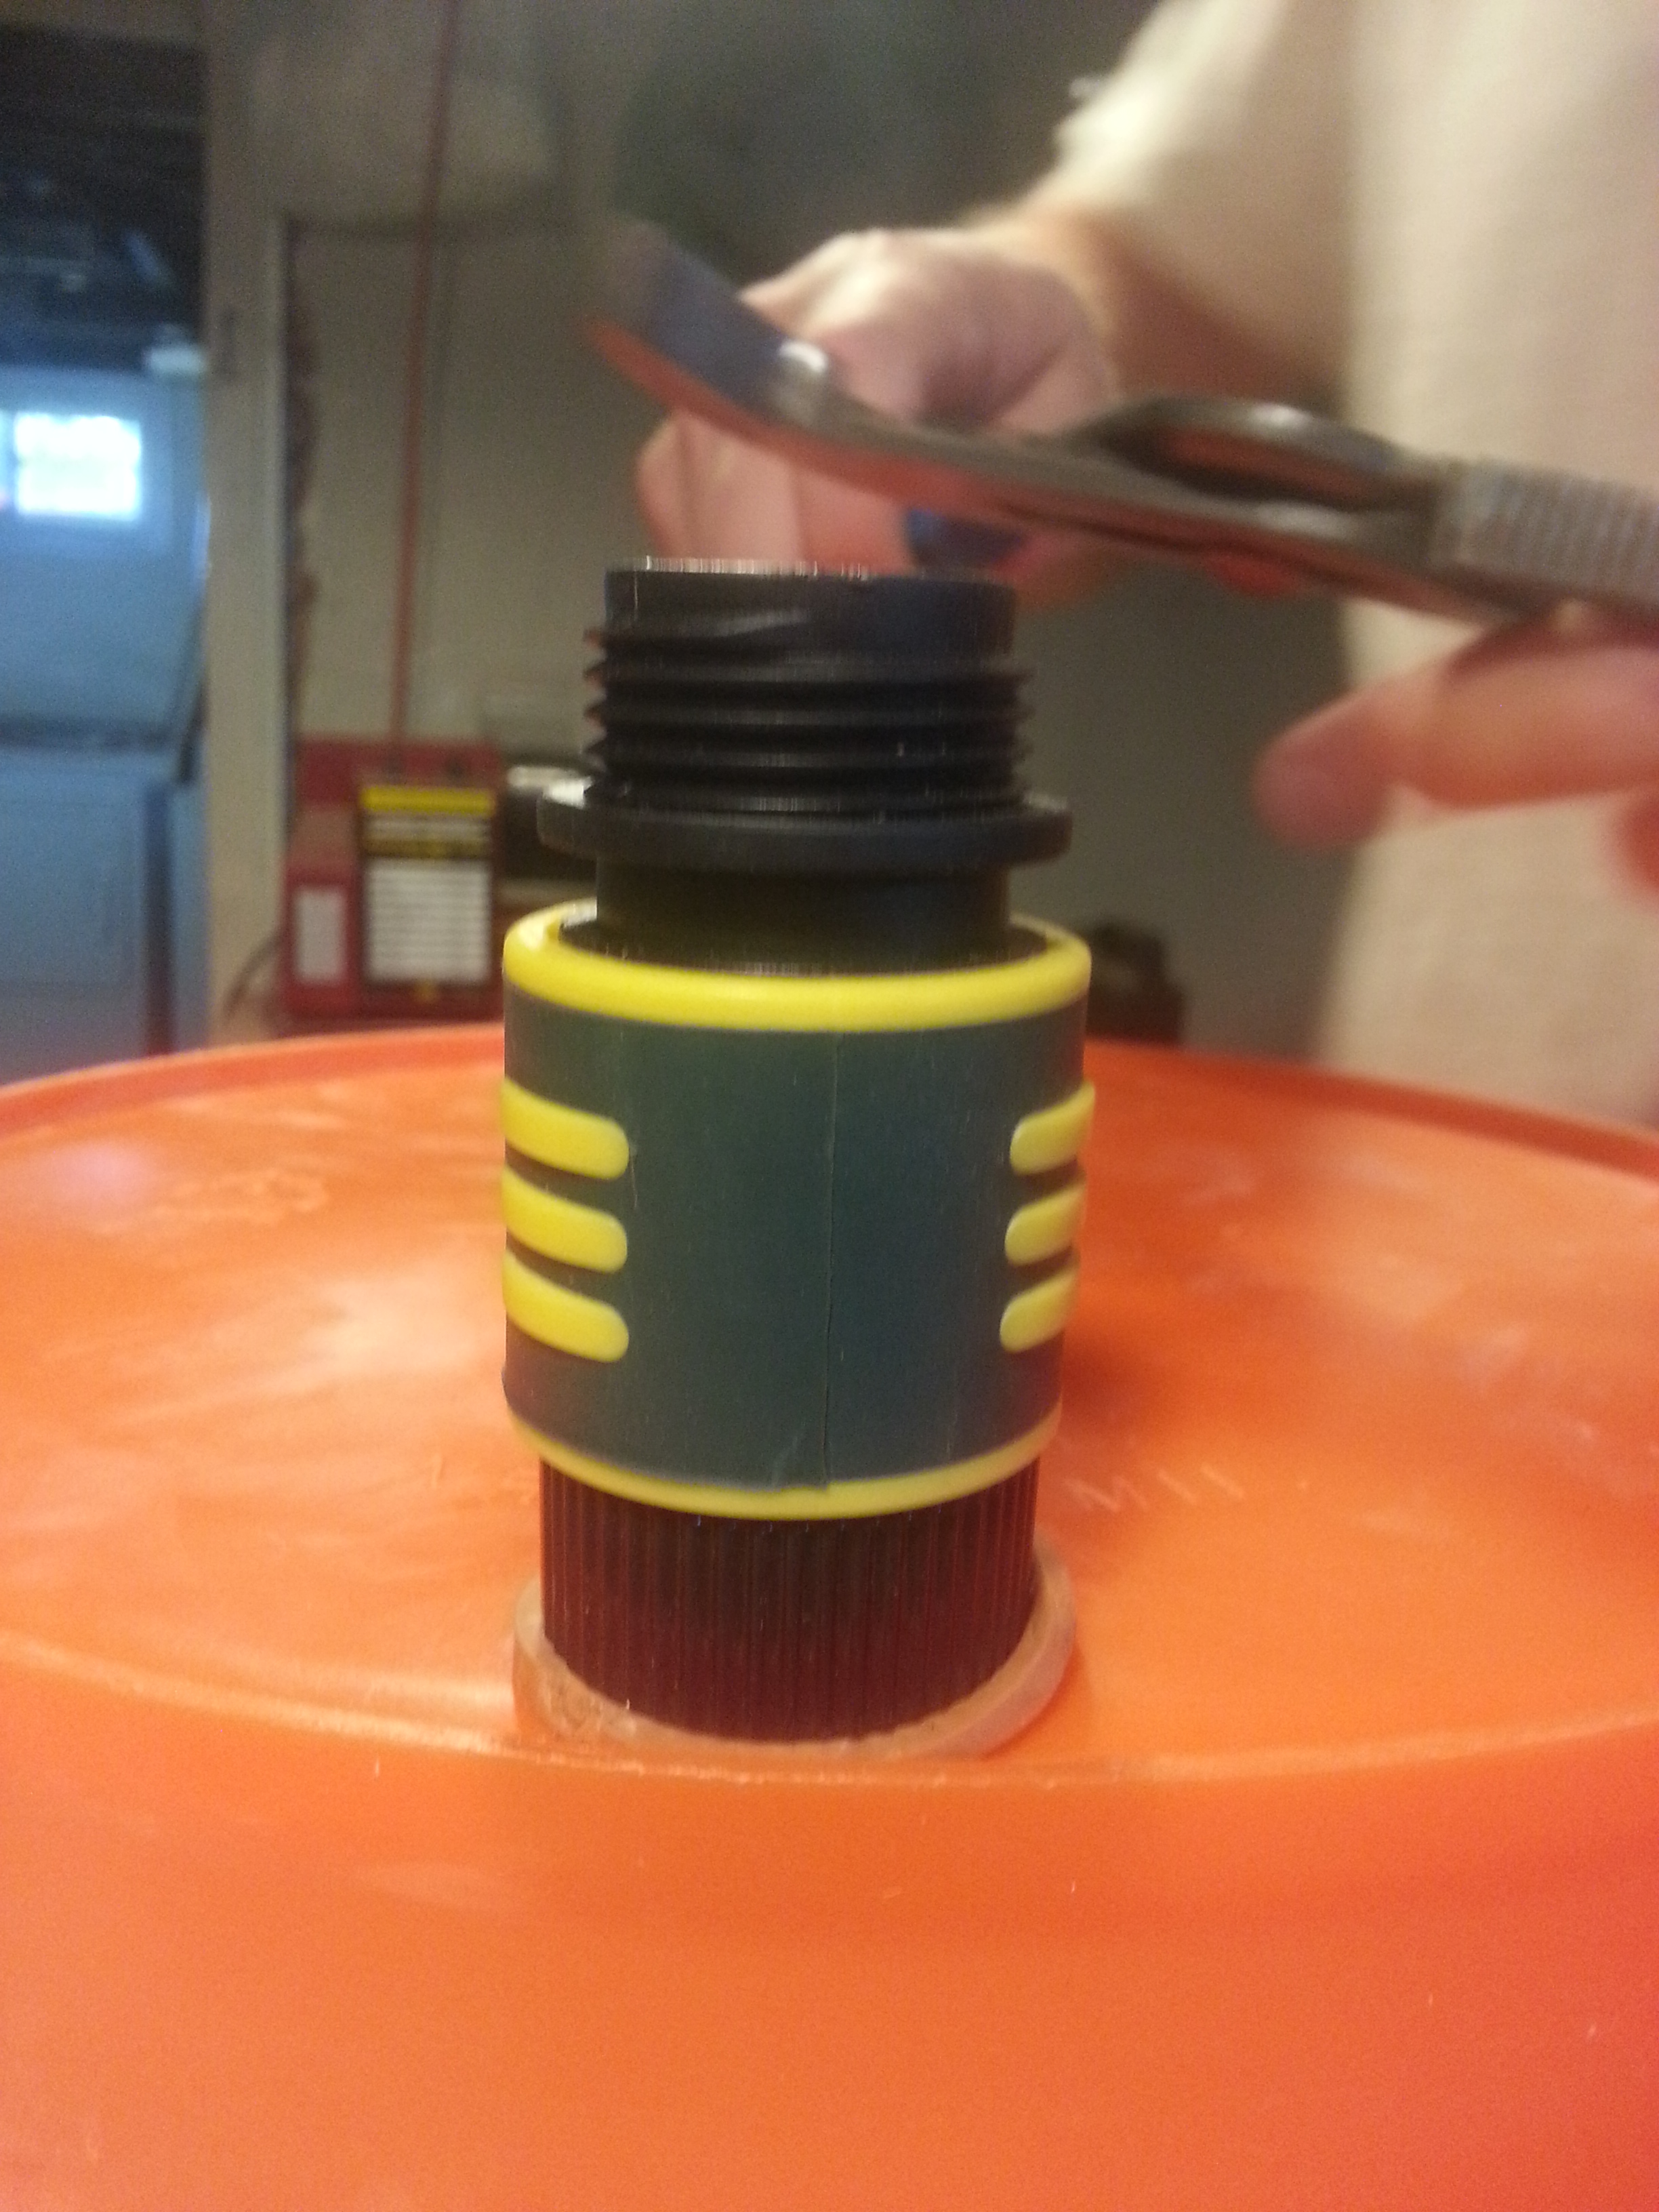
The seal was not as good as we’d hoped. It took a few trial fillings and a few replacement washers to get it right.

20151011_120140

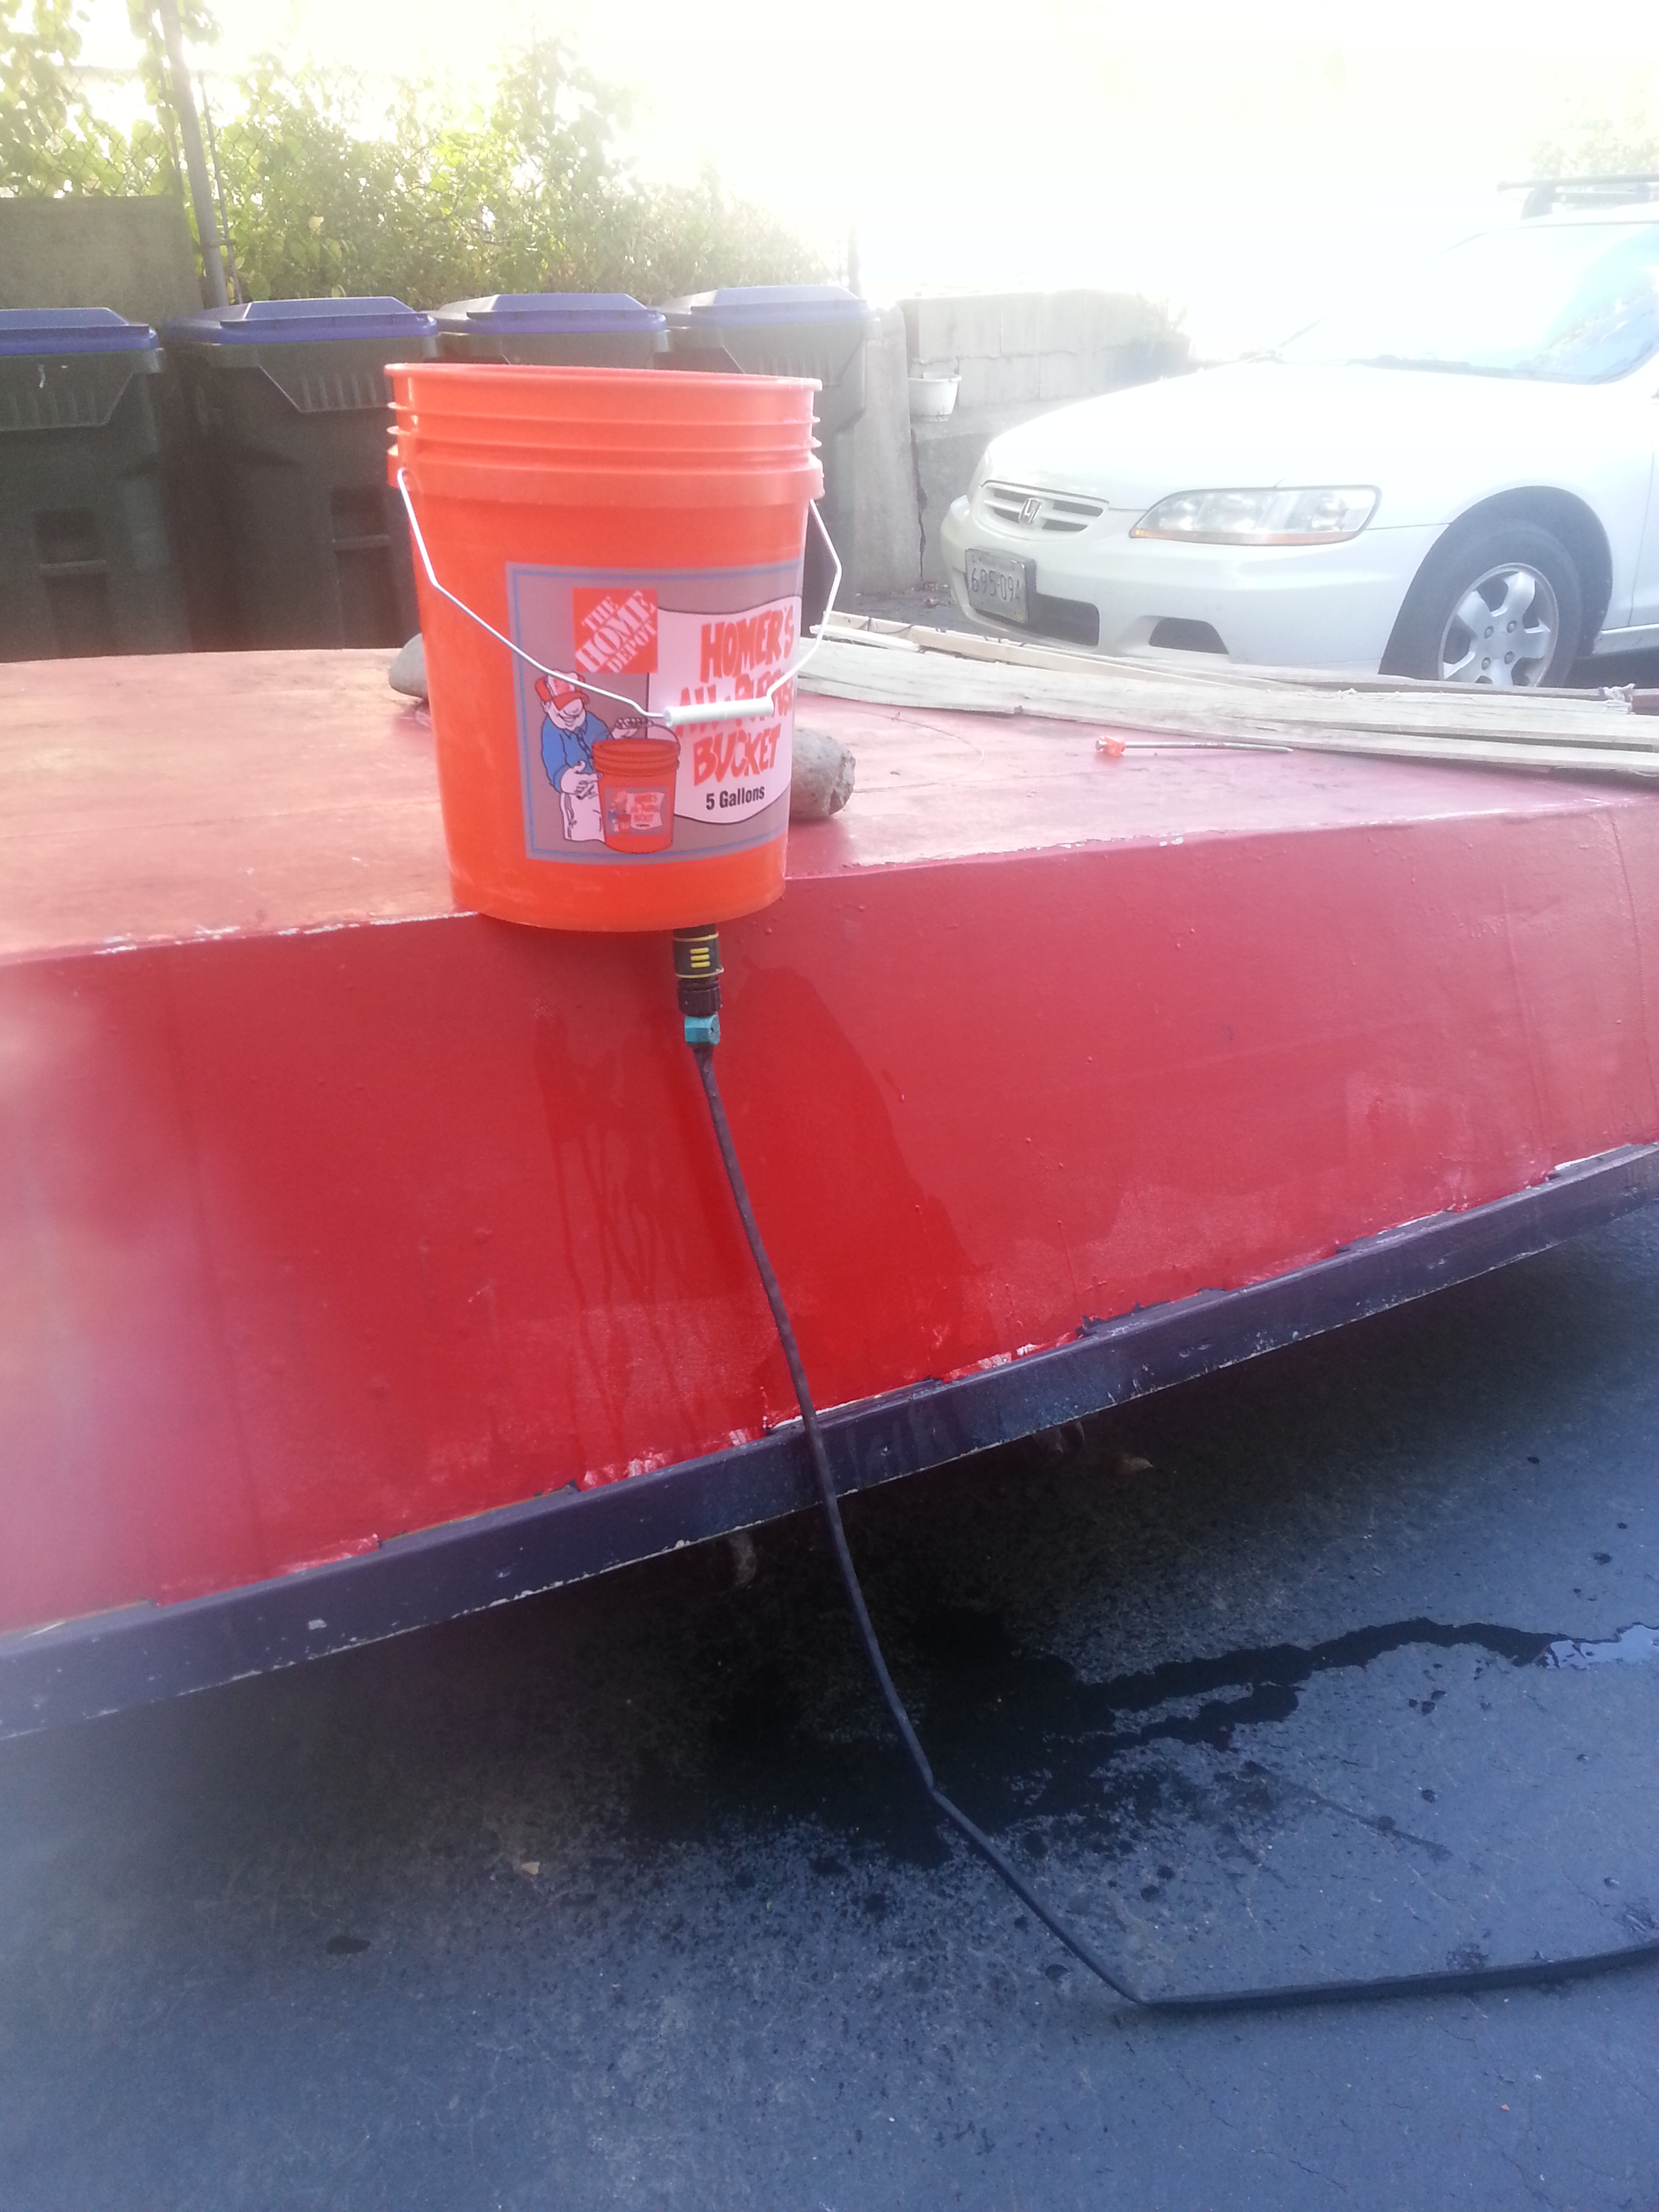
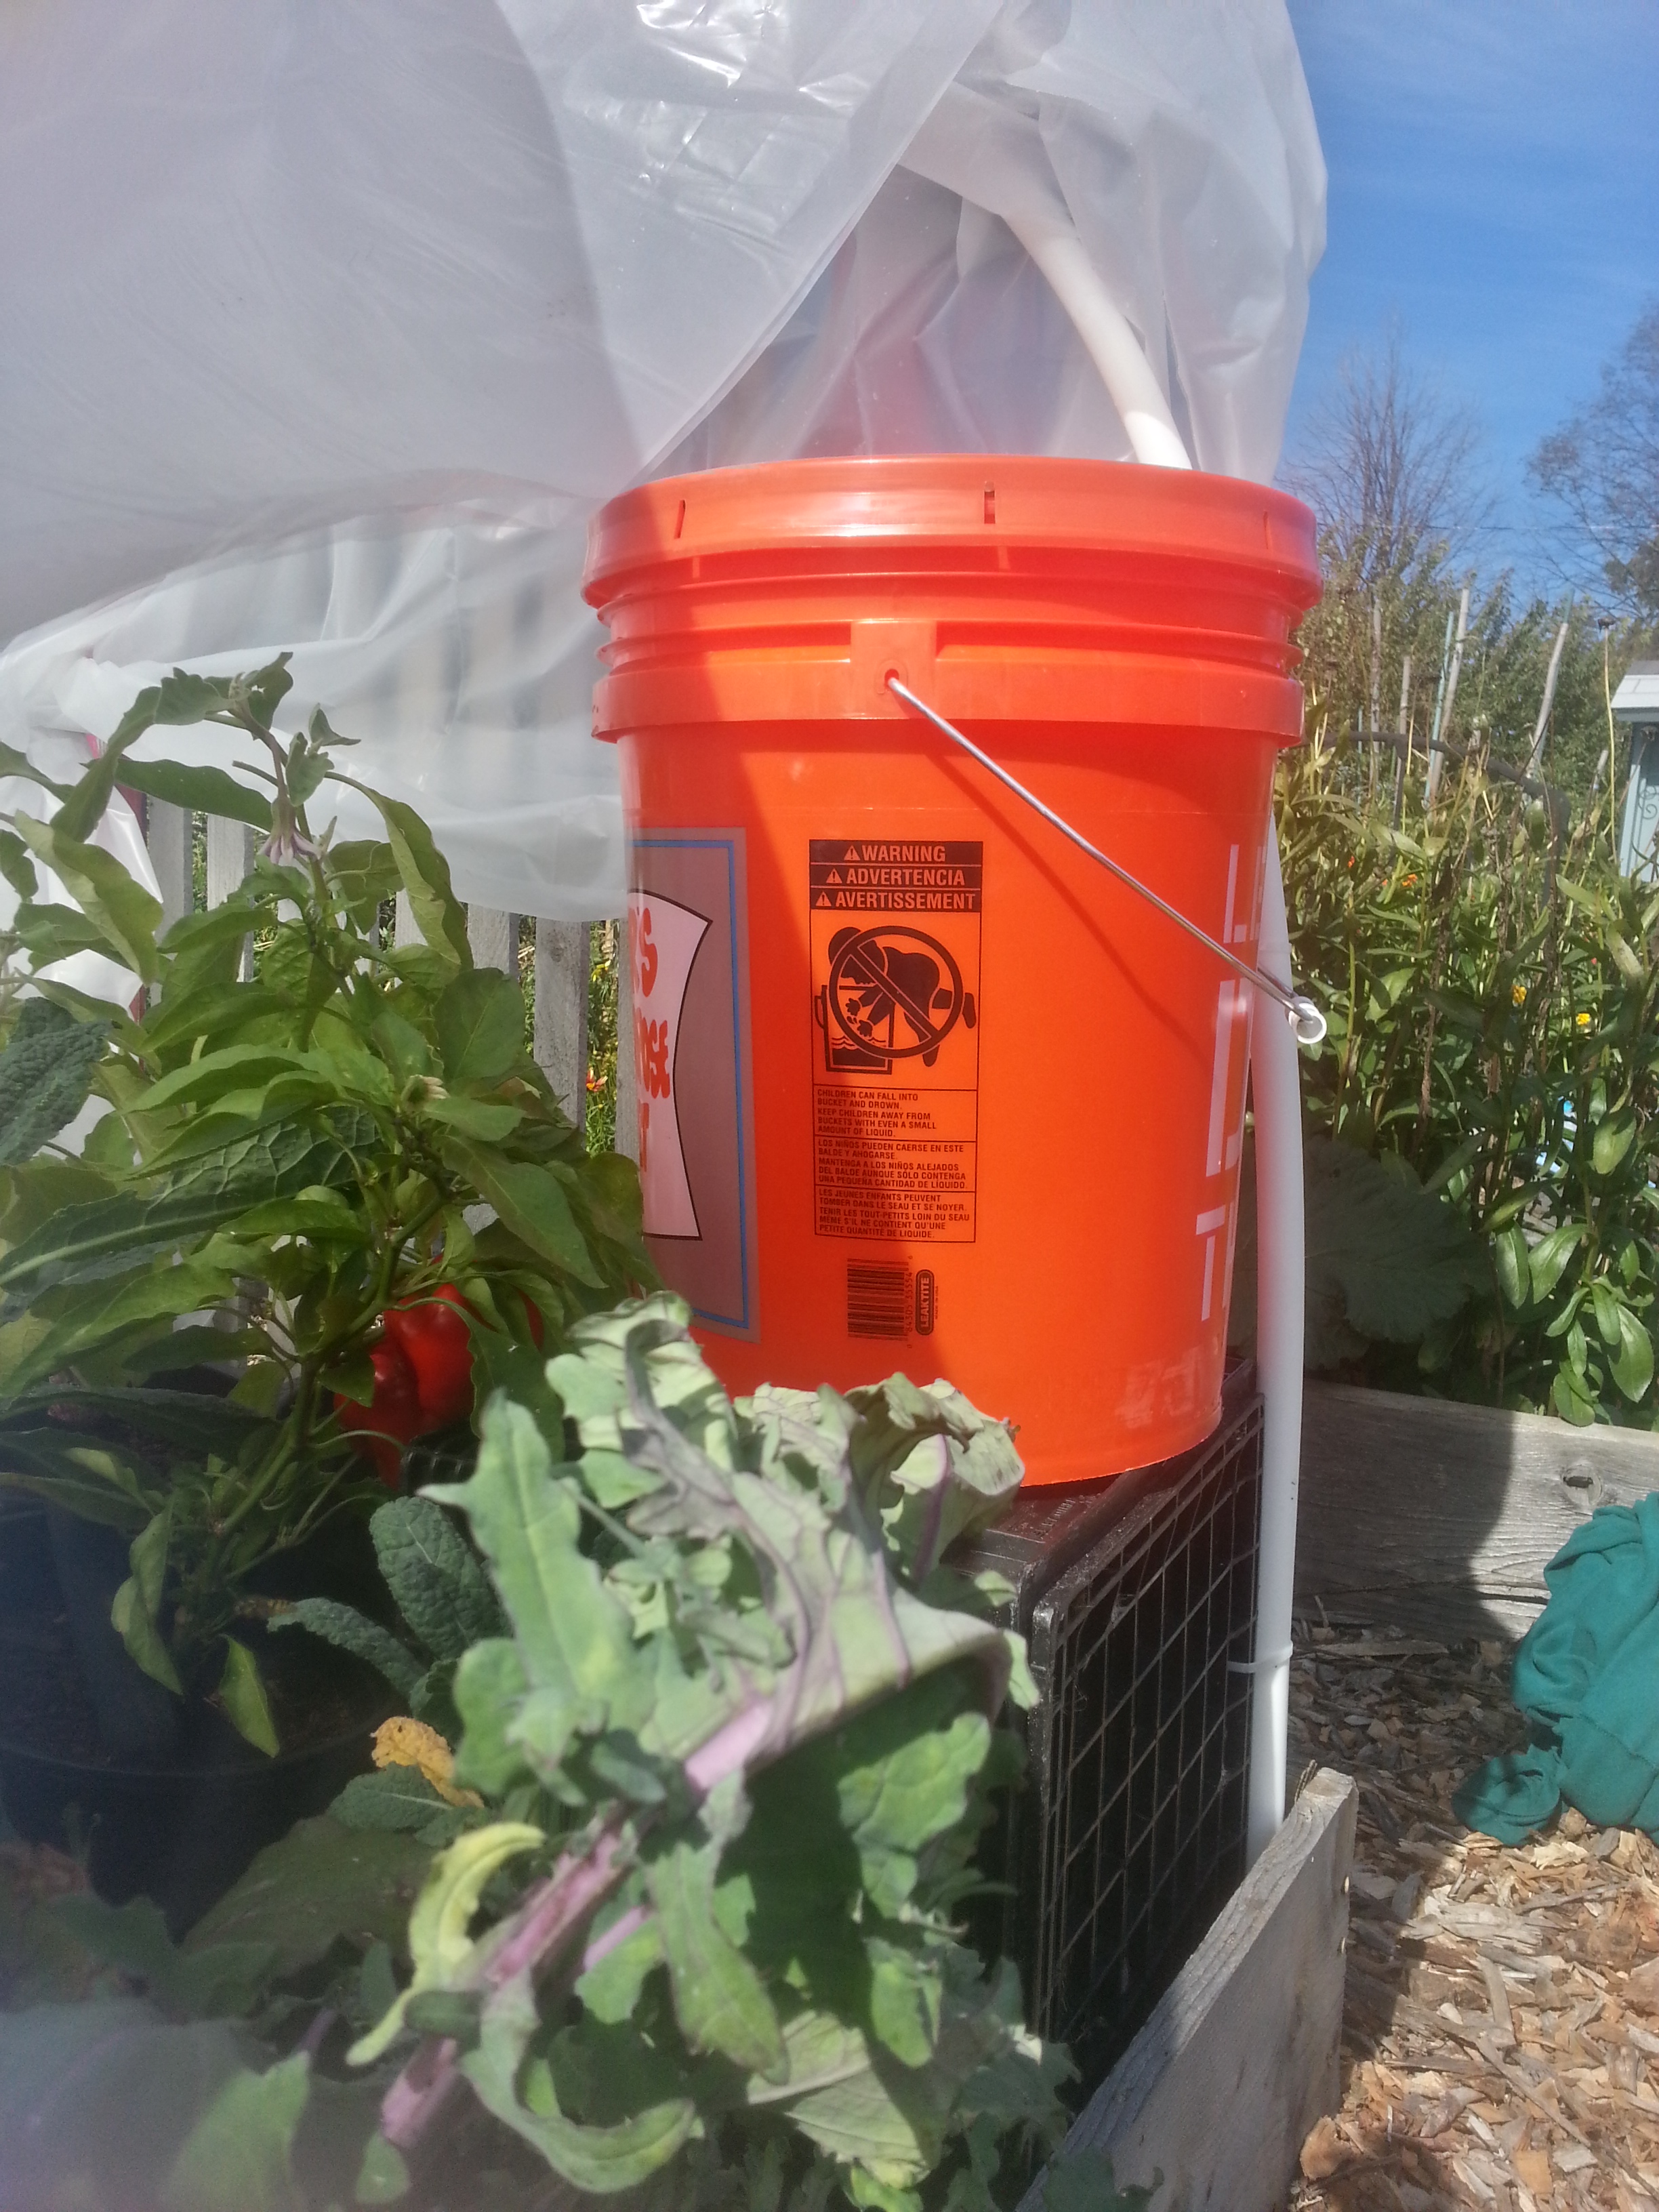
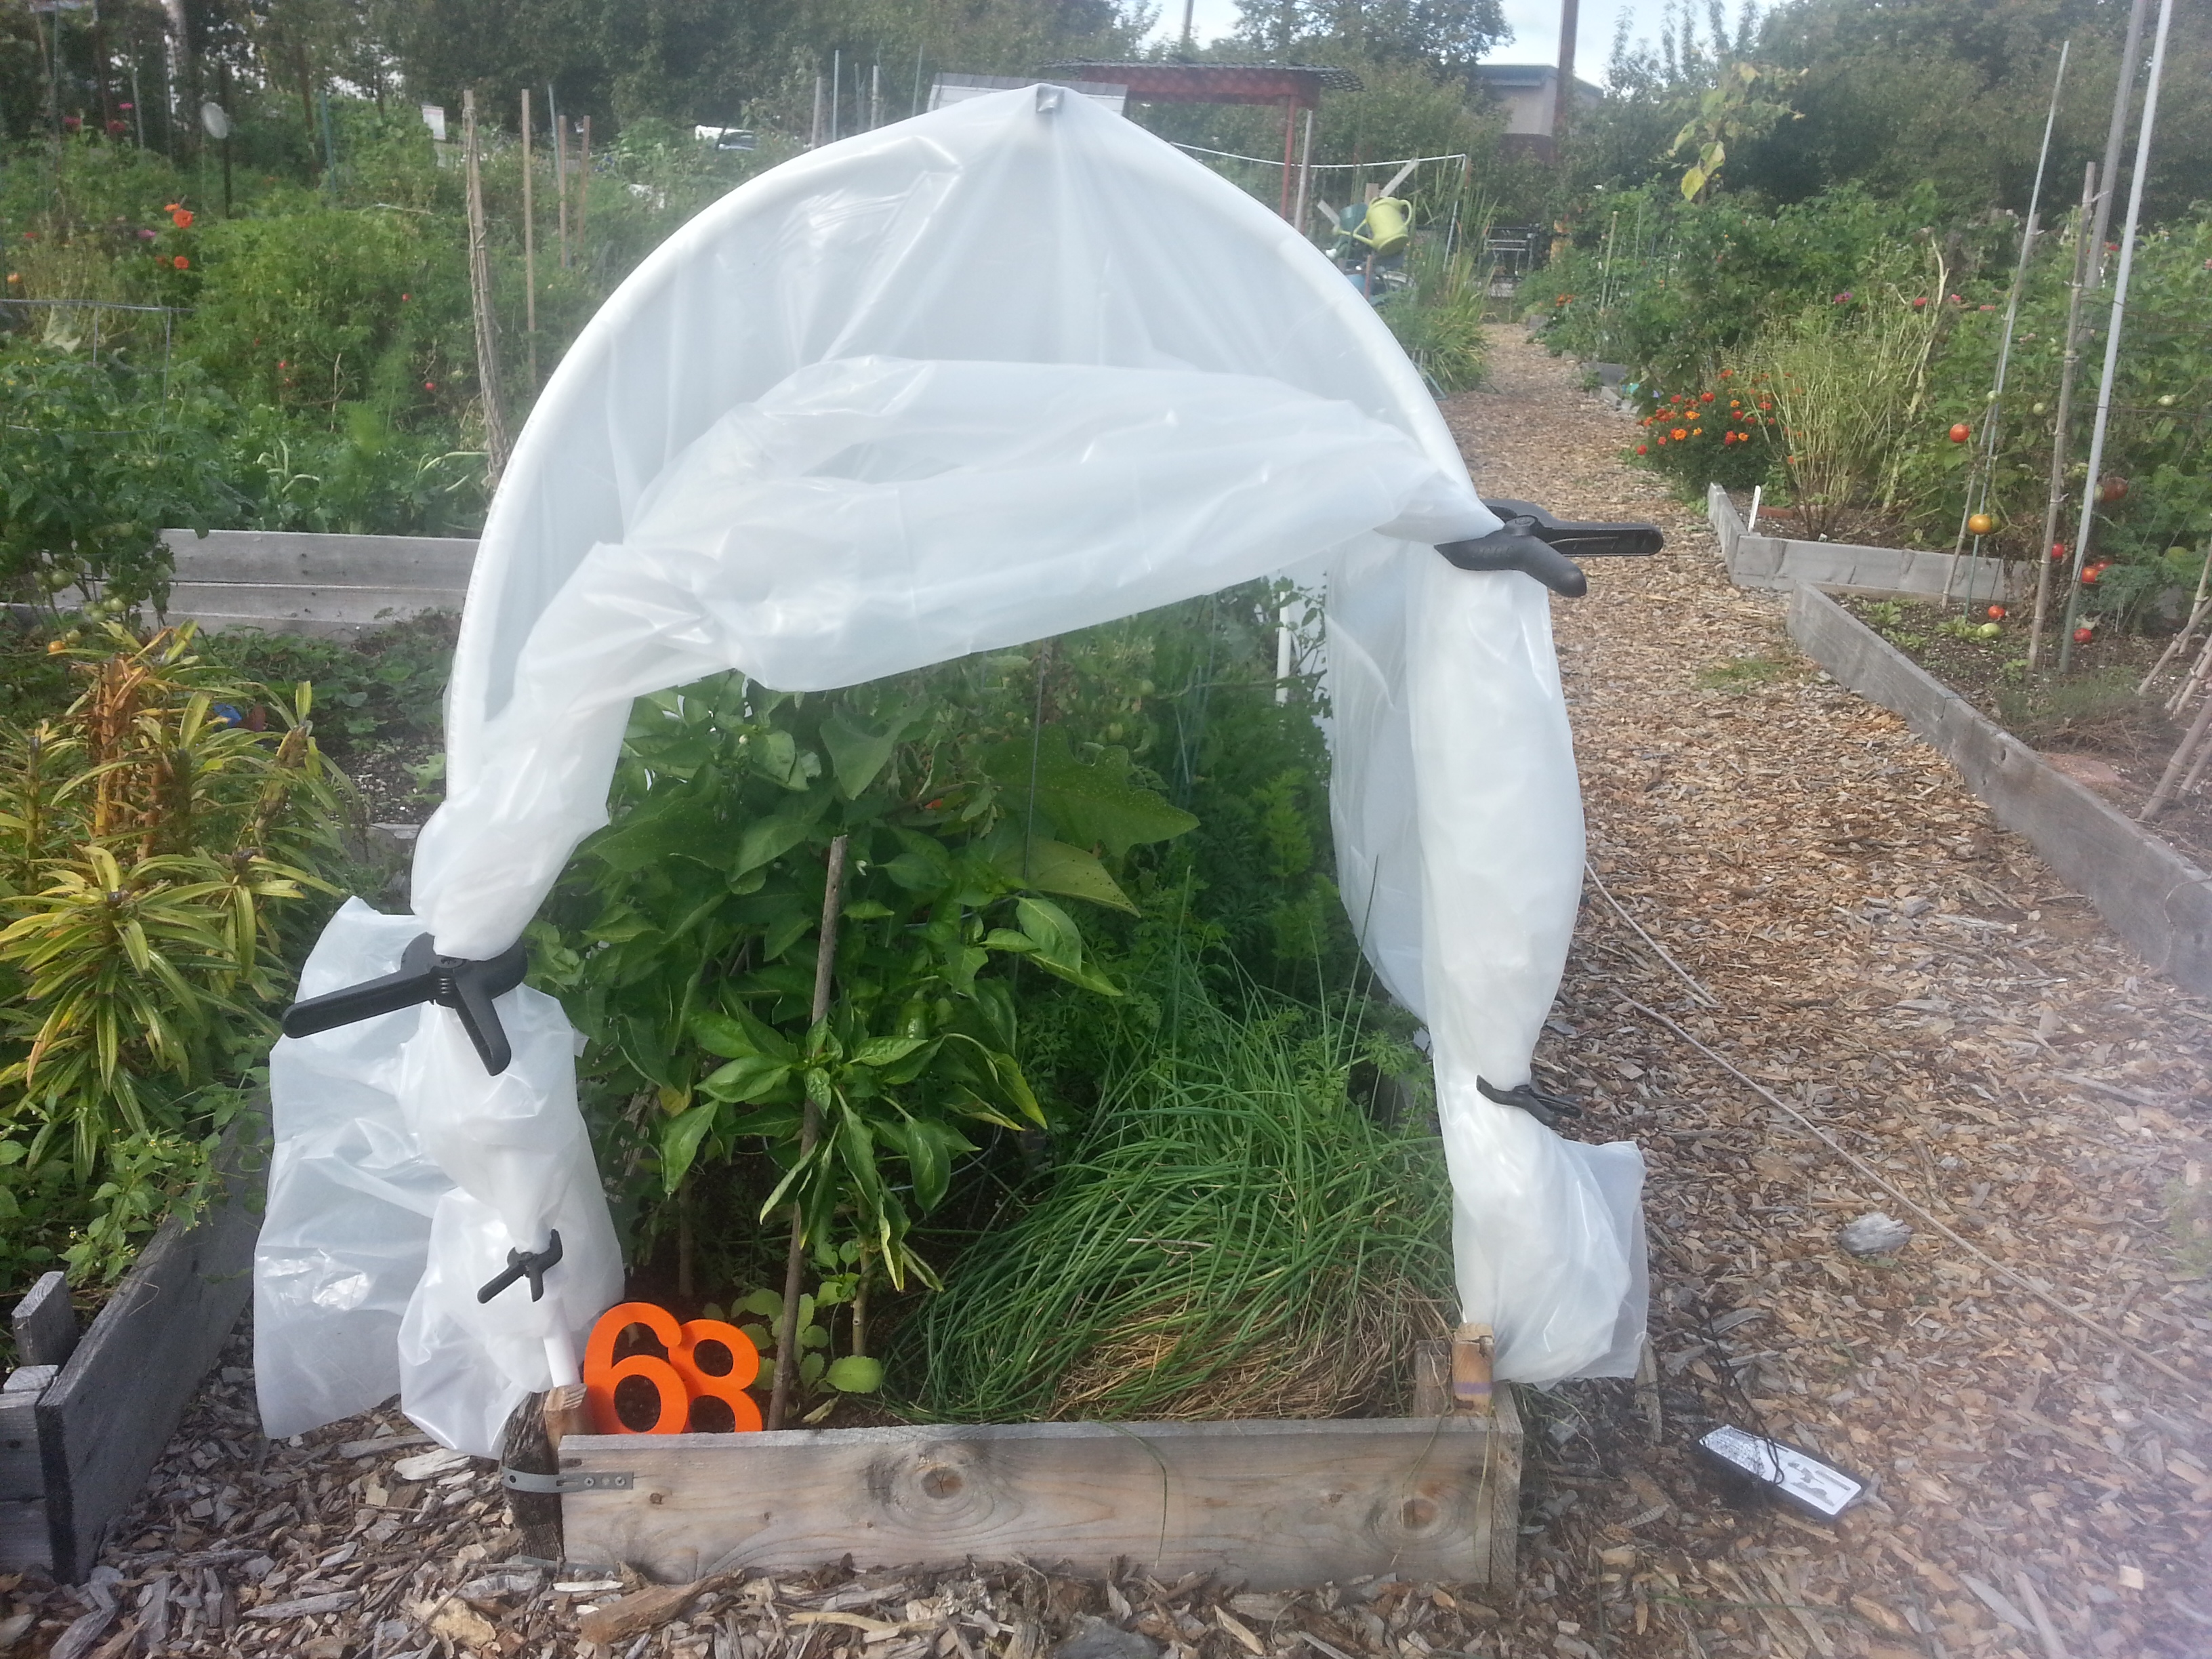
Once we were convinced no water was escaping, we installed the whole thing in the hoop house. We fit the bucket just inside the tent in the hope that the water won’t freeze as quickly this way. We perched it on a milk crate so gravity will build up some pressure. That’s my biggest concern: Will lifting the water a foot off the ground be enough to push it to the plants that are 25 feet away?

20151011_124401_HDR

I filled it up with a few gallons of water on Sunday morning, and despite a slow start, by Monday morning the water was gone! Those few gallons had gone somewhere, and I think it was exactly where I wanted it to go.

20151012_131119

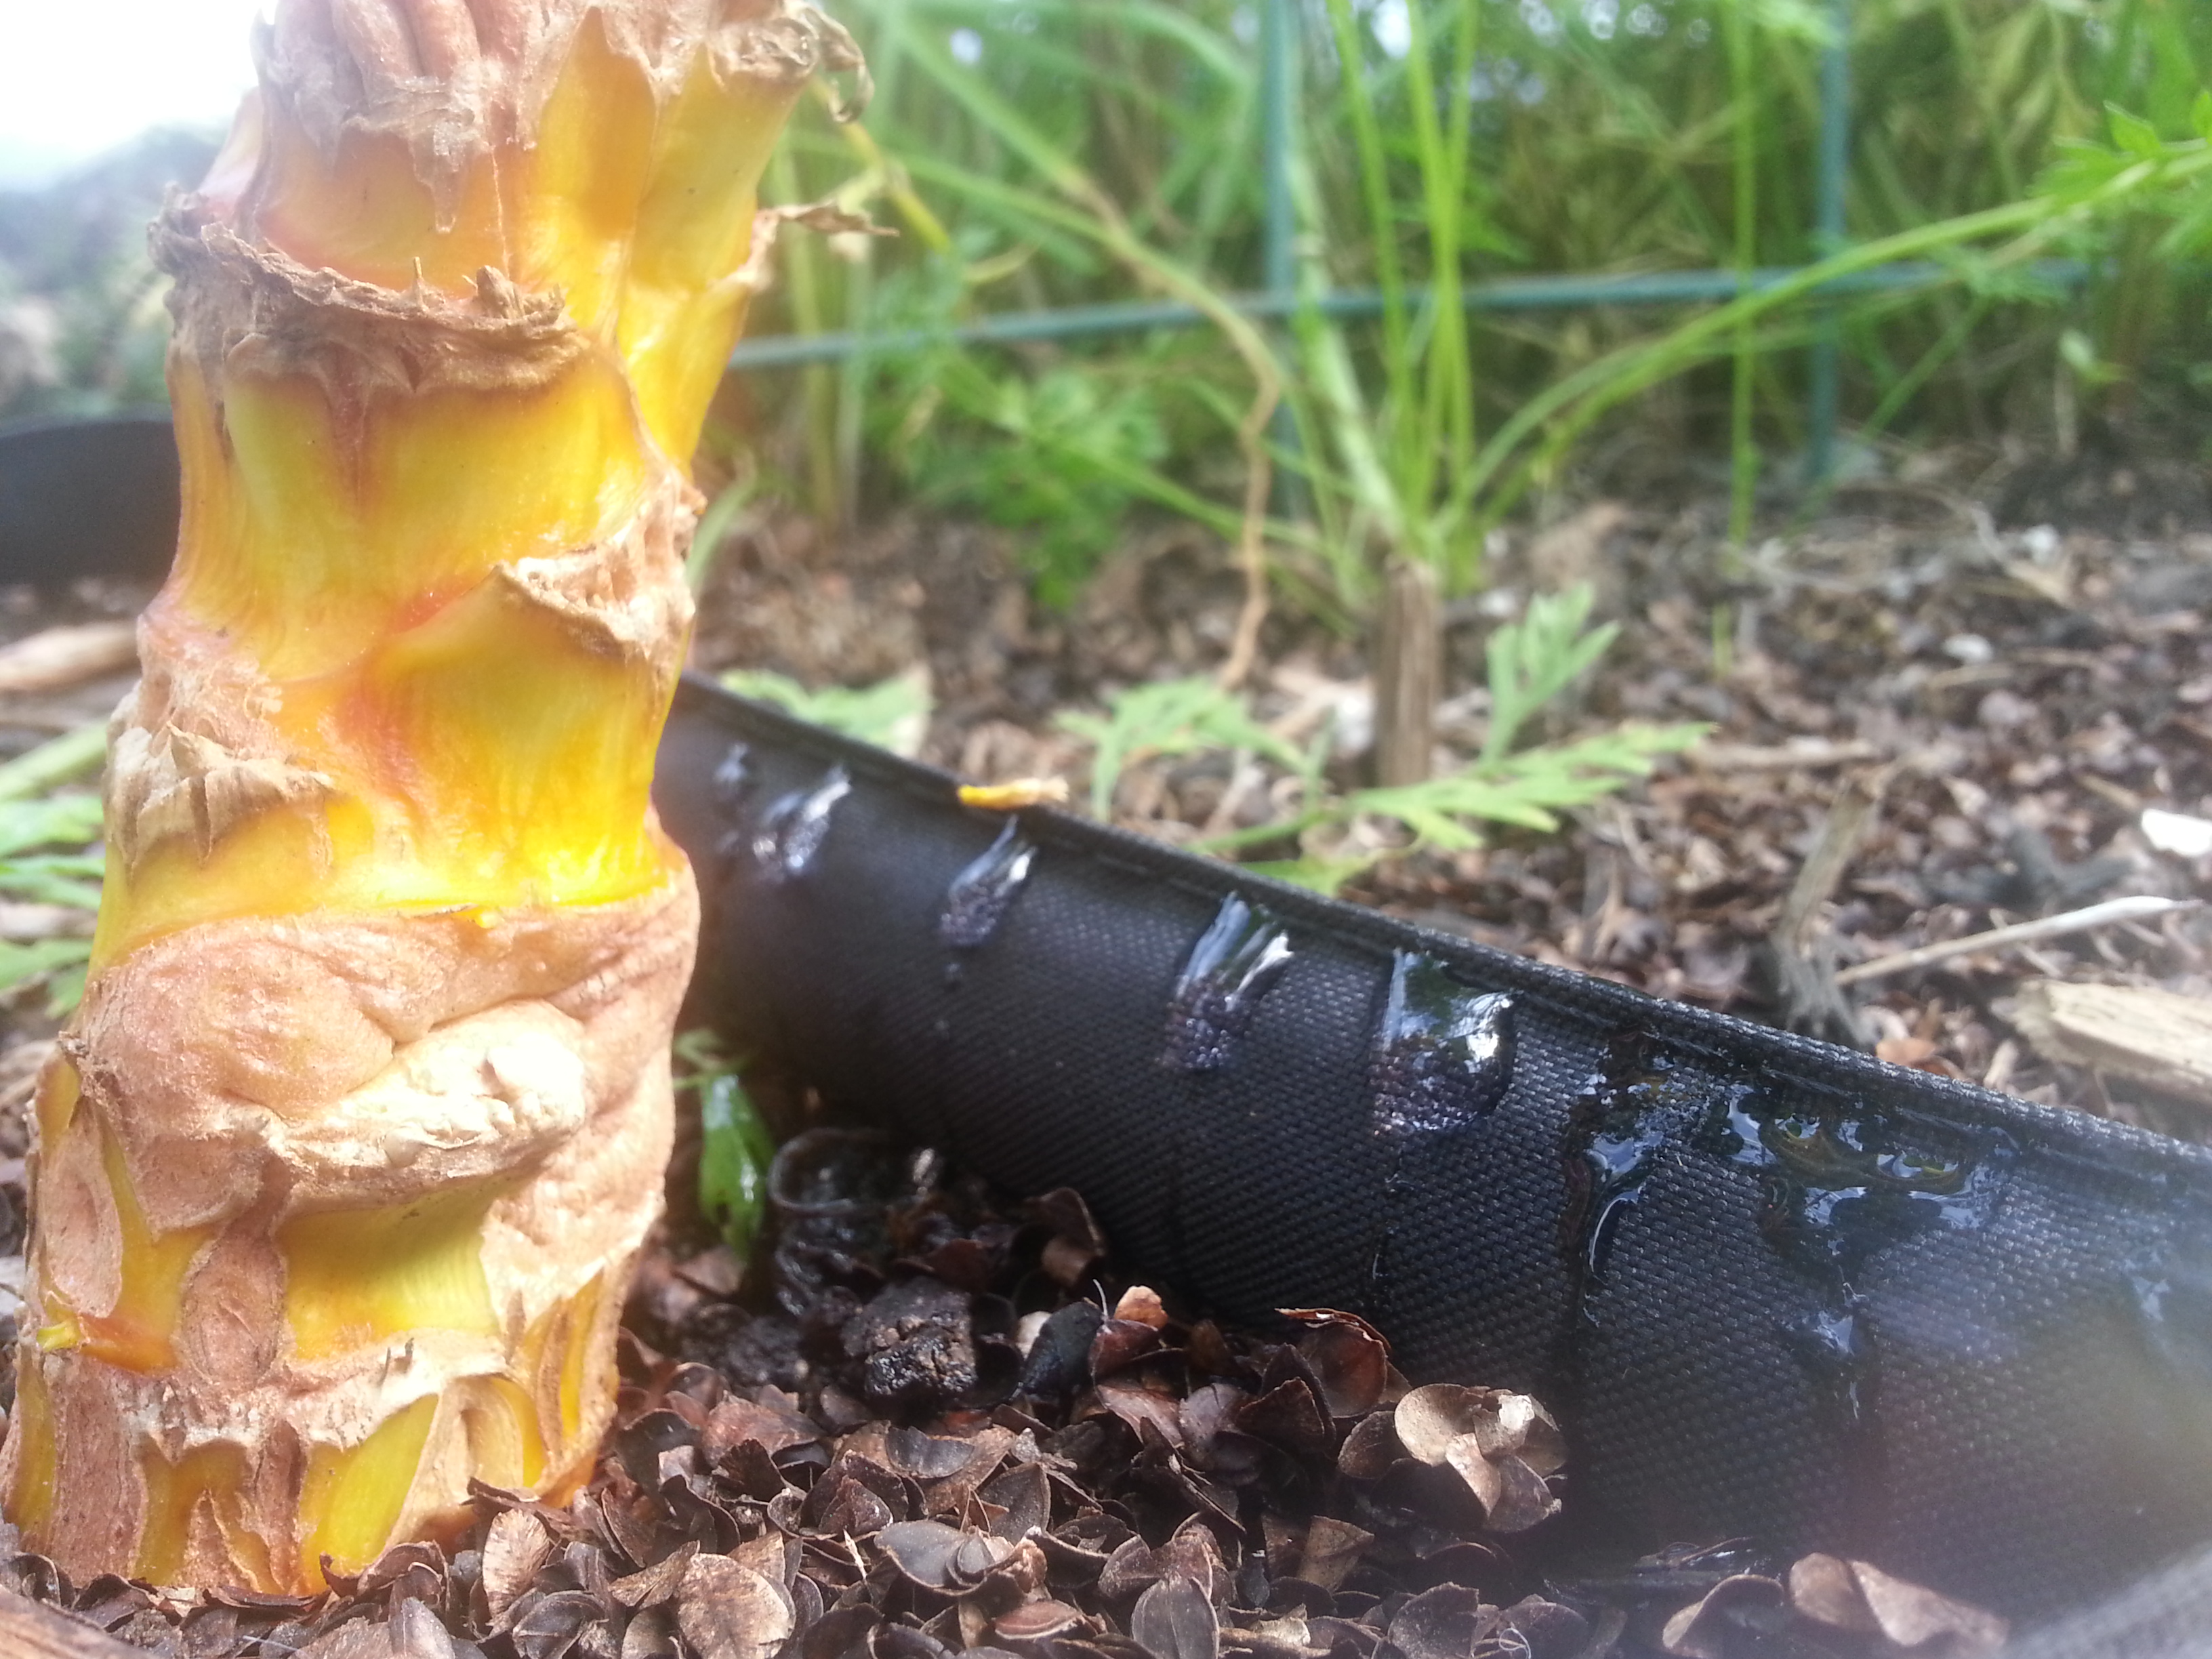
This hose truly is slow release. It seems to be full of water and ever-so-slowly beading it out. To human me, this seems like an unconscionably hard way to get a drink. But to the plants, this might be just fine, and preferable to waiting for me to get around to watering them.

One area I’m worried about is the container section. The hose takes a steep climb to get to these guys, and while there’s plenty of water seeping out farther down the line, this section is bone dry. Is this something to do with the pressure needed for the elevation change? Ben’s officially a physics PhD candidate now – figuring this out will be his assignment.

20151011_124528

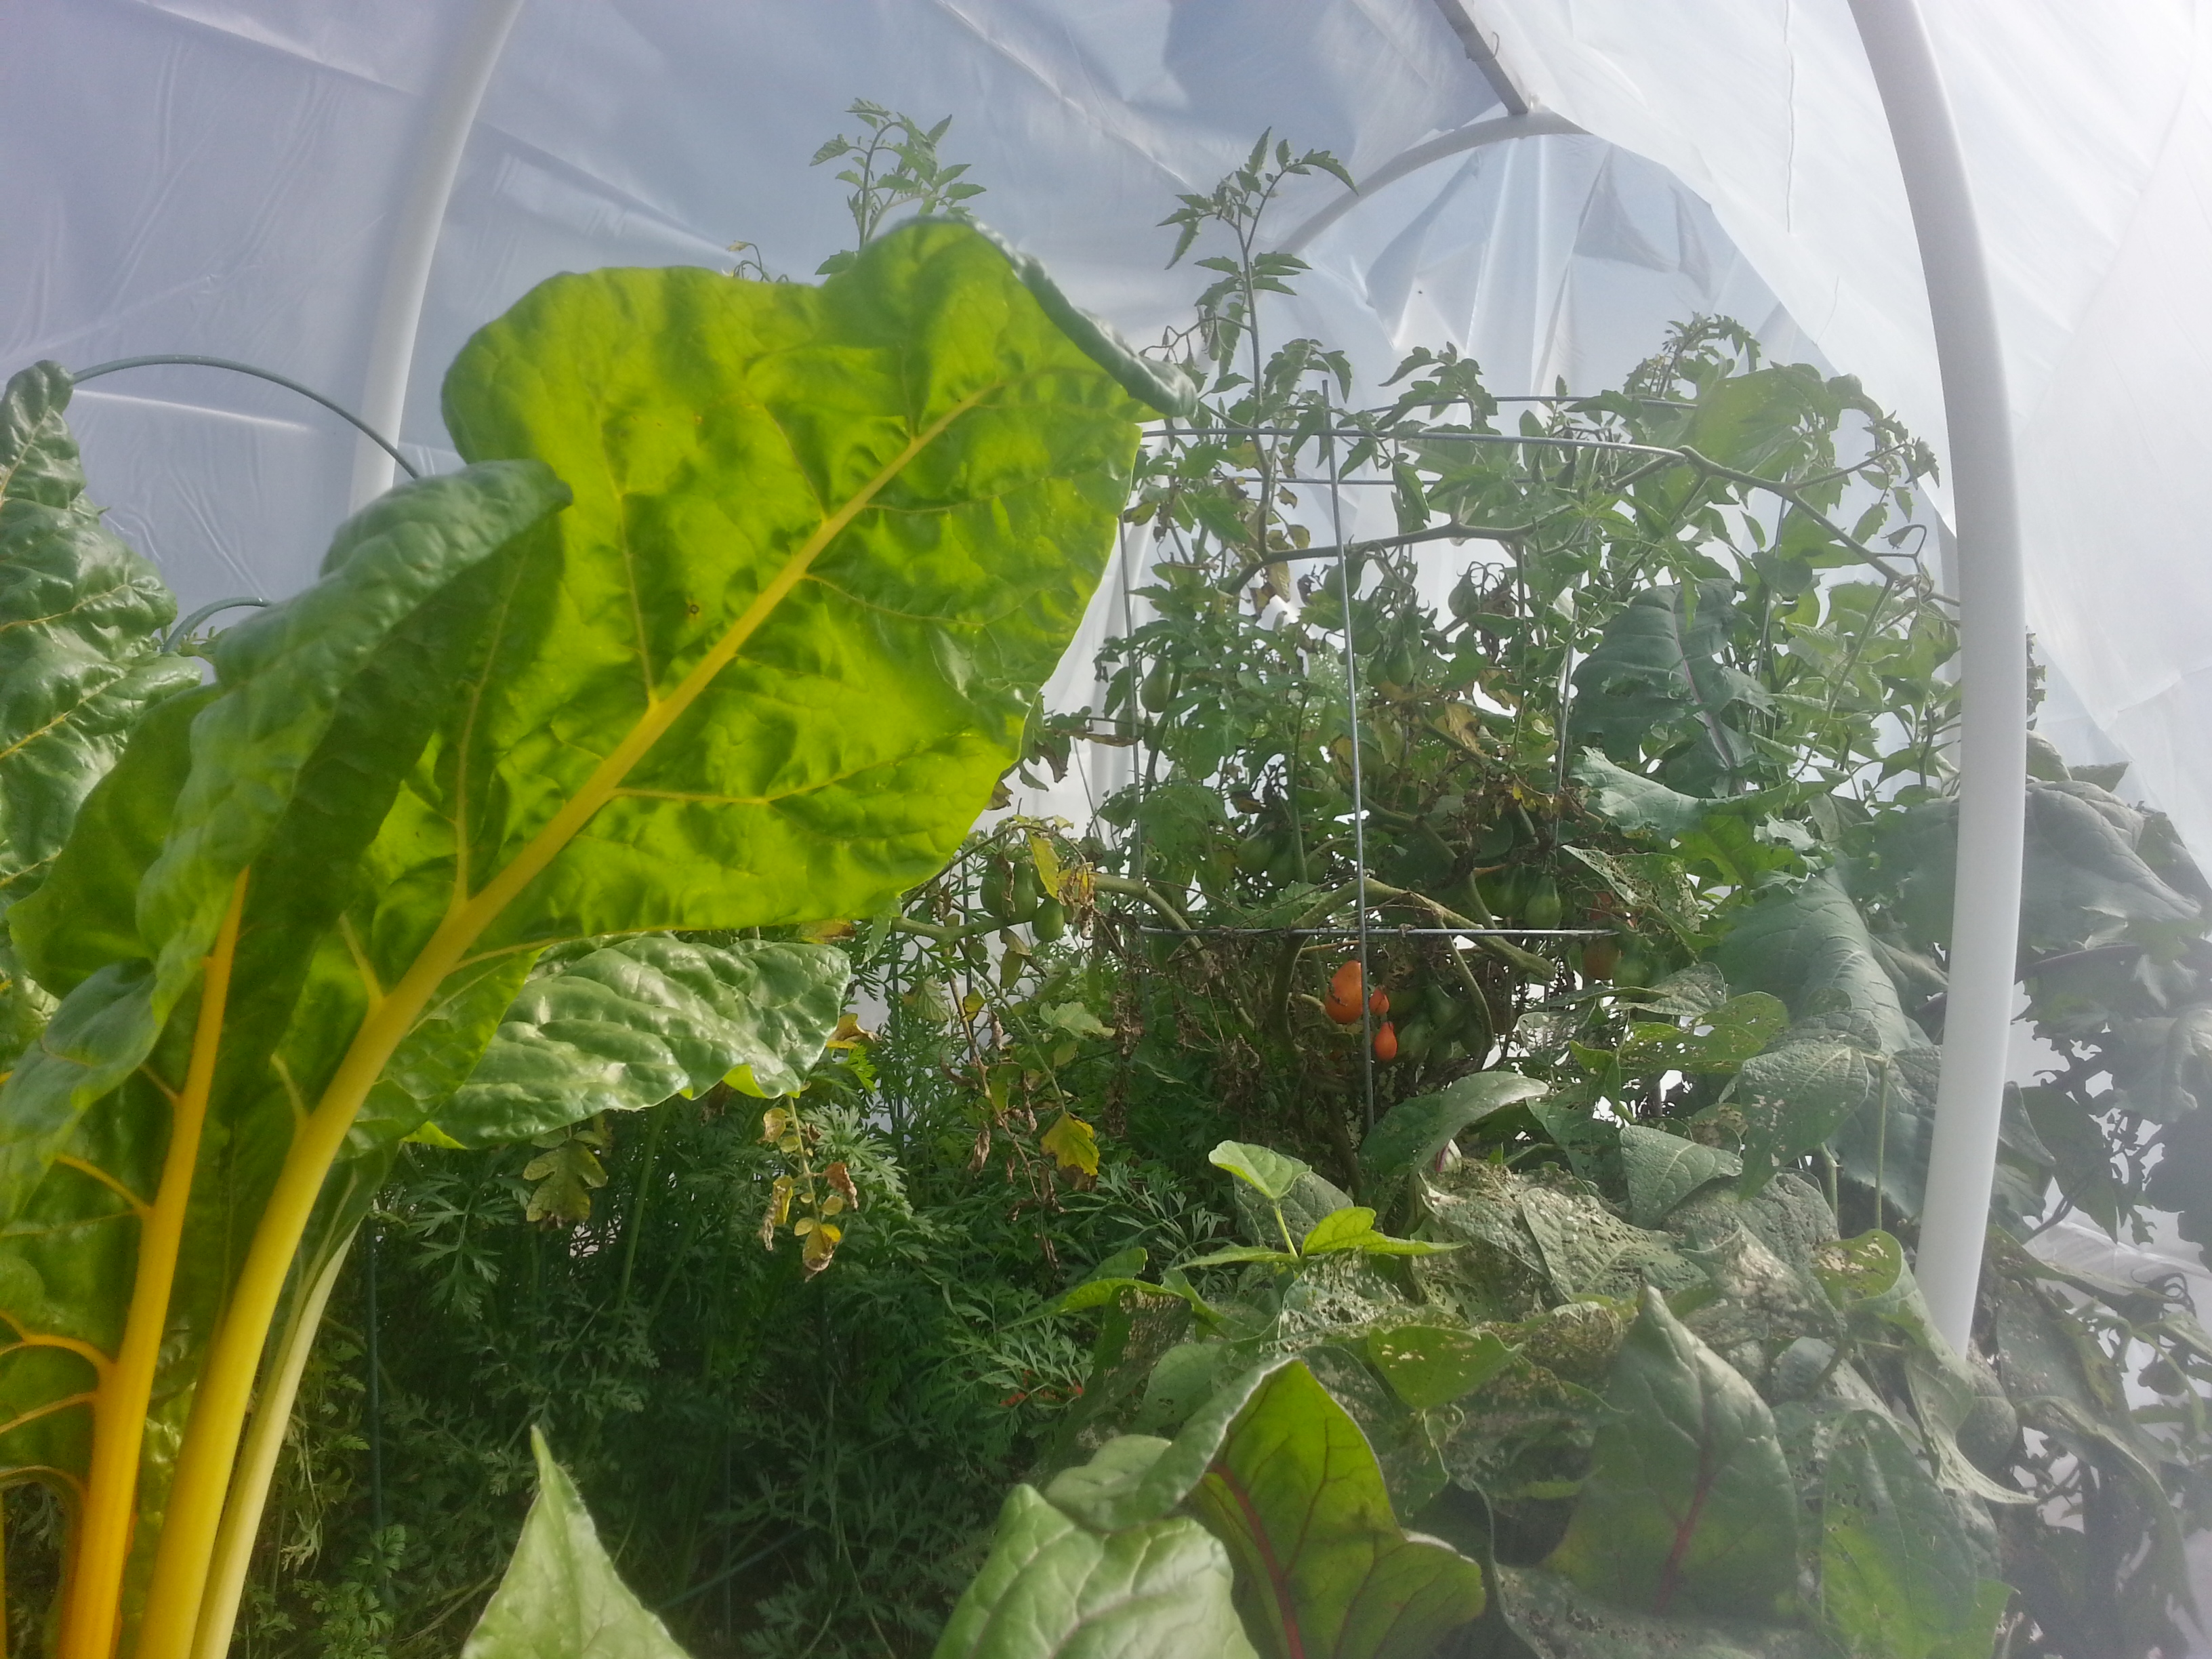
Apart from in that one elevated section, the hose seems to be doing its job. My main worry now is that there isn’t enough of it. Twenty-five feet of hose for a forty square foot area may not be enough, particularly with a drip this slow. 20151011_124218For the moment I’m going to wait it out and see how well the plants fare with no additional watering. With the plastic roof and constant water flow, I may wind up creating a self-contained ecosystem. A little bio-dome.

20151012_131052

If the nuclear fallout comes, I’m gonna go live with the vegetables.

Winter Is Coming

Inspiration is a funny thing.

Gardening Know How asked me to write a piece about building hoop houses. I didn’t know a single thing about building hoop houses. So I researched it, and then I wrote my authoritative article, and then I built one of my own. In that order.

This little guy is my boyfriend, Ben. I enlisted his help because he loves building projects, and he loves trips to the Home Depot. He’s never been too keen on squishing around in foamy buckets of fermented fruit, so this was a good opportunity to do something together. 20151004_142425

We’re hovering right around the first frost date for our area, depending upon who you ask. Some say it’s as early as October 3rd, and some say it’s as late as October 31st. Looking at the forecast, I’m more inclined to believe the latter. This wild map suggests that it varies by a few weeks within the city, with the line following, as far as I can tell, the contours of the hills.

So I may be a few weeks early. Or I may not be. I have too many frost sensitive plants that are just starting to produce in earnest to want to cut it close, though.

Construction was a breeze. My plot is roughly ten feet by three feet. We bought four ten-foot lengths of PEX tubing and sunk them deep into the soil. This made a tunnel just high enough to cover everybody. The trellis didn’t make the cut, but the cucumbers and melons on it had all but given up for the season, anyway. It was a mercy killing.

The cross beam was… improvised. Across the top we zip-tied three wooden stakes I’d been using as a trellis. The ends were still wet with dirt. The plan is to replace them this weekend with an irrigation pipe of some sort. But for now the stakes are performing admirably.

20151004_143551

We draped a single translucent plastic tarp over the whole thing. It’s ten feet wide, so it overlaps just right with the sunken ten foot poles. It’s roughly a million feet long, so even with plenty of slack to fold up securely on either end, we cut off quite a bit extra that I plan to rig up into a smaller enclosure for my container garden by the house. We attached it to the structure with a bargain bag’s worth of plastic clamps.

20151004_144456

And that’s it! From inside, it looks like a veritable tropical paradise!

20151004_145325_HDR

From outside, it looks like that scene from Independence Day.

20151004_145222

“Release… me…”

After just a few minutes, it definitely felt warmer inside. It was a windy day, though, so I suspect this came more from the plastic functioning as a windbreak. I’m sure the plants will appreciate that as the wind gets nastier.

20151004_145549_HDR

There was some room on the end where I’d ripped out the cucumbers and melons. I had planned on planting peas there, but since the trellis didn’t make it into the enclosure, it wasn’t in the cards. Rather than planting something new, I decided to fill the space with as many hot weather containers as I could fit.

This is my secret garden – the three-foot-wide strip of concrete along the side of my house. It gets full sun, it’s not in anyone’s way, and while it’s a pain to water, it gives me a steady supply of tiny eggplants.

Plus, the cat loves it.

20151004_150808_HDR

After some agonizing, I picked out my strongest producers and carted them down to the garden. I fit three eggplants, a pepper, and a tomato, which I removed from its cage and stretched lengthwise along the kale. You can see one little arm reaching up in the distance. Quarters are tight, but they live in buckets. They’re used to it.

20151004_155954_HDR

And that’s that! The thing that distinguishes a hoop house from a greenhouse is that it’s labor intensive. Where greenhouses rely on heaters and fans to regulate temperature, hoop houses rely on the sun and wind. The sun is absorbed passively. The wind, however, is left to human intervention. The ends have to be opened up daily to allow for air circulation, otherwise the heat from the sun will get so intense it’ll just cook your vegetables where they stand.

20151004_145721_HDR

Since it’s still warm out, I’m leaving the ends perpetually rolled up, and I’m treating the hoop house mainly as surprise frost protection. Once the temperatures start dipping lower, I’ll have to roll the ends down at night and up in the morning. With any luck, this will keep the warm weather guys alive long past their unprotected neighbors. With even more luck, pollinators will be able to find their way into and out of this thing.

I’m expecting the eggplants, peppers, tomatoes, and squash to give up the ghost eventually. The days are going to get too short and the bees are going to go into hiding, and any tomatoes I eat in January will come from California. For the leaves and roots, however, I have high hopes! With some mulching, and maybe a flap cut into the roof in preparation for access through the many feet of inevitable snow, there’s a chance I could be eating fresh vegetables on Valentine’s Day.

It’s just like they say: Beets are a girl’s best friend.

I Have So Much Wine

Today is all about dark wine. It wasn’t meant to be, but completely by accident all my dark, autumnal-looking wines were due to be racked at roughly the same time. Which is good, because they all catch the autumn light in such a way it’s a shame they live in the basement. I’ve read that exposure to light can give wine off flavors. I’m not sure off flavors are a real concern for someone at my level, so I may consider relocation. It would be the most roundabout stained glass in town.
20150924_105228_HDR

Then again, sunlight beating down on my wine might heat it up to an uncomfortable extent. This may be a sight that comes only every month or two. It’s more special that way. From left to right we have Raspberry Melomel, Elderberry Wine, Plum Wine, and Strawberry Wine. “Melomel” is the beautiful old fashioned-sounding term for mead flavored with fruit. The even older fashioned-sounding “metheglin” is mead flavored with herbs or spices. If I learn the professional language, I’m one step closer to being a professional myself. Right?

Speaking of metheglin, I racked my lavender metheglin last week, and it received rave reviews. It’s incredibly strong (I’m still getting the hang of the hydrometer) but the little bit I tried tasted lovely, especially with a little honey mixed in. One of my roommates said it reminded him of Viking’s Blod, a household favorite mead, so I took it as the highest of compliments. Viking’s Blod don’t come cheap, so I’d dearly love to be able to replicate it. The recipes I’ve found involve hibiscus, not lavender, so I may need to explore the world of flower-flavored metheglins.

But enough about future projects. In the here and now, I’m still racking this elderberry wine which, as you may remember, tasted like vinegar back in July. I sure remember. I’m still dutifully racking it every month in the hopes that it will, as the recipe suggests, improve with age.

20150924_120356_HDR

And as far as my monthly notes are concerned, my hopes are not unwarranted. In July this wine was “…Not good” and I was “hoping for an ageing miracle.” In August another ellipsis introduced an incredulous “…getting better?” Now, in September, I swear it was downright close to drinkable. It tastes and looks to me like a very dry red wine. Is this stuff actually improving, or is my palate getting more and more accustomed to dubious homemade fruit wine? The latter is almost definitely true, but I’m hoping the former is a little bit true, too. We’ll see.

I also racked a mulberry melomel that had been fermenting in a bucket for a few weeks. True to form, I’m following a half-remembered friend-of-a-friend forum post recipe and hoping for the best. In a departure from my usual methods, I soaked the berries and sugar in water overnight and added the resulting strained and simmered juice to the honey and more water. After it had cooled, I combined it with raisins and yeast and let it sit in an air-locked bucket for two weeks. I opened it up to find some very alcoholic reconstituted grapes floating on a sea of hooch. I have got to get my alcohol content under control before I go blind.

20150924_113806_HDR

Despite its potency, the mulberry melomel is really delicious. It has a light mulberry flavor with a strong honey base. And its color is fantastic. It reminds me of freshly pressed cider and has an opacity to it that I hope doesn’t disappear. So far I haven’t made a mead I don’t like. The honey makes for such a warm background to other flavors that it avoids that astringency I tend to get in straight fruit wines. Once winter kicks in and the fresh fruit is from California, meads brewed with dried herbs and spices might be just the thing.

20150924_115408

I counted, and I have eleven and a half gallons of wine sitting in my basement. None of it’s ready yet, but in a few months’ time my apartment may have to have a serious Bacchanal.

Anything Can Be Wine If You Just Believe

20150913_150117_HDRI’ve got some peach wine brewing. It’s made from locally grown peaches and it smells just like summer and I’m sure it’ll be my favorite thing to drink in the dark of February.

But who cares?

I’m making cucumber wine.

In my garden plot I have three cucumber vines that can’t be persuaded to climb a trellis but are nonetheless producing like crazy.

I’ve made them into pickles and I’ve munched on them whole while I water, but they just keep coming!

I had never tried or, to be honest, heard of cucumber wine, but I thought it must exist. I thought that every food must, at some point, have been thrown into a bucket with yeast and sugar. It seems the list may be finite, though, and cucumbers are right at the bottom of it, because my internet searches have brought me exactly one recipe. It can be found in a few different places, but it’s always exactly the same, copied and pasted over and over. And I’m here to carry on the tradition!

Of course, once I’d set my mind on using “all these cucumbers,” I discovered that I had only four, and that they weighed about half of what I needed for my recipe. My mission to use up extra produce suddenly required a trip to the grocery store. Oh well. The light green pickling cucumbers came from my garden. The dark green traditional ones came from a farm somewhere in Rhode Island, if the produce department is to be believed. One of them is missing an end because my boyfriend took a bite out of it. So it goes.20150913_183455_HDR

The recipe called for two lemons and two oranges, cut into slices. I imagine this is because cucumbers on their own don’t have a lot of body to them. Also, even though I’m looking for a cucumber flavor, a fruity base might be what it takes to tip this thing from pickle juice into wine territory. I’m a little apprehensive about how the orange flavor will mesh, but since this is my first try I’ll put all my faith into that one mysterious person who devised this recipe and follow it to the letter. Maybe the oranges will add some complexity that lemons alone can’t.

20150913_183830_HDR

I sliced the citrus and roughly chopped the cucumbers. I added seven cups of sugar and yeast nutrient, then I poured a gallon of boiling water over it all. It smelled like a spa treatment.

Up until now I’ve always used sodium metabisulfite to sanitize the must before adding yeast, but now I’m experimenting with using just boiling water. I have no political or health reasons (I had no idea I was supposed to hate sulfites until I came across recipes that proudly omit them). I’m just curious to see if it works.

20150913_191136_HDR

Once the must cooled (it took hours!) I added pectic enzyme to help break things down. After 24 hours I pitched the yeast and let it do its thing. It made a beautiful froth and all but disintegrated the cucumbers. The skins and seeds were still floating around, but the meat disappeared, making for a slimy goop that I could pick up in my hand and had a heck of a time filtering.

20150915_111957

But filter it I did. The finished product is an interesting color: green from some angles, yellow from others. Does it taste like cucumbers? Yes! Does it taste good? Not particularly. Does it smell like pickles? Not as much as I expected, but that’s not a no. Is it so full of citrus that it burned every little cut in my hands as I cleaned the equipment? Oh yes. Taste-wise, the citrus is a little overwhelming, too. Between the lemon and the alcohol, it’s like an astringent medicine that happens to taste like cucumber. I’m hoping it settles down over time.

Even if it doesn’t, it’s a good conversation piece. And it’s not more pickles.

20150920_103319_HDR

Saving Seeds

20150730_171939_HDR

I’ve started saving seeds. I wasn’t planning on it, but when you go away for the last week and a half of June, some decisions get made for you. I left orderly rows of leafy greens and roots. I came back to anarchy.

The lettuce had bolted. So had the bok choy and last year’s leeks. And so had this downright tumescent radish.

My community garden has a plastic baggie pinned to a bulletin board where you can dump old seed packets. Just to fill in space where some of my kohlrabi had failed, I planted some seeds from this baggie. They were for some daikon-like radish packaged for 2010. I wasn’t expecting much, so I threw in the whole packet’s worth of seeds. And they all germinated.

I thinned them down to just a few and picked most of them when they were a reasonable size. They looked just like white carrots but had a serious, almost peppery bite to them. This last one I left in the ground before my vacation, and by the time I came back it was in full flower. I let it go until the flowers turned to seedpods and the seedpods started to be eaten by birds. I yanked the whole thing out of the ground, then, and brought it inside to dry. I hung it upside down in the cellar from a ribbon the cat likes to play with, because there was no string on hand and I couldn’t just leave this monster draped across the kitchen table.20150909_131149_HDR

If you’re doing the math, you may have figured out by now that this thing has been hanging in my basement for quite a while. You’re right. I’ll admit that I’ve found the prospect of dealing with it daunting, and knowing that something’s dried and not going anywhere is fantastic for procrastination. Now that I’ve gotten my act together and discovered that seed collection is all the work of a few minutes, I’m planning on going at it full throttle and becoming that old seed saving woman in Mad Max.

I dragged the whole plant upstairs and returned the ribbon to where the cat last left it. The radish had formed a big network of spreading twigs, and at the end of each one was a seed pod. I quickly found that the easiest method was to break all these pods off first to get the huge, brittle structure out of the way.

While breaking off pods, I found one bunch of flowers that had been blooming when I picked the radish and dried with the rest of it. The flowers were so delicate when they were blossoming, and I can’t believe how well they were preserved. Maybe next year I’ll grow a couple just for the flowers. I wrote a post recently for Mother Earth Living about cutting and preserving bolted vegetable flowers. Go have a look if you’re in the mood.

20150909_131821

Once I’d collected the pods, my task suddenly seemed a lot less daunting. They were dry as a bone and split apart easily in my fingers. 20150909_132143

In just a few minutes, I had a healthy little pile of seeds. Sometimes gardening seems like magic to me. I often say that if someone told me you could make unlimited food by sticking a little bit of old food in the ground for a while, and I didn’t know that’s how it actually works, I’d never believe it. A single seed sat in the ground for a while and made all of these new seeds. How can that be right?

20150909_140650

Anyway. I tucked all my radish seeds into an envelope labelled Big White Radish because I have no recollection of the real name on the packet, and I got to work on some other plants I’ve had lying around drying for far too long. This is a bok choy, another surprise success from the ancient seed baggie. A lot like the radish, it produced these branched seed pods for the convenience of the collector.

20150907_173433_HDR

I did my best with a spinach plant I’ve been drying since forever, but I’m worried the seeds may not have matured. I pulled the plant at the time because it was stone dead, but the seeds had to be pried off with force and don’t want to break apart from their clusters readily. Are the seeds too young, or have I just been spoiled with these pod-producing plants? We’ll find out in the spring.

20150907_174649

That’s my seed arsenal for the moment. That and a bunch of chives I saved when I noticed the chive flowers I’d picked were dumping seeds onto the kitchen table. It’s no fail-safe against the fall of civilization, but it’s mine. I could have let the leeks die to produce seeds, too, but I picked and dried them still in bloom because they’re just so cool. I can buy leek seeds.

20150804_173144_HDR

A Sudden Windfall

20150821_111357_HDR
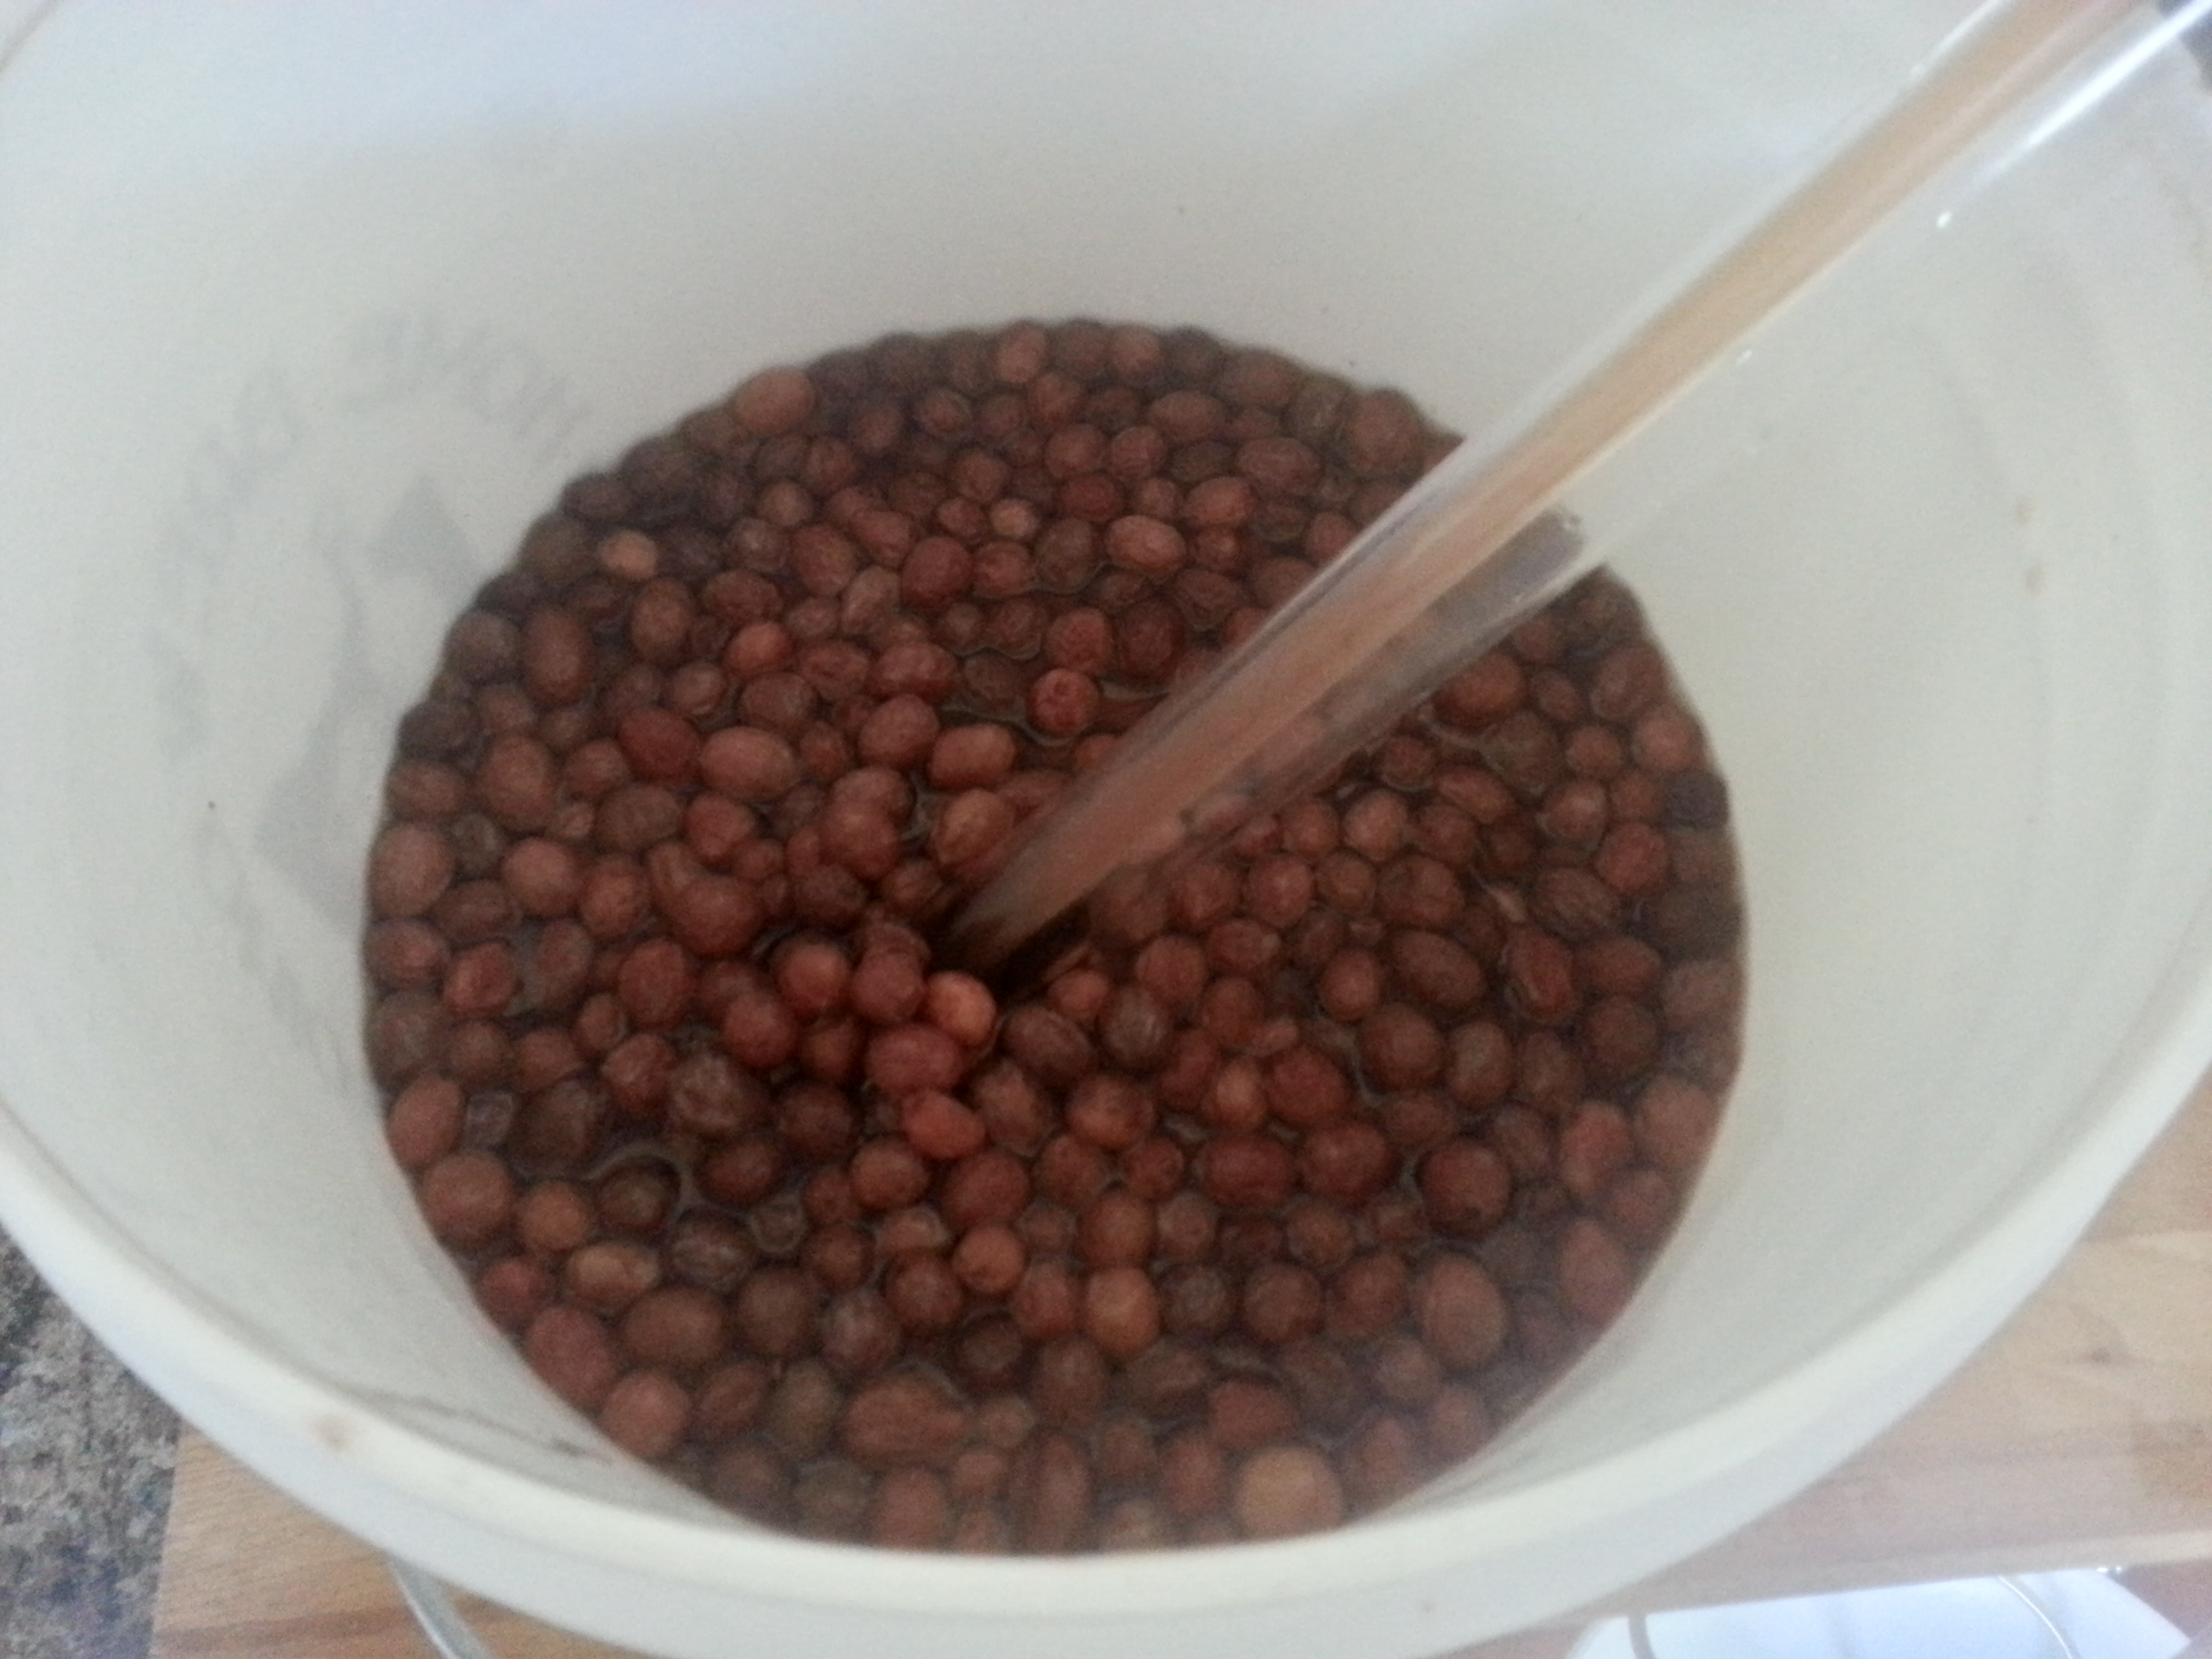
There are six gallons of mead on my cellar floor.

I thought I fixed a faulty spigot. It turns out I didn’t.

But let’s not focus on the bad things. At least not until I’ve thoroughly mopped. Because plenty of good things are happening. I racked the lavender and raspberry meads, and they both taste very good. So does the mulberry wine. My Kazakh melon vine has taken way off, and I might actually get to see what its fruit tastes like before the frost.

And I have recently come into a huge amount of fruit.

Keri of kombucha fame let me in on a hot tip: Her fruit tree-obsessed landlord was away on vacation and the yard was getting littered with windfall fruit. He’d given her permission to go in and clear it up a little. If anything, we were performing an important service.

This tiny backyard orchard has plums, pears, and a few varieties of apple. It even has apples and pears growing out of the same trunk, because this old Portuguese landlord I’ve never met is an avid amateur grafter.

The ground was, as promised, littered with fallen fruit. Some had been there for quite a while, but some was brand new. While we were there I got startled more than once by a pear crashing down behind me. 20150821_105750_HDR
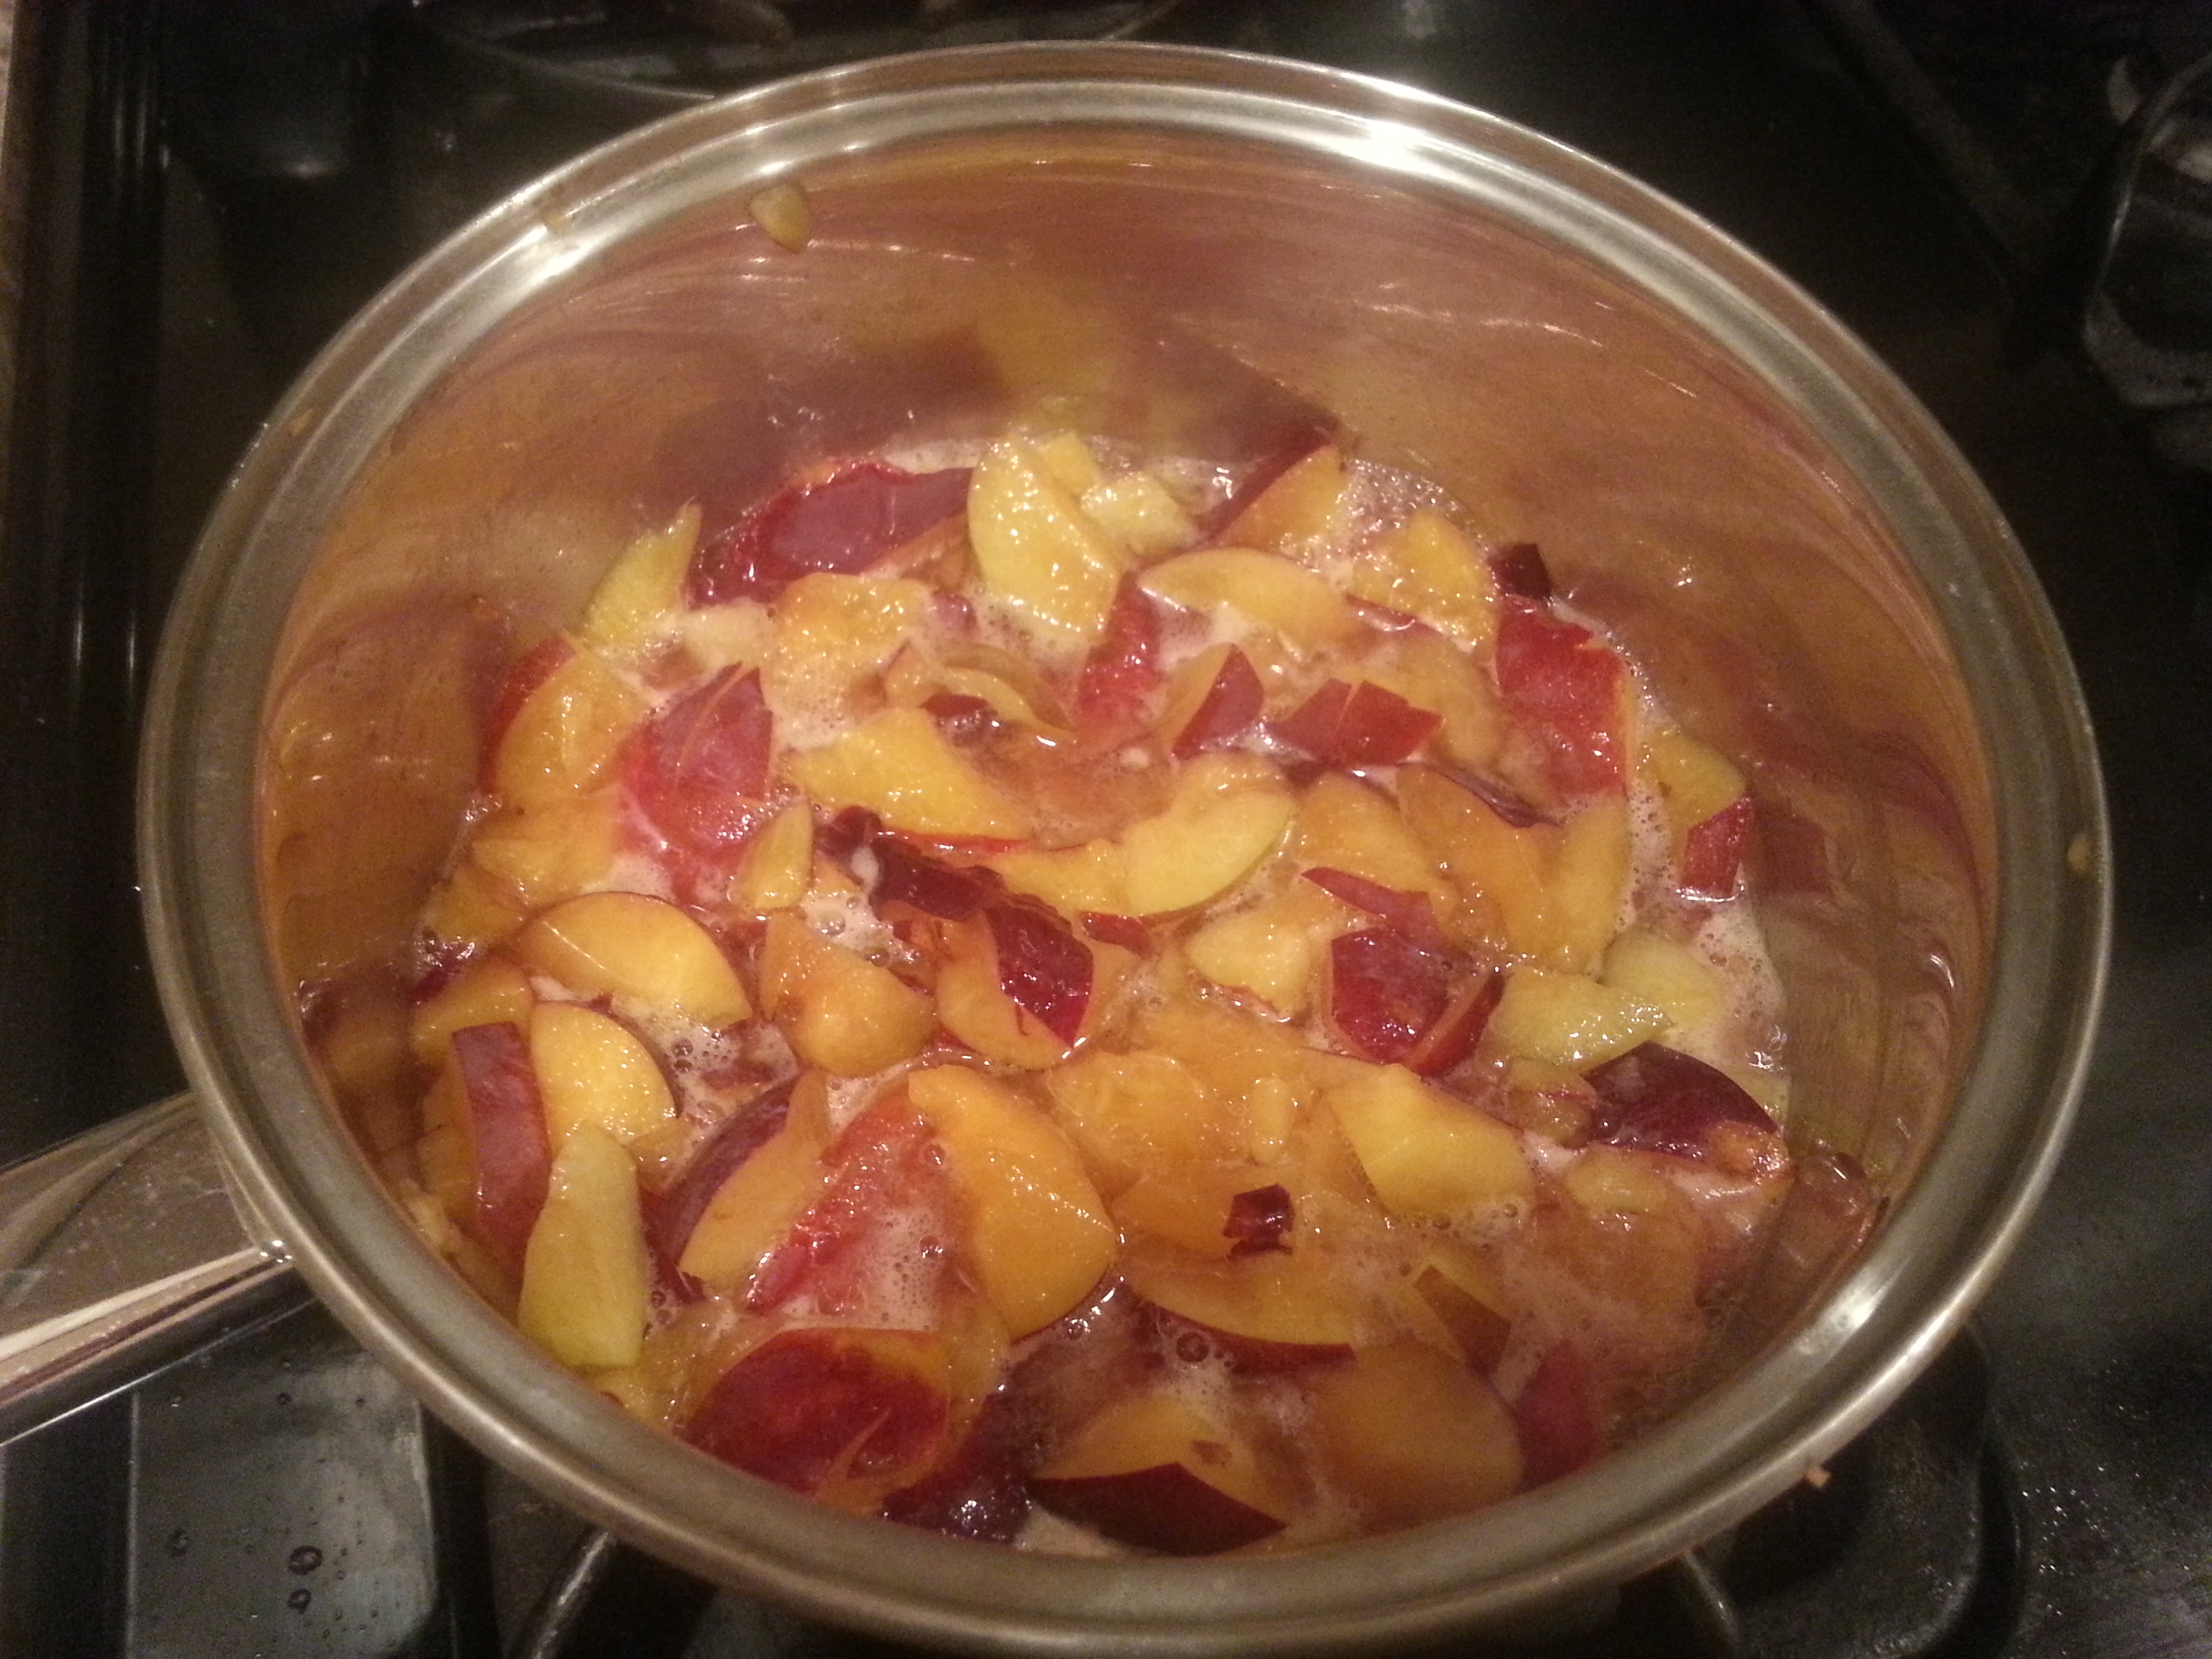
We waded around in the wet grass, getting devoured by mosquitoes and sorting the fruit into usable and unusable. The former we split between ourselves and the latter we composted. In the end I think I had something like six pounds each of apples and pears and a couple pounds of plums. And I was supposed to go away to Cape Cod for a week the next day. Cue frantic preservation. 20150821_160712_HDRI was saved by the fact that a lot of the pears weren’t completely ripe yet. I was… reasonably confident that they and the unbruised apples would last a week. But where to keep them? The house was hot, the refrigerator was at capacity, and I still hadn’t recovered from discovering my cellar mangoes full of little rodent toothmarks. Rationalizing that they were free anyway, I sealed them in a five gallon bucket in the cellar and tried not to think any more about it. 20150821_232313_HDRThe remaining apples and pears had some serious holes and bruises, and the plums were so ripe they were dissolving into my table as tried to figure out what to do with them. I’d never made preserves before, but I decided to take a stab. After some over-the-phone reassurance from my mother that I’ve eaten unprocessed jam my whole life and am no worse for wear, I sealed the preserves hot in sterilized old jam jars rather than processing them in the canner. 20150901_160639_HDRThe four light jars are apple and pear, heavy on the pear. The single dark jar is all that’s left of the plums after I ate quite a few. Apple butter was also on the menu. I found a great recipe for overnight apple butter, set the slow cooker on its way, and woke up the next morning to the smell of charcoal and cinnamon. It was not meant to be. 20150901_162219_HDROne week older and a tiny bit tanner, I opened up the bucket and was pleasantly surprised. There was some moisture on the sides and a touch of fuzz on a few stems, but no sign of the writhing mass of worms or near-sentient mold I’d envisioned. I had just enough pears for a gallon and a half of wine. It was meant to be a gallon, but I found myself with extra, and the man at the brew supply store made fun of me the other day for being small beans. 20150908_171547_HDRWith the remaining apples I attempted slow cooker apple butter number two. This time I added plenty of apple juice to keep it moist and woke up to…20150902_090559_HDR…Charcoal and cinnamon. It just wasn’t meant to be.

Bee Update!

I said we weren’t going to mess with the bees.

I lied.

Or rather, once I said we weren’t messing with them, we realized it had been a while since we had messed with them.

So today we messed with them. We went in for a checkup more than anything. We want to monitor their progress and get a sense of if and when we can do another honey harvest.

So we opened up the top honey box to see if the hive had made any progress. And I, through thick gloves and sunglasses and face netting, managed to snap this completely centered and focused bee in flight. How did I even do this?20150905_123353_HDRWe weren’t sure if they would have started storing in the new honey box or not. But they have! They’ve built the comb up in every frame and started storing honey in quite a few. These are the frames of the top hive body onto which they’ve built some little honey-filled burr comb extensions. Just like in those 2013 bottles, this late-season honey is noticeably much darker in color that the stuff we’ve already harvested. We tried a little bit, and I swear it tasted like elderflowers. Who knows. 20150905_123519_HDRAfter exploring the honey box, we delved into the top hive body. Production down here is also at full throttle. These bees are exceptional. If I have my own hive someday, I’m gearing myself up for some serious disappointment. The capped cells stretching into the distance are brood – each one contains an egg or larva that will eventually be a worker bee. In the foreground and running along the right edge of the frame are drone brood, identifiable by their bumpiness. The drones are the only males in the colony and kept around only for breeding with neighboring queens. I could say something wry about men here, but I won’t.20150905_123736_HDRInstead I’ll show you this picture of the miracle of birth! Most of the bees in this picture are workers going about their business with their heads in the cells. To the far left of the frame, however, halfway down, are two bees coming out of their cells headfirst. These are drones emerging for the first time from the cells they were laid in as eggs. About four cells northeast of them is another drone a little behind in the process, still breaking through his wax cap. All you can clearly see are his antennae. 20150905_123723_HDRIn a by-and-large positive checkup, there was one ill omen: propolis. The stuff acts as a sealant, and while it’s perfectly natural for it to be here, Kim says the fact that it’s so prevalent and so thick this early in the season means the bees think it’ll be an especially hard winter. This is bad news for me, because I still haven’t gotten over last winter. And it’s bad news for the bees, because they have a heck of a time surviving the cold. Our colony last year didn’t survive. Neither did something like 40% of the colonies in Rhode Island. We love these bees, though, so we’re going to do our best to keep them alive. If we do take another batch of honey, we’re only taking half at the most. And I’ll be cooking up fondant and hopping the fence to feed them when the snow’s too deep to open the garden gate. Hopefully they make it!20150905_123436_HDRBut for now the weather’s still warm and the bees are loving it. In fact, look who I found later in the flowers by my house! She’s not necessarily one of ours, but I’m choosing to believe she is. 20150905_133854_HDR

Kombucha?

IMG_7952

I didn’t know what kombucha was when I made it.

My friends Keri and Justin from the community garden invited me to their house for a festival of fermentation. I gave them wine. They gave me a sourdough starter, a ginger soda starter, and a kombucha starter. Tragically, the sourdough went bad in a way I’ve never seen anything go bad before. The ginger is still lying in wait. But with the kombucha I went ahead full throttle.

If you notice that some of my pictures actually look good, it’s because they were taken by my friend who has a real and very nice camera. Go see his other stuff on Flickr. Tell me which photos were taken on my phone as per usual and win a prize!

I learned everything I know about kombucha as I was making it. It is, essentially, fermented sweet tea. At the heart of that fermentation is a thing called a SCOBY. This stands for Symbiotic Colony of Bacteria and Yeast. Why not SCOBAY? Your guess is as good as mine.
IMG_7950Here’s a bird’s eye view of a SCOBY I grew all by myself. It’s about five inches across. I grew it myself because – and here’s the catch – every time you brew a batch of kombucha, you grow a brand new SCOBY. Often people don’t have the heart to throw them away because, well, they’re little guys! So they store them up in jars called SCOBY hotels and find people to pawn them off on.

When Keri told me, via text, that she had a SCOBY hotel she wanted to share with me, it never even crossed my mind that I wasn’t looking at a typo.

Pawning off is of course an unfair term. I was more than happy to take this disgusting little critter into my home and drink the fluid it lives in. And I’m fascinated by the thought that these SCOBYs are passed and propagated from person to person and mine might have a noble lineage. Maybe I’ll get into SCOBY genealogy.

My housemates were less enthusiastic about this new addition to our home. They’ve long since accepted my weird fermentations. Or at the very least they’ve grown accustomed to them. Kombucha was a step into the unknown, however. And the sight of this slimy, vinegary disc teeming with rapidly reproducing life (as well as the prospect of having to do a taste test) didn’t calm any hearts or stomachs. I reassured everyone that it was perfectly natural and healthy and supposedly tasty. I took it for granted that I was right. 20150801_141203

By the by, if anyone out there really knows their kombucha and can tell from the pictures that mine is actually grotesquely unhealthy, let me know, I guess. Here’s one of the SCOBYs drifting slowly from the bottom of its jar up to the top to join with its newly formed offspring.

So what’s the deal with kombucha?

Essentially, it’s fermented sweet tea. It’s often flavored and carbonated to make something like a healthy person’s soda. And boy, is it healthy. Whenever I wanted to read about it online, I’d first have to wade through paragraphs and paragraphs about probiotics and detoxification and anti-oxidants. Is any of it true? All I know is I had a cold, I drank some kombucha, and I still have that cold. Maybe I need to drink more.

The brewing process is excitingly easy. Brew some black tea, add a whole bunch of sugar, and let it cool. Throw in a SCOBY or two and some of the vinegary liquid it lives in, and fill up the remaining space with water. Rubber band a piece of fabric over the top of the jar and let it sit out of the way for around a week. You’ve just made kombucha. 20150806_142205_HDR

The sheer healthfulness of kombucha culture is a little bit of an obstacle. I read a lot of recipes, and according to every one I needed organic black tea and organic cane sugar, because the chemicals used to process the non-organic varieties can kill SCOBYs. And I had to use filtered water because the traces of lead in my taps would kill SCOBYs. Unfair though it may be, I couldn’t help but wonder if all these delicate SCOBY tendencies weren’t projected by the people who grew them. If I believe city water and non-organic sugar is bad for me, why wouldn’t it also be bad for my yeasts? So after following all the rules the first time, I brewed my second batch with tap water, Lipton tea, and Domino’s white sugar. Maybe my SCOBY felt healthfully bankrupt, but I didn’t notice any difference.

Though it was supposed to take as long as a week, the summer heat kicked my kombucha into overdrive and formed a new SCOBY in about four days. The taste was like a sweet apple cider vinegar. At this point kombucha is 20150806_142140_HDR
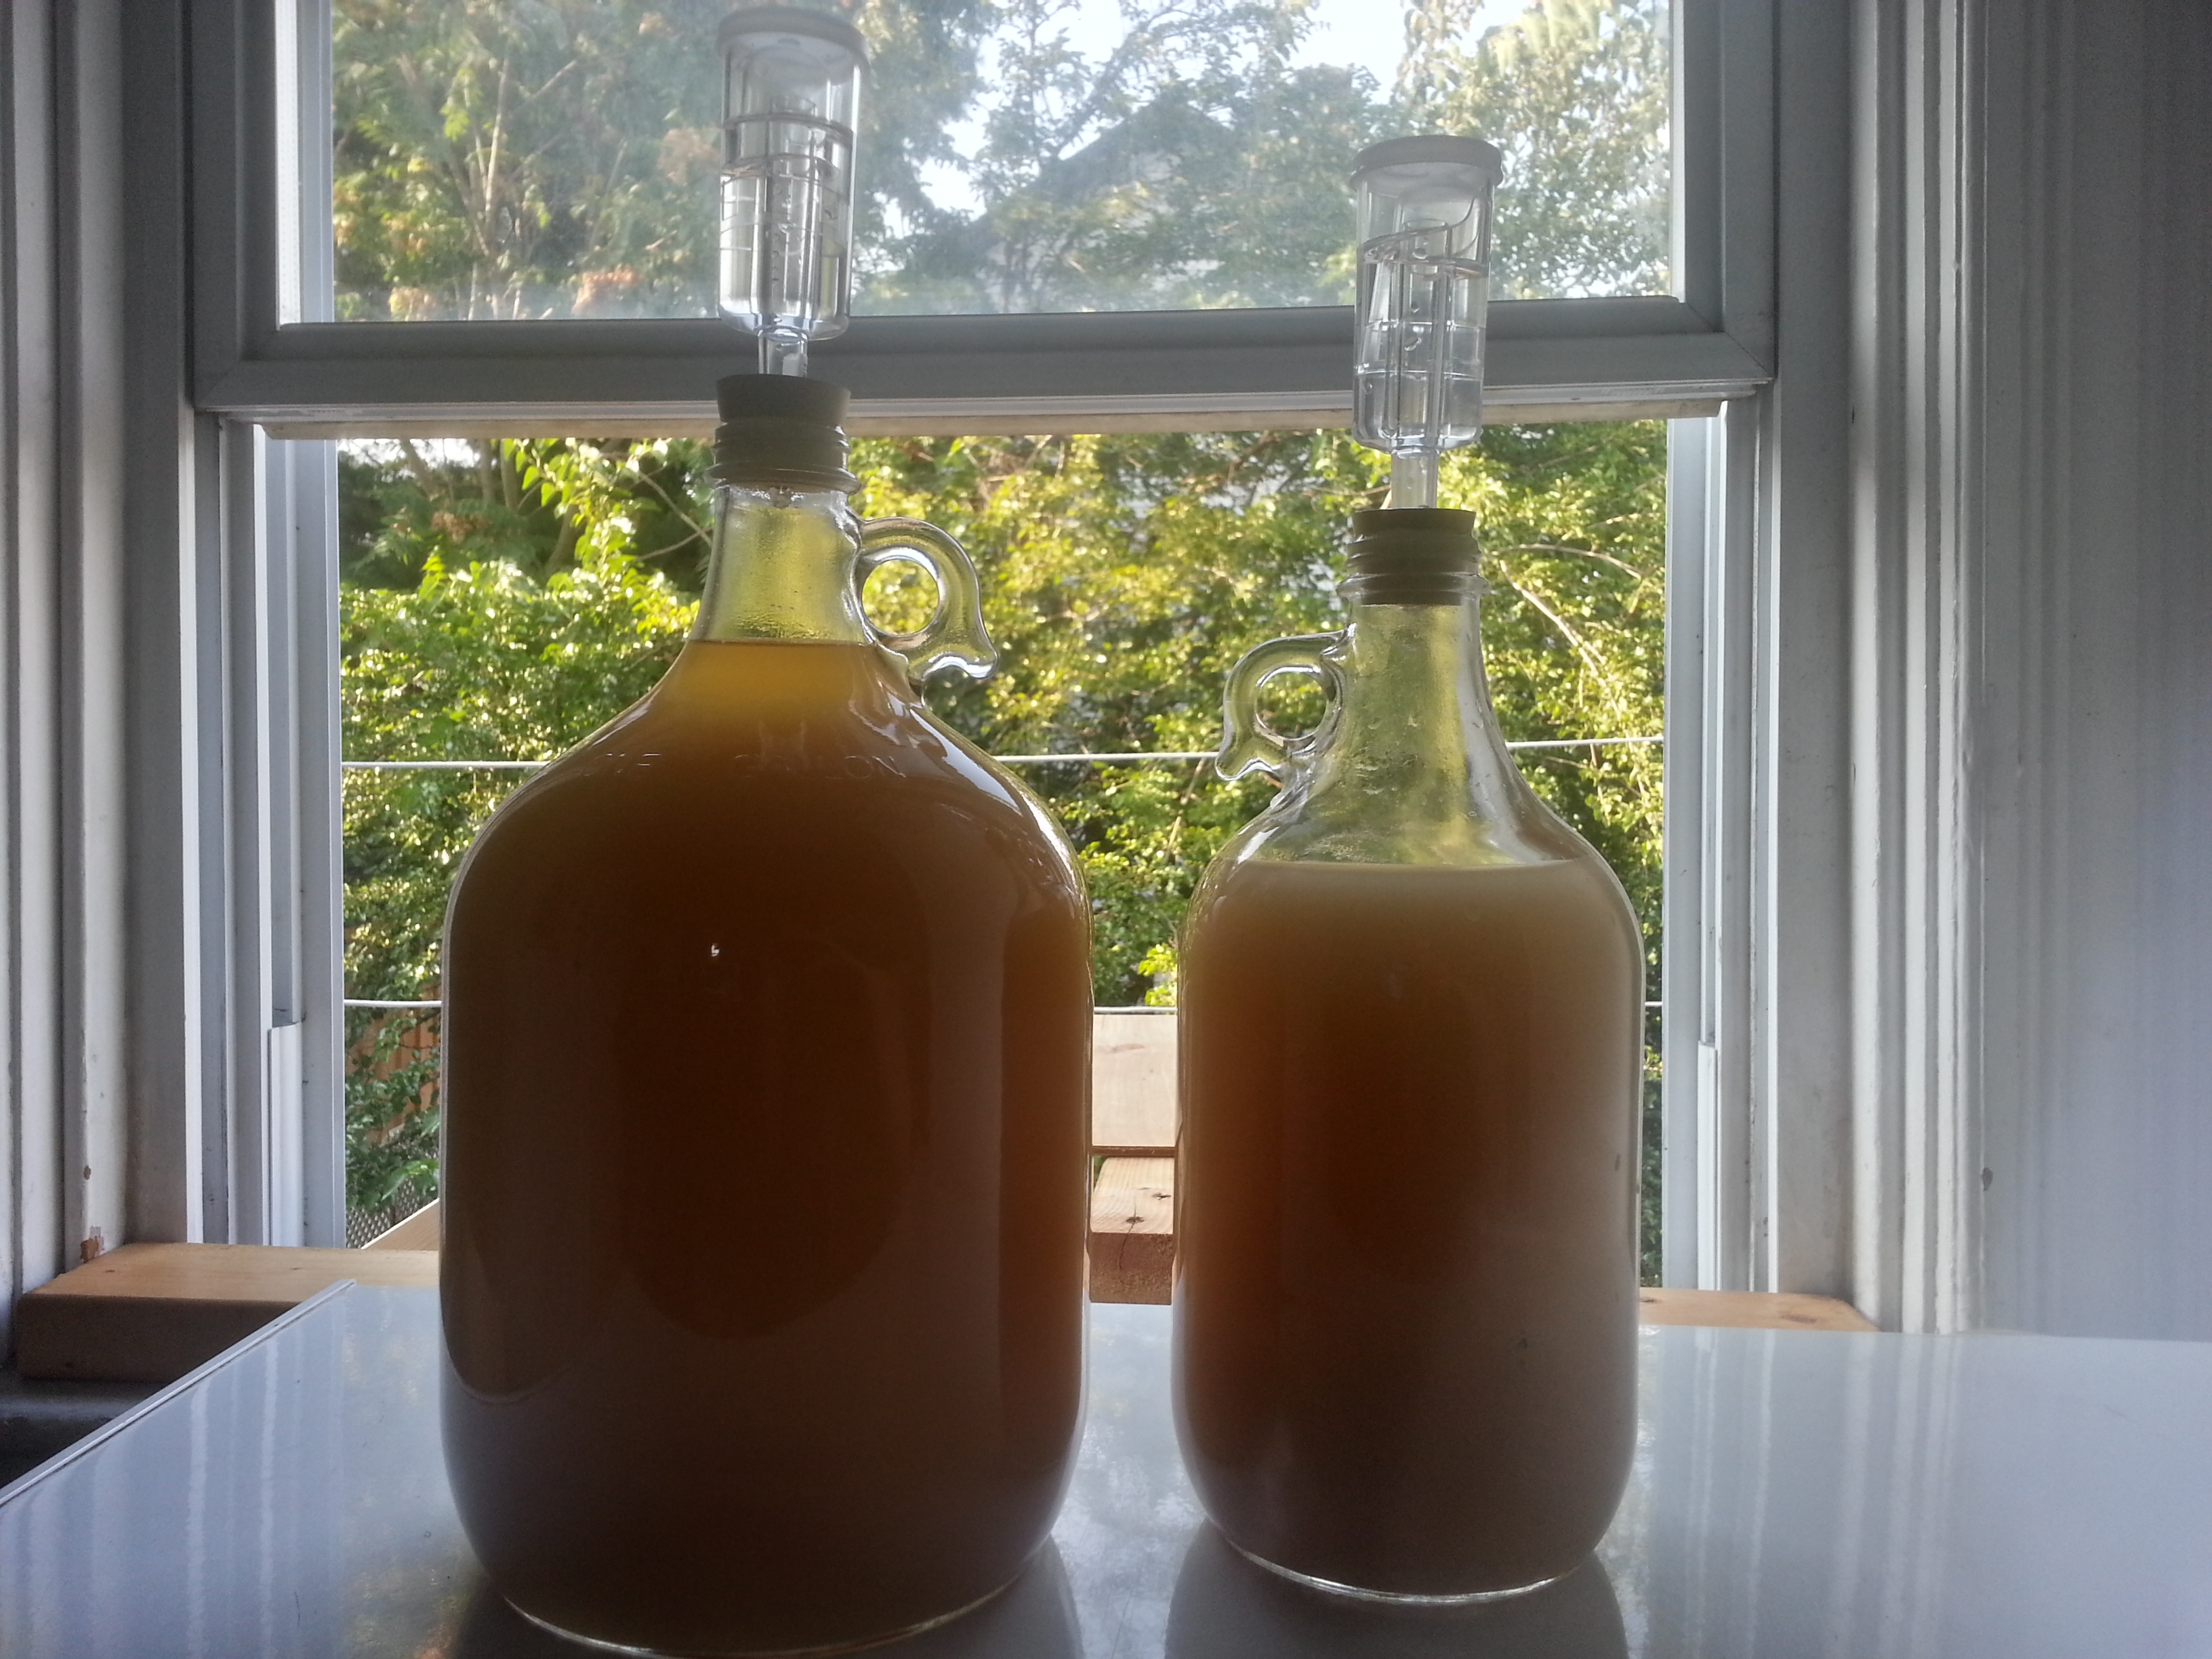
completely drinkable, but I chose to go a step further by doing a second fermentation with flavoring. This involved bottling the stuff in beer bottles with whatever I could find in the kitchen that I thought might taste good. I did lemon, honey, ginger, lemon honey, lemon ginger, honey ginger, and elderberry, to give you a sense of what I had lying around the house. I let the bottles sit out in the kitchen for about four days to allow the yeast to eat the sugars and carbonation to build up. Then I stuffed them all in the fridge to slow the fermentation way down and prevent explosions.

And the verdict? Pretty darn good! You can see from all the bubbles that the carbonation was a success. You can also see from that suspicious circle floating on the top of the glass that a new bottleneck-sized SCOBY began to form in each bottle. One slipped straight down my throat during an ill-fated afternoon refreshment. It was a little like eating a raw oyster.

20150806_204700
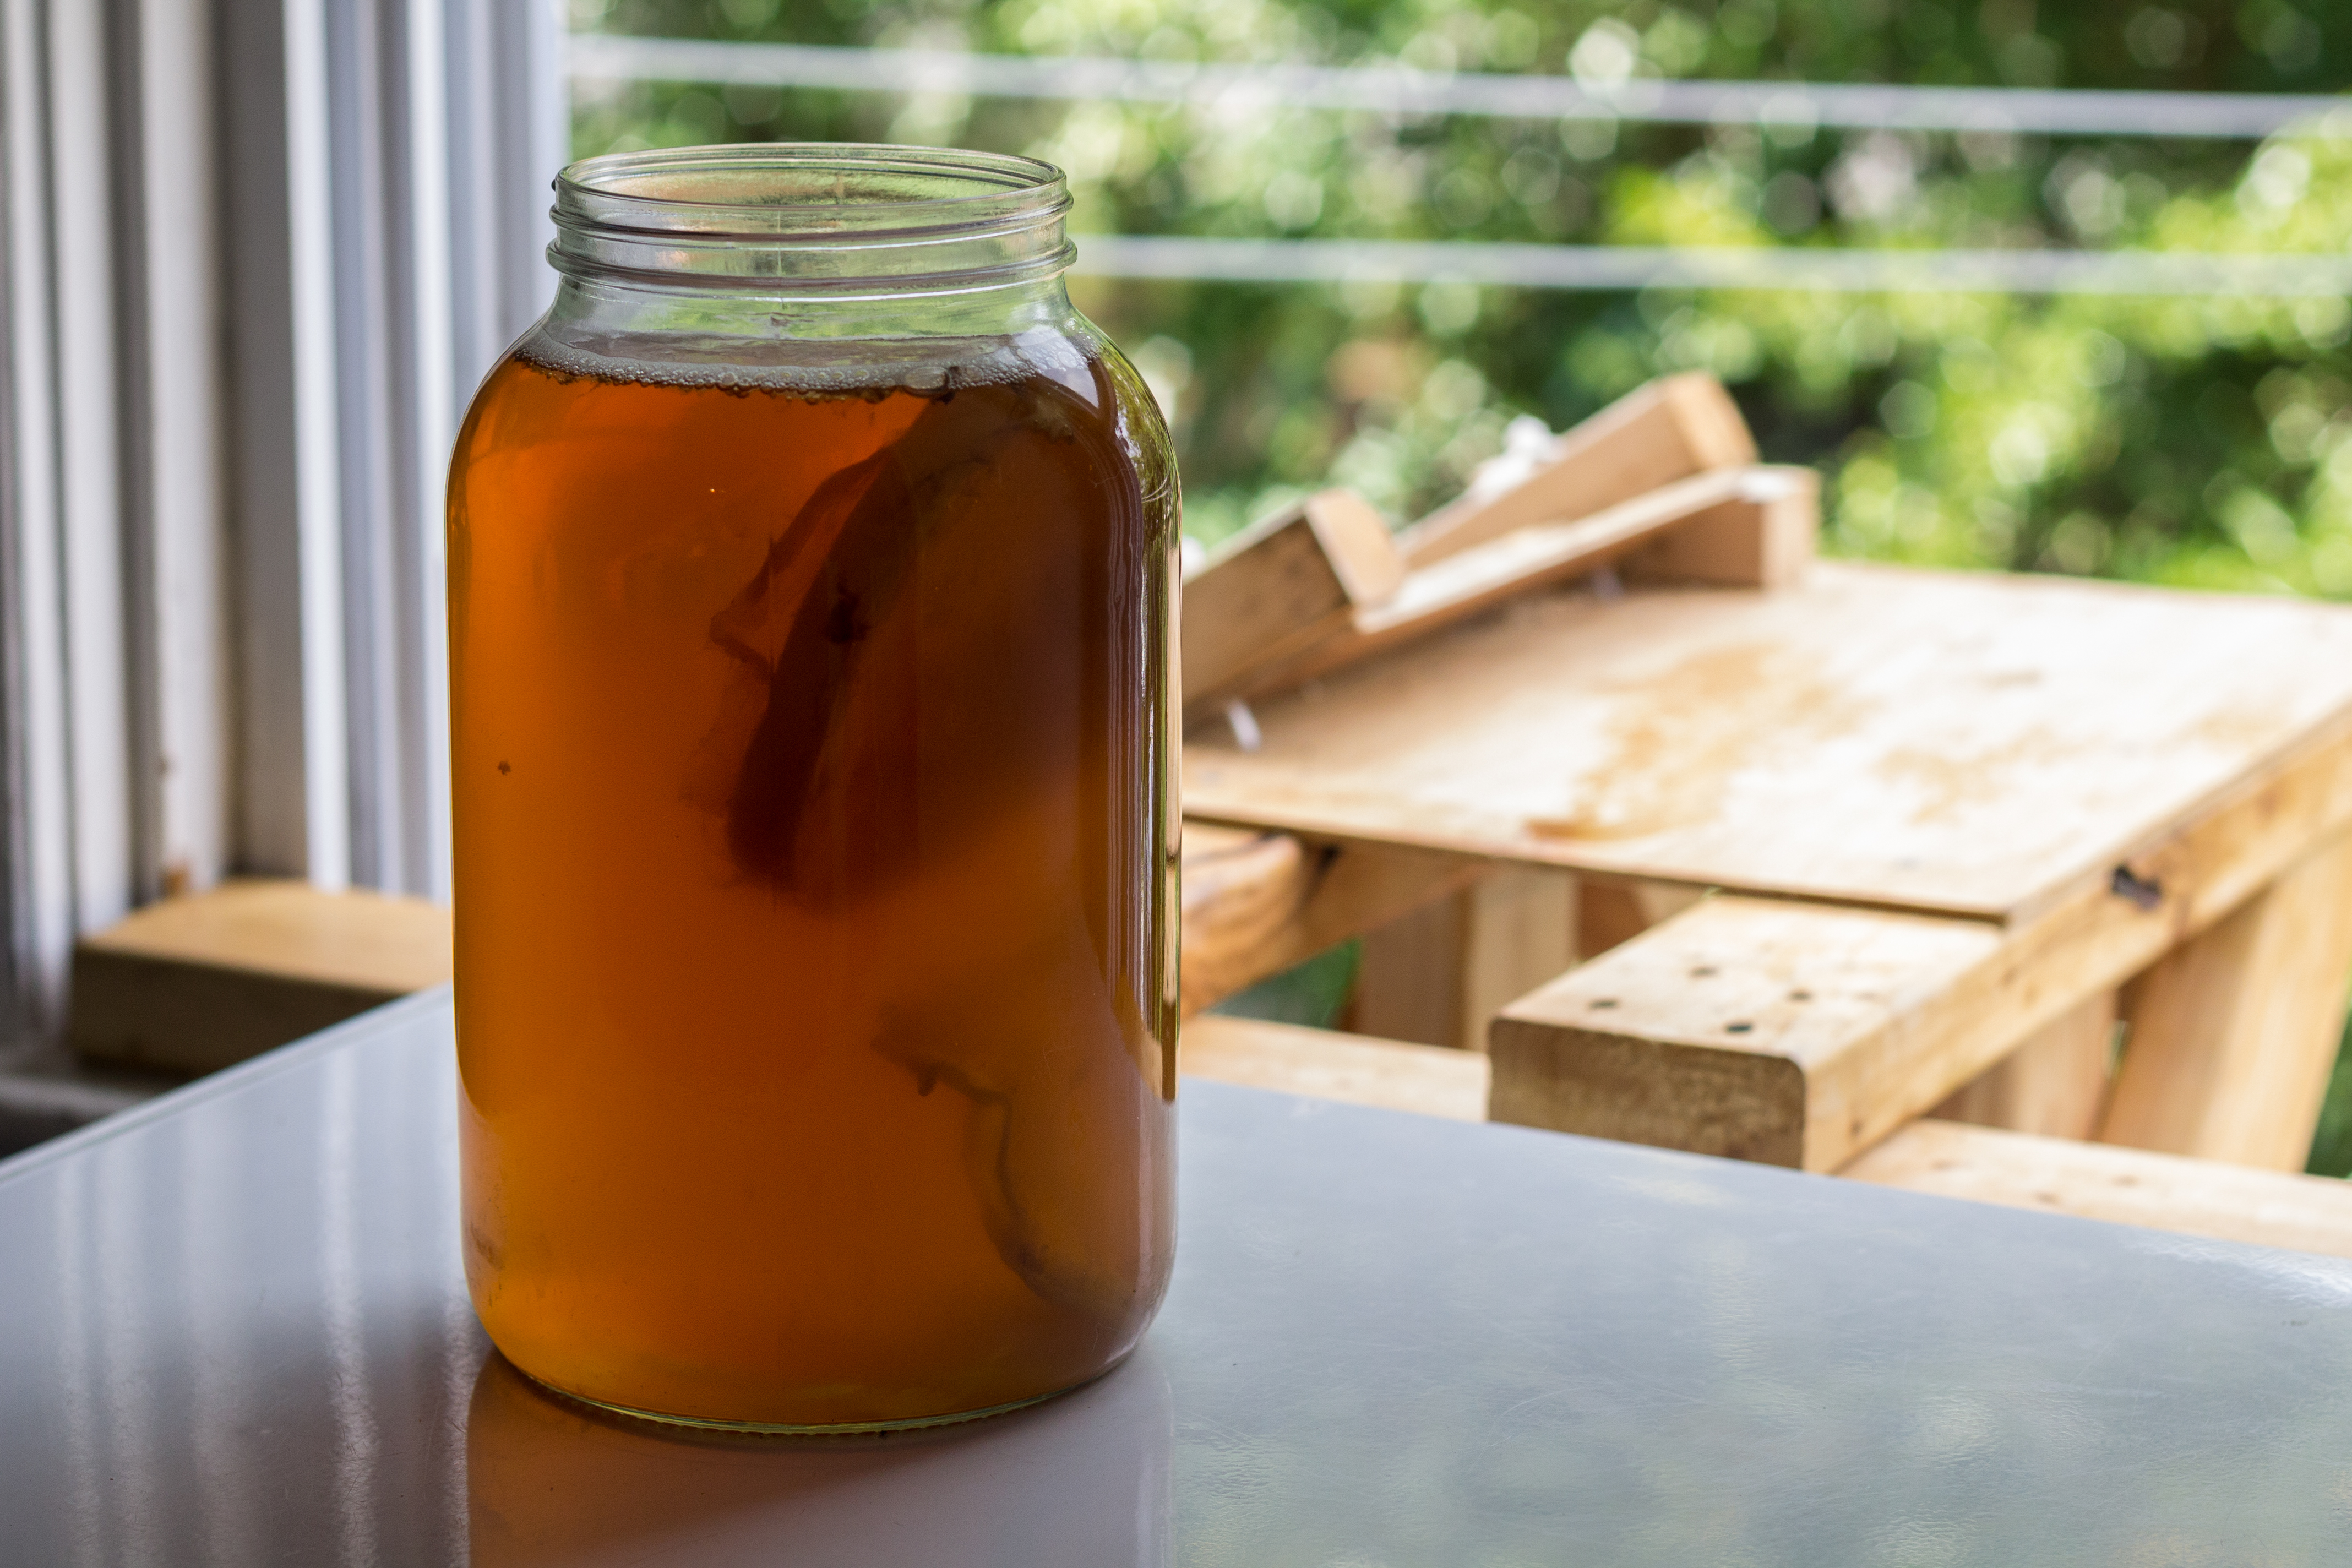
Sneaky little SCOBYs aside, the overall rating was widely positive.

Even though the good reviews came begrudgingly and with a little suspicion from those who actually saw it made.

We Did It!

Honey is here!20150810_142221

After giving the triangle board a few days to work its magic, we stole the full honey box right off the top of the hive. We got all suited up, lit two smokers, set the honey box in a wagon, wrapped it in a sheet, and booked it on out of there.

We needn’t have worried. The bees didn’t even seem to notice that we were making off with a month’s hard work, and the honey box was completely deserted. The triangle board could not have worked better!

Actually, it could have worked a little better. The bees who left late must have been tipped off that something was up, because some of the honey had disappeared. After a certain point, every bee must have taken a bellyful of honey when she went through the triangle board. It’s not a huge loss, though, and it’s likely just been moved to the next honey box.20150810_141555

We brought the honey box back to Kim’s house and set to work spinning. I’d heard of “spinning honey,” but I’d never known what to picture and certainly didn’t think to take the term so literally.

When the bees declare a cell full of honey, they cap it off with a layer of wax. It’s almost as if they know what we’re up to and are trying to make it harder on us. To clear a path for the honey to slide out, we have to remove every single cap. For the first frame we used a tool that looked like a pointy afro pick to poke them out. For the next frame we tried out an electrically heated knife that came with the rental equipment. It was a lot more effective. It was like running a hot knife through butter. Except the butter was wax.

20150810_142558

Once the first three frames were uncapped, we initiated the next phase. This contraption is the extractor itself. A tall cylinder with a hand crank on top, it’s a lot like an ice cream maker. Inside are three wire racks, each of which holds a frame. It’s like an ice cream maker with a rotisserie chicken cooker inside.

With the frames loaded up, it was time to spin. And spin is exactly what we did.

Turning the hand crank whirls the racks around and the honey, uncapped, gets flung out of the comb by centrifugal force. It hits the walls of the cylinder and slides down to collect in a reservoir in the bottom. I gave it 200 cranks in one direction, flipped the frames, and gave it 200 in the other direction. I threw in another 50 for good measure at the end. Honey

Here I am getting into the spirit of things.

Between the hot knife and the spinning, we got a nice two-man procession line going. Before long we had all nine frames extracted and were ready to move on to filtration. At this stage, the honey contains a lot of wax and more than a few stray bee parts. You gotta strain. Disastrously, our rental equipment was missing its filter! My huge brewing straining funnel stepped up to the plate, though, and performed admirably. You’d never even know it wasn’t part of the setup.11872238_10206296204155550_5329416799319933996_o

We let the honey drain out of the extractor into the funnel, then through the funnel’s mesh into the bucket below. Honey doesn’t move fast, and the day took on a slower pace from this point forward.

When the extractor was empty, we could move the bucket and funnel mess up to the table and begin bottling into 1 lb and 1/2 lb jars. I also set aside three pounds to make into mead. 20150810_160935

We opened up a bottle of my previous batch of mead to sip while the honey drained. I have to admit, this honey has a richness to it that the store-bought stuff I’ve been using in my mead lacks. I’m so excited to brew with honey I’ve actually raised and harvested myself, but I’m afraid this will ruin me for the cheap and easy method.

So it goes.

I’m also becoming more aware of the tremendous range of flavor honey comes in. So many mead recipes I’ve read call for specific blossom varieties, a distinction I’ve never really taken to heart. I thought there might be notes of specific flavors that came through mainly to those who were looking for them. Kim and I sampled a few different honeys, however, and I was bowled over by how different each batch was. We tried a jar from our garden in the spring of 2013. (The last jar in existence, Kim said. There’s a dark finality in small artisinal batches, man). It tasted, for all the world, like flowers. Way beyond slight notes. 20150810_162330

Then we tried a jar from the fall of the same year. From color alone, you could tell something was different. It was dark. Almost brown. And it tasted, I swear, like autumn. It was smoky and so rich. I’ve never had honey like that.

Then we tried a store-bought bottle from the Caribbean that Kim had been given as a gift. She says once you become an acknowledged “bee person,” people start giving you honey stuff. I’m alright with that. This bottle was completely different. It was dark, but not thick. And while it was sweet, of course, it had a spiciness to it. It was almost hot. I’m not sure I’d put it on my granola, but it was fascinatingly different.

But enough of my poetic honey waxings. (Thank you ladies and gentlemen, I’ll be here all week). 11857549_10206320240276438_2126174302_n

All told, we collected about 30 pounds of honey. Not bad at all for just one month with the honey box! At this rate, we may very well get another harvest in. We’ll be selling the honey within the community garden and using the proceeds to offset bee costs.

Maybe buy a hot knife of our very own.

Robbing the Hive

The bees must be so confused.20150808_110149

Soon we’ll be harvesting the nearly full honey box, so we’re taking care of a few things in preparation.

First we put together a new honey box to replace the one we’ll be thieving. A lot of last year’s honey box frames fell prey to a moth infestation, and rather than risk carrying any eggs over, we bought and constructed all new frames.

All bees need to get going is a nice hexagonal pattern. Really, they don’t even need that, since the hollows in old trees they might frequent in the wild don’t have anything quite so factory-perfect. It’s a good nudge in the right direction, though, and it encourages them to build in a way that keeps the frames easily extractable. 20150808_104829

This is what a frame looks like before the bees have their way with it: a big flimsy game of Q*bert.

A lot of beekeepers buy these sheets printed in plastic, but we’re going au naturel and using sheets printed in pure beeswax. After the frames have been used, we put them in a solar wax melter, and it’s much easier going if the whole thing just melts away without plastic getting involved.

With our new frames assembled, we opened up the hive. This time Kim let me do all the prying open and heavy lifting. I took off the cover and set aside the existing honey box. Here the bees are spilling up out of the top of the hive body and through the queen excluder among the burr comb they’ve built between it and the honey box. As you can see, I’m still rocking my stupid taped-up pants. They’re my bee pants now.IMG9583171

Rather than go poking around in the hive body, we set to work building up all our new layers. It’s all about getting in and out quickly before the bees get too aggravated. Our colony is outrageously good-natured, and every time we’ve managed to accomplish our goals before they get territorial. They’re so friendly, in fact, that I have yet to be stung.

Actually, I have never been stung. Ever.

The day might come that I learn I have a severe allergy, and that’ll be the end of an illustrious career. I hope not.

Anyway. We put the fresh honey box (the white one here) on top of the queen excluder. The lighter tan strip on top of the honey box is a shim. It’s just a wooden frame with a circular hole drilled into one side. To keep the bees from returning to the honey box, we have to close off the door that normally sits above it. The shim makes up for the lost airflow.IMG9595091

The thing I’m putting into place on top of that is a triangle board. Under that hole is a piece of mesh covering a series of wooden triangles. Here’s a good picture if that lame explanation meant nothing to you. It’s essentially a one-way bee maze: easy to get out of but hard to get back into. Finding her normal door closed, a bee makes her way through this maze and either out the shim hole or down into the new honey box. Ideally, this happens dozens of thousands of times until all the bees have evacuated.

On top of that we put the old, full honey box. And on top of that we put the lid with its door sealed. On top of that we put two cinder blocks to hold the whole thing down in case of heavy winds. It is very nearly my size now. I was fine disassembling and reassembling the hive. I wasn’t overcome by the weight of the honey or the swarm of bees. But when it came time to put the full honey box back on top, I couldn’t do it on my own. I was just too darn short to lift something that heavy and that full of bees that high.IMG9593391

I may or may not be allergic to bees, but I most definitely am and always will be five foot two, which might put an end to an illustrious career if bee hives get any taller than this.

I hope they don’t.

I’ve published this on the Fox Point Community Garden blog, too. Go check it out!