Steeped Grains

It’s beer time again.

My last two batches have been attempts at all-grain without the right equipment. I was trying to Brew in a Bag, which is a legitimate technique, but only if you understand how it works. I didn’t, and wound up diluting my wort and supplementing with leftover dry malt extract to get the sugar content back up. This time I did basically the same thing.

But I did it deliberately. 

So it’s fine.

some_text

For my recipe I’m following a completely unvetted concoction from the American Homebrewers Association, because I’ve lost control of my life. And because the real recipes are behind a paywall.

It’s a steeped grain recipe, which means you soak a small amount of specialty malted grains in hot water for flavor and color, then you make up for the missing sugar with malt extract.

To start I measured out my specialty malts by weight.

some_text

Here we have 8 oz of 20L crystal malt, 4 oz of 80L crystal malt, 4 oz of CaraVienne malt, and 5 oz of wheat malt, stored attractively in fruitcake bowls of Christmases past.

some_text

Up until now I’ve been buying grain from the local brew supply store and milling it on site. This leads to a couple of problems, though. For one, I can only use the grains available in the store. For two, I have to mill it all at once, seriously reducing the shelf life of any grain I have leftover. It’s possible to buy milled grain online, but that only solves the first problem. To make things easier on myself, I invested in a grain mill.

I hope to one day be as rugged as the man on the box.

some_text

This was my mill’s maiden voyage, and unfortunately it showed. The whole thing had a metallic, oily smell. Upon reading the directions, I learned you’re supposed to give it a good scrubbing first.

some_text

So into the sink we went. Only a minor detour.

some_text

With my mill fresh and clean, I got it all assembled (in the living room, where the table was thin enough for the clamp).

some_text

And I got to milling.

some_text

With a nylon sac in a bowl underneath, I ground all my specialty grains into what was probably too fine a powder for what I was doing.

some_text

But what are you gonna do? Next time I’ll try to set it to a coarser grind.

some_text

I tied off my bag and submerged it in 2 gallons of water at 160F for half an hour. Once the time was up, I squeezed the bag dry and set it aside.

some_text

I added 6 pounds of light LME to make up the fermentable sugars the grains couldn’t supply, and I set the whole thing boiling.

some_text

For my hops I used Nugget, Cascade, and Nelson Sauvin, a fancy guy all the way from New Zealand that’s supposed to have a well-defined, citrusy quality. My Cascade hops weren’t quite the recommended AA, so I had to do some serious math on the fly.

some_text

After an hour of boiling I took the wort off the stove and aerated it by sloshing it back and forth between two pots. The real glory of working with specialty grains is that you can start with a small amount of liquid and dilute later. This meant I could pick it up and fling it around the kitchen all by myself.

some_text

With my wort aerated, I pitched the yeast and filled the carboy up to the 5 gallon mark with water. I like to think that this method adds some much needed extra aeration.

some_text

After that I sealed it up and left the yeast to do their thing. By the next morning the fermentation was off to a good start. Nine days later I dry hopped with more Cascade and Nelson Sauvin.

some_text

I plan on bottling as soon as I can get my act together. I just hope the recent heat hasn’t been doing anything untoward in there.


Uncle Beth’s Home Grown Mead

Last November Kim and I started a gallon of mead with our bees’ honey. Since then I’ve been racking it occasionally but mostly forgetting about it. I discovered it again recently and declared it ready to bottle.

It was, like everything I make, extremely dry and boozy, so I back sweetened it with 1/4 cup of honey. Booziness aside, I’m very happy with it. It’s so different from the store honey mead and, dare I say it, better. I’d say it tastes richer and has a stronger honey base. There’s also a lot less of it. I’ve been free with the 5 gallon batch of mead, taking it to parties and pawning it off on friends, because 5 gallons is a lot to have of anything. One gallon, on the other hand, filled just 11 beer bottles. Beer bottles are perfect for gallon batches, because they can be portioned out more slowly.

They’re also perfect for my small homemade labels. Technically this was the prototype for the official label, but I think I like it more.

IMG_4036

All-Grain Madness

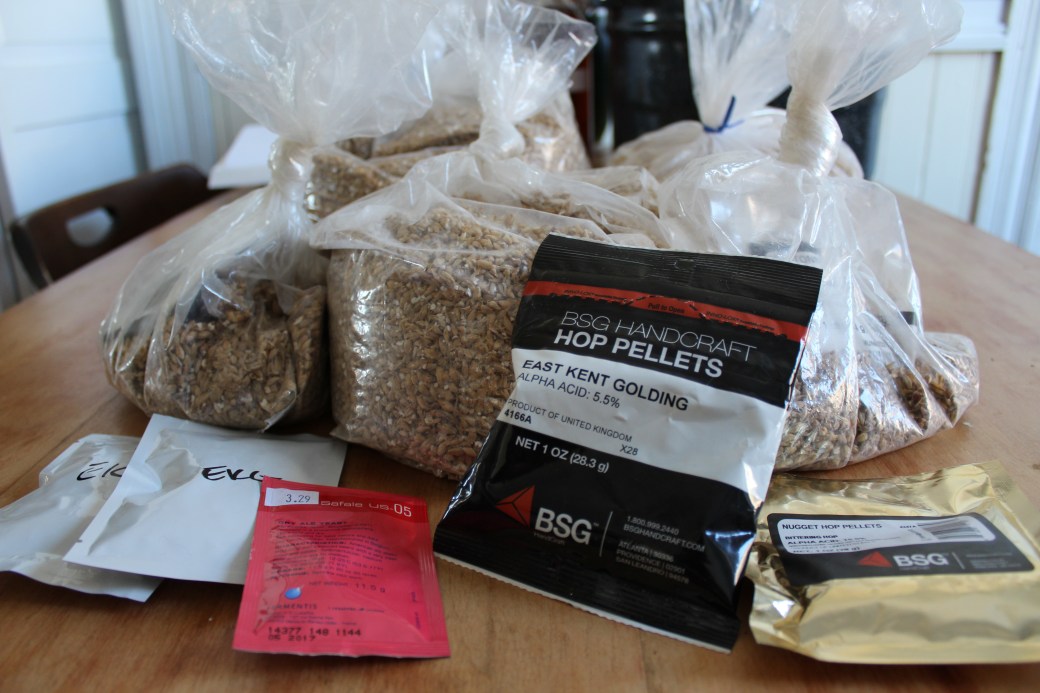
I got my big pot. It holds eight gallons, which is huge for a pot. And it’s perfect for brewing five gallons of all-grain beer. I inaugurated it with the grain I bought too many weeks ago at the brew supply shop to make an IPA recipe from my John Palmer book. Milled grain is supposed to be good for about two weeks. I’d had this for… longer. But this was a learning experience, so I let it slide.

IMG_0252

How big is this new pot, you ask? Big enough that I fit inside the box it came in. You can use this picture as a fun reference for size and for the low quality of the pictures I was taking with my phone.

20160118_195740

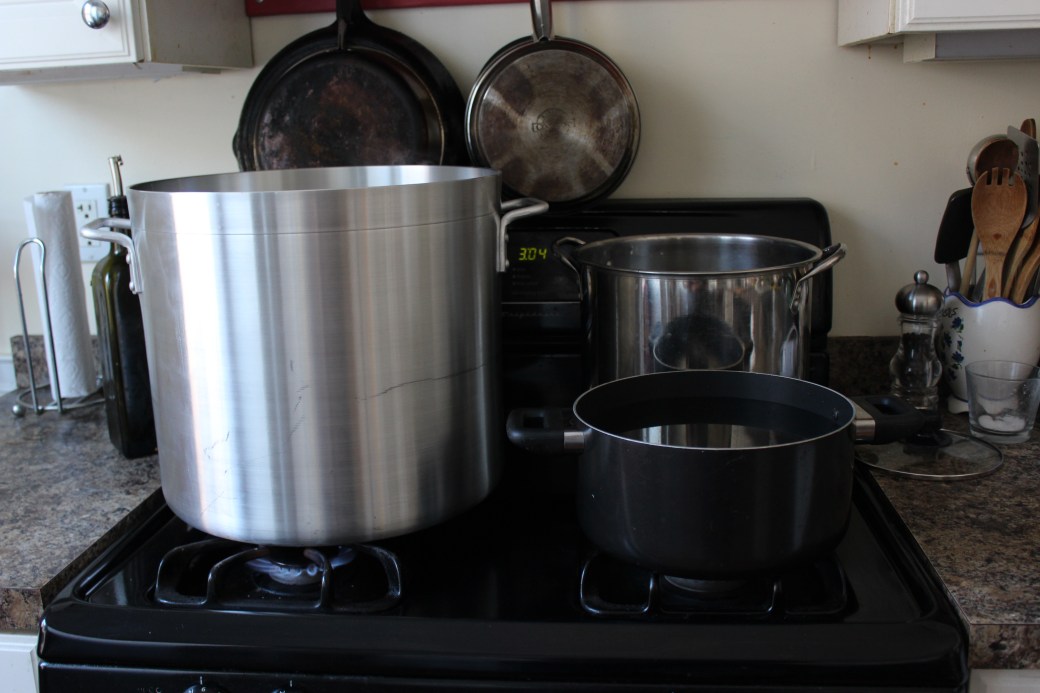
The pot itself comfortably takes up two burners on the stove. Every pot in the house pitched in for this mission. In the big pot I heated about 5 1/2 gallons for the mash, which is the first mixture of water and grain. Between the two little guys on the right I heated 3 1/2 gallons for the sparge, which is the water flushed through the grain a second time to pick up any sugars the first bunch missed.

IMG_0255

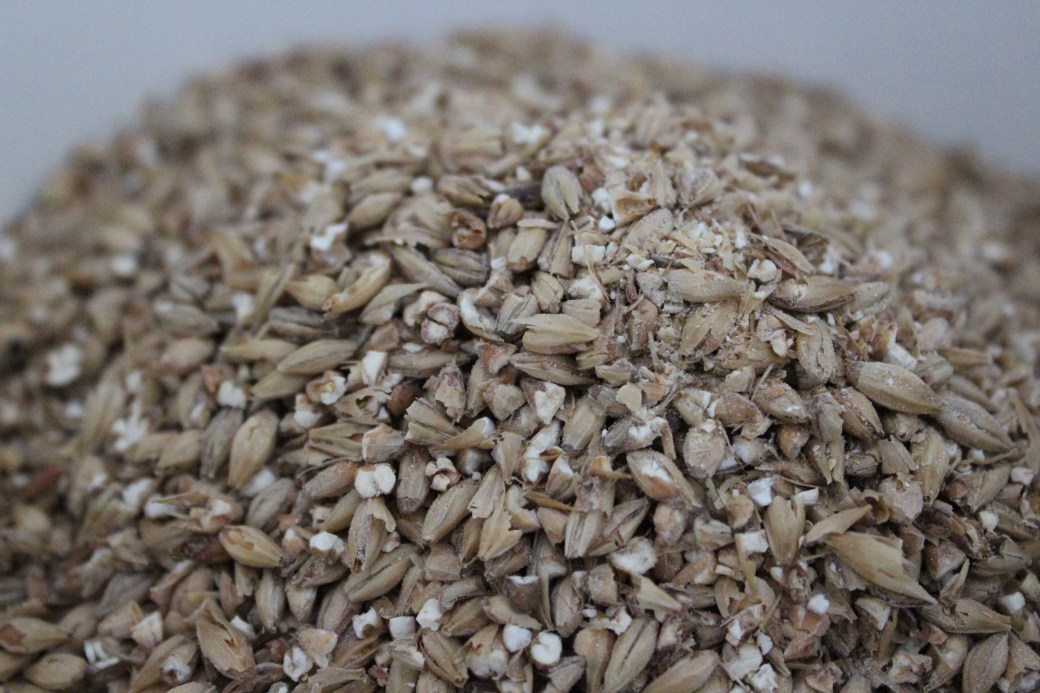
It takes a huge amount of grain to brew 5 gallons of beer. The recipe called for 10 pounds of pale ale malt and half a pound each of crystal malt and Munich malt. I managed to find all of these at the brew shop. In fact I chose this recipe because I could find them all.

IMG_0263

I heated the big pot of water to 165F. It was at this point that I started to realize the shortcomings of my equipment. My book recommends using a big cooler as a mash tun. I don’t have a big cooler. (Strictly speaking, I do, but we use it for camping and it’s seen too many opened packs of days-old hot dogs for my taste).

The purpose of a mash tun is to hold the mash at a temperature of 152F for one hour. I have a gas stove, so keeping a pot at a more or less constant temperature isn’t a problem. But the book specifies that you should add your water to your grain, and not the other way around. Well, I’d just heated my water in the only stove-worthy container big enough to hold it. So I added the grain to the water, and not the other way around. I just hope I didn’t “thermally shock the enzymes,” as the book warns.

IMG_0277

Checking the temperature frequently and strategically turning the burners on and off, I managed to keep the mash at a more or less constant 152F for an hour. After that, it was time to coerce Ben into helping me. Once I had a full batch of all-grain beer in front of me, my worst suspicions were confirmed: There is no way in hell I can move this much weight around on my own. I either have to get to the gym or always brew when someone else is home.

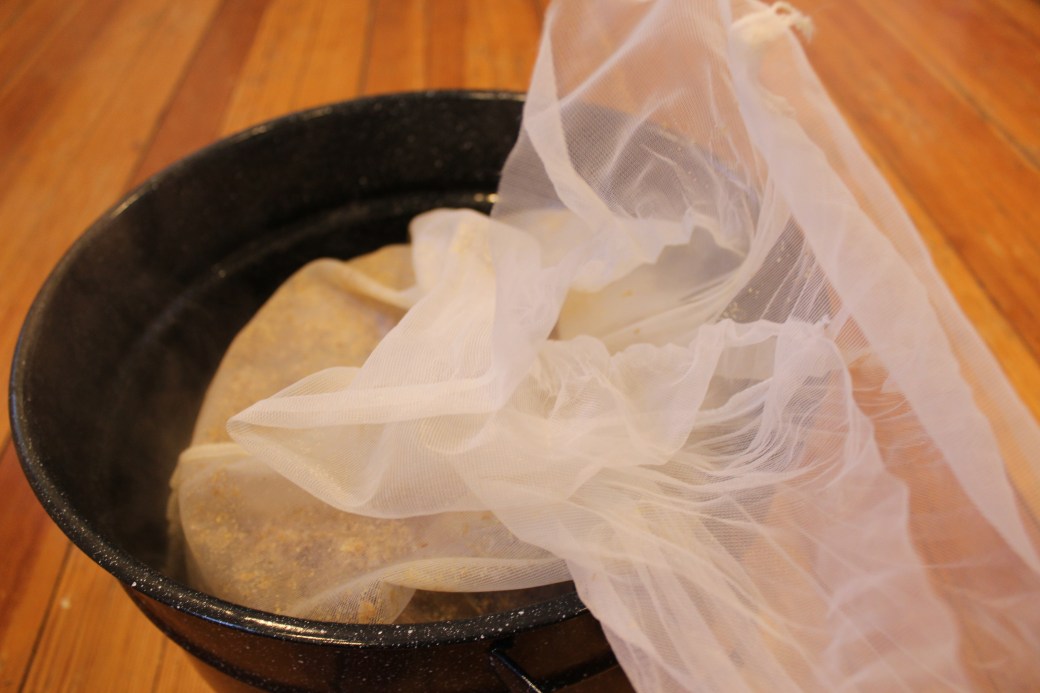
The point of this transfer was to separate the grain from the liquid, which at this point is called wort. I lined my 7.8 gallon bucket with a nylon sack held in place with clothespins. This was an idea hacked together on the spot, and I had no idea if the sack would rip apart or if the clothespins would go flying. Even though I couldn’t lift the pot, I lent a supporting foot.

IMG_0287

Surprisingly enough, the sack and clothespin method worked well. Unfortunately at this point I discovered another big thing I was missing. In home brewing a mash tun usually doubles as a lauter tun, meaning it has a screened false bottom and a spigot. Open up the spigot, and the wort drains out slowly through the grain. My nylon sack served more or less as the false bottom, but what about the spigot? I had no way to drain the wort slowly.

IMG_0294

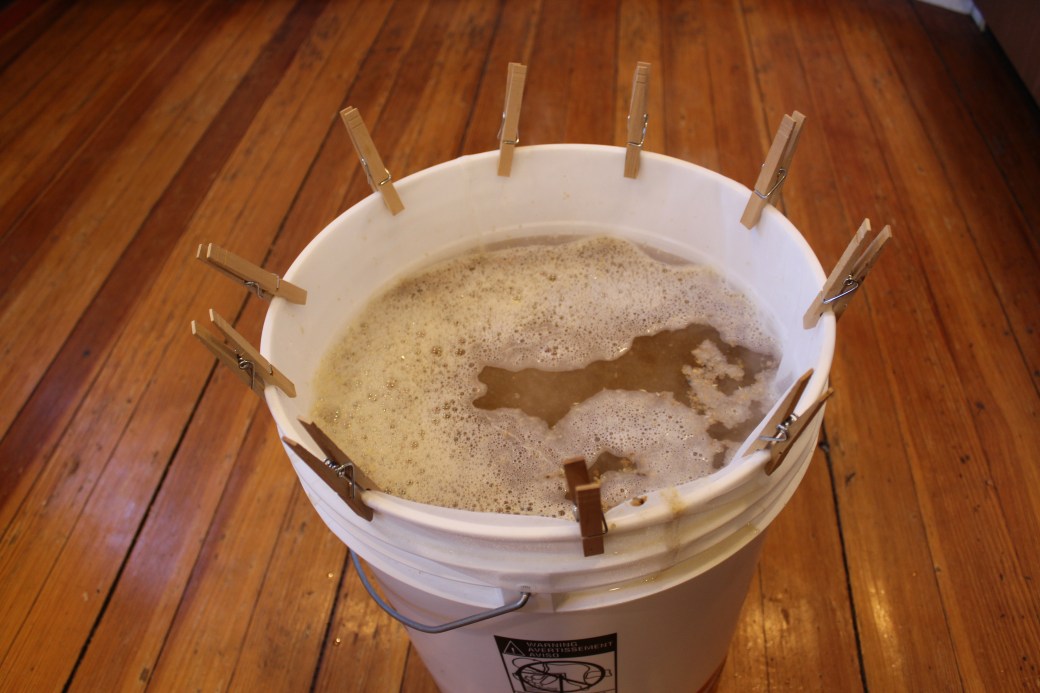
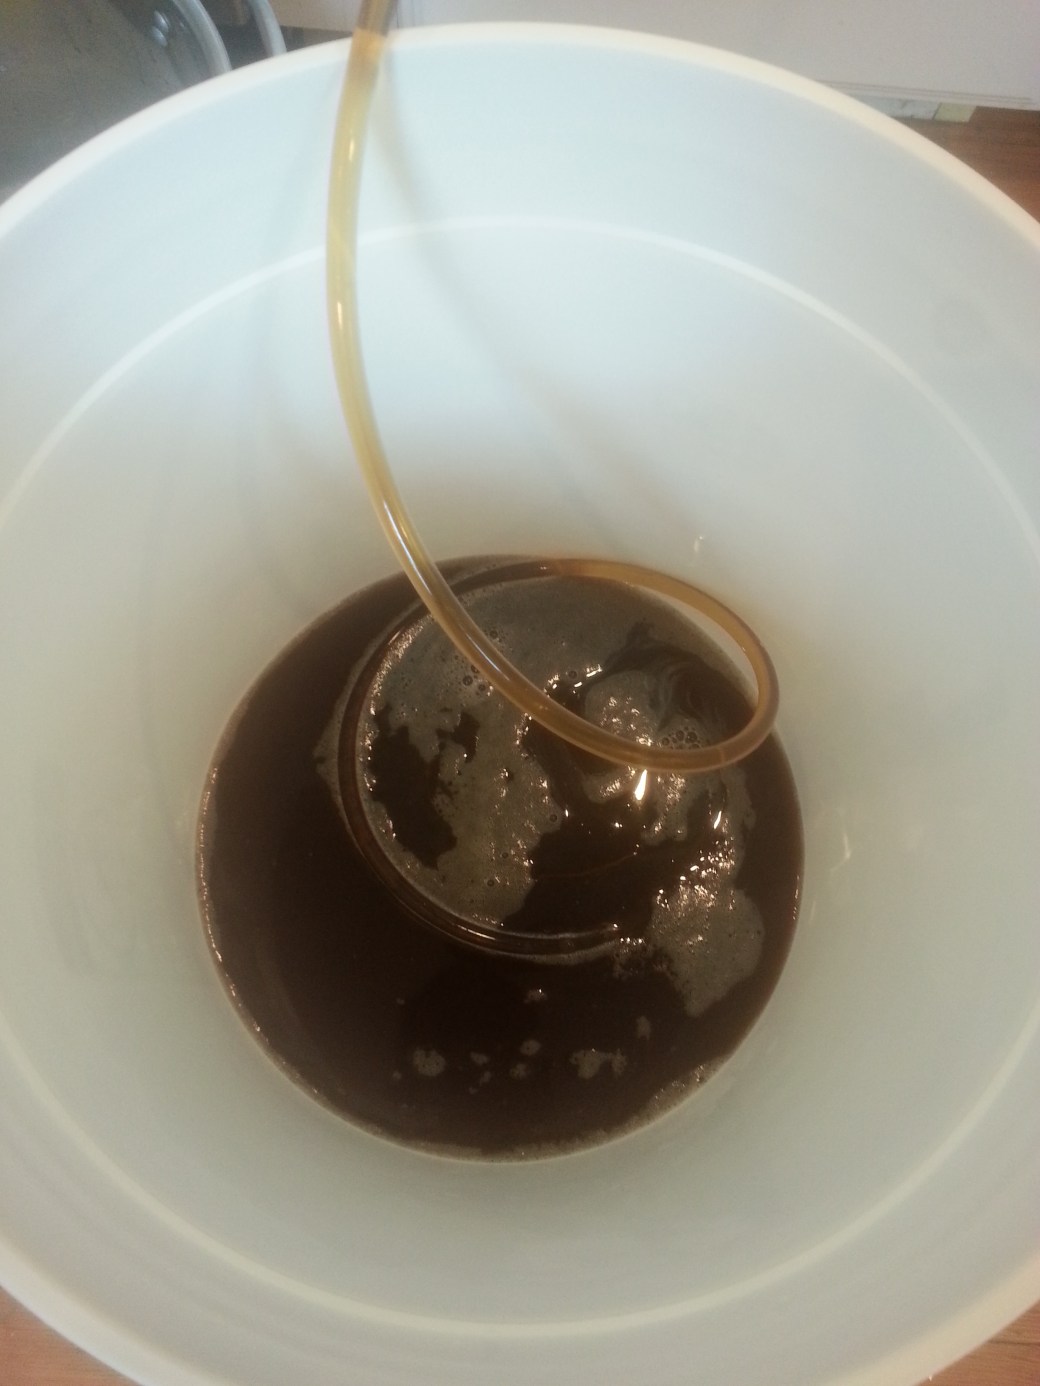
What I wound up doing was simply lifting the sack out of the bucket. (Thank God it held). This gave me something like 3 gallons of wort. I think this was more or less fine, but it was the next step that did me in. I’d heated an additional 3.5 gallons of sparge water to 165F, because that’s what the book said to do. What you’re supposed to do next is close your spigot, let your grain sit in the sparge water for fifteen minutes, then open your spigot and let the wort drain out. It’s supposed to take as long as an hour. I didn’t have a spigot, though, so I couldn’t let the wort drain out slowly. Instead I let the grain sit in the sparge water for fifteen minutes, and then I lifted the bag of grain straight out. I effectively eliminated an hour’s worth of sugar extraction. Whoops.

IMG_0300

I didn’t realize this, of course, until after I’d combined my first runnings wort with the sparge wort and took a gravity reading with my hydrometer. According to the book, I was to take my gravity points (22), and multiply them by the number of gallons of wort I’d produced (7 – since I’d effectively steeped my grain like tea rather than drip it like coffee, I’d wound up with more than my target 6 gallons). Then I was supposed to divide that number by the pounds of grain I’d used (11).

All this was to determine how much sugar I’d extracted from my grain. According to the book, a good target number was 28, though higher would be better. I got 14. After some initial panic, I remembered that hydrometers are calibrated for 59F. My wort was at about 140F, meaning my reading was something like 12 points lower than it should have been. So if my gravity was actually 34 points, that meant my extraction number was more like 22. Still lower than 28, but not disastrously low.

I still had my big bag of grain, and I probably could have somehow steeped it in the wort for longer. Space was at a real premium, though – I had nothing big enough to hold my seven gallons of wort together with my sack o’ grain. What I did have was some leftover dry malt extract from my last batch. I stirred it gradually into the wort until the hydrometer reached a level that gave me an extraction number of 28. I think I accidentally brewed a partial mash batch.

IMG_0304

The despair of my low gravity behind me, I set the wort to boil on the stove. I boiled it for an hour, adding Nugget and East Kent Golding hops along the way. Once the hour was up, I cooled it in an ice bath in the sink. The beauty of brewing in the winter is that you have an endless ice bath supply right outside. Of course, I chose to do this on the coldest night of the year and had to brave temperatures approaching ten below every time I refilled my little snow bowl.

IMG_0339

The wort chilled, it was time to find someone big to aerate it. I stole my friend Phil away from whatever he was doing and convinced him nothing would bring him more joy than sloshing a bunch of liquid back and forth between a kettle and a bucket.

I think he bought it.

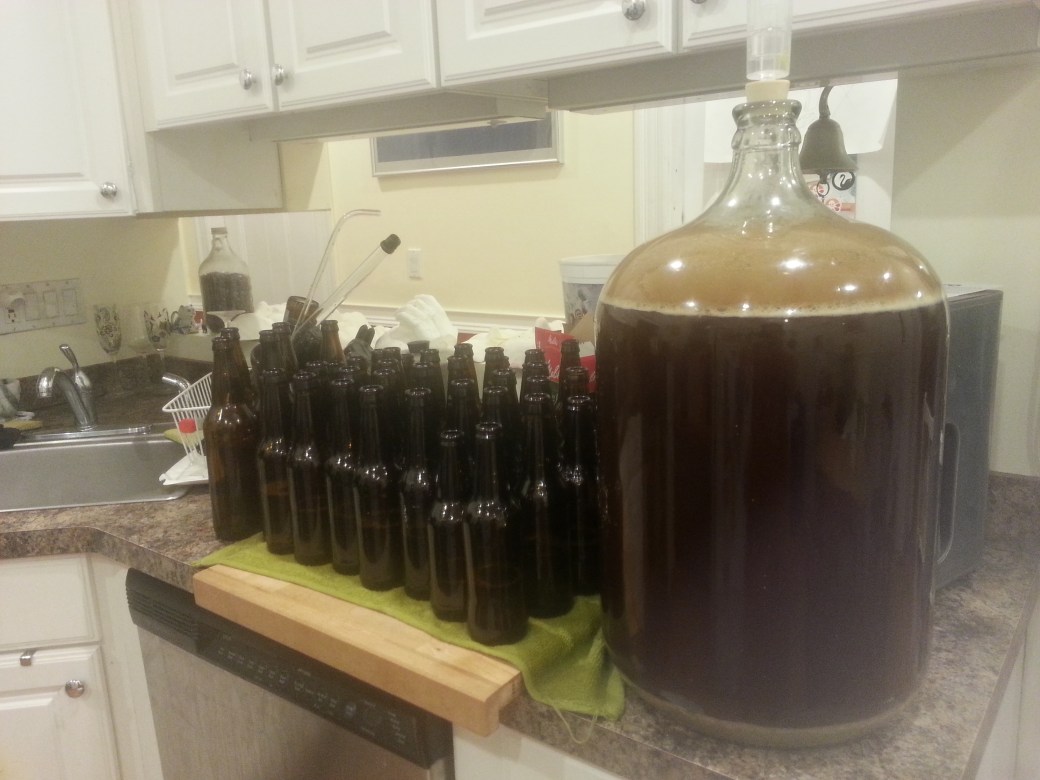
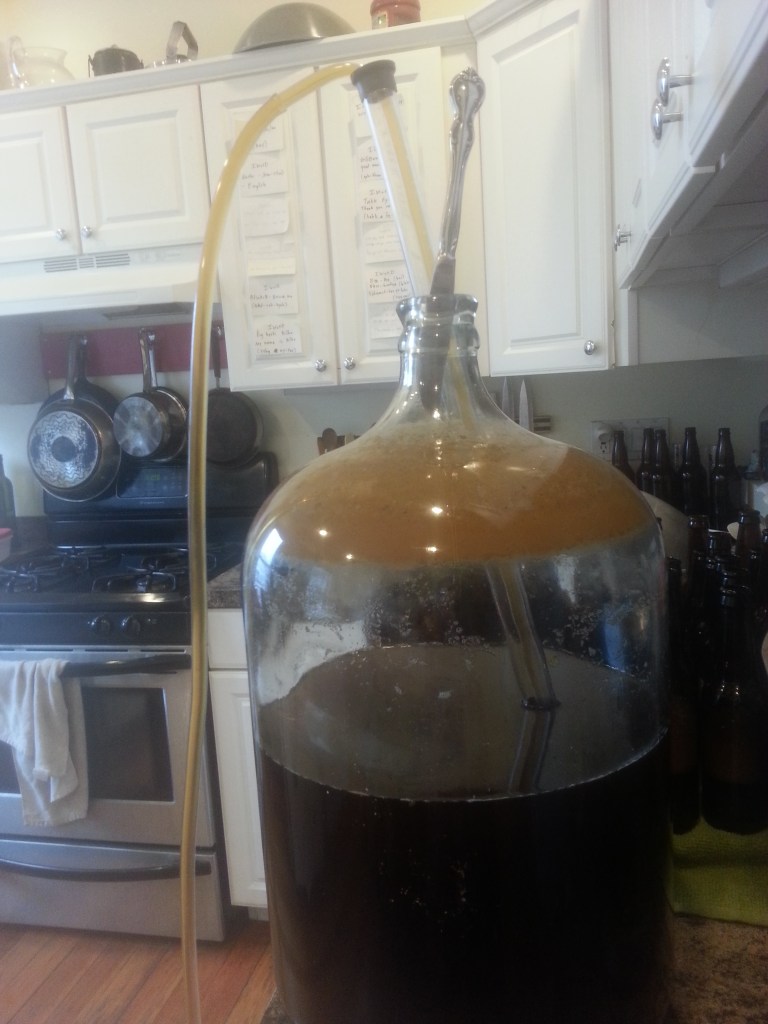
Once the wort was good and bubbly, we moved it to the carboy. It wasn’t until after the fact that a discovered a piece of an airlock wedged in the the base of the funnel. I swear this happens every time. They must get stuck together soaking in the sanitizer. Someday I’ll use a clear funnel and I’ll be shocked at how easy it is.

IMG_0368

I added my rehydrated yeast, stuck the airlock in place, and left it in the middle of the kitchen overnight. By the next morning it was bubbling nicely.

IMG_0389

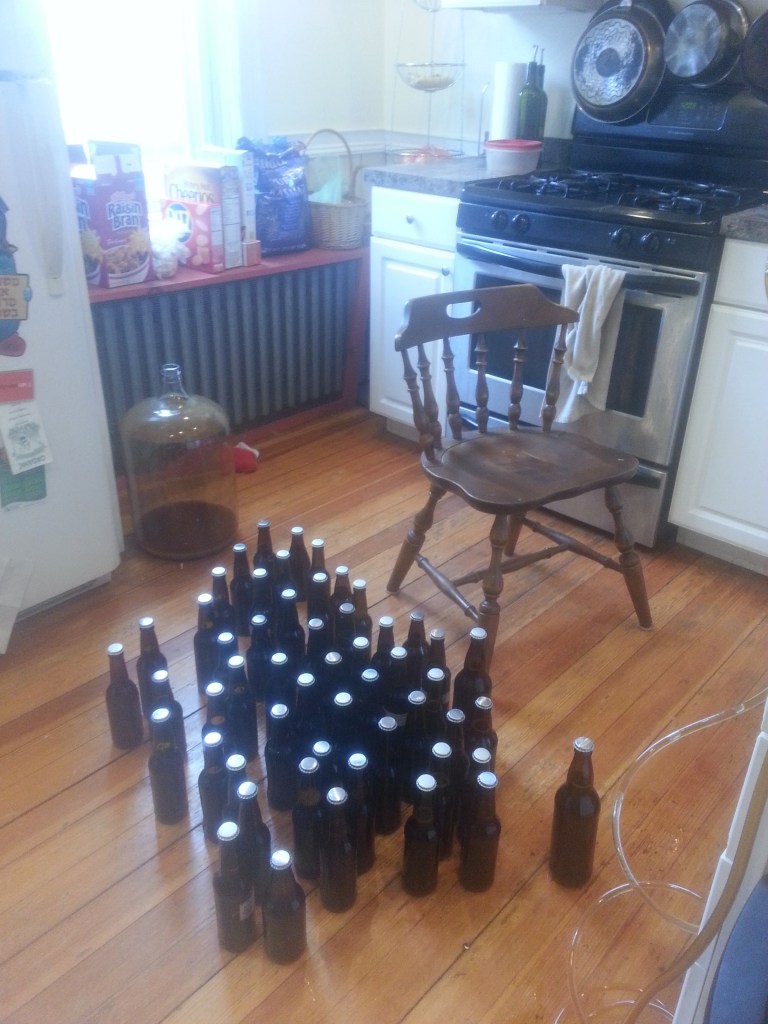
I asked Ben to move it into our closet, where it will be living until it’s time to bottle. He used the hot new carboy handle I ordered and had a much easier time of it than usual. Now all that’s left is to sit back and wait for the yeasts to do their thing.

IMG_0436

And maybe get myself a lauter tun.

Beer Beer Beer

Two weekends ago I set out to bottle my amber ale. The recipe called for ten days of fermentation in the primary fermenter. I’d given it thirteen. If anything, I was worried I was behind. So I scrounged up about fifty bottles and sanitized them, and I found someone big to lift the carboy up onto the counter.

And then I actually looked at the beer.

20160123_171006

It was still bubbling. Quite a lot. The krausen had fallen, and there was a lot of trub on the bottom, but there was also a very, very steady upward movement of tiny bubbles. It was just like the mead that I’d decided would be impossible to bottle.

But I wanted so badly to bottle this beer. I’d scrubbed and sanitized the bottles. I’d schlepped the carboy out of the closet. I’d prepared mentally. But it really, really looked like it was still fermenting.

I read the forums – they said to wait. I called my friend Joe who actually knows what he’s doing – he said to wait. I polled my roommates – they didn’t know the specifics, but they were in favor of doing whatever wouldn’t result in exploding bottles. Namely, waiting.

And so, with a heavy heart, I waited. I dumped all the sanitizer and I wedged the carboy back in its corner of the closet, and I waited… until today!

20160123_170900_HDR

I waited ten more days in all. If anything, I probably should have racked it to a secondary fermenter, but I never anticipated it taking so long. My best guess is that the cold weather is to blame. Since the house is so cold, and we never did get the PID controller space heater working, the yeast may have just been working at a cooler temperature and, therefore, more slowly. At any rate, the extra time seemed to have done it good. There were, if we’re being totally honest, still a few bubbles. But it was nothing like last time, so I declared it to be Good Enough.

20160203_101751

The bottles had been biding their time around the sink – I sanitized them and finally reclaimed that counter space for mankind.

20160203_102606_HDR

One by one I filled the bottles with sanitzer and gave them a good shake. I always use Star San, famed for its sanitizing foam. This was a good instance of that foam coming in handy – only a little bit of liquid (supposedly) sanitizes a whole bottle.

20160203_103936_HDR

My tall auto siphon had given me so much trouble racking the mead, but I needed to use it again. Thankfully, I managed to find a length of tubing that fit and was not kinked all to hell. With a little cutting and finagling, I managed to fit it onto my auto siphon. It worked like a charm.

I’ve read about methods for racking beer without picking up the trub. These include swirling, starting the siphon in a separate container, and trusting in the raised bottom. I’m sure these all work, but I’ve discovered a certain poetry in just jamming a knife in the top.

20160203_110737

With my trusty knife method, the beer flowed smoothly and quickly down into the priming bucket, the bottom of the siphon resting safely just above the trub. As it flowed, I dissolved 2/3 of a cup of sugar in 2 cups of water and poured it gently into the beer. This should get the yeast motivated just enough to carbonate the beer in the bottles.

20160203_110447

Once all the beer was in the priming bucket, I gave it a few stirs to incorporate the sugar and hefted it up onto the counter. Onto the other end of my great new tube, I attached a bottling wand. This bottling wand either came from a Craigslist stranger or my dad – I inherited a lot of miscellaneous equipment from both. I’d never used it before because wouldn’t fit with my small auto siphon. I used it today for the first time and Good God Almighty is it convenient. It’s a ten inch stiff plastic tube with the simplest but best little gizmo on the end. If the gizmo is pressed against a hard surface, like the bottom of a bottle, it allows the beer to flow through it freely. If it’s not touching a hard surface, however, it forms a seal that stops the flow. This means the moment a bottle is full, you can lift the wand and stop the flow, only starting it again when it’s in the next bottle. It’s so smooth and simple and I’m never ever going back.

20160203_115856

So how many bottles does 5 gallons of beer make? Here we have 50 regular bottles, plus 2 bombers, plus one more I managed to fill from the dregs after this picture was taken. That brings us to a grand total of 55. All that remains is to let them sit in the dark and carbonate.

20160203_121021

But how does it taste? Really, genuinely good. I sucked the remains out of the tubing while I was cleaning, and I was very pleasantly surprised. It’s not too sour, and it’s not too boozy. It tastes like a real, very flat beer, which is precisely what it should taste like. Barring some crisis in the next few weeks (of which there could be many) I think I may have a huge amount of perfectly passable beer.

20160203_122504

I just hope it doesn’t explode.

Mead Take Two

As avid readers may know, the20151028_171114_HDR last time I tried to make mead in bulk, it wound up inches deep on my basement floor. I could have been drinking it right now…

It took me a while to grieve, but I’m finally ready to give it another shot. I am, as always, using the cheapest honey I can find. These handsome three pound bottles came from the bulk store and cost $8 apiece. As you can see, I bought so many they let me keep the box.

The rule of thumb I’ve discovered is that three pounds of honey makes for one gallon of mead. It was six gallons I lost to the honey gods last time, but on this pass I’m going to do a modest five. One of Ben’s birthday expansions was a new five gallon carboy I want to use, and this sixth bottle I’m saving for a strawberry melomel I’ve got in mind.

So that means a paltry five bottles, or fifteen pounds, of honey. That’s heavier than my cat, and he’s fat!

There are very different schools of thought on whether or not to boil honey before fermenting it. Lots of people, including the author of my mead book, believe that you should for sanitation purposes. Plenty of purists are horrified at the thought, because being unheated is what makes raw honey so special and so much better for you. Since my honey was delivered on a pallet and was most assuredly boiled at some point, I’m not too worried about that. Purists of a different sort, however, insist that honey doesn’t need to be boiled because microbes can’t survive in it and it’s essentially sterilized from the moment it comes out of the bee. This school of thought requires less work, so I’m inclined to go with it. All I did was submerge the bottles in a warm bath for a few minutes to get the honey flowing at a rate that wasn’t maddening.

20151028_171329

Weight was a big consideration working with five gallons of liquid. I can carry my one gallon batches up and down the stairs all day, but five gallons is a different animal. Not only do I not think I could carry that much mead down two flights of stairs, I would never want to. Just the thought of losing another huge batch, this time on the stairs, brings tears to my eyes. But my basement is dark and scary and the sink, while existent, is far from sanitary. I split the difference and did as much work upstairs as I thought I could manage – two gallons of water and all fifteen pounds of honey. It was heavy going on the starirs, and visions of the bucket’s handle breaking flashed before my eyes, but I made it.

20151028_171611

The warm bath worked like a charm, and the honey flowed right out.

20151028_172152

Once each bottle was empty, I ran a little bit of water into it, shook it like there was no tomorrow, and added it to the bucket. This caught a lot of that pesky honey clinging to the walls and, I hope, really oxygenated the must.

20151028_172328

I wrangled the bucket down to the set of Saw VII and added the final gallon and change of water. I mixed the honey and water like crazy, added two packets of rehydrated yeast, secured the lid and airlock, and left it to work its magic.

20151028_181348_HDR

Now it just has to pass the next couple months not on the floor, and we’re in business!

Kombucha?

IMG_7952

I didn’t know what kombucha was when I made it.

My friends Keri and Justin from the community garden invited me to their house for a festival of fermentation. I gave them wine. They gave me a sourdough starter, a ginger soda starter, and a kombucha starter. Tragically, the sourdough went bad in a way I’ve never seen anything go bad before. The ginger is still lying in wait. But with the kombucha I went ahead full throttle.

If you notice that some of my pictures actually look good, it’s because they were taken by my friend who has a real and very nice camera. Go see his other stuff on Flickr. Tell me which photos were taken on my phone as per usual and win a prize!

I learned everything I know about kombucha as I was making it. It is, essentially, fermented sweet tea. At the heart of that fermentation is a thing called a SCOBY. This stands for Symbiotic Colony of Bacteria and Yeast. Why not SCOBAY? Your guess is as good as mine.
IMG_7950Here’s a bird’s eye view of a SCOBY I grew all by myself. It’s about five inches across. I grew it myself because – and here’s the catch – every time you brew a batch of kombucha, you grow a brand new SCOBY. Often people don’t have the heart to throw them away because, well, they’re little guys! So they store them up in jars called SCOBY hotels and find people to pawn them off on.

When Keri told me, via text, that she had a SCOBY hotel she wanted to share with me, it never even crossed my mind that I wasn’t looking at a typo.

Pawning off is of course an unfair term. I was more than happy to take this disgusting little critter into my home and drink the fluid it lives in. And I’m fascinated by the thought that these SCOBYs are passed and propagated from person to person and mine might have a noble lineage. Maybe I’ll get into SCOBY genealogy.

My housemates were less enthusiastic about this new addition to our home. They’ve long since accepted my weird fermentations. Or at the very least they’ve grown accustomed to them. Kombucha was a step into the unknown, however. And the sight of this slimy, vinegary disc teeming with rapidly reproducing life (as well as the prospect of having to do a taste test) didn’t calm any hearts or stomachs. I reassured everyone that it was perfectly natural and healthy and supposedly tasty. I took it for granted that I was right. 20150801_141203

By the by, if anyone out there really knows their kombucha and can tell from the pictures that mine is actually grotesquely unhealthy, let me know, I guess. Here’s one of the SCOBYs drifting slowly from the bottom of its jar up to the top to join with its newly formed offspring.

So what’s the deal with kombucha?

Essentially, it’s fermented sweet tea. It’s often flavored and carbonated to make something like a healthy person’s soda. And boy, is it healthy. Whenever I wanted to read about it online, I’d first have to wade through paragraphs and paragraphs about probiotics and detoxification and anti-oxidants. Is any of it true? All I know is I had a cold, I drank some kombucha, and I still have that cold. Maybe I need to drink more.

The brewing process is excitingly easy. Brew some black tea, add a whole bunch of sugar, and let it cool. Throw in a SCOBY or two and some of the vinegary liquid it lives in, and fill up the remaining space with water. Rubber band a piece of fabric over the top of the jar and let it sit out of the way for around a week. You’ve just made kombucha. 20150806_142205_HDR

The sheer healthfulness of kombucha culture is a little bit of an obstacle. I read a lot of recipes, and according to every one I needed organic black tea and organic cane sugar, because the chemicals used to process the non-organic varieties can kill SCOBYs. And I had to use filtered water because the traces of lead in my taps would kill SCOBYs. Unfair though it may be, I couldn’t help but wonder if all these delicate SCOBY tendencies weren’t projected by the people who grew them. If I believe city water and non-organic sugar is bad for me, why wouldn’t it also be bad for my yeasts? So after following all the rules the first time, I brewed my second batch with tap water, Lipton tea, and Domino’s white sugar. Maybe my SCOBY felt healthfully bankrupt, but I didn’t notice any difference.

Though it was supposed to take as long as a week, the summer heat kicked my kombucha into overdrive and formed a new SCOBY in about four days. The taste was like a sweet apple cider vinegar. At this point kombucha is 20150806_142140_HDR
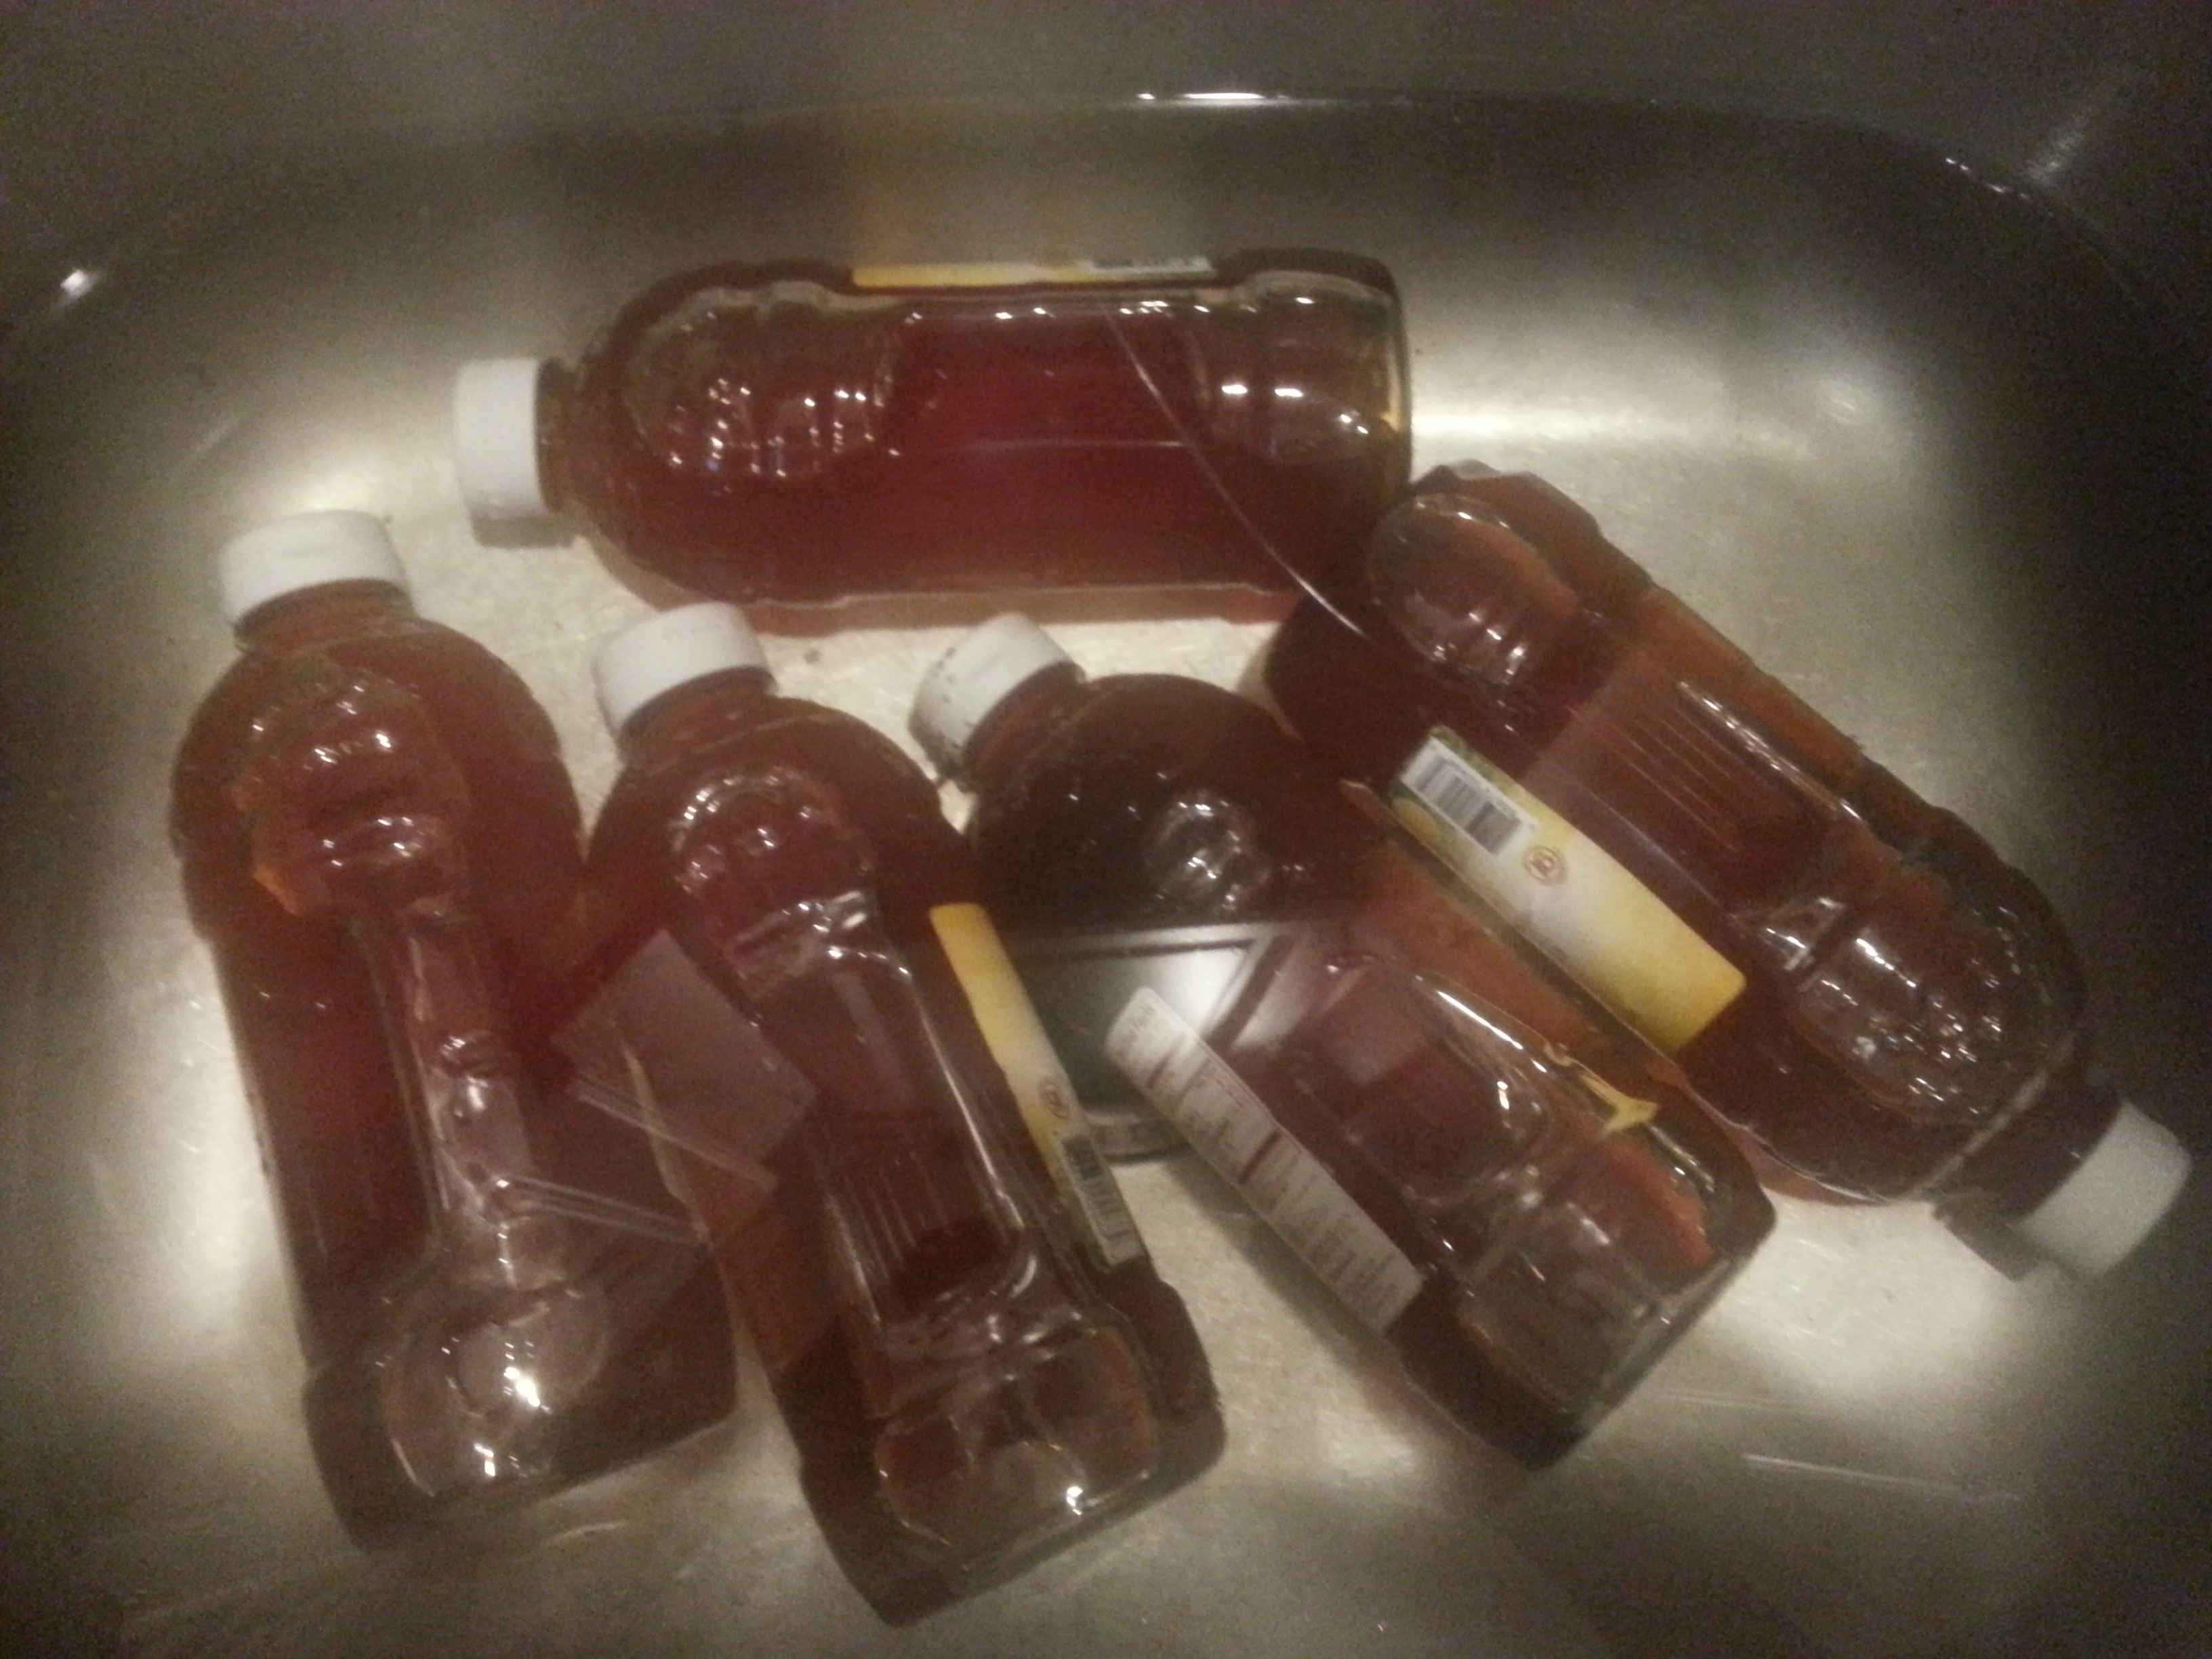
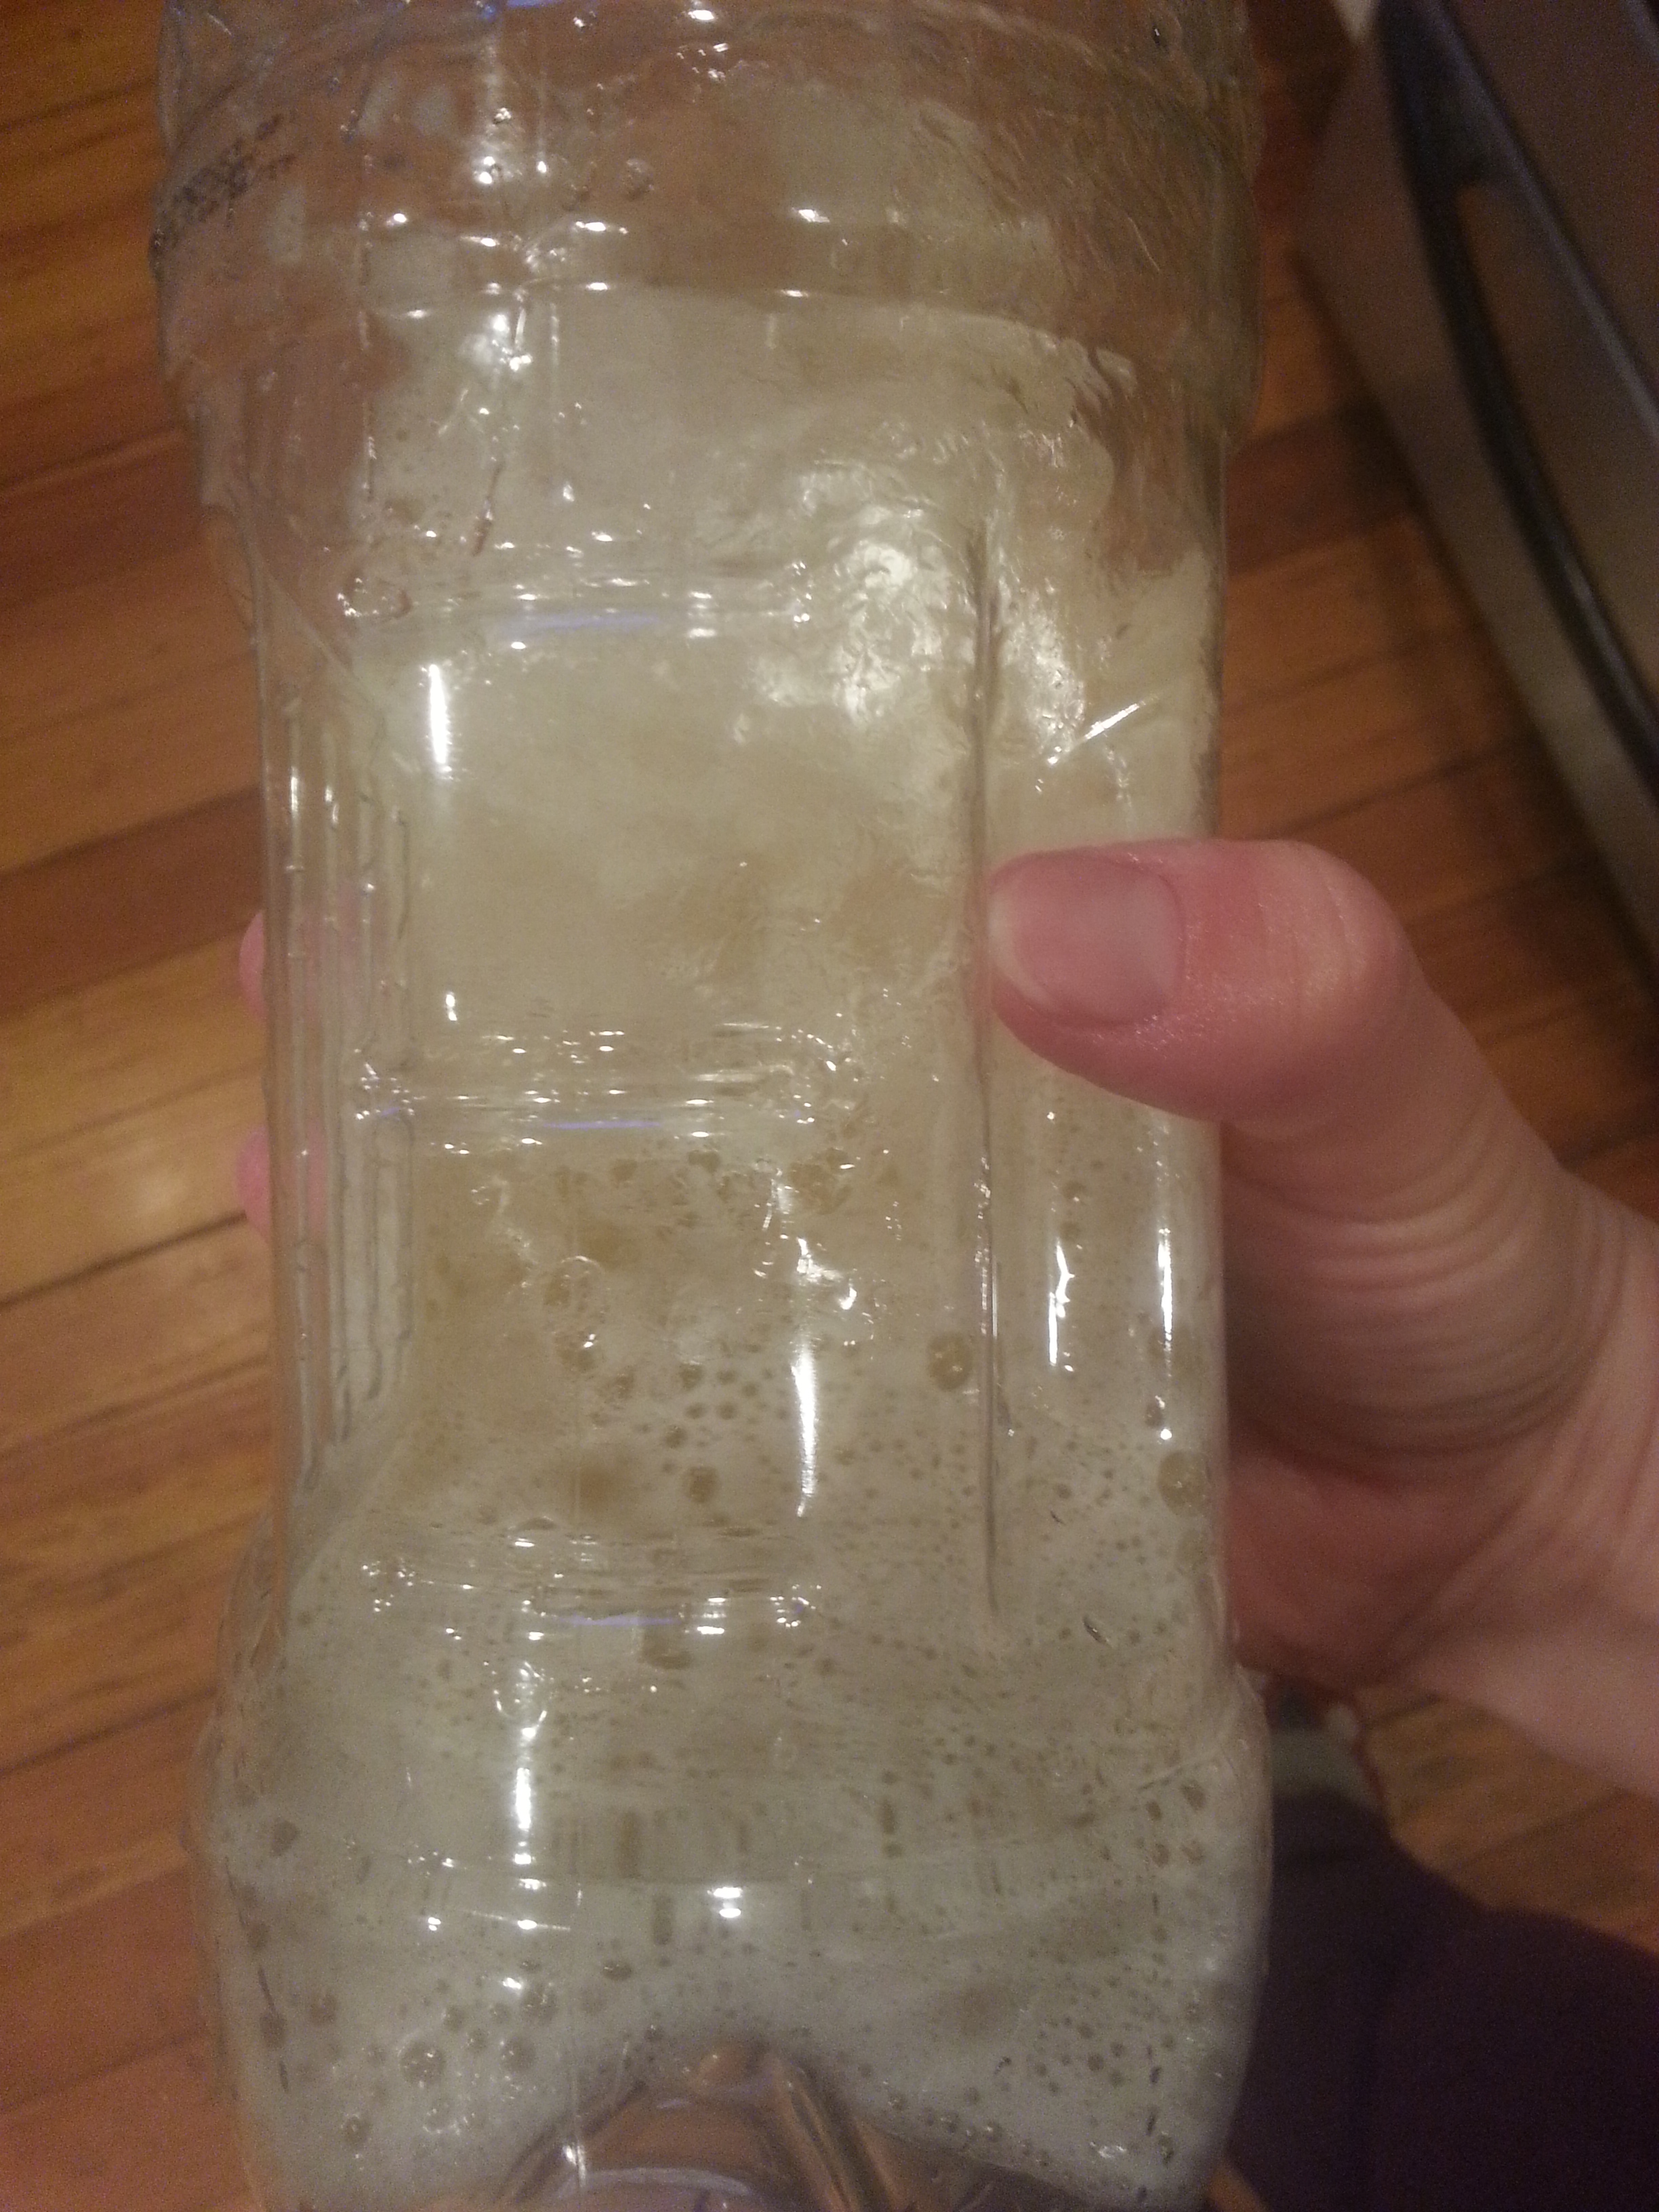
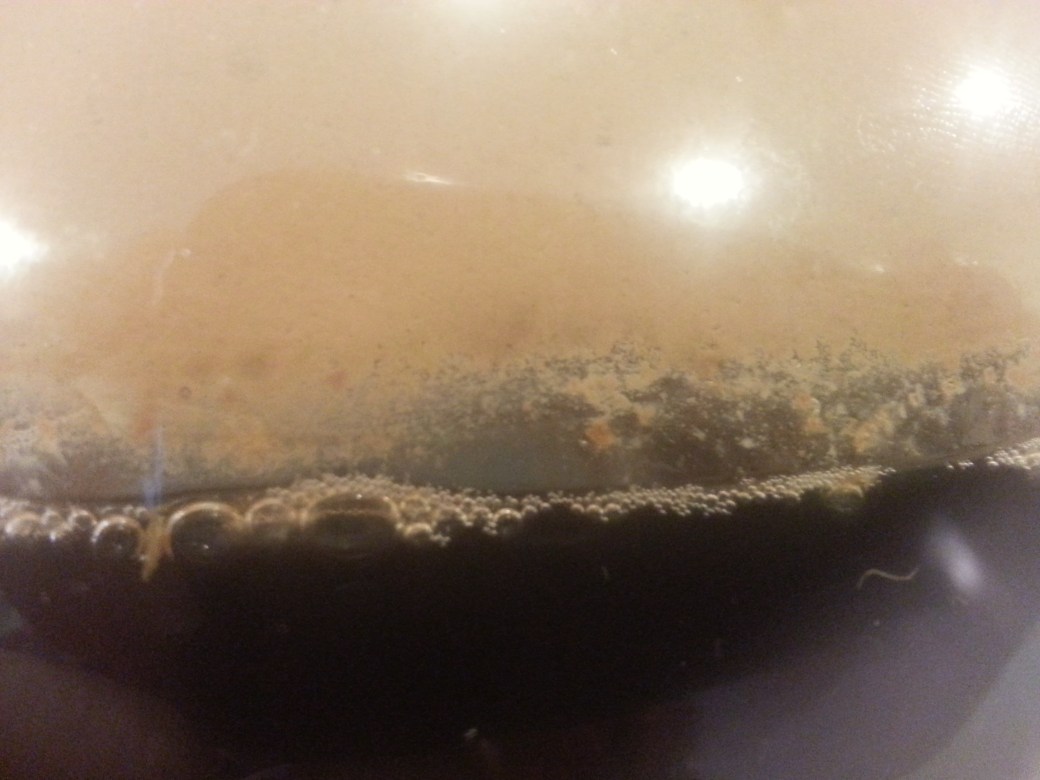
completely drinkable, but I chose to go a step further by doing a second fermentation with flavoring. This involved bottling the stuff in beer bottles with whatever I could find in the kitchen that I thought might taste good. I did lemon, honey, ginger, lemon honey, lemon ginger, honey ginger, and elderberry, to give you a sense of what I had lying around the house. I let the bottles sit out in the kitchen for about four days to allow the yeast to eat the sugars and carbonation to build up. Then I stuffed them all in the fridge to slow the fermentation way down and prevent explosions.

And the verdict? Pretty darn good! You can see from all the bubbles that the carbonation was a success. You can also see from that suspicious circle floating on the top of the glass that a new bottleneck-sized SCOBY began to form in each bottle. One slipped straight down my throat during an ill-fated afternoon refreshment. It was a little like eating a raw oyster.

20150806_204700Sneaky little SCOBYs aside, the overall rating was widely positive.

Even though the good reviews came begrudgingly and with a little suspicion from those who actually saw it made.

The Best-Laid Meads

My first mead was good!20150724_114023_HDR 
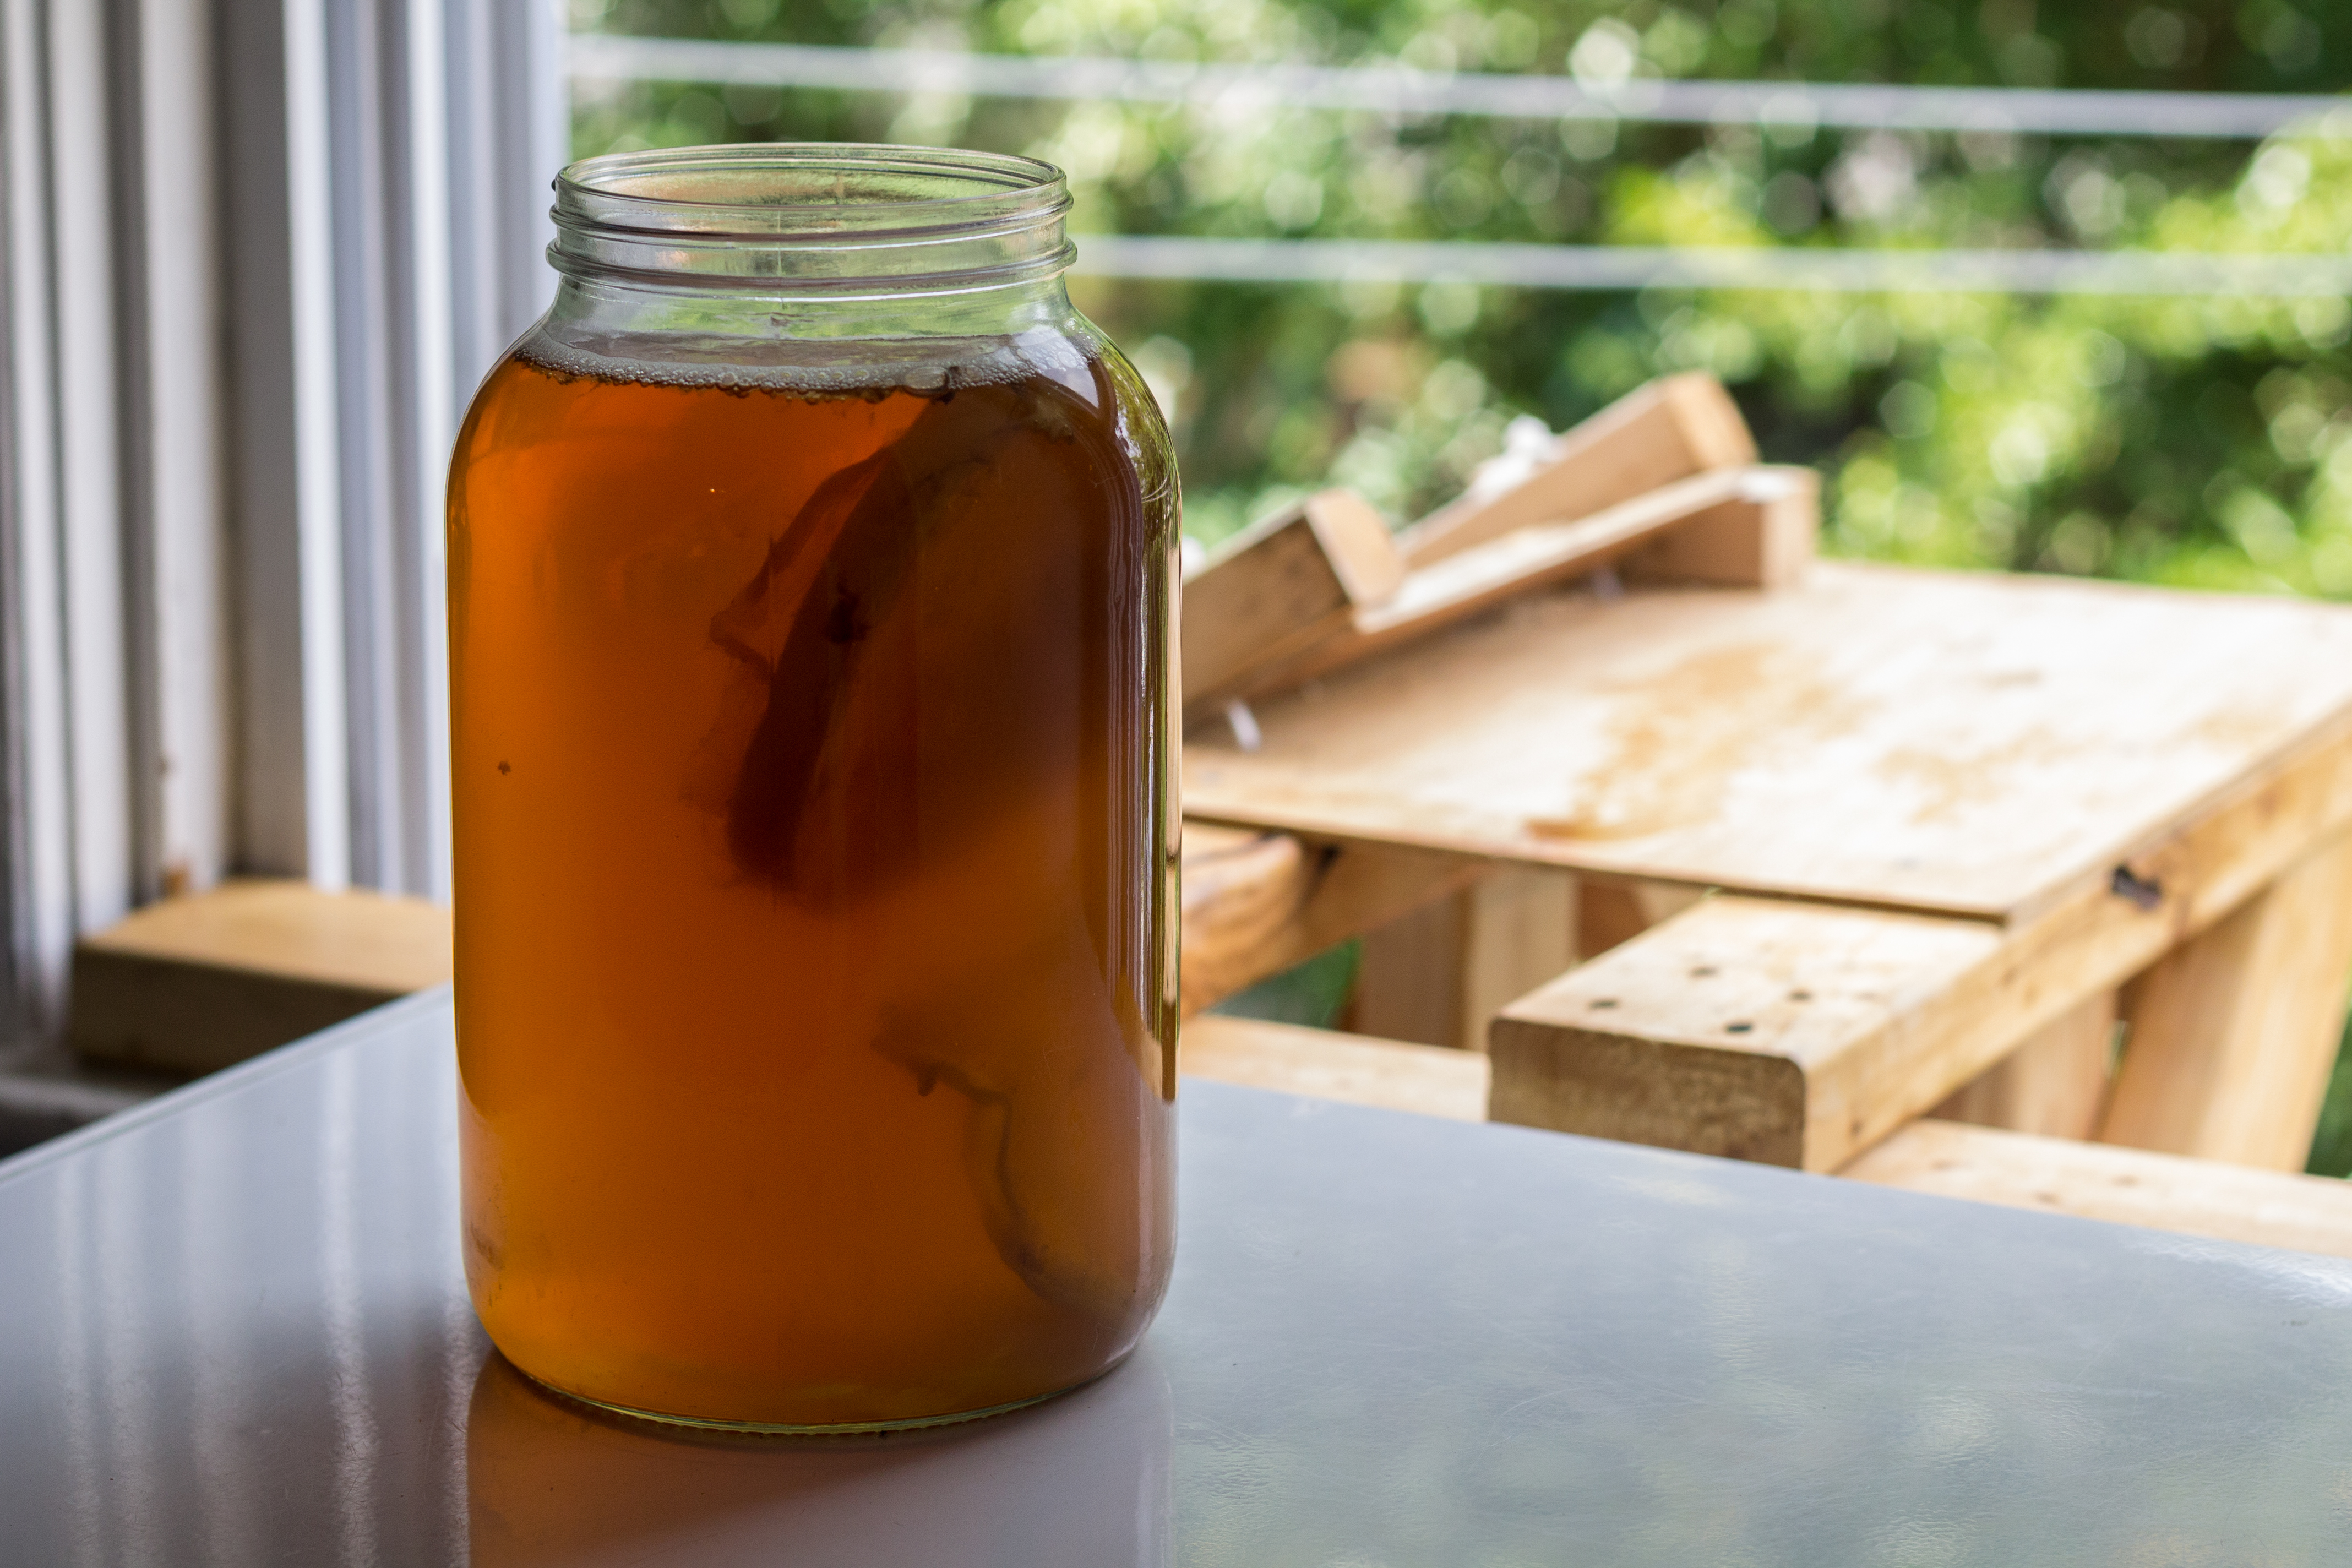
I’m as surprised as anyone. And since the only thing to do with moderate success is run with it until you trip over yourself, I’ve whipped up two more meads. They’re flavored, more ambitious, and a lot more free-wheeling. On the left we have raspberry mead, and on the right we have lavender mead. Both are bubbling away nicely.

Now for a note on honey. Here’s the thing about honey: it don’t come cheap. Or more correctly, it don’t come cheap unless you buy the cheap stuff. There will come a day when I have the money to buy humanely raised meat and raw, local honey. I hope. But it is not this day. Particularly when I’m still learning, I’d rather not pay top dollar for my honey. For my first batch of mead I used generic brand, pasteurized clover honey from my neighborhood grocery store (as far from purist as you can get) because I didn’t know what to expect and didn’t want to spend too much. And I was so happy with the results. So for the moment I’m sticking with my cheapo, heated, store brand bulk honey and aiming for quantity (and therefore variety) rather than quality.

That being said, I’m trying to make improvements in quality where I can. I thought my grocery store strawberry wine was a little lacking, so I’ve flavored my crappy honey with home grown ingredients. The raspberries were grown in my parents’ garden and frozen at peak ripeness. The lavender was donated by my community garden neighbor Ken, who’s getting overwhelmed by his huge lavender bush.20150724_161453_HDR

I wish I had that kind of problem. This is my lavender bush at present.

It’s over a year old and still so tiny!

Anyway, I had a hard time finding a definitive recipe for lavender mead online. There were plenty of rumors and memories of friends of friends who make it all the time, but nothing really concrete. And the few details that were concrete varied wildly, from steeping the lavender into tea, to leaving it whole in the mead for a month, to leaving it out completely until bottling. I’d already picked my lavender, so that last one was right out. In the end I decided to make up my own recipe, roughly adapted from this guy’s vague remembering.

In a sterilized pot I heated some water to 160F, then20150721_212127_HDR added an ounce and a half of lavender flowers. I let them steep until the water turned to a nice golden brown tea and the whole house smelled like lavender. I may have driven my roommates away for the night.

I let the tea cool a bit, then combined it in a gallon carboy with three pounds of honey. I topped the carboy up with water, added yeast nutrient and sodium metabisulfite, shook it up, and let it sit for a day with a towel over the top.

This may not have been a good idea.

I swear I’ve added nutrient and metabisulfite to must simultaneously before, but maybe never in a fully topped up carboy. When I checked on it the next day, the must had bubbled up into what was by then a very crusty towel. My suspicion is that I 20150721_224210_HDRwas feeding the natural yeasts from the lavender at the same as I was inhibiting them, and the feeding won out in the end. If this is the case, I may have some sub-par mead on the way.

Then again, I may have just shaken it too vigorously and the bubbling over happened in the first minute.

Only time will tell. Or maybe it won’t.

My raspberry mead had some hangups, too. Actually, raspberry mead isn’t called mead, but melomel – a fermented mixture of honey and fruit.

My raspberry melomel had some hangups, too.

I thawed and smushed the raspberries (just under two pounds) and shook them up with three pounds of honey, some sodium metabisulfite, acid blend, pectic enzyme, and enough water to equal a gallon. I did not add any yeast nutrient, because the recipe I was vaguely following didn’t say to. Maybe these recipes know what they’re talking about, because this one did not bubble over in the night.

The next day, however, I continued to follow my recipe closely and set my yeast and nutrient in a cup of water to get it started. I then poured it into the carboy and the liquid filled up straight to the top. No room for even a single bubble. Until now I’ve been pitching my yeast straight into the must, and for some reason it didn’t occur to me that extra water would mean extra volume. Whoops.

I had to get some of the liquid out; I was afraid that the very first bubble was going to pop the cork off this thing. The whole top layer was yeast, though. I wanted to get rid of the liquid in the middle. I eased the auto siphon in and the carboy promptly overflowed. There went a lot of my yeast. I released some liquid and pulled out the siphon. It was coated in a lot more of my yeast. No!

There was no immediate activity in the airlock, and I was worried I’d completely eradicated the yeast. I didn’t want to add more, though, in case I wound up with too much. I decided I’d give it until morning to start fermenting, and went to bed uneasy.20150724_114124

Lo and behold, this is what I woke up to! The next morning the raspberry melomel was bubbling with a vengeance, as was the lavender. They’ve both been put in cool and dark storage in the cellar.

The main lesson I’ve learned is that there’s no reason to do a primary fermentation in a carboy. I’m not sure what possessed me to do it, and to do it twice! The little bit of liquid I removed from the melomel tasted fantastic, though, so I have high hopes.

Just as long as those seeds don’t sprout…