A Sudden Windfall

20150821_111357_HDRThere are six gallons of mead on my cellar floor.

I thought I fixed a faulty spigot. It turns out I didn’t.

But let’s not focus on the bad things. At least not until I’ve thoroughly mopped. Because plenty of good things are happening. I racked the lavender and raspberry meads, and they both taste very good. So does the mulberry wine. My Kazakh melon vine has taken way off, and I might actually get to see what its fruit tastes like before the frost.

And I have recently come into a huge amount of fruit.

Keri of kombucha fame let me in on a hot tip: Her fruit tree-obsessed landlord was away on vacation and the yard was getting littered with windfall fruit. He’d given her permission to go in and clear it up a little. If anything, we were performing an important service.

This tiny backyard orchard has plums, pears, and a few varieties of apple. It even has apples and pears growing out of the same trunk, because this old Portuguese landlord I’ve never met is an avid amateur grafter.

The ground was, as promised, littered with fallen fruit. Some had been there for quite a while, but some was brand new. While we were there I got startled more than once by a pear crashing down behind me. 20150821_105750_HDRWe waded around in the wet grass, getting devoured by mosquitoes and sorting the fruit into usable and unusable. The former we split between ourselves and the latter we composted. In the end I think I had something like six pounds each of apples and pears and a couple pounds of plums. And I was supposed to go away to Cape Cod for a week the next day. Cue frantic preservation. 20150821_160712_HDRI was saved by the fact that a lot of the pears weren’t completely ripe yet. I was… reasonably confident that they and the unbruised apples would last a week. But where to keep them? The house was hot, the refrigerator was at capacity, and I still hadn’t recovered from discovering my cellar mangoes full of little rodent toothmarks. Rationalizing that they were free anyway, I sealed them in a five gallon bucket in the cellar and tried not to think any more about it. 20150821_232313_HDR
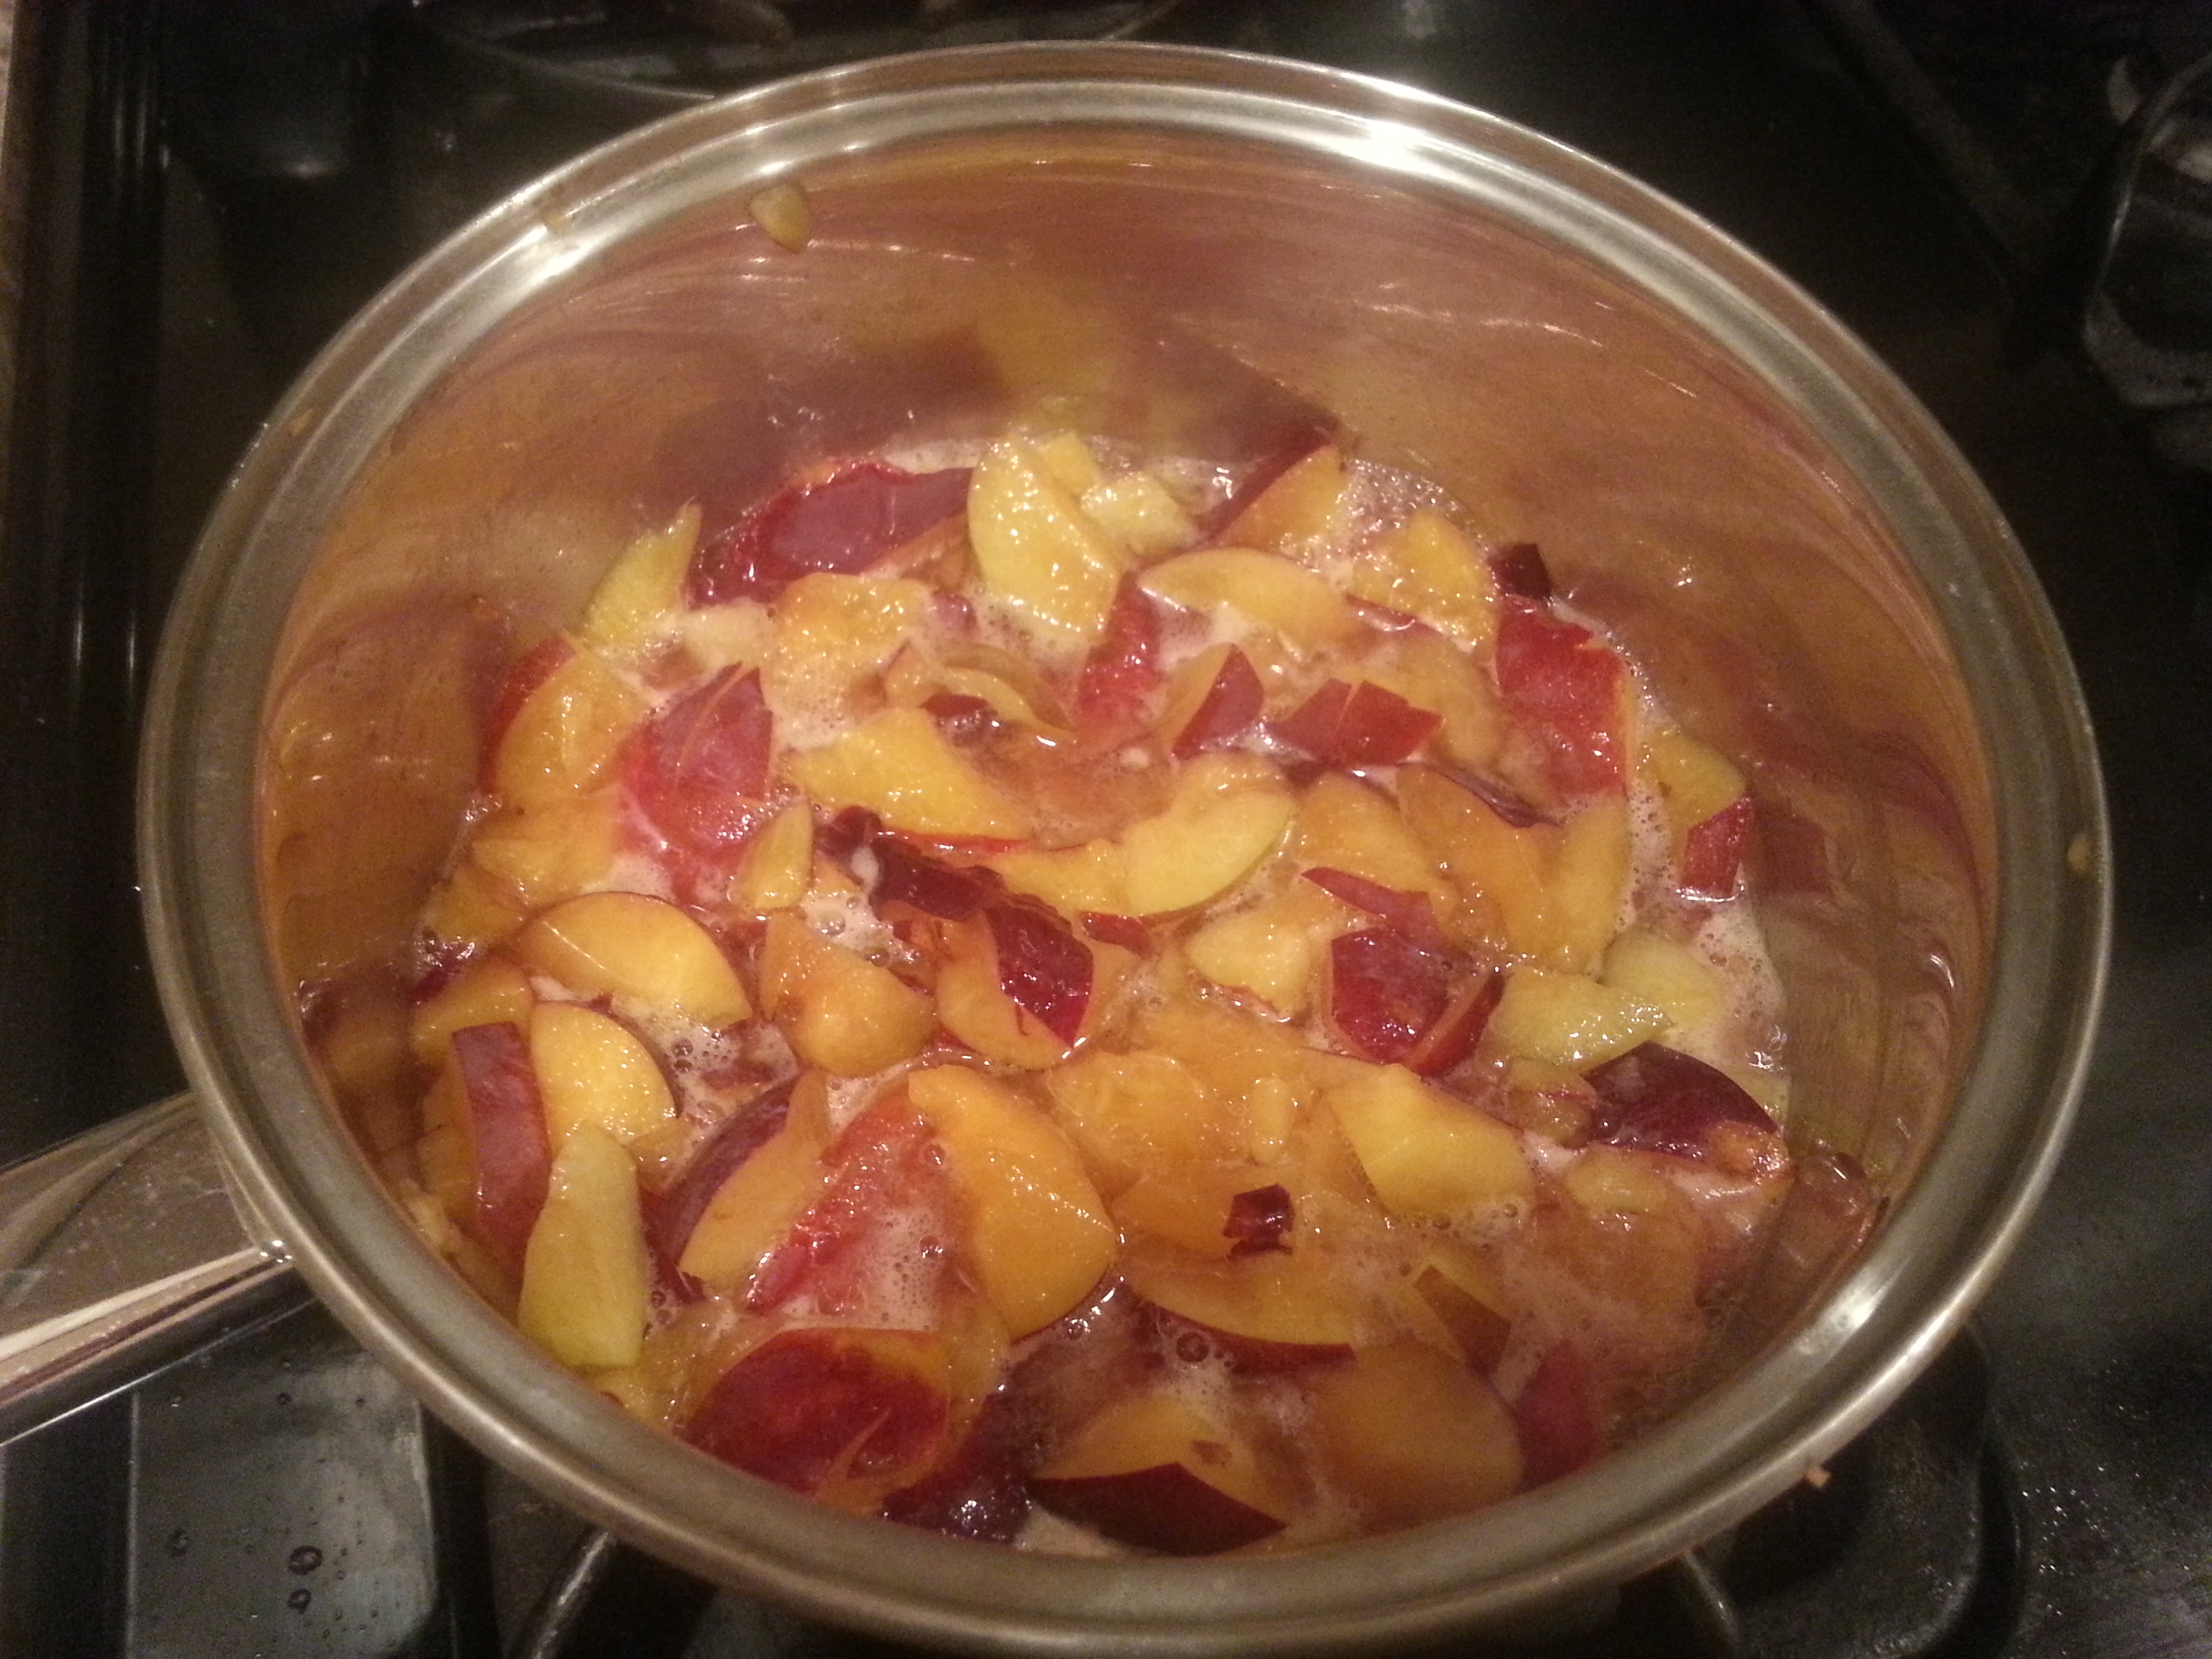
The remaining apples and pears had some serious holes and bruises, and the plums were so ripe they were dissolving into my table as tried to figure out what to do with them. I’d never made preserves before, but I decided to take a stab. After some over-the-phone reassurance from my mother that I’ve eaten unprocessed jam my whole life and am no worse for wear, I sealed the preserves hot in sterilized old jam jars rather than processing them in the canner. 20150901_160639_HDRThe four light jars are apple and pear, heavy on the pear. The single dark jar is all that’s left of the plums after I ate quite a few. Apple butter was also on the menu. I found a great recipe for overnight apple butter, set the slow cooker on its way, and woke up the next morning to the smell of charcoal and cinnamon. It was not meant to be. 20150901_162219_HDROne week older and a tiny bit tanner, I opened up the bucket and was pleasantly surprised. There was some moisture on the sides and a touch of fuzz on a few stems, but no sign of the writhing mass of worms or near-sentient mold I’d envisioned. I had just enough pears for a gallon and a half of wine. It was meant to be a gallon, but I found myself with extra, and the man at the brew supply store made fun of me the other day for being small beans. 20150908_171547_HDR
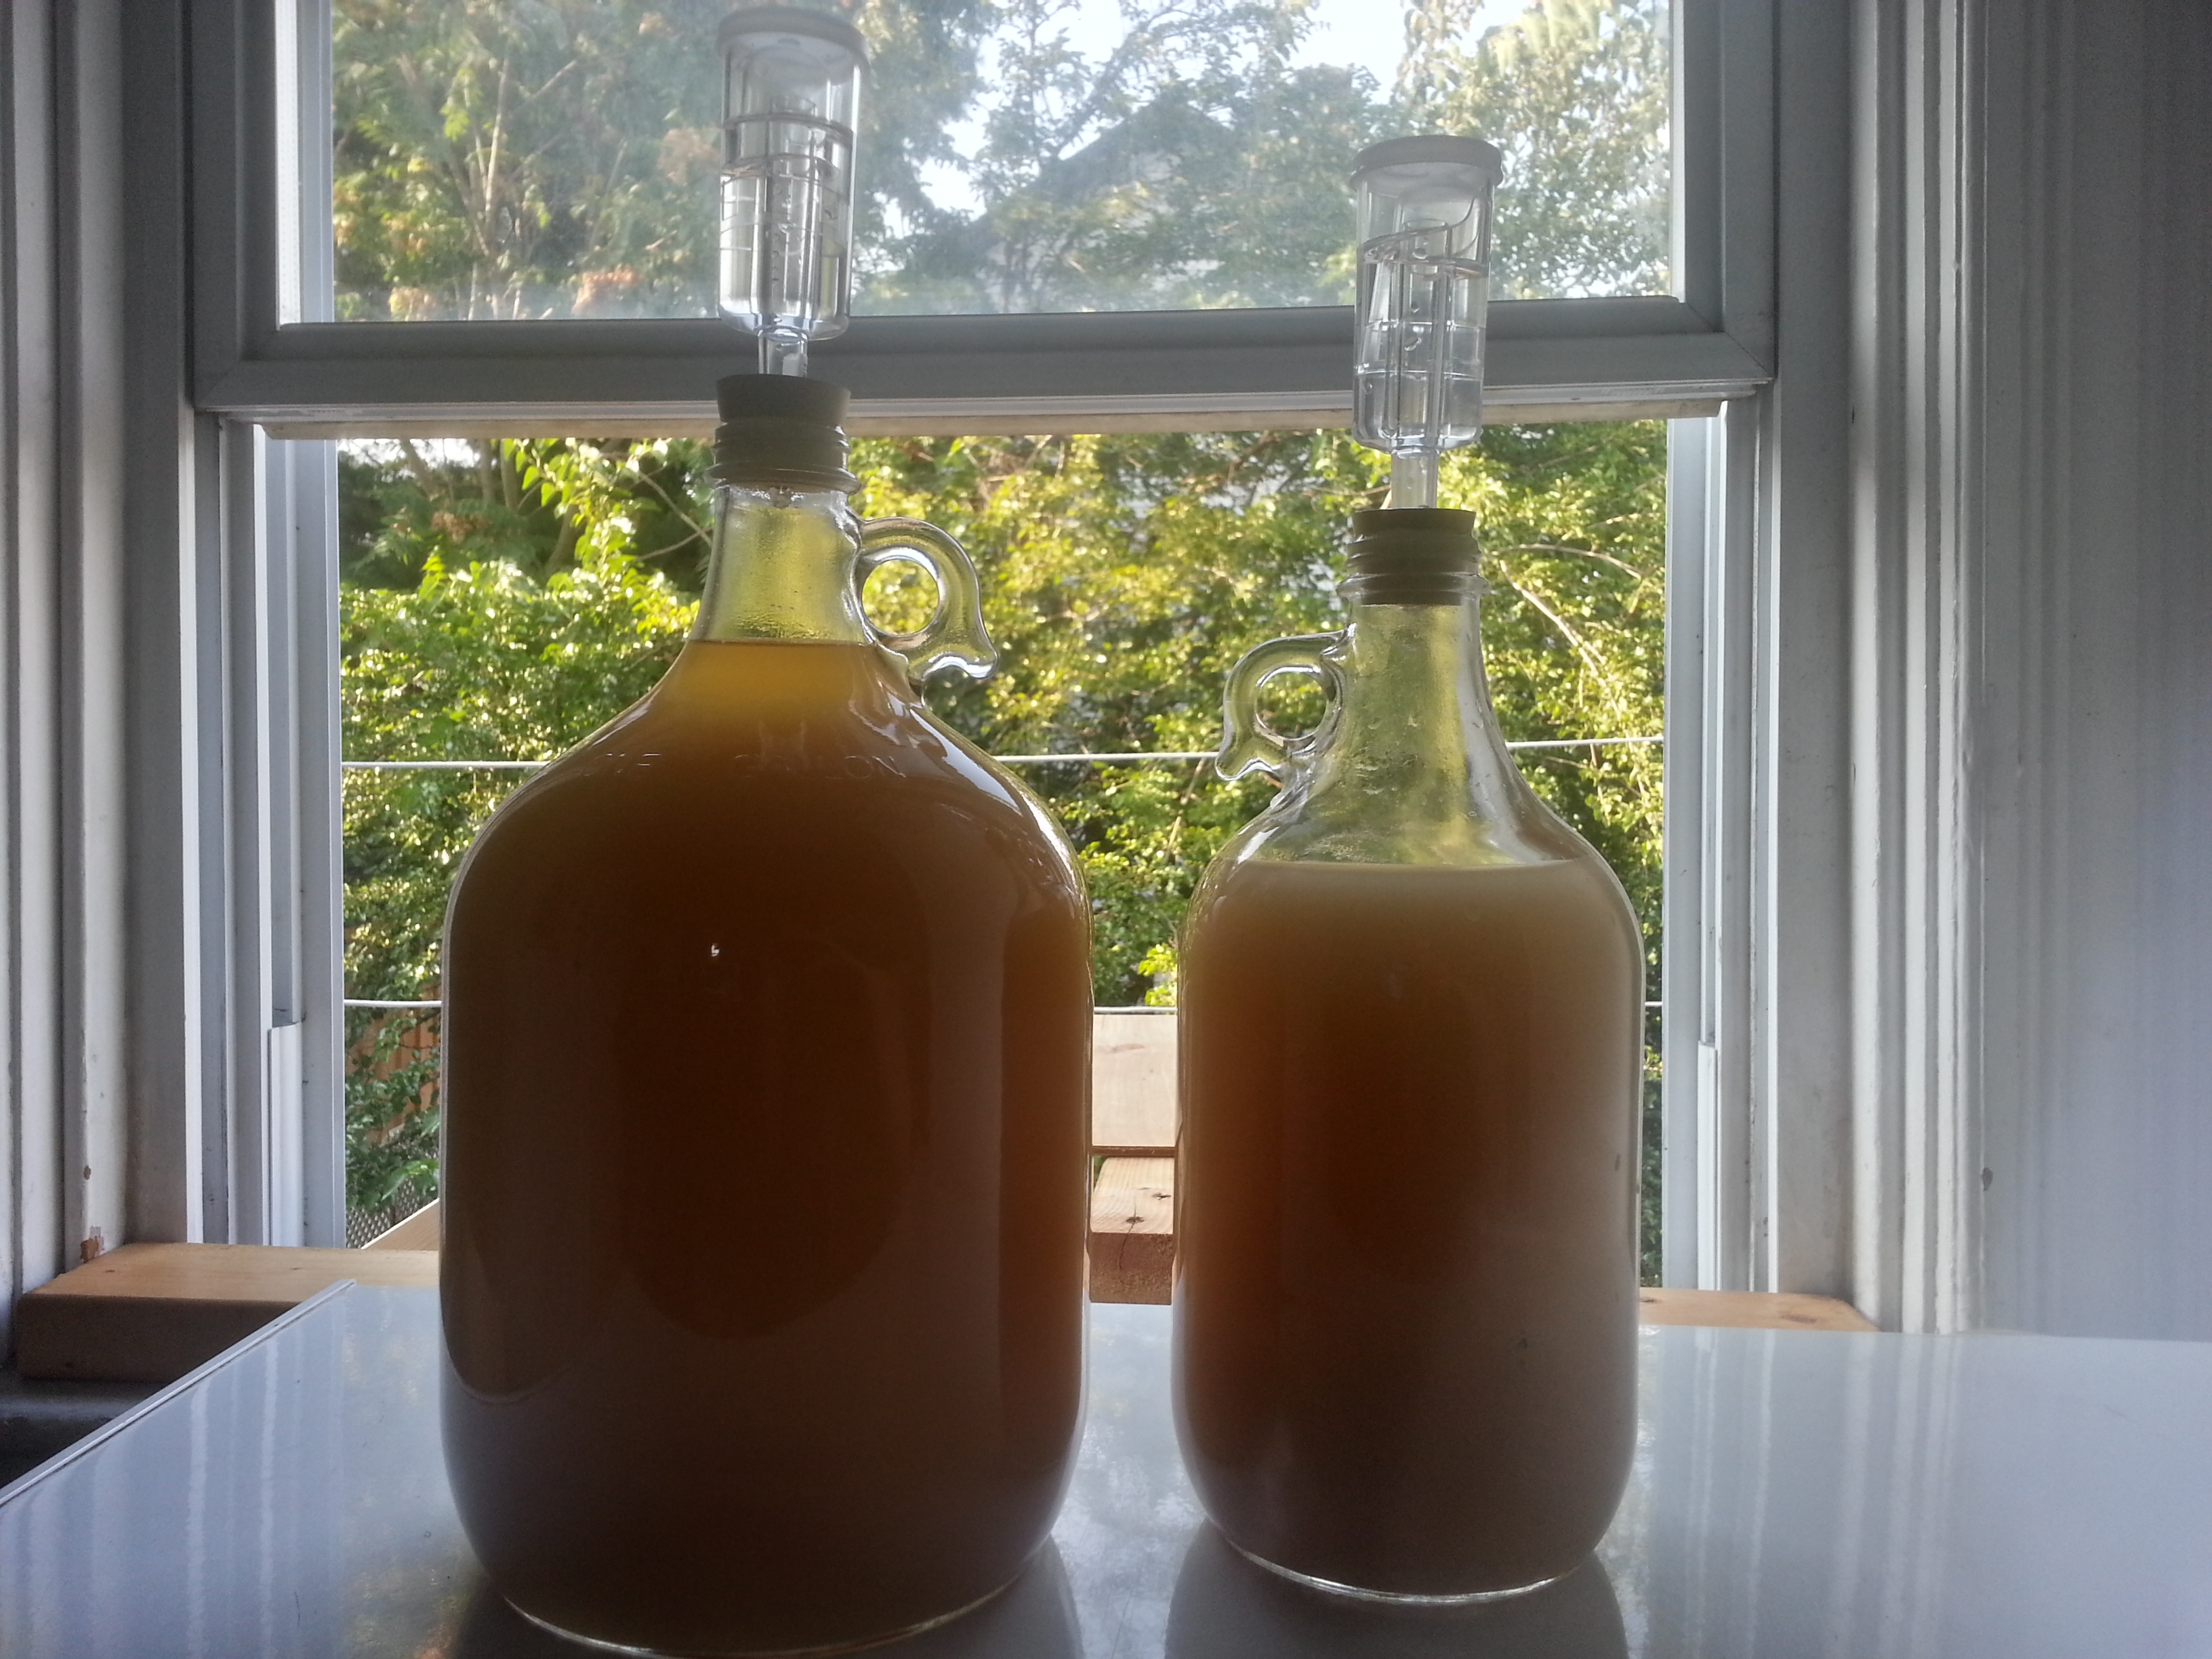
With the remaining apples I attempted slow cooker apple butter number two. This time I added plenty of apple juice to keep it moist and woke up to…20150902_090559_HDR
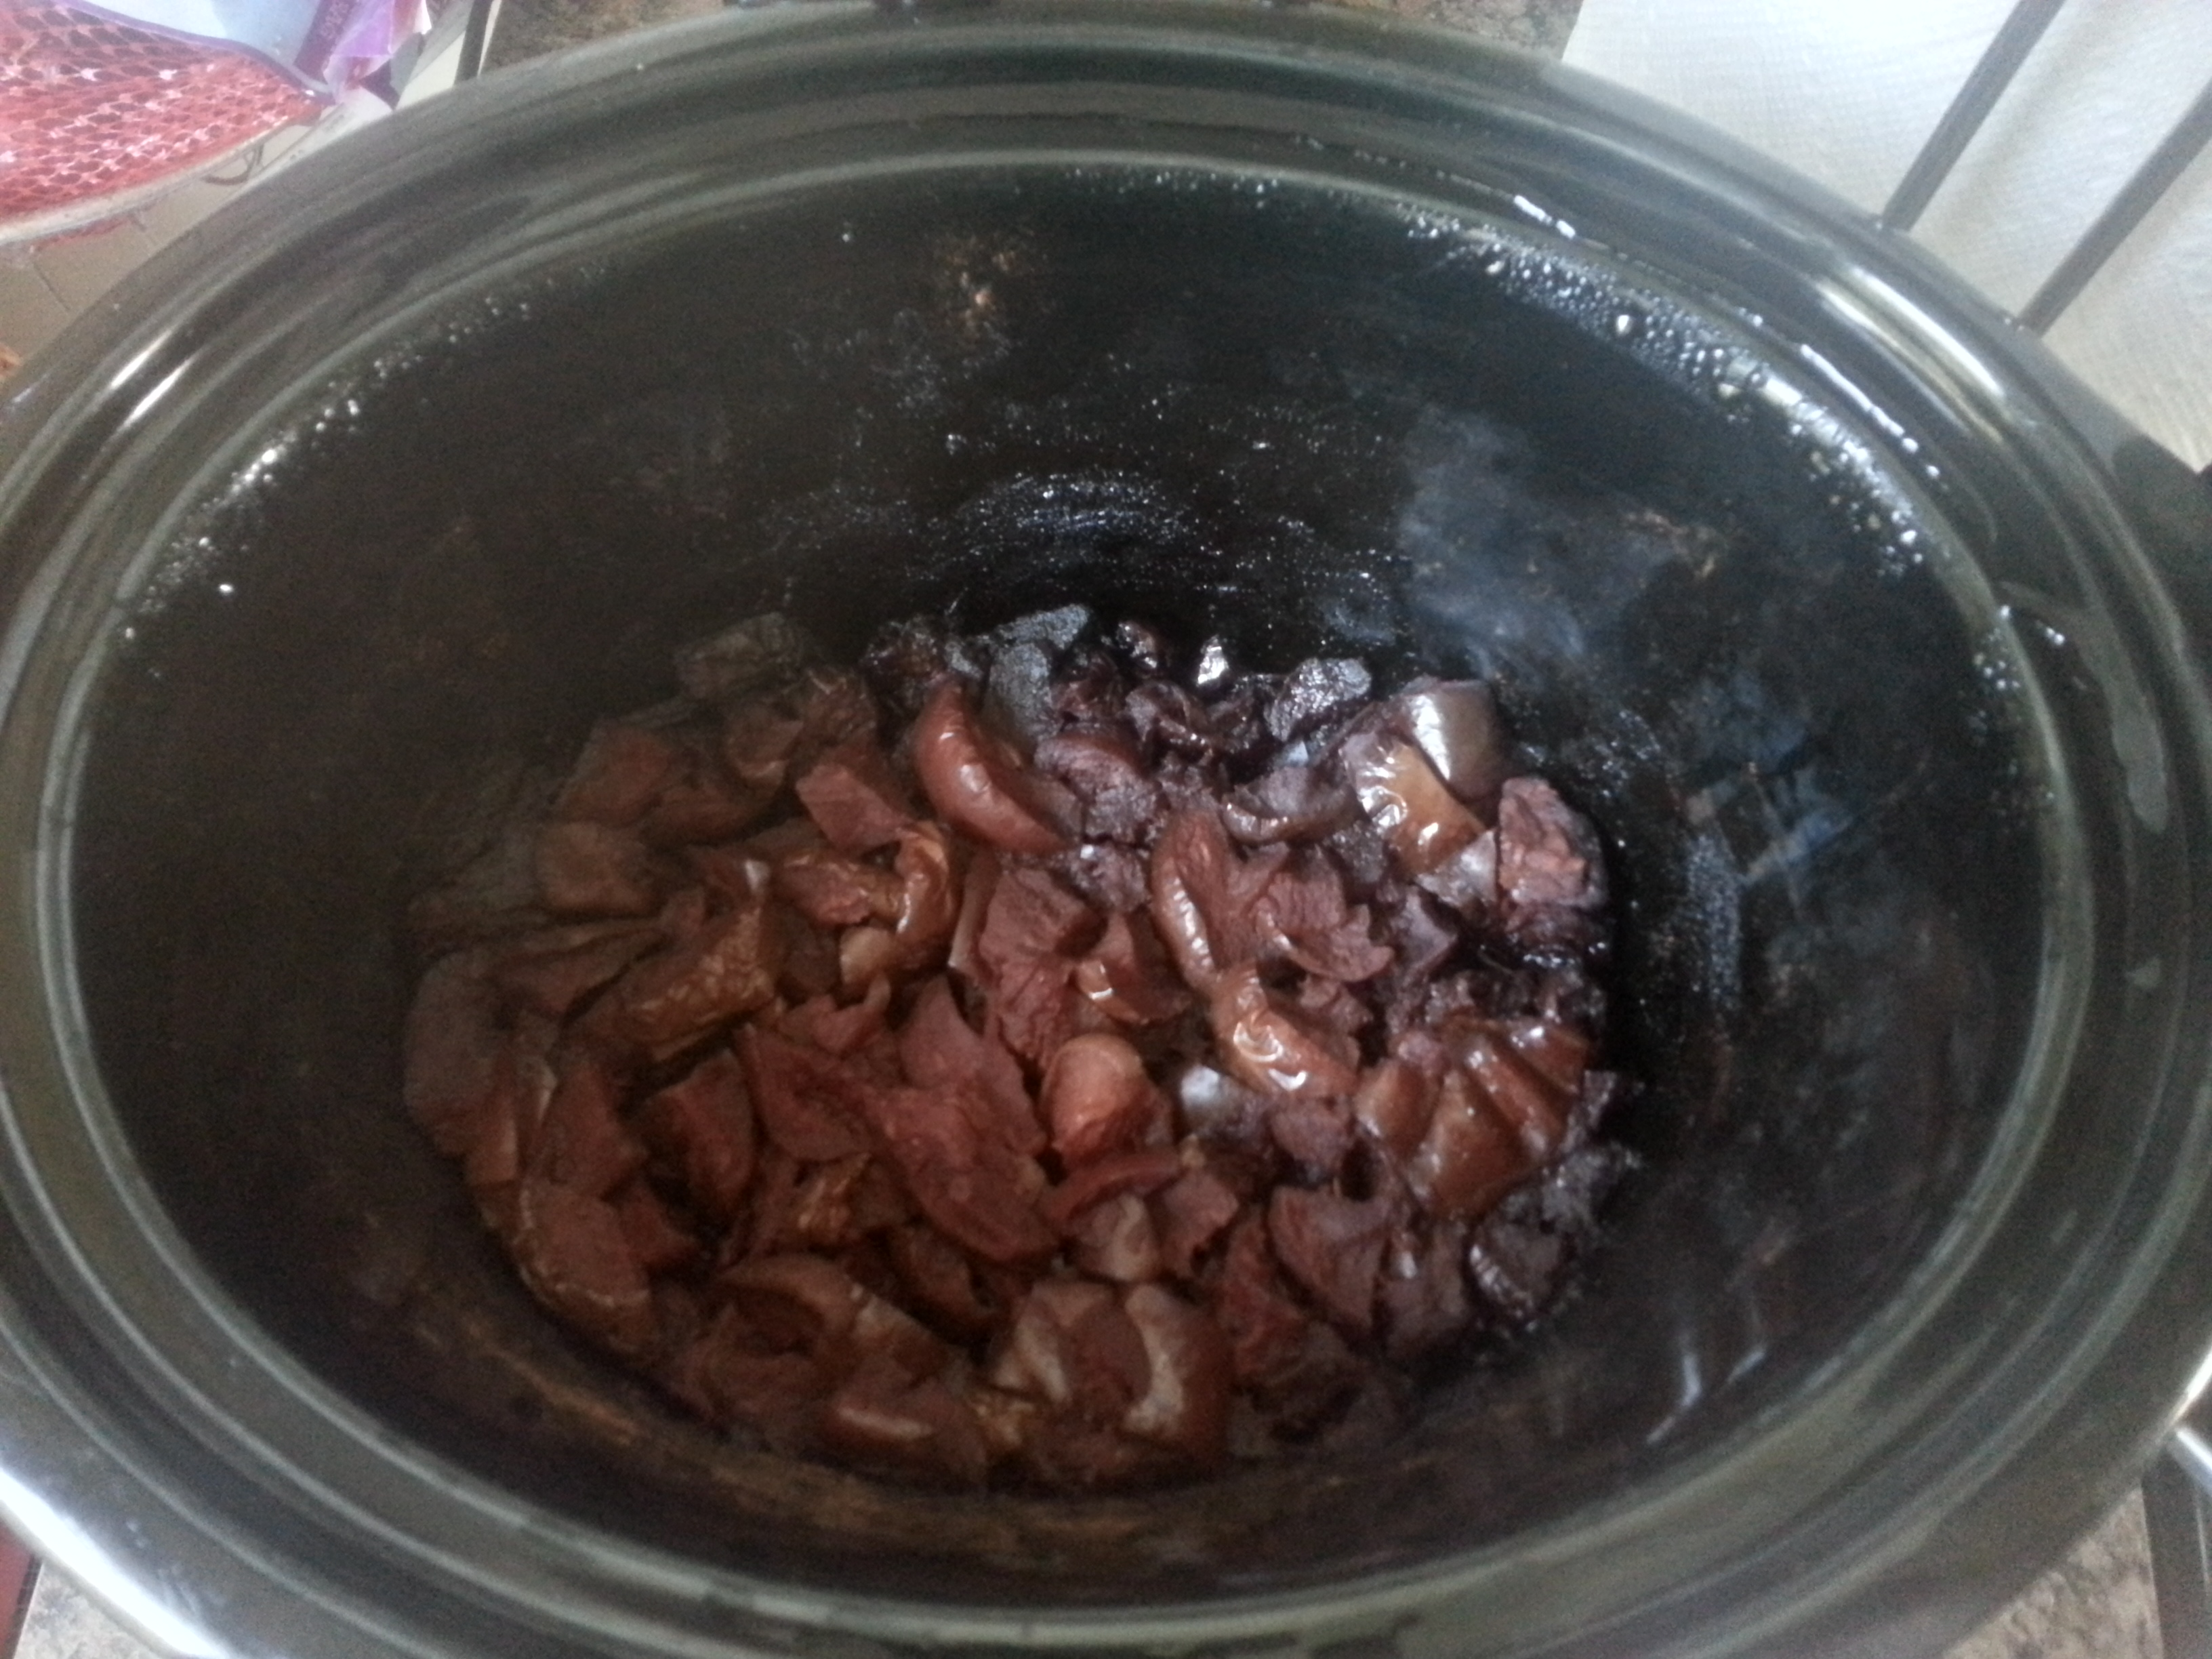
…Charcoal and cinnamon. It just wasn’t meant to be.

Bee Update!

I said we weren’t going to mess with the bees.

I lied.

Or rather, once I said we weren’t messing with them, we realized it had been a while since we had messed with them.

So today we messed with them. We went in for a checkup more than anything. We want to monitor their progress and get a sense of if and when we can do another honey harvest.

So we opened up the top honey box to see if the hive had made any progress. And I, through thick gloves and sunglasses and face netting, managed to snap this completely centered and focused bee in flight. How did I even do this?20150905_123353_HDRWe weren’t sure if they would have started storing in the new honey box or not. But they have! They’ve built the comb up in every frame and started storing honey in quite a few. These are the frames of the top hive body onto which they’ve built some little honey-filled burr comb extensions. Just like in those 2013 bottles, this late-season honey is noticeably much darker in color that the stuff we’ve already harvested. We tried a little bit, and I swear it tasted like elderflowers. Who knows. 20150905_123519_HDRAfter exploring the honey box, we delved into the top hive body. Production down here is also at full throttle. These bees are exceptional. If I have my own hive someday, I’m gearing myself up for some serious disappointment. The capped cells stretching into the distance are brood – each one contains an egg or larva that will eventually be a worker bee. In the foreground and running along the right edge of the frame are drone brood, identifiable by their bumpiness. The drones are the only males in the colony and kept around only for breeding with neighboring queens. I could say something wry about men here, but I won’t.20150905_123736_HDRInstead I’ll show you this picture of the miracle of birth! Most of the bees in this picture are workers going about their business with their heads in the cells. To the far left of the frame, however, halfway down, are two bees coming out of their cells headfirst. These are drones emerging for the first time from the cells they were laid in as eggs. About four cells northeast of them is another drone a little behind in the process, still breaking through his wax cap. All you can clearly see are his antennae. 20150905_123723_HDRIn a by-and-large positive checkup, there was one ill omen: propolis. The stuff acts as a sealant, and while it’s perfectly natural for it to be here, Kim says the fact that it’s so prevalent and so thick this early in the season means the bees think it’ll be an especially hard winter. This is bad news for me, because I still haven’t gotten over last winter. And it’s bad news for the bees, because they have a heck of a time surviving the cold. Our colony last year didn’t survive. Neither did something like 40% of the colonies in Rhode Island. We love these bees, though, so we’re going to do our best to keep them alive. If we do take another batch of honey, we’re only taking half at the most. And I’ll be cooking up fondant and hopping the fence to feed them when the snow’s too deep to open the garden gate. Hopefully they make it!20150905_123436_HDRBut for now the weather’s still warm and the bees are loving it. In fact, look who I found later in the flowers by my house! She’s not necessarily one of ours, but I’m choosing to believe she is. 20150905_133854_HDR

Kombucha?

IMG_7952

I didn’t know what kombucha was when I made it.

My friends Keri and Justin from the community garden invited me to their house for a festival of fermentation. I gave them wine. They gave me a sourdough starter, a ginger soda starter, and a kombucha starter. Tragically, the sourdough went bad in a way I’ve never seen anything go bad before. The ginger is still lying in wait. But with the kombucha I went ahead full throttle.

If you notice that some of my pictures actually look good, it’s because they were taken by my friend who has a real and very nice camera. Go see his other stuff on Flickr. Tell me which photos were taken on my phone as per usual and win a prize!

I learned everything I know about kombucha as I was making it. It is, essentially, fermented sweet tea. At the heart of that fermentation is a thing called a SCOBY. This stands for Symbiotic Colony of Bacteria and Yeast. Why not SCOBAY? Your guess is as good as mine.
IMG_7950Here’s a bird’s eye view of a SCOBY I grew all by myself. It’s about five inches across. I grew it myself because – and here’s the catch – every time you brew a batch of kombucha, you grow a brand new SCOBY. Often people don’t have the heart to throw them away because, well, they’re little guys! So they store them up in jars called SCOBY hotels and find people to pawn them off on.

When Keri told me, via text, that she had a SCOBY hotel she wanted to share with me, it never even crossed my mind that I wasn’t looking at a typo.

Pawning off is of course an unfair term. I was more than happy to take this disgusting little critter into my home and drink the fluid it lives in. And I’m fascinated by the thought that these SCOBYs are passed and propagated from person to person and mine might have a noble lineage. Maybe I’ll get into SCOBY genealogy.

My housemates were less enthusiastic about this new addition to our home. They’ve long since accepted my weird fermentations. Or at the very least they’ve grown accustomed to them. Kombucha was a step into the unknown, however. And the sight of this slimy, vinegary disc teeming with rapidly reproducing life (as well as the prospect of having to do a taste test) didn’t calm any hearts or stomachs. I reassured everyone that it was perfectly natural and healthy and supposedly tasty. I took it for granted that I was right. 20150801_141203

By the by, if anyone out there really knows their kombucha and can tell from the pictures that mine is actually grotesquely unhealthy, let me know, I guess. Here’s one of the SCOBYs drifting slowly from the bottom of its jar up to the top to join with its newly formed offspring.

So what’s the deal with kombucha?

Essentially, it’s fermented sweet tea. It’s often flavored and carbonated to make something like a healthy person’s soda. And boy, is it healthy. Whenever I wanted to read about it online, I’d first have to wade through paragraphs and paragraphs about probiotics and detoxification and anti-oxidants. Is any of it true? All I know is I had a cold, I drank some kombucha, and I still have that cold. Maybe I need to drink more.

The brewing process is excitingly easy. Brew some black tea, add a whole bunch of sugar, and let it cool. Throw in a SCOBY or two and some of the vinegary liquid it lives in, and fill up the remaining space with water. Rubber band a piece of fabric over the top of the jar and let it sit out of the way for around a week. You’ve just made kombucha. 20150806_142205_HDR

The sheer healthfulness of kombucha culture is a little bit of an obstacle. I read a lot of recipes, and according to every one I needed organic black tea and organic cane sugar, because the chemicals used to process the non-organic varieties can kill SCOBYs. And I had to use filtered water because the traces of lead in my taps would kill SCOBYs. Unfair though it may be, I couldn’t help but wonder if all these delicate SCOBY tendencies weren’t projected by the people who grew them. If I believe city water and non-organic sugar is bad for me, why wouldn’t it also be bad for my yeasts? So after following all the rules the first time, I brewed my second batch with tap water, Lipton tea, and Domino’s white sugar. Maybe my SCOBY felt healthfully bankrupt, but I didn’t notice any difference.

Though it was supposed to take as long as a week, the summer heat kicked my kombucha into overdrive and formed a new SCOBY in about four days. The taste was like a sweet apple cider vinegar. At this point kombucha is 20150806_142140_HDR
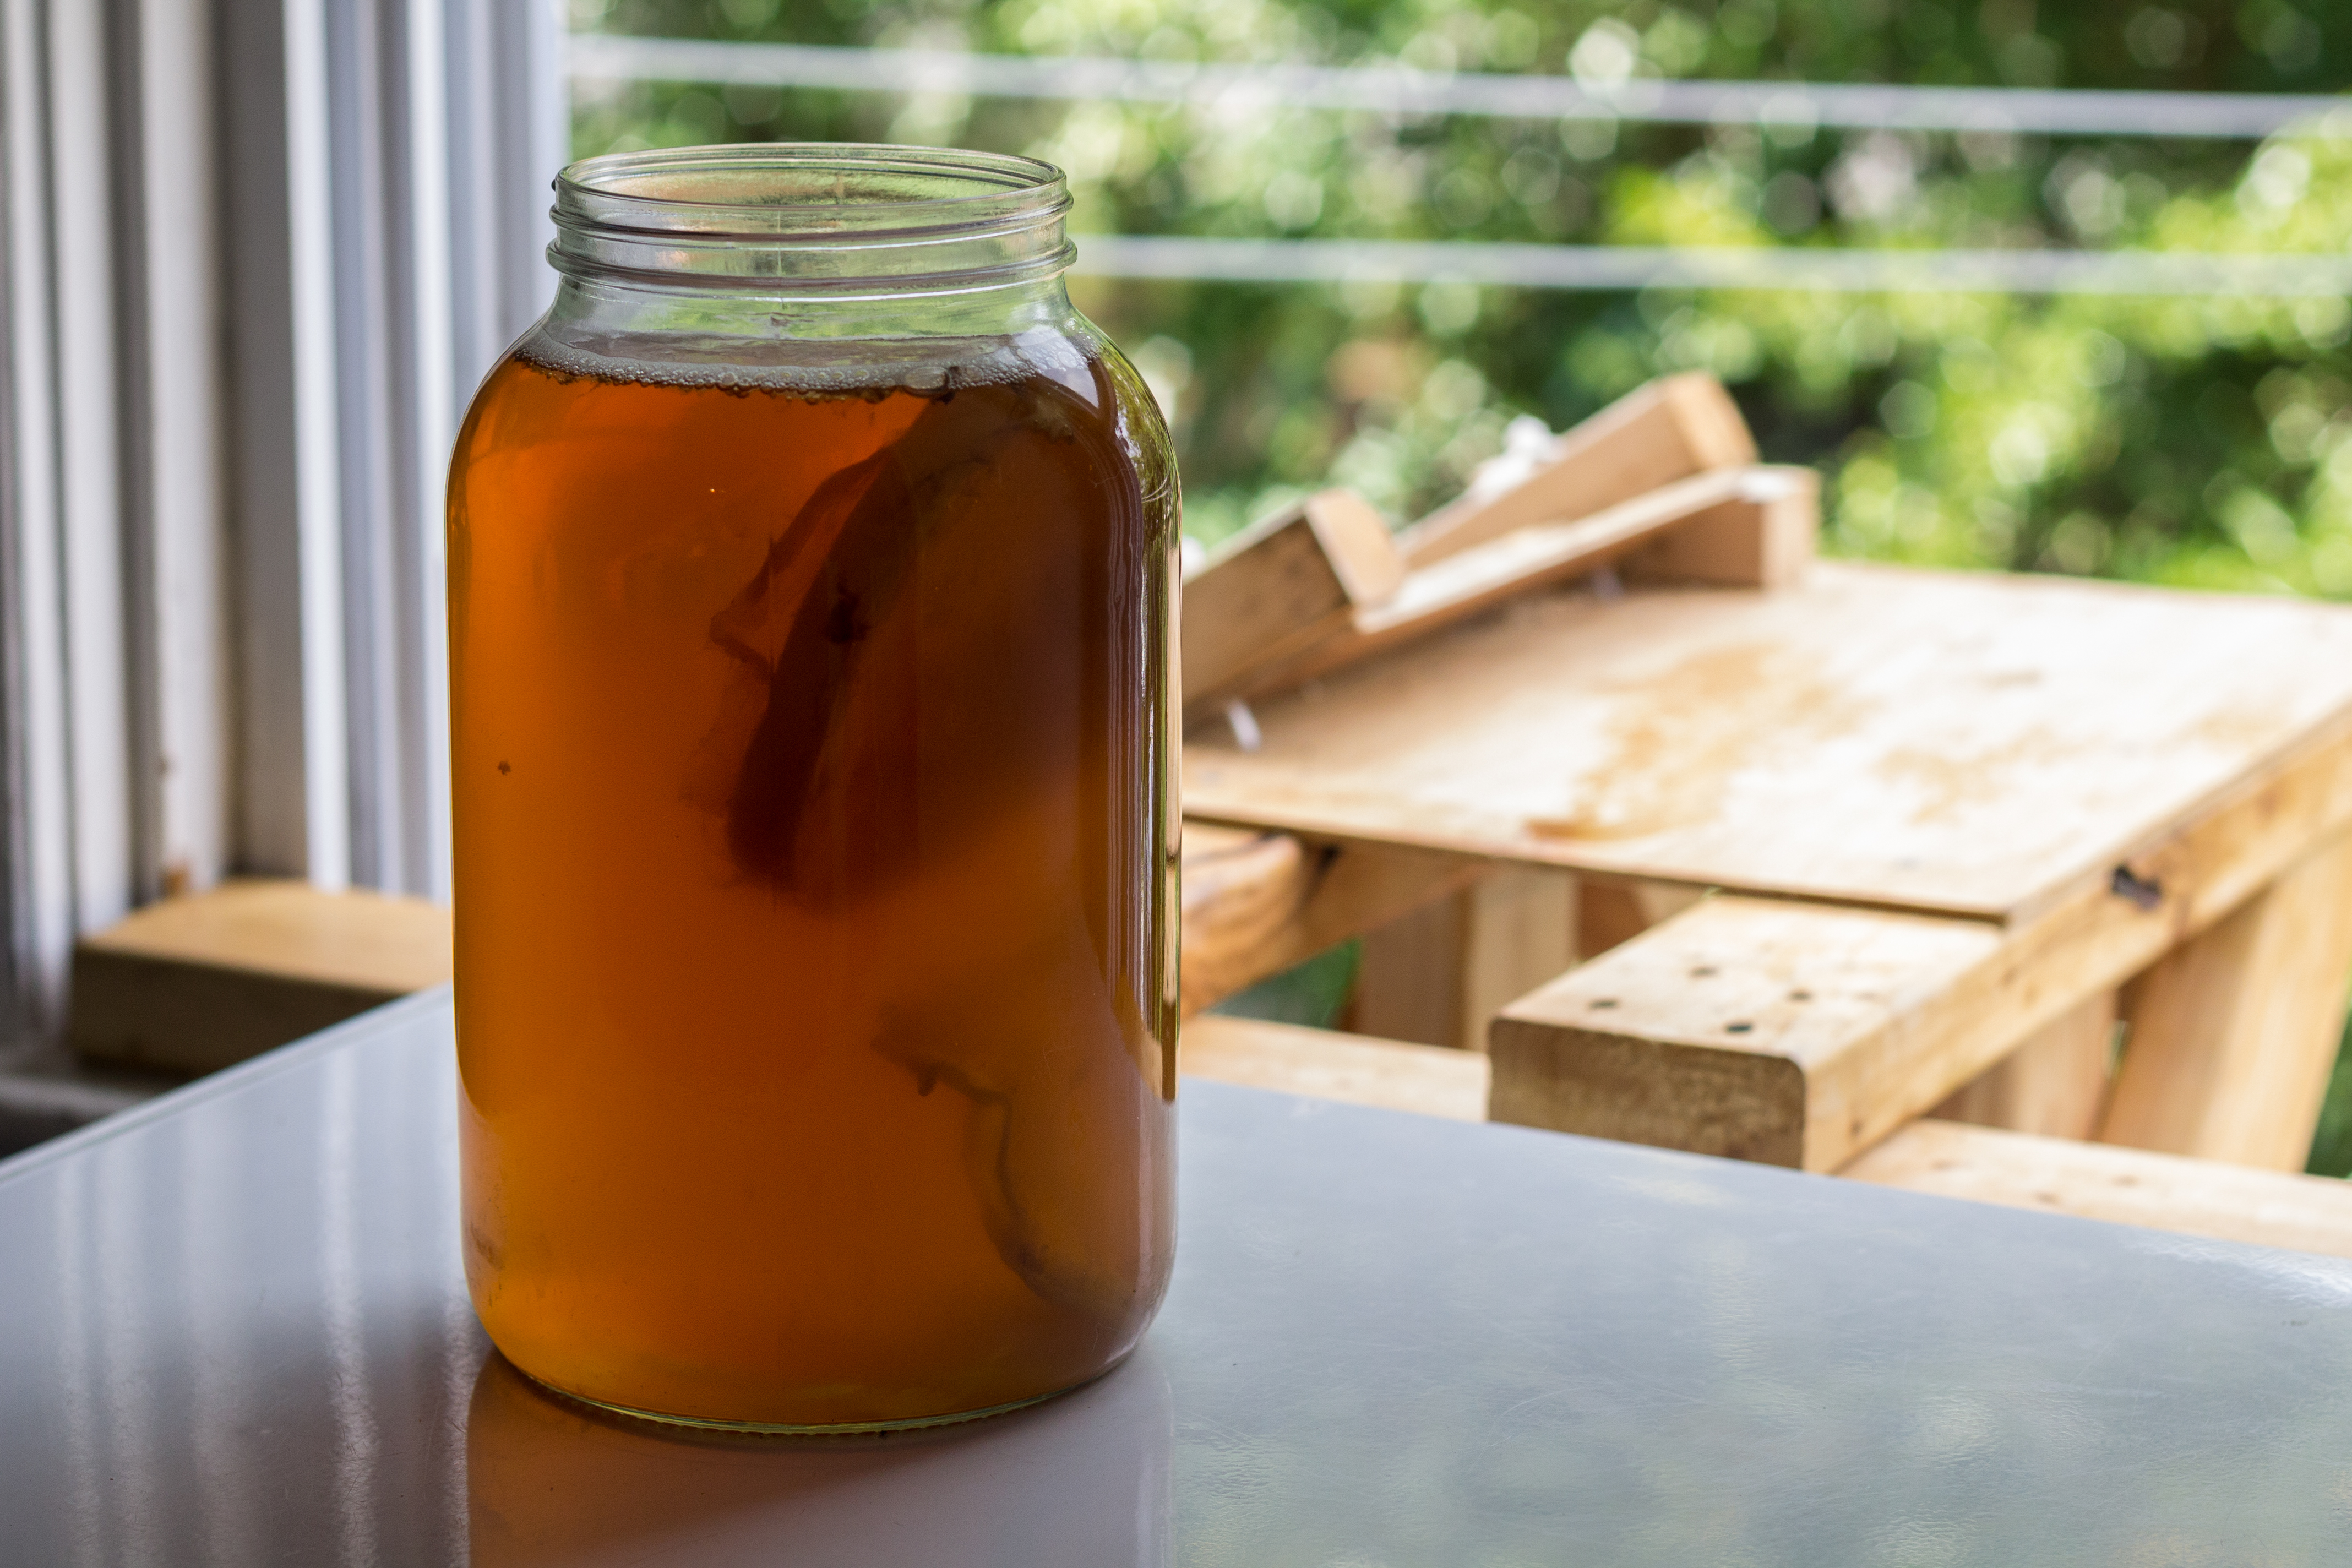
completely drinkable, but I chose to go a step further by doing a second fermentation with flavoring. This involved bottling the stuff in beer bottles with whatever I could find in the kitchen that I thought might taste good. I did lemon, honey, ginger, lemon honey, lemon ginger, honey ginger, and elderberry, to give you a sense of what I had lying around the house. I let the bottles sit out in the kitchen for about four days to allow the yeast to eat the sugars and carbonation to build up. Then I stuffed them all in the fridge to slow the fermentation way down and prevent explosions.

And the verdict? Pretty darn good! You can see from all the bubbles that the carbonation was a success. You can also see from that suspicious circle floating on the top of the glass that a new bottleneck-sized SCOBY began to form in each bottle. One slipped straight down my throat during an ill-fated afternoon refreshment. It was a little like eating a raw oyster.

20150806_204700Sneaky little SCOBYs aside, the overall rating was widely positive.

Even though the good reviews came begrudgingly and with a little suspicion from those who actually saw it made.

We Did It!

Honey is here!20150810_142221

After giving the triangle board a few days to work its magic, we stole the full honey box right off the top of the hive. We got all suited up, lit two smokers, set the honey box in a wagon, wrapped it in a sheet, and booked it on out of there.

We needn’t have worried. The bees didn’t even seem to notice that we were making off with a month’s hard work, and the honey box was completely deserted. The triangle board could not have worked better!

Actually, it could have worked a little better. The bees who left late must have been tipped off that something was up, because some of the honey had disappeared. After a certain point, every bee must have taken a bellyful of honey when she went through the triangle board. It’s not a huge loss, though, and it’s likely just been moved to the next honey box.20150810_141555

We brought the honey box back to Kim’s house and set to work spinning. I’d heard of “spinning honey,” but I’d never known what to picture and certainly didn’t think to take the term so literally.

When the bees declare a cell full of honey, they cap it off with a layer of wax. It’s almost as if they know what we’re up to and are trying to make it harder on us. To clear a path for the honey to slide out, we have to remove every single cap. For the first frame we used a tool that looked like a pointy afro pick to poke them out. For the next frame we tried out an electrically heated knife that came with the rental equipment. It was a lot more effective. It was like running a hot knife through butter. Except the butter was wax.

20150810_142558

Once the first three frames were uncapped, we initiated the next phase. This contraption is the extractor itself. A tall cylinder with a hand crank on top, it’s a lot like an ice cream maker. Inside are three wire racks, each of which holds a frame. It’s like an ice cream maker with a rotisserie chicken cooker inside.

With the frames loaded up, it was time to spin. And spin is exactly what we did.

Turning the hand crank whirls the racks around and the honey, uncapped, gets flung out of the comb by centrifugal force. It hits the walls of the cylinder and slides down to collect in a reservoir in the bottom. I gave it 200 cranks in one direction, flipped the frames, and gave it 200 in the other direction. I threw in another 50 for good measure at the end. Honey

Here I am getting into the spirit of things.

Between the hot knife and the spinning, we got a nice two-man procession line going. Before long we had all nine frames extracted and were ready to move on to filtration. At this stage, the honey contains a lot of wax and more than a few stray bee parts. You gotta strain. Disastrously, our rental equipment was missing its filter! My huge brewing straining funnel stepped up to the plate, though, and performed admirably. You’d never even know it wasn’t part of the setup.11872238_10206296204155550_5329416799319933996_o

We let the honey drain out of the extractor into the funnel, then through the funnel’s mesh into the bucket below. Honey doesn’t move fast, and the day took on a slower pace from this point forward.

When the extractor was empty, we could move the bucket and funnel mess up to the table and begin bottling into 1 lb and 1/2 lb jars. I also set aside three pounds to make into mead. 20150810_160935

We opened up a bottle of my previous batch of mead to sip while the honey drained. I have to admit, this honey has a richness to it that the store-bought stuff I’ve been using in my mead lacks. I’m so excited to brew with honey I’ve actually raised and harvested myself, but I’m afraid this will ruin me for the cheap and easy method.

So it goes.

I’m also becoming more aware of the tremendous range of flavor honey comes in. So many mead recipes I’ve read call for specific blossom varieties, a distinction I’ve never really taken to heart. I thought there might be notes of specific flavors that came through mainly to those who were looking for them. Kim and I sampled a few different honeys, however, and I was bowled over by how different each batch was. We tried a jar from our garden in the spring of 2013. (The last jar in existence, Kim said. There’s a dark finality in small artisinal batches, man). It tasted, for all the world, like flowers. Way beyond slight notes. 20150810_162330

Then we tried a jar from the fall of the same year. From color alone, you could tell something was different. It was dark. Almost brown. And it tasted, I swear, like autumn. It was smoky and so rich. I’ve never had honey like that.

Then we tried a store-bought bottle from the Caribbean that Kim had been given as a gift. She says once you become an acknowledged “bee person,” people start giving you honey stuff. I’m alright with that. This bottle was completely different. It was dark, but not thick. And while it was sweet, of course, it had a spiciness to it. It was almost hot. I’m not sure I’d put it on my granola, but it was fascinatingly different.

But enough of my poetic honey waxings. (Thank you ladies and gentlemen, I’ll be here all week). 11857549_10206320240276438_2126174302_n

All told, we collected about 30 pounds of honey. Not bad at all for just one month with the honey box! At this rate, we may very well get another harvest in. We’ll be selling the honey within the community garden and using the proceeds to offset bee costs.

Maybe buy a hot knife of our very own.

Robbing the Hive

The bees must be so confused.20150808_110149

Soon we’ll be harvesting the nearly full honey box, so we’re taking care of a few things in preparation.

First we put together a new honey box to replace the one we’ll be thieving. A lot of last year’s honey box frames fell prey to a moth infestation, and rather than risk carrying any eggs over, we bought and constructed all new frames.

All bees need to get going is a nice hexagonal pattern. Really, they don’t even need that, since the hollows in old trees they might frequent in the wild don’t have anything quite so factory-perfect. It’s a good nudge in the right direction, though, and it encourages them to build in a way that keeps the frames easily extractable. 20150808_104829

This is what a frame looks like before the bees have their way with it: a big flimsy game of Q*bert.

A lot of beekeepers buy these sheets printed in plastic, but we’re going au naturel and using sheets printed in pure beeswax. After the frames have been used, we put them in a solar wax melter, and it’s much easier going if the whole thing just melts away without plastic getting involved.

With our new frames assembled, we opened up the hive. This time Kim let me do all the prying open and heavy lifting. I took off the cover and set aside the existing honey box. Here the bees are spilling up out of the top of the hive body and through the queen excluder among the burr comb they’ve built between it and the honey box. As you can see, I’m still rocking my stupid taped-up pants. They’re my bee pants now.IMG9583171

Rather than go poking around in the hive body, we set to work building up all our new layers. It’s all about getting in and out quickly before the bees get too aggravated. Our colony is outrageously good-natured, and every time we’ve managed to accomplish our goals before they get territorial. They’re so friendly, in fact, that I have yet to be stung.

Actually, I have never been stung. Ever.

The day might come that I learn I have a severe allergy, and that’ll be the end of an illustrious career. I hope not.

Anyway. We put the fresh honey box (the white one here) on top of the queen excluder. The lighter tan strip on top of the honey box is a shim. It’s just a wooden frame with a circular hole drilled into one side. To keep the bees from returning to the honey box, we have to close off the door that normally sits above it. The shim makes up for the lost airflow.IMG9595091

The thing I’m putting into place on top of that is a triangle board. Under that hole is a piece of mesh covering a series of wooden triangles. Here’s a good picture if that lame explanation meant nothing to you. It’s essentially a one-way bee maze: easy to get out of but hard to get back into. Finding her normal door closed, a bee makes her way through this maze and either out the shim hole or down into the new honey box. Ideally, this happens dozens of thousands of times until all the bees have evacuated.

On top of that we put the old, full honey box. And on top of that we put the lid with its door sealed. On top of that we put two cinder blocks to hold the whole thing down in case of heavy winds. It is very nearly my size now. I was fine disassembling and reassembling the hive. I wasn’t overcome by the weight of the honey or the swarm of bees. But when it came time to put the full honey box back on top, I couldn’t do it on my own. I was just too darn short to lift something that heavy and that full of bees that high.IMG9593391

I may or may not be allergic to bees, but I most definitely am and always will be five foot two, which might put an end to an illustrious career if bee hives get any taller than this.

I hope they don’t.

I’ve published this on the Fox Point Community Garden blog, too. Go check it out!

Ten Pounds of Frozen Mulberries

I have ten pounds of frozen mulberries. 20150707_143950

At the end of the season I moved from my calm handpicking method to much more drastic measures involving a tarp, some bungees, and a long PVC pipe. Yields went up. Tree limbs went down.

By now the tree has finally mellowed and stopped producing fruit. The birds have moved to greener pastures and the driveway no longer smells like vinegar. And I have to find something to do with all this fruit.

Or rather, I have to find a few things to do with this fruit in a way that adds up more or less to ten pounds. Thankfully all the berries are frozen, so any time constraints are replaced by freezer space constraints. Which are also kind of pressing.

For my first project I’m trying a very simple wine. I’ve read a few recipes that recommend adding raisins or juice because mulberries on their own make for a very thin-bodied wine. In fact, the alternate recipe in that link calls for both raisins and orange juice. For my first batch, though, I’d like to do without the bells and whistles. I’ve still got six pounds to tinker with if I think I can make improvements. And I figure as long as I’m in this house I’ll have summertime mulberry re-ups.20150721_220801_HDR

I thawed four pounds of berries and threw them into a bucket. They were still unbelievably cold, so instead of crushing them with my hands like in the old country, I used a potato masher. I think the effect was more or less the same.

I added a pile of sugar plus yeast nutrient, acid blend, and pectic enzymes. I threw in some sodium metabisulfite and let the berries sit for a day to hopefully kill off whatever’s been living in our driveway.

Then I pitched the yeast and got this bizarre moonscape. I’d say it’s halfway between a satellite map and a cobbler.20150723_162514

I let the yeast do its thing, squishing the berries and swirling the bucket daily, leaving the lid loosely on the bucket with just a cloth over the grommeted hole to let oxygen in but keep fruit flies out. I did this for a week, and I think it was too long.

A lot of my problems at the moment seem to come from the weather being too hot. I can’t wait until a few months from now when I get a whole new batch of unforeseen cold weather problems. 20150730_124032_HDR

I racked the wine to a carboy by siphoning it through my trusty mesh funnel. I forewent my old nylon stocking trick because I thought the wines I’d used it on had a certain… nylony taste to them. The funnel worked just fine, and I got a beautiful full carboy of mulberry wine…

…That isn’t showing the slightest signs of fermenting.20150730_125359_HDR

It’s a great color. It tasted… fair. But there’s not a single bubble in the airlock. There’s not a single bubble creeping up the inside of the glass.

This stuff just isn’t fermenting anymore.

I’ve been reading up, and the problem is almost certainly due to the heat, of which we’ve had a lot lately. There’s a chance the fermentation has gotten stuck due to big fluctuations in temperature, which we’ve certainly had between daytime and nighttime. There’s also a chance it’s been so hot during the day that the fermentation has gone into overdrive and just plain finished.

I’m hoping it’s the latter problem, and I’m going to proceed as if it is and see what happens. I gave the carboy a hearty shake and no yeast turned up. I tasted it and it certainly tastes fermented. There is a risk that if it fermented at a very high temperature it’ll produce off flavors. I’m not sure I’m up to a high enough standard for that to be a problem yet.

20150803_175512_HDR
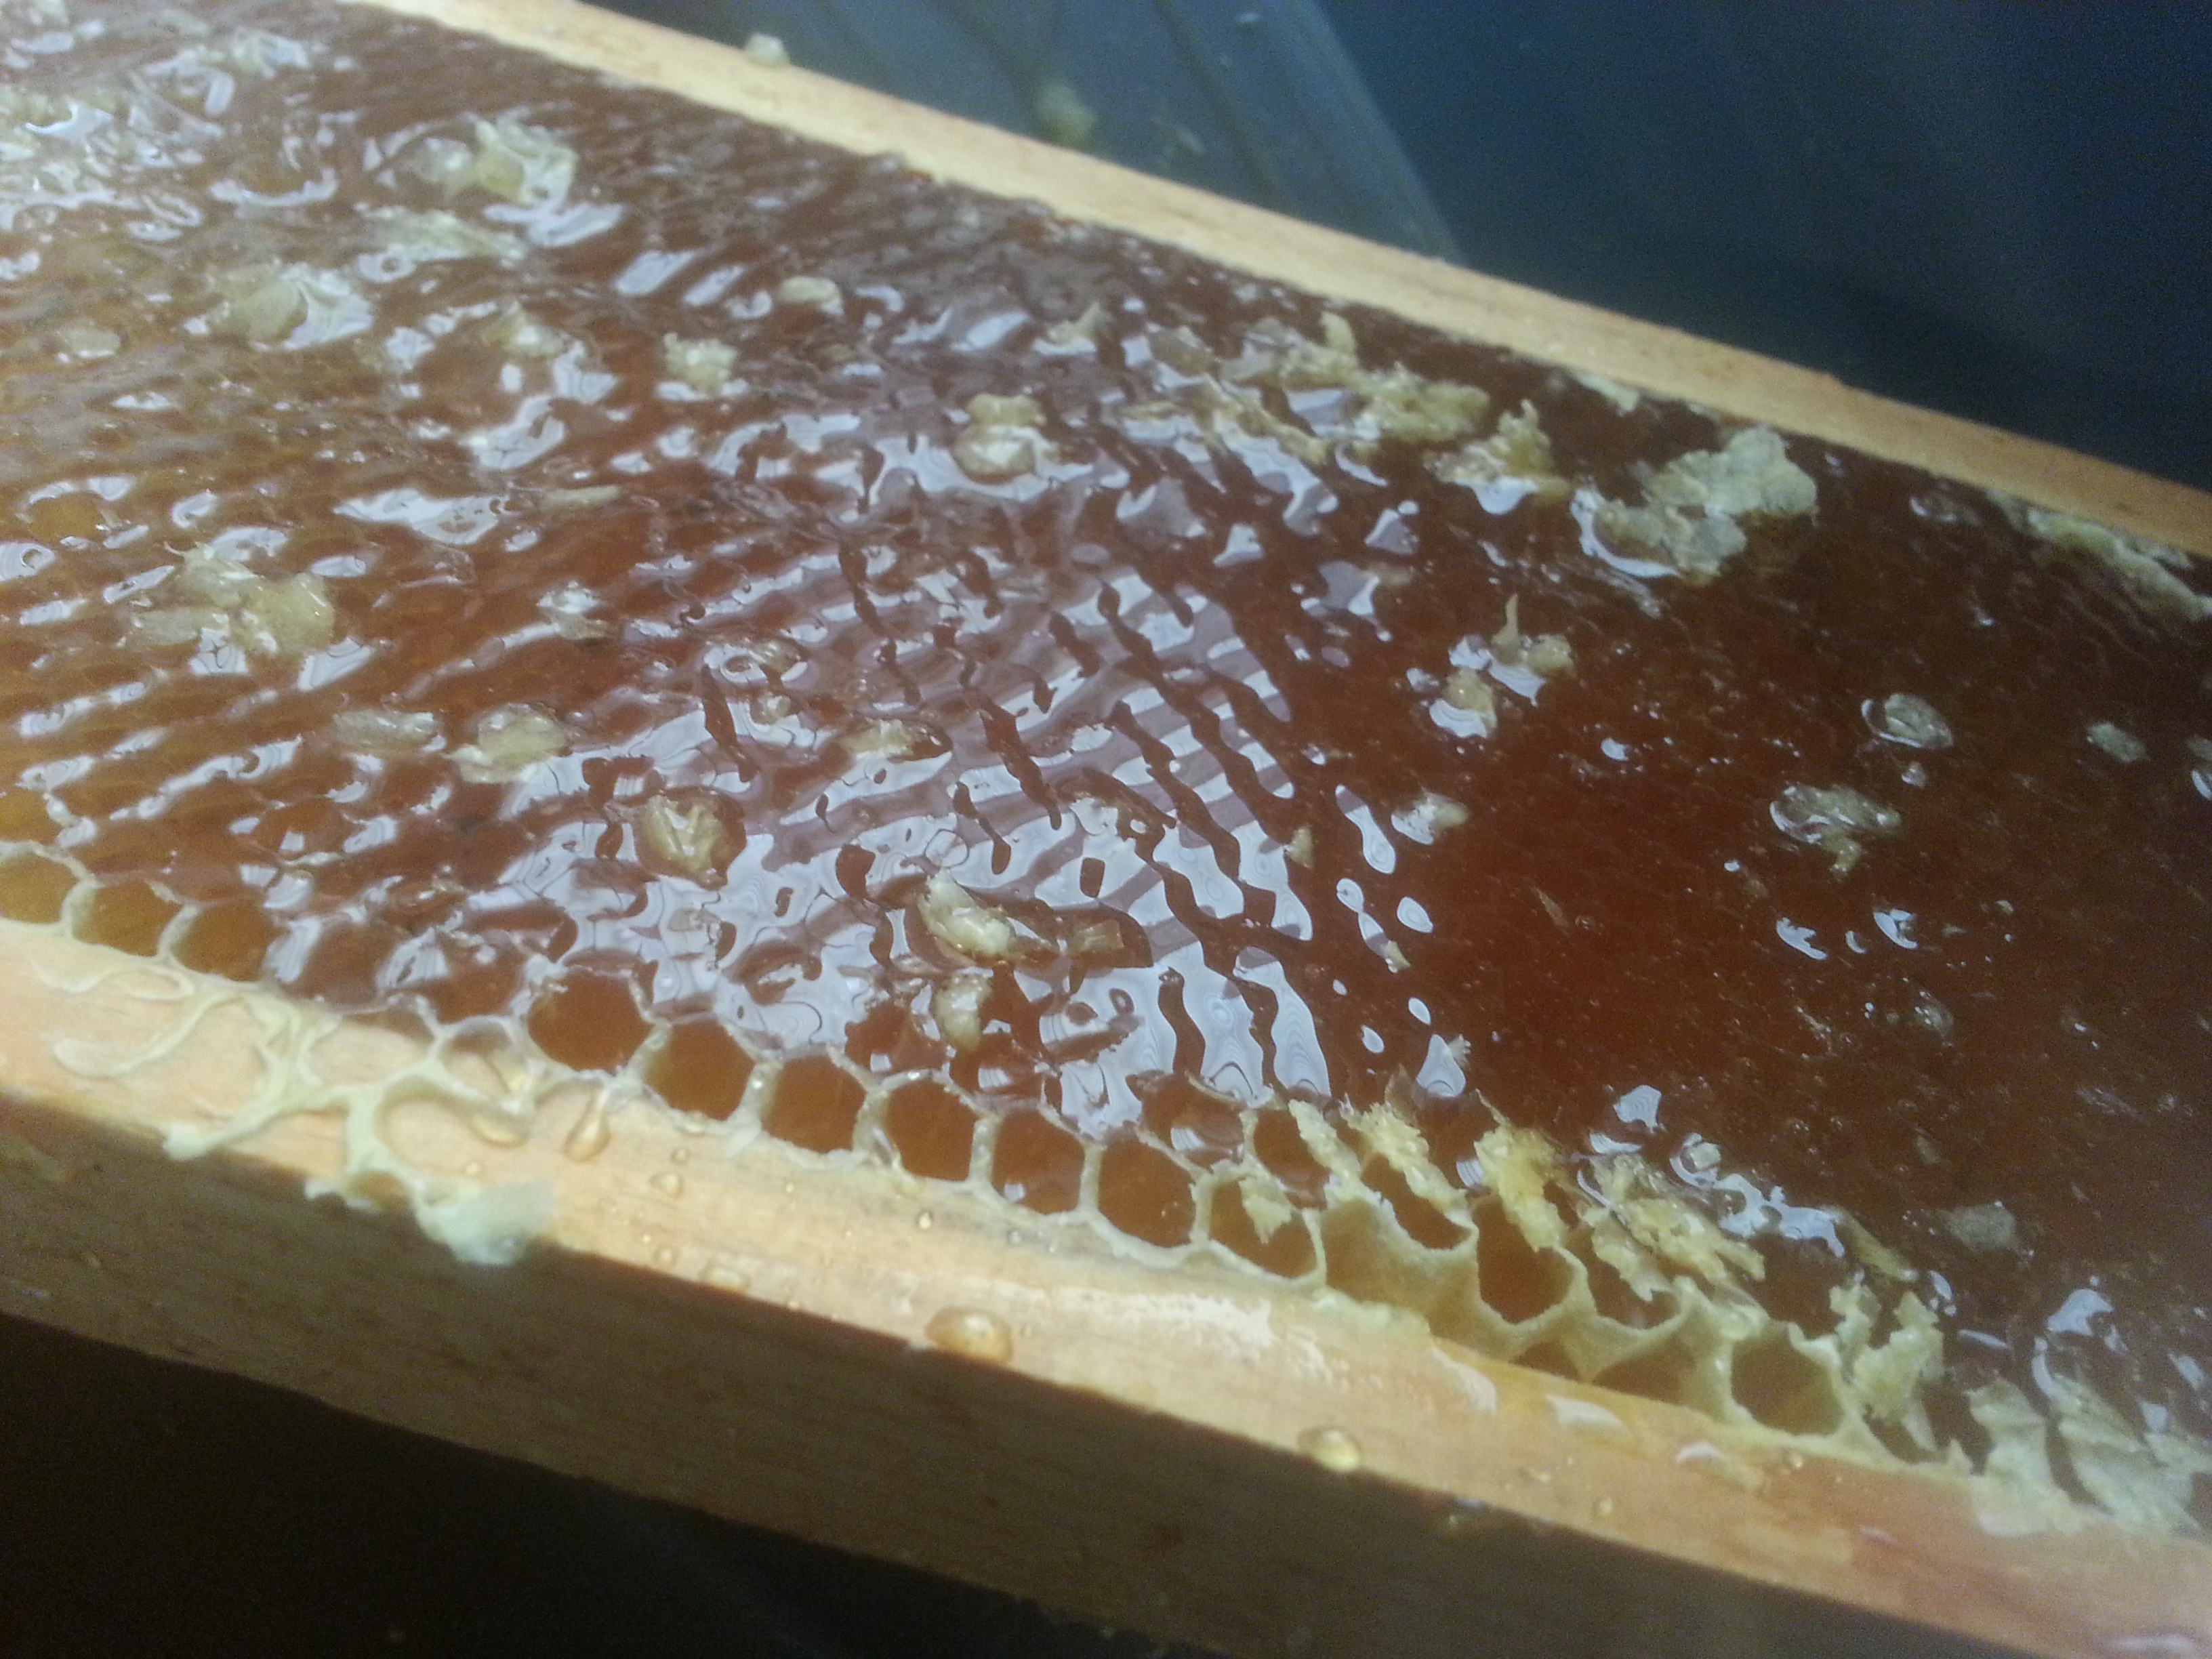
We’ll have to wait and see with the plum wine I’ve just made, too, because the exact same thing happened to it. Nice fermentation in the bucket, none at all in the carboy. Beautiful color and wine-y but not by any means good taste. Whatever the problem is, it seems to be environmental, and I’m tempted to believe it was a rapid fermentation.

This is partly because it means I don’t have to worry about it anymore.

Honey on Tap

Two bee posts in a row? But how? 20150801_113442

Truth be told, my last post was about events of a few weeks ago. Today’s is about today. So, through blog magic, you get to see the results of nearly a month of honey box action!

Before going in, we always thoroughly smoke the bees. Using this great little steampunk contraption we slowly burn pine needles, pumping the bellows occasionally to create nice puffs of white smoke. Once you’ve let the needles burn for a few minutes, the smoke changes from hot to just warm and, for bees, intoxicating. It has a real calming effect on them that beekeepers have known about and exploited for centuries. And it really does seem to work. 20150801_112412

After giving the bees a few minutes to get drowsy, we prised open the hive. We set the honey box aside for a moment and examined the top box in the hive body. This is where the queen ought to be laying and new bees growing up big and strong. These frames were covered in honey that had dripped down from the honey box. A very good sign.

We took a peek inside the top hive body: no sign of the queen this time either, but there was a huge amount of brood (egg cells), as well as larvae and some honey and nectar. Basically all evidence of a healthy and productive colony. 20150801_114135 (1)

After that it was into the honey box.

We could tell just from lifting it that the bees had been at work. Honey ain’t light.

The honey box is working exactly as we were hoping it would. Of the ten frames, two and a half are completely filled with honey and capped, meaning the bees have declared it done and sealed it off for storage. All the rest of the frames have at least some honey in them. This couldn’t be going better.

The bees are working at a very fast rate, which means we have to take our next few steps fairly quickly. For one, we’ll want to add another honey box so they have plenty of room to expand and won’t slow down production or move honey storage back down to the hive body. For two, we’ll begin our honey extraction. We have a special excluder screen that fits under the honey box and allows bees out but not back in, because honey collection is easier when thousands of bees aren’t involved. 20150801_114623 (1)

Or so I’ve heard.

I’ve cross-posted this one with the community garden’s blog, too. Go give it a read!

The Road to Honey

The bees are living the good life. 20150706_122814

At least they seem to be. It’s high summer and they’re producing well, which means it’s time to start messing with them. On our most recent trip in, the plan of action was to take stock of life in the hive and, if all was well, install a honey box.

A honey box is a slightly squatter version of the boxes the bees live in. The main difference is that it’s separated from the rest of the hive by a queen excluder, a sheet of metal mesh that the worker bees can fit through but the larger queen bee can’t. That means no eggs can be laid past it, and it can be devoted to honey. Not all beekeepers do this, but it seems a whole lot easier to me. Here’s ours: the excluder will obviously go under it when we place it on top of the hive.

Our first order of business was to pretty up one of our old honey boxes. This meant scraping away all the propolis. Propolis is a hard, waxy substance (not to be confused with wax) that bees make to cement their hive together.

20150706_122104My friend Tommy, of previous mulberry
fame
, was visiting, so we set him to work scraping propolis off of the honey box and frames.

Poor guy. It was his birthday.

We went to the zoo afterward, though, so it was alright.

Propolis is popular as a dietary supplement and all-around healer. We saved all of our scrapings in an envelope that I put… somewhere. As soon as I find it I’ll try concocting a balm.

Once the honey box was prepped, we donned our suits. Kim always wears a full suit, and we managed to get Tommy fully outfitted. I always wear a full coat, veil, and gloves, but the rest of my outfit is a little more improvised.

20150706_123400I had already tucked my jeans into my socks when we discovered some holes worn through in a particularly bee-vulnerable area. I didn’t want to go all the way home for new pants, and I certainly didn’t want inner thigh stings. We had a roll of masking tape in with the equipment, and when needs must…

I wasn’t doing much with my dignity, anyway.

All passages to tender flesh sealed, we opened up the hive and took a look around. The bees have been producing famously. The queen is laying eggs at a good rate and the workers have started making honey. A couple of the frames were already noticeably heavy with it. With any luck they’ll take this new honey box and run with it.

20150706_125621
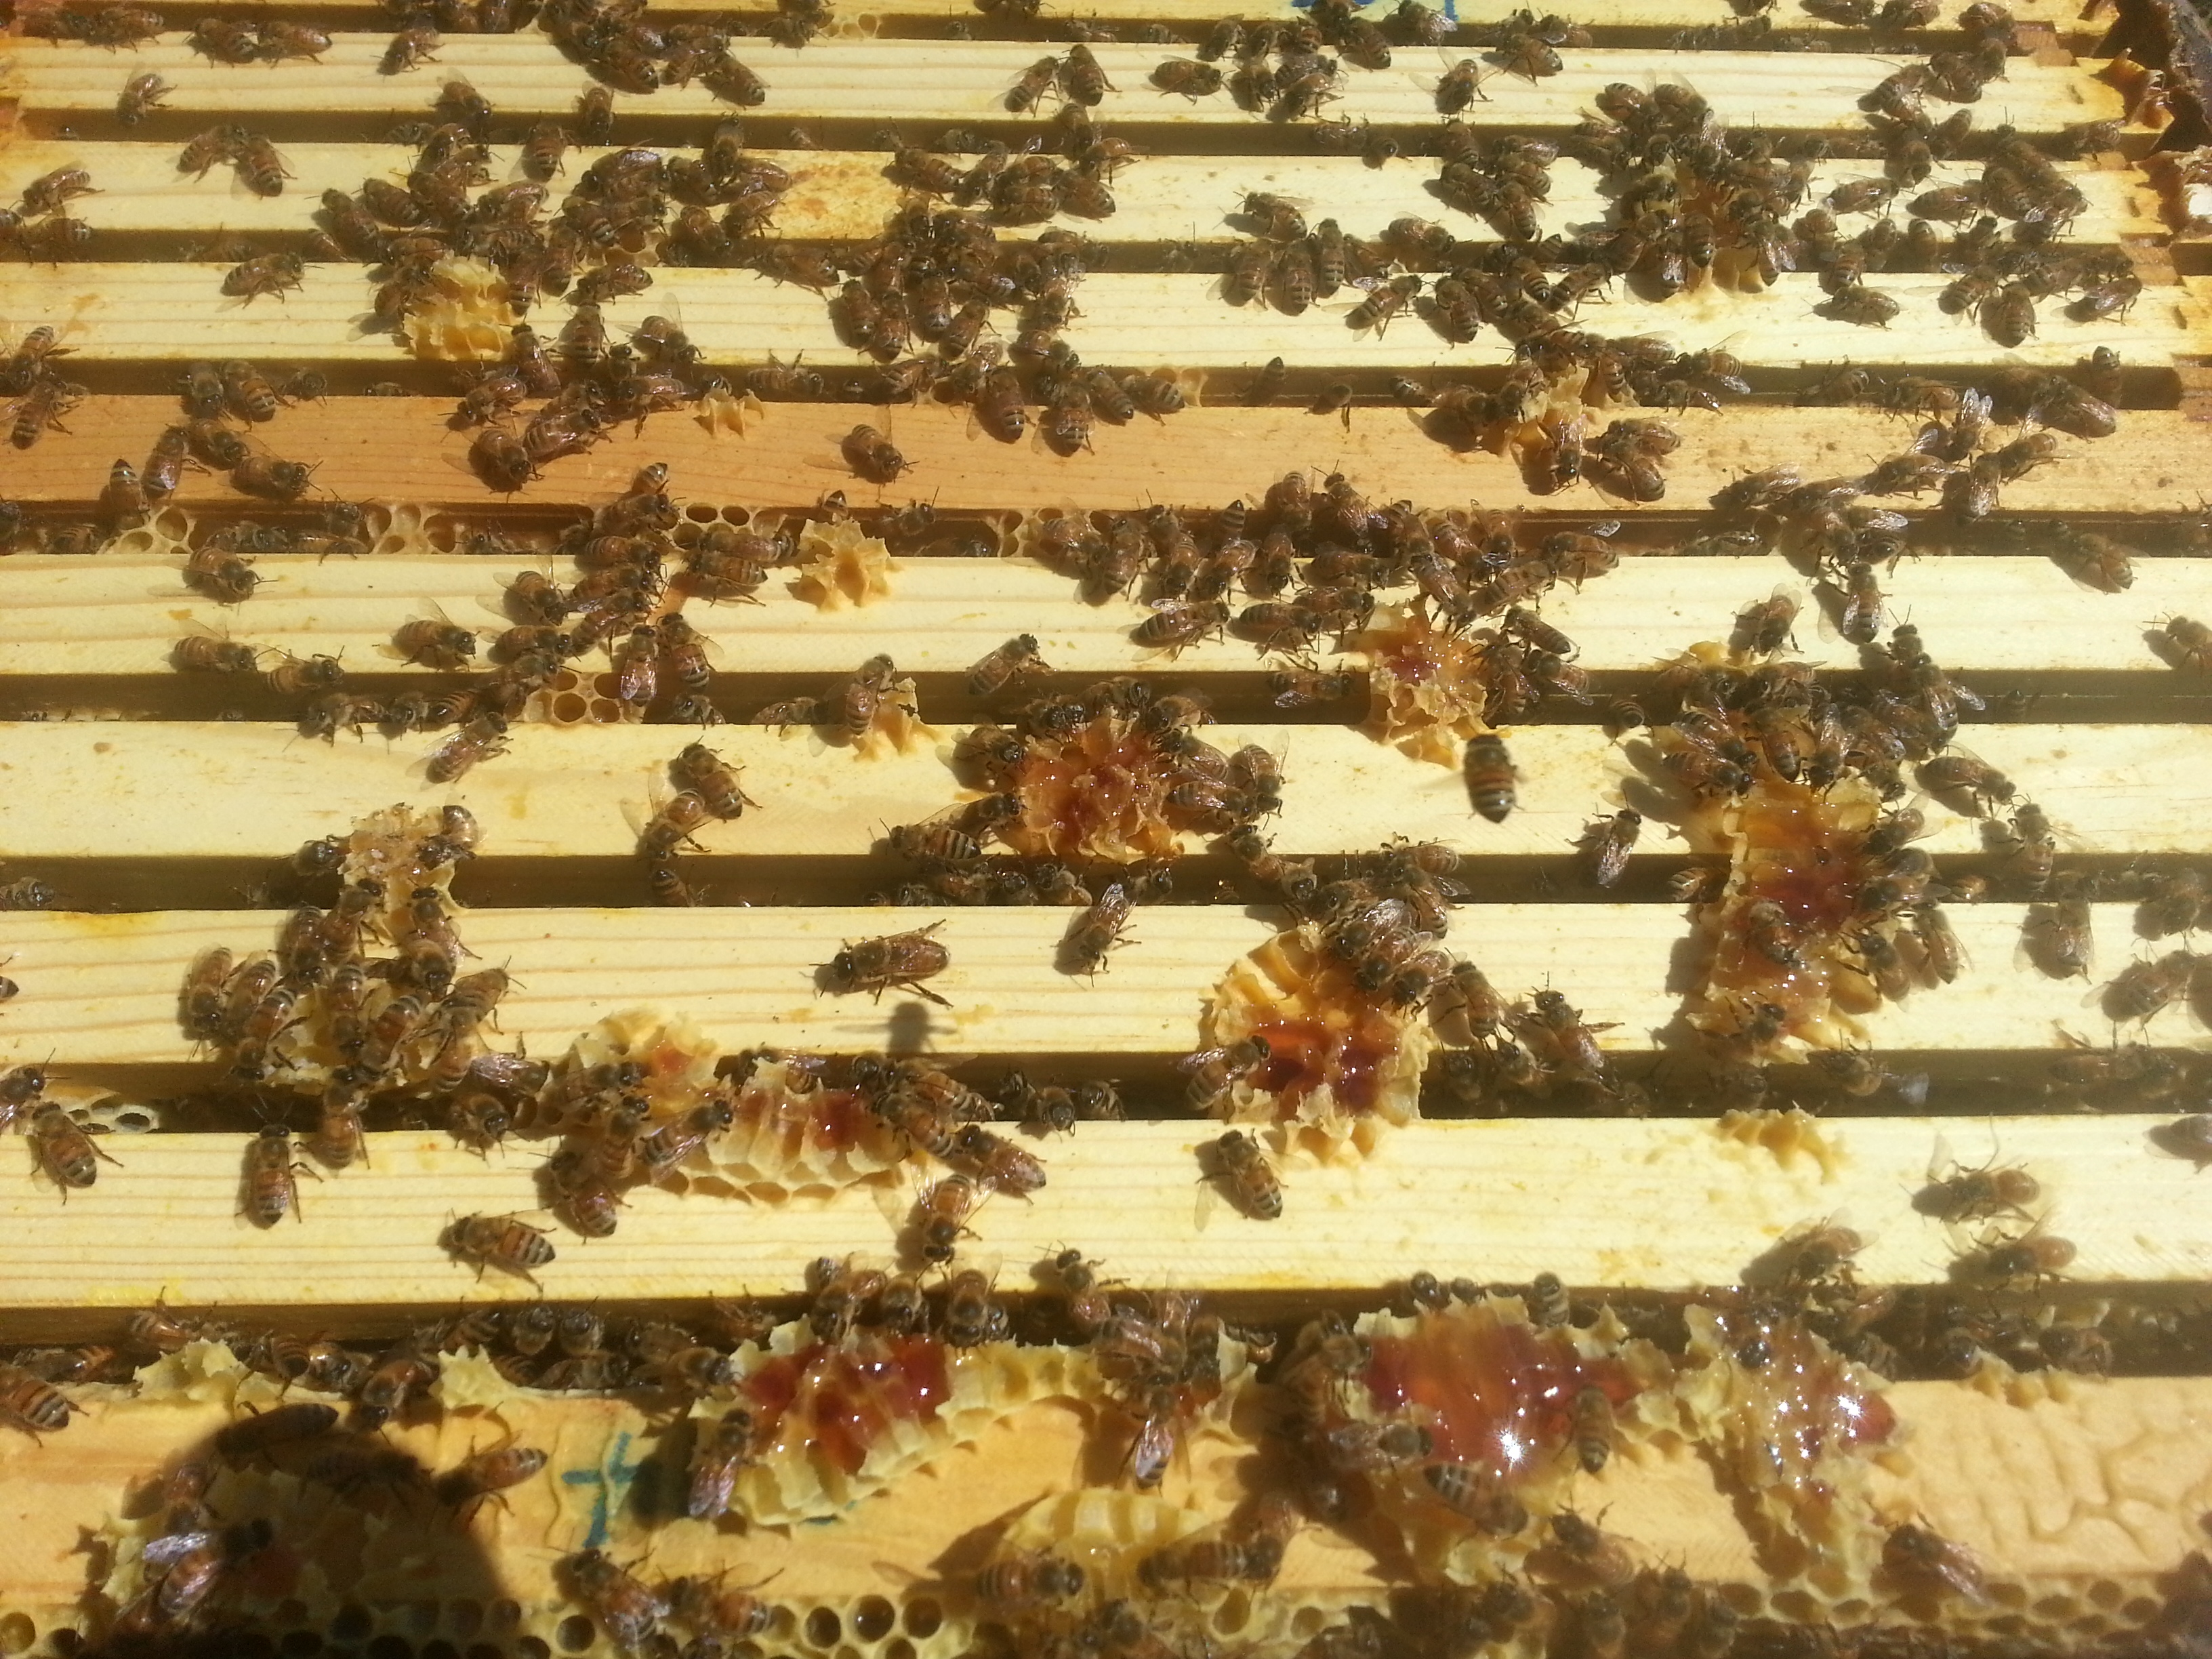
The last few times we’ve been able to find the queen, but this time she was hiding. This isn’t particularly worrying – there are thousands of little guys crawling around in there, and you can’t let yourself get down just because you didn’t find a specific one. It’s mainly good to find her because it shows she’s active, but with all the eggs and larvae present, it’s easy to intuit.

We also know she’s doing well because we haven’t found any queen cells. These are big, peanut-shaped protrusions on the frame, and each one holds a larva that’s being fed royal jelly – the goop that gives a queen that special queen flair (and ability to lay a whole hive’s worth of eggs). One of these larva will emerge before the others and, as her first royal act, she will murder all her proto-queen sisters in the womb. Bees are rough. This can happen when the previous queen is dead or just not very good at her job, so a lack of queen cells is a nice vote of confidence from the colony as a whole.

Queen cells may also be laid in preparation for a swarm. Bees swarm when they’ve20150706_125640 filled up their hive – the existing queen leaves, taking roughly half the population with her to seek greener pastures. The remaining colony stays behind with a freshly hatched queen. Our plan, if this does happen, is to steal the new queen before the swarm and raise her up separately in her own little queen nook. This way we’ll have an extra queen in our pocket if ours suddenly dies or a neighboring beekeeper loses theirs and calls in a favor.

It’s also another interesting way to play God.

I’m cross-posting this bee update on my community garden’s blog. Go check it out!

The Best-Laid Meads

My first mead was good!20150724_114023_HDR I’m as surprised as anyone. And since the only thing to do with moderate success is run with it until you trip over yourself, I’ve whipped up two more meads. They’re flavored, more ambitious, and a lot more free-wheeling. On the left we have raspberry mead, and on the right we have lavender mead. Both are bubbling away nicely.

Now for a note on honey. Here’s the thing about honey: it don’t come cheap. Or more correctly, it don’t come cheap unless you buy the cheap stuff. There will come a day when I have the money to buy humanely raised meat and raw, local honey. I hope. But it is not this day. Particularly when I’m still learning, I’d rather not pay top dollar for my honey. For my first batch of mead I used generic brand, pasteurized clover honey from my neighborhood grocery store (as far from purist as you can get) because I didn’t know what to expect and didn’t want to spend too much. And I was so happy with the results. So for the moment I’m sticking with my cheapo, heated, store brand bulk honey and aiming for quantity (and therefore variety) rather than quality.

That being said, I’m trying to make improvements in quality where I can. I thought my grocery store strawberry wine was a little lacking, so I’ve flavored my crappy honey with home grown ingredients. The raspberries were grown in my parents’ garden and frozen at peak ripeness. The lavender was donated by my community garden neighbor Ken, who’s getting overwhelmed by his huge lavender bush.20150724_161453_HDR

I wish I had that kind of problem. This is my lavender bush at present.

It’s over a year old and still so tiny!

Anyway, I had a hard time finding a definitive recipe for lavender mead online. There were plenty of rumors and memories of friends of friends who make it all the time, but nothing really concrete. And the few details that were concrete varied wildly, from steeping the lavender into tea, to leaving it whole in the mead for a month, to leaving it out completely until bottling. I’d already picked my lavender, so that last one was right out. In the end I decided to make up my own recipe, roughly adapted from this guy’s vague remembering.

In a sterilized pot I heated some water to 160F, then20150721_212127_HDR added an ounce and a half of lavender flowers. I let them steep until the water turned to a nice golden brown tea and the whole house smelled like lavender. I may have driven my roommates away for the night.

I let the tea cool a bit, then combined it in a gallon carboy with three pounds of honey. I topped the carboy up with water, added yeast nutrient and sodium metabisulfite, shook it up, and let it sit for a day with a towel over the top.

This may not have been a good idea.

I swear I’ve added nutrient and metabisulfite to must simultaneously before, but maybe never in a fully topped up carboy. When I checked on it the next day, the must had bubbled up into what was by then a very crusty towel. My suspicion is that I 20150721_224210_HDRwas feeding the natural yeasts from the lavender at the same as I was inhibiting them, and the feeding won out in the end. If this is the case, I may have some sub-par mead on the way.

Then again, I may have just shaken it too vigorously and the bubbling over happened in the first minute.

Only time will tell. Or maybe it won’t.

My raspberry mead had some hangups, too. Actually, raspberry mead isn’t called mead, but melomel – a fermented mixture of honey and fruit.

My raspberry melomel had some hangups, too.

I thawed and smushed the raspberries (just under two pounds) and shook them up with three pounds of honey, some sodium metabisulfite, acid blend, pectic enzyme, and enough water to equal a gallon. I did not add any yeast nutrient, because the recipe I was vaguely following didn’t say to. Maybe these recipes know what they’re talking about, because this one did not bubble over in the night.

The next day, however, I continued to follow my recipe closely and set my yeast and nutrient in a cup of water to get it started. I then poured it into the carboy and the liquid filled up straight to the top. No room for even a single bubble. Until now I’ve been pitching my yeast straight into the must, and for some reason it didn’t occur to me that extra water would mean extra volume. Whoops.

I had to get some of the liquid out; I was afraid that the very first bubble was going to pop the cork off this thing. The whole top layer was yeast, though. I wanted to get rid of the liquid in the middle. I eased the auto siphon in and the carboy promptly overflowed. There went a lot of my yeast. I released some liquid and pulled out the siphon. It was coated in a lot more of my yeast. No!

There was no immediate activity in the airlock, and I was worried I’d completely eradicated the yeast. I didn’t want to add more, though, in case I wound up with too much. I decided I’d give it until morning to start fermenting, and went to bed uneasy.20150724_114124

Lo and behold, this is what I woke up to! The next morning the raspberry melomel was bubbling with a vengeance, as was the lavender. They’ve both been put in cool and dark storage in the cellar.

The main lesson I’ve learned is that there’s no reason to do a primary fermentation in a carboy. I’m not sure what possessed me to do it, and to do it twice! The little bit of liquid I removed from the melomel tasted fantastic, though, so I have high hopes.

Just as long as those seeds don’t sprout…

The Worst Cakes in Providence

I didn’t even plant fennel. 20150618_125335_HDR
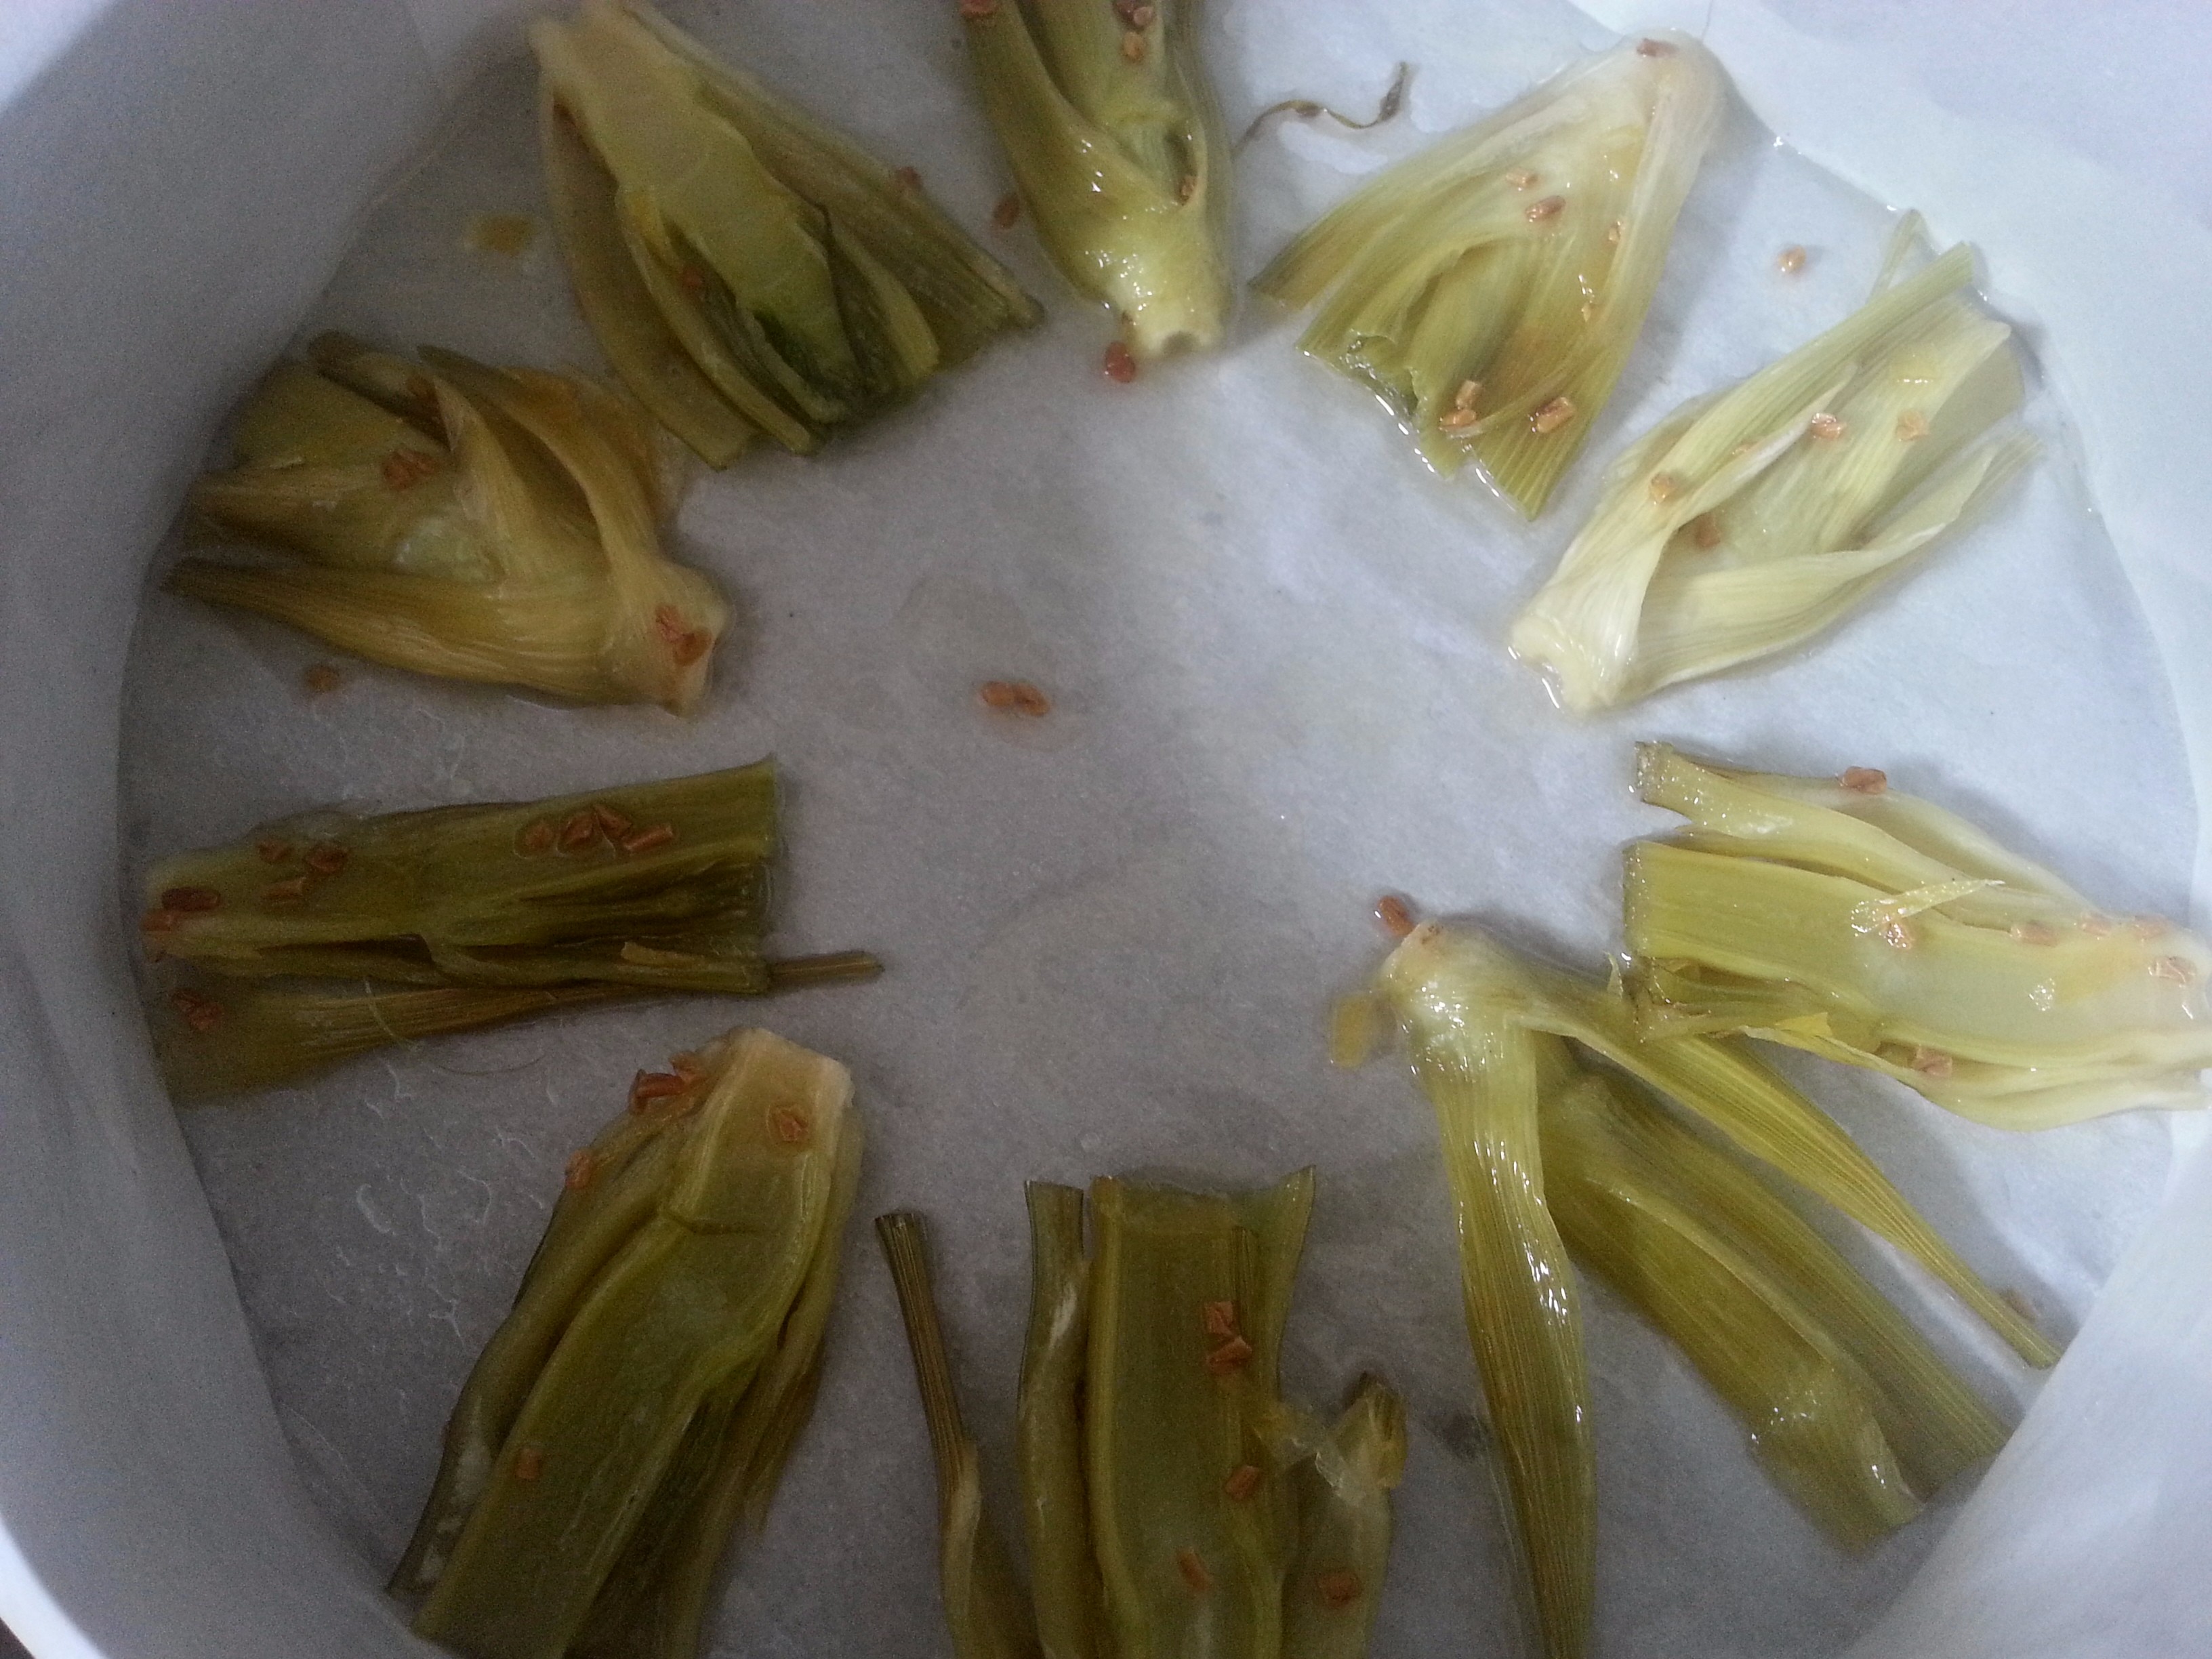
My neighbor in the community garden grew fennel last year, and it went forth and multiplied. Which is how I wound up with seven hardy volunteers in my plot this year. I would have pulled them, but they looked so happy and healthy (happier and healthier than a lot of my own vegetables) that I kept them. Besides – why turn down free fennel?

Unfortunately, as time went by, the fennel got so happy and healthy that it was shading everybody else. I wanted to get rid of it, but didn’t have the heart to do it before the bulbs formed. Finally, nature took pity and made the decision for me. An especially hot week made all the fennels begin to bolt at once. I’d read that the bulbs of bolted fennel are terrible, so I went down one night and gleefully ripped them all out of the ground. I left one, which I thought I might harvest for seed.

The next day was a lazy Saturday – dark and raining intermittently, it wasn’t a good day to set out far from the house. It was a good day for cooking, and I was suddenly fennel rich. I scoured the internet for something unusual I could do with fennel, preferably a dessert. I found exactly what I was looking for in this Candied-Fennel-Topped Lemon Cake. I wouldn’t even have to go to the store.20150718_141207_HDR

This cake was fascinating to make. I brought the fennel bulbs to a boil on their own, then drained them and simmered them with sugar, lemon zest, and fennel seeds. This step smelled amazing, and allowed me to indulge an age-old fantasy that I’m a 14th century monk who tends the abbey gardens and cooks up balms and cordials. Anyway.

In the meantime I mixed up a simple buttermilk cake batter with lots of lemon zest. The one resounding complaint in the recipe’s reviews was that this lemon cake barely even tasted like lemon, so I scraped clean all one and a half lemons I found in the fridge and came up with about double what the recipe called for. I’ve always been a proponent of extra lemon. 20150718_145921_HDR

I lined a round pan with parchment paper and oiled the heck out of it so my sugary fennels wouldn’t glue themselves down. My pan was wider than the recipe’s so I got this courtyard in the middle. The recipe also said the pan could be filled with a single fennel bulb, cut lengthwise into 1/4 inch slices. Mine took five. And “bulbs” might be a bit of an overstatement. I filled my pan with five bottom parts of fennel plants, cut into 1/4 inch halves. Then I reduced the syrup I’d simmered them in and poured it over.

I added the batter on top of that, then baked it for half an hour, which turned out to be the perfect amount of time for this pan. It smelled… mostly good while baking. Definitely interesting. It did smell like there was a competition between the generic sweetness of the cake and the herbiness of the fennel. The smells didn’t exactly mesh.20150718_153652

The cake came out of the pan with no incident and looked… pretty weird. Like someone had thrown a bunch of vegetables on top of a perfectly good cake. Which they had. And one of the fennels drifted away, ruining my thrown vegetable symmetry. Oh well. The taste made up for it, right?

The taste did not make up for it.

This was one of the worst things I’ve eaten. The sponge was fine, and I’d say double lemon was the right amount of lemon. But the fennel seeds snuck up on me. I thought they would have softened, but they were still hard, and with every other bite I’d hit one or two. They were tasteless until bitten down on, whereupon they’d release a flavor I wouldn’t even classify as “fennel.” I’d just call it “bad.” The fennel itself, despite all that simmering, was still just a vegetable, and so tough. I had to eat this cake with a knife and fork, and even in manageable pieces the fennel was sometimes unchewable. Granted, I might have chewed longer, but I wanted it to be in my mouth for as little time as possible.

I am not a picky eater. I like eating almost everything, and I will try absolutely anything. But I’ve never liked anise. I thought that baked, with lots of lemon and sugar, it would be different. I thought I could gain an appreciation for it. I was wrong.20150722_122124_HDR

I’ve dared roommates and visitors to try it, and they haven’t given it nearly such a bad review. They’ve called the fennel “a little chewy but good.” It’s still with us four days later, but it’s almost half gone, so somebody’s been eating it. Maybe it’s not as objectively bad as I thought, but if you don’t like anise, it is subjectively horrible.

I ripped out that last plant in my garden. I don’t think I need to save any seeds.