Lemon Hope

My lemon tree has had a strange winter. It’s shot up by a few feet and is about as tall as I am. And it’s lost a lot of its leaves…

Both very good reasons to give it a bigger pot.

IMG_4247

This tree has never given me a lemon and perhaps it never will, but I love it anyway.

I planted it from a seed three years ago when I moved to Providence. In a fit of gardening I went to the grocery store and bought every food I thought I could plant. The only remnants are this tree and my prized ugly rosemary bush, grown from a sprig.

I bought a 16″ pot with a false bottom that’s supposed to be self-watering. Citrus trees need a lot of water, so I’m hoping this helps.

IMG_4249

First I had to get the tree out of its old pot. I gently turned it on its side. Some loose soil fell out, but but almost all of it was bound up in the root ball.

Cat for scale.IMG_4254

It took some doing to get the root ball out of the pot. I banged on the sides and bottom and yanked gently on the trunk. The trunk is a good centimeter in diameter and very woody, but this was rougher than I wanted to be with it. I was about to get the shears to cut the pot away when the whole thing popped out all at once.

IMG_4260

The roots had started to circle around the bottom – not ideal. I loosened them up a little with my fingers, so hopefully they’ll spread out in their new home.

IMG_4266

I made a bed of a few inches of potting soil and set the tree on top of it. At some point in the winter it sprouted this new little stalk from the base of its trunk. It’s the healthiest part of the tree and my failsafe – if the main plant gets worse I’ll lop everything off and hope this little guy makes it.

There are some new leaves higher up, though, so I’m hoping for the best.

IMG_4271

I filled the pot up too high with potting soil and worked in some kelp meal. I’ll have to research what lemon trees like to eat, but in the meantime I get the impression that you can’t go wrong with kelp.

IMG_4277

I filled the pot even more too high with buckwheat hulls to keep the moisture in. My dad has forever put bits and bobs in his potted plants, so I do too. They’re especially helpful for holding the hulls in place and dispersing the watering can’s stream more evenly.

The bits and bobs featured here are oyster and scallop shells, a rusted railroad tie, and some rocks from Iceland.

IMG_4291

I’ve put the tree in a dappled shade part of the driveway. I’ll move it to full sun eventually, but this is already a big change from its window inside, and I don’t want it getting scorched.

Hopefully it starts to recover those lost leaves.

IMG_4293

Maybe someday I’ll even get a lemon.

Happy as a Bee

I was pretty worried about the bees.

We moved them in on a cold, wet day, and the days after just got colder and wetter. We’d planned to peek in on them on Saturday, but because of the cold we pushed it back to Sunday, which was also cold. And wet.

It was a bad week for bees all around.

IMG_4156

Despite the weather, we had to check on our queen. My parents were visiting, so my dad acted as photographer and my mom, to her credit, spent her Mother’s Day standing in the drizzle watching me play with bees.

I did make her brunch afterward.

IMG_4163

The bad weather had me worried. I’d gone down the day after installation and didn’t see a single one. Normally after moving into a new home, the workers will fly around and around the entrance orienting themselves. The temperature was in the 40s, though, when no sane bee would leave her home. It made sense not to see them, but I didn’t like that I couldn’t.

IMG_4172

I put my ear up against the side of the hive – I thought that if I could hear buzzing, I’d at least know they were alive in there. But I couldn’t hear a thing. I was prepared for the worst.

IMG_4166

But I didn’t need to be! The bees are not only alive, they’re productive! They’ve already started drawing out comb!

IMG_4169

The queen is alive and has been naturally released from her little cage. We spotted her crawling around on a frame.

IMG_4170

They haven’t taken very much of the syrup – the jar was still mostly full. We’re not overly worried, though, since we started them with a few frames of pollen and honey from last year. It makes sense that they’d want to eat that before sugar water.

IMG_4181

Since it was raining, we closed up shop as soon as we found the queen. One of these days it’ll be nice enough to do a real inspection. For the time being, we confirmed everything we needed to – the queen was free, she’d been accepted, and the workers were working. We put the syrup jar back in place and popped the lid on top.

IMG_4175

I was down just this afternoon, and the bees were flying around happily. They weathered the storm and should have a warm, sunny week ahead of them.

If you’re in the garden, stop by and say hi!

IMG_4301

From a safe distance, of course.

The Bees Are in Their Bee House

You heard it here first – the bees are hived and happy.

Early this morning the bees were in Georgia, their home state. Then they were loaded into the back of a truck and driven to Wood’s Beekeeping Supply and Academy, where we picked them up.

20160504_163508

Here they are! Three-thousand happy little guys. I’m just kidding – they just got shaken out of their hives to travel 2,000 miles to a cold, wet place. They’re probably far from happy.

IMG_4126

These six in particular must have spent the entire trip clinging to the outside of the package.

IMG_4127

The weather was threatening rain all day, and as luck would have it the heavens opened just as we picked our bees up. We wanted to get them in, though, so we worked very quickly. I poked some holes in the lid of my bee syrup jar. We turned it over, and after a few seconds of dripping, the vacuum seal held. The bees will be able to pull the syrup out when they want it, but it won’t just drip all over them.

IMG_4123

Finally it was go-time. David grabbed the bees and we booked it over to the hive.

IMG_4129

We set them up in our state of the art weatherproof environment.

IMG_4137

And we set to work. Technically I was in charge of this installation, though Kim had my back. Using the hive tool I pried open the lid of the package and pulled out the syrup can. The bees travel with a can of syrup so they stay fed on the road. That’s why they’re so clustered around the top of the package.

With the can out of the way, I could get to the queen. She travels in a much smaller mesh cage with a handful of attending bees.

IMG_4134

She has to be kept separate because the bees in her package aren’t actually part of her colony. Queens are reared separately and put into these cages with a few bees who’ve grown up with and know her. But the 3,000 others are miscellaneous bees from other colonies. They’re literally shaken into the package and given a queen at random.

Bees don’t take kindly to random queens – in fact they go out of their way to kill them. That’s the reason for the separate queen cage (that, and making her easy for us to find). If she weren’t kept physically separate from the strange worker bees, she’d be dead before they left Georgia. Give her a few days, though, and she can spread her queeny pheromones and adopt this new colony as her own.

The key is keeping her in the cage inside the hive, so the colony can’t kill her before they get used to her. The cage comes with a pre-drilled hole in the side, plugged up with a cork. We pulled the cork out to reveal a second plug made of candy. Bees can’t chew through cork, but they’ll jump at the chance to eat some candy. The process takes a few days’ time – just long enough for them to fall under the queen’s sway. By then the queen will have a clear path out of her cage and a hive full of loyal subjects.

I hung the queen cage between two frames in the hive by nailing the attached yellow ribbon to the top of a frame. You can clearly see our queen in the topmost circle with a big white dot of paint on her back.

IMG_4140

The queen in place (you can see the yellow ribbon laid across the frames), it was time to dump everybody else into their new home. I took three frames out of the center of the hive body to make room. We sprayed the bees with some bee syrup to calm them down (because they focus their attention on grooming) and clump them together (because they’re really sticky). Since it was a cold day, we went very light on the syrup so as not to chill them.

Also to help the clumping process, I gave the package a gentle but firm whack against the deck to knock them all down onto each other.

IMG_4147

And then I shook them out. That’s all it takes – a little bit of shaking and maneuvering, and the majority of them dropped out through that hole and into the hive.

I very gently replaced the frames (don’t want to squish the bees below!) and put the inner cover on. On top of the inner cover we placed a second deep hive body to surround the inverted bee syrup feeder (lifted up on pieces of wood to give the bees room to get to the holes) and the package. Not all of the bees came out, and they’d have a very bad time left out in the cold and the rain. We covered everything up with the telescoping outer cover and got out of there.

On Saturday we’ll go back in to check on the queen and make sure she’s been released and welcomed. If she hasn’t been released, we’ll let her out. If she hasn’t been welcomed, we’ll panic and try to find another queen.

IMG_4144

Until Saturday, it’s all up to the bees. I hope they’re warm tonight.

Bee Syrup

The bees are coming tomorrow!

The dandelions and most of the trees are in full bloom here already, but it’s good to give the bees some low hanging fruit to eat, at least until they get settled in and draw out all their comb.

What I’m affectionately calling bee syrup is just white sugar and water, mixed together at a 1:1 ratio. To facilitate mixing, I’m boiling the water first.

IMG_4069

And pouring it into a big old jar. This jar used to hold 4 lbs. of olives and is just the right size to hold 10 cups of water…

IMG_4084

Mixed with 10 cups of sugar.

IMG_4094

The solution that I got has a wonderful viscosity to it – check out those ripples that form in the wake of the spoon!

IMG_4103

My bee syrup is made, and now I’m just waiting for it to cool. Tomorrow I’ll use a hammer and a small nail to poke a few holes in the lid. This way, we can turn the jar upside down and rest it on top of the frames in the hive. A vacuum seal formed by turning the jar over should keep the syrup from all leaking out of the holes at once – instead the bees will be able to draw it out through the holes when they need it. We’ll surround it with an empty deep hive body and put the lid on top to prevent robbing from other bees. Basically our hive tomorrow will have two boxes – one for bees and one for food.

IMG_4108

I’m not putting any holes in the lid until I get this thing transported to the garden, though. Covered in syrup is no way to start a hive installation.

It’s Bee Time Again

I have good bee news and I have bad bee news.

The bad bee news is that our colony from last year is dead. They didn’t make it through the winter. On the first truly warm day of spring, I went down to the garden to check on them. They should have been flying all over, enjoying the sun and reorienting themselves.

They weren’t.

A few days later we got all suited up just in case and opened the hive.

IMG_2044

It was totally empty!

There weren’t just dead bees – there were no bees. Honestly this was one of the best case scenarios (coming in at a long second to living bees). I was having horrible visions of thousands of dead bees rotting in the hive. Instead of a disgusting job of scraping bee slime out of the hive, we had pristine frames and a whodunnit on our hands.

IMG_1995

Our screened bottom board had a few dead wasps on it, and our first thought was that the bees had been overrun by them. If that had been the case, though, there would have been bee corpses everywhere.

IMG_1976

The wasps weren’t killers – they were just opportunists. They must have come in after the hive was abandoned to steal the remaining honey. An unoccupied hive is an amazing find if you’re a wasp, unless you’re this poor little guy, who somehow died in the act of theft.

IMG_2056

My friends Will and David had come along, and we shed our veils and coats and did a thorough inspection of the hive.

IMG_1989

In spite of the wasps, there were still patches of honey. One or two frames were still pretty heavy with it. We’ll put these in the hive to give the new bees a head start.

IMG_2038

Some frames will not be going back in. When the colony disappeared, the wasps weren’t the only opportunists to set up shop. The wax moth is a particularly gross pest drawn to beehives. These moths lay their larvae in honey comb – when the larvae hatch they tunnel through the comb and leave behind this distinctive webbing. Their favorite food (because they are so gross) is the skin of bio material left behind in the cells when a baby honeybee emerges. They craw from cell to cell, gorging themselves on this skin.

IMG_2011

A strong colony should be able to fight off wax moths without a problem. They’re mostly a hazard when you store used comb that’s full of tasty brood skin but unguarded by bees.

IMG_2029

We found this webbing in a few of the frames. We won’t be reusing this comb, but we will save the wax. We gouged out the webbing (because who wants that?) and put the frames in our solar wax melter.

IMG_2008

What else did we find? Nothing much. A single cell of hot pink honey. Maybe one bee went off the grid and harvested a melting Skittle.

IMG_2060

A sad sight – a lone bee, about to be born but with no one left to take care of it.

IMG_2039

And a gorgeous display of packed pollen in different shades.

IMG_2066

So what happened to the bees? They didn’t starve, or freeze, or get murdered. If they had, we’ve have the bodies. Kim and I went to the Rhode Island Beekeepers Association meeting to talk to the experts, and the prevailing opinion is that Varroa mites are to blame.

Varroa mites are usually to blame when it comes to honeybee problems, especially here in the north where overwintering is so difficult as it is.

We didn’t treat aggressively enough for mites in the fall, so as winter wore on, the mites’ numbers increased. Bees with high mite infestation are much more susceptible to disease. Just like with everything else, bees’ attitude toward disease is very self-sacrificing. On a warm day, infected bees would have flown away from the hive to die, hoping to prevent the spread to other bees in the colony. But it was spreading anyway, and these sacrificial flights happened again and again until literally no one was left.

But I said I had good bee news, too, and I do! We’re moving on and learning from our mistakes, and we have new bees on their way! On Wednesday we’ll be picking up a package from Georgia – a little mesh box containing a queen and about 3,000 bees.

This will be the foundation for our new colony.

Uncle Beth’s Old Fashioned Mead

It’s about time I had some good mead news.

My first big batch leaked all over the floor, and I was too depressed and sticky to even write about it. My second batch started out strong, but then it just kept getting stronger and bubbled longer than it had any right to.

But this batch… is still the second batch. It’s the same mead, hastily thrown into four separate containers to try to stop fermentation because I didn’t know what else to do. But here’s the thing:

It’s actually good!

IMG_2083

I’d been dreading opening up these fermenters, and I put it off for a few months. This may actually have been the best thing I could have done. All the mead makers I’ve talked to have said the same thing – if you don’t like it now, just forget about it for a while.

IMG_2102

Tommy was visiting from Texas, which got me inspired. He’s always up for some good blog fodder. We hauled up the mead and gave it a taste. It was outrageously boozy – everything I make is. I need to get a better handle on the fermentation process so I can stop warning people not to pour a full glass every time they open a bottle of wine.

IMG_2100

Five gallons of mead is a heck of a lot of mead. My parents have been stockpiling bottles, though, and handing them off every time they see me. It felt excessive until I actually needed them. I was especially grateful for the big double wide bottles, because they gave us extra time to think between fillings.

IMG_2097

The corking was a bit of a pain. The corker is inherited from my dad’s wine making days and is made of plastic older than I am. You have to press with all your strength for it to work, but I’m worried all my strength will snap it in half. Some corks didn’t make it as far as others and had to be redone later.

IMG_2108

When all was said and done, we had 10 normal bottles and 7 double sized bottles. I’d painstakingly removed the labels from a few, but when the mead kept flowing we had to break out the reserves. I gave some away before I had a chance to scrub their labels off, but the ones I kept got cleaned up to make way for… wait for it…

IMG_2105

Uncle Beth’s Old Fashioned Mead. Ben designed it, and I’m very happy with how it turned out. My dad’s always had a mustache, and I’m carrying on the tradition. The labels were printed by Bottle Mark and came extremely fast. I’m not sure I’m wild about the red, but for a first run I think it’s great.

IMG_3979

And it feels a heck of a lot more professional than ball point pen on stickers.


Mango Avocado Soap

Due to some tricky wording on Amazon Prime, I stocked up on soap making supplies.

Tricky how? Well, if you opt for slower Prime shipping, you can earn $5.99 credit toward Prime Pantry. But you are not, it turns out, allowed to use that credit on anything but the flat $5.99 shipping rate. In other words, if you choose slow free Prime shipping, you build up credit to get a different kind of slow free Prime shipping.

I found this out after I’d happily filled up a Prime Pantry box with all kinds of oils that I thought I’d be getting for free. I went ahead and ordered that box, but never again.

You hear that, Amazon? Your wording is tricky, and I won’t stand for it!

The silver lining is that I got avocado oil and mango butter so I could make this avocado mango soap. I also ordered a case of pigments, so I can start dyeing my soap colors beside the usual shades of brown.

IMG_3925

I cooked up a pound of the soap in my slow cooker, then separated it half. I mixed a little bit of green pigment in water, stirred it into the soap, and crammed it into a bar mold.

Then I did the same with yellow pigment.

IMG_3927

Hot process soap is a pain to work with. I’ve mixed in ground coffee and oatmeal before, but color is tougher because it’s necessary to get more even coverage. I was also working with a smaller amount of soap, so it had a greater tendency to stick to the walls and dry out. I got it in the end, though.

IMG_3936

And I was rewarded with these extremely ugly bars of soap. I think, as a rule, that hot process and individual bar molds just don’t mix. The soap’s too gloppy, and the mold relies on too much exposed surface area.

IMG_3938

Out of the mold it’s not much prettier. The gloppiness thwarted my dreams of a bar that seamlessly transitions from yellow to green. At least it holds together.

IMG_3968

After being used a few times it looks a lot more like what I set out to make. I think if I’d done cold process or even just a loaf pan, I would have had a much better time. The green has a tendency to run when it gets wet – I may have gone overboard with the pigment. It’s not dyeing me green, at least.

It’s full of those little white spots that I think come from the bottom of the slow cooker where the soap’s been heated to much. I’m still not sure how to get rid of them, or if I even should. I think they add some nice texture.

IMG_3975

My fear is that I’m going to say the same thing about patches of uncured lye and burn my skin off…

The Final Syrup

Welcome to the final installment of Maple Syrup on the Baessler Estate, a chronicle of our journey to my childhood home in Pennsylvania to make maple syrup. You can read parts One and Two here.

After visiting my cousin’s professional operation, we returned to my house to finish the day’s work. While we were gone the two pans boiled down enough to be combined into one.

IMG_1429

We continued to let the sap boil for about as long as it took to roast and eat some hot dogs and get frustrated with a crossword puzzle. It’s all about precision timing.

IMG_1474

Once time was up, Ben and my dad moved the pan from the fire. It’s much easier to work away from the smoke.

IMG_1514 (1)

Next came the filtering. When you’re boiling outside in a big open pan, you’re likely to get – for lack of a better term – bits. Sticks, flakes of ash, sediment from the sap buckets, and other unsavory things might be floating in the syrup. My dad transferred some of it to a bowl.

IMG_1526

And ran it through a cloth into another bowl.

IMG_1543 (1)

We then ran it through a second filter. The filters in this case are old tie dyed napkins from my childhood.

IMG_1561 (1)

We collected the clear, filtered syrup.

IMG_1586 (1)

And hung out the filters to hose them down. My mom was a big fan.

IMG_1592 (1)
Finally it was time to put out the fire. We pushed away the cinder blocks so they wouldn’t shatter with the sudden cold water, and doused the whole area.

IMG_1599

The next morning the syrup was still a little runny, so my dad boiled it down more on the stove. Once it had reached a good consistence, he canned it in quart jars.

IMG_1765 (1)

For all that work, we got six quarts, or a gallon and a half of syrup.

IMG_1769

While the jars cooled outside, we made another batch of pancakes and enjoyed them with some more of last weekend’s syrup.

IMG_1819 (1)

All in all, it was a rousing success! There was some talk about how maple syrup ever became a thing, considering the time, investment, and resources involved. Since we’re not scraping out a living in the Big Woods, though, it makes for a fun weekend and a yearly savings on the order of tens of dollars.

IMG_1824 (1)

And a pretty cool blog topic.

A Detour

The first rule of blogging is: Don’t apologize for not blogging.

Well, I’m sorry, but I’m sorry I haven’t updated in a while. I have a good excuse, at least. I just got back from almost two weeks of roaming the American Southwest.

From March 25th through April 4th, I drove around Utah and Arizona with four friends (and a fifth once he got time off from work). We rented a minivan in Las Vegas and pitched our tents in and around National Parks. Sometimes we even had running water.

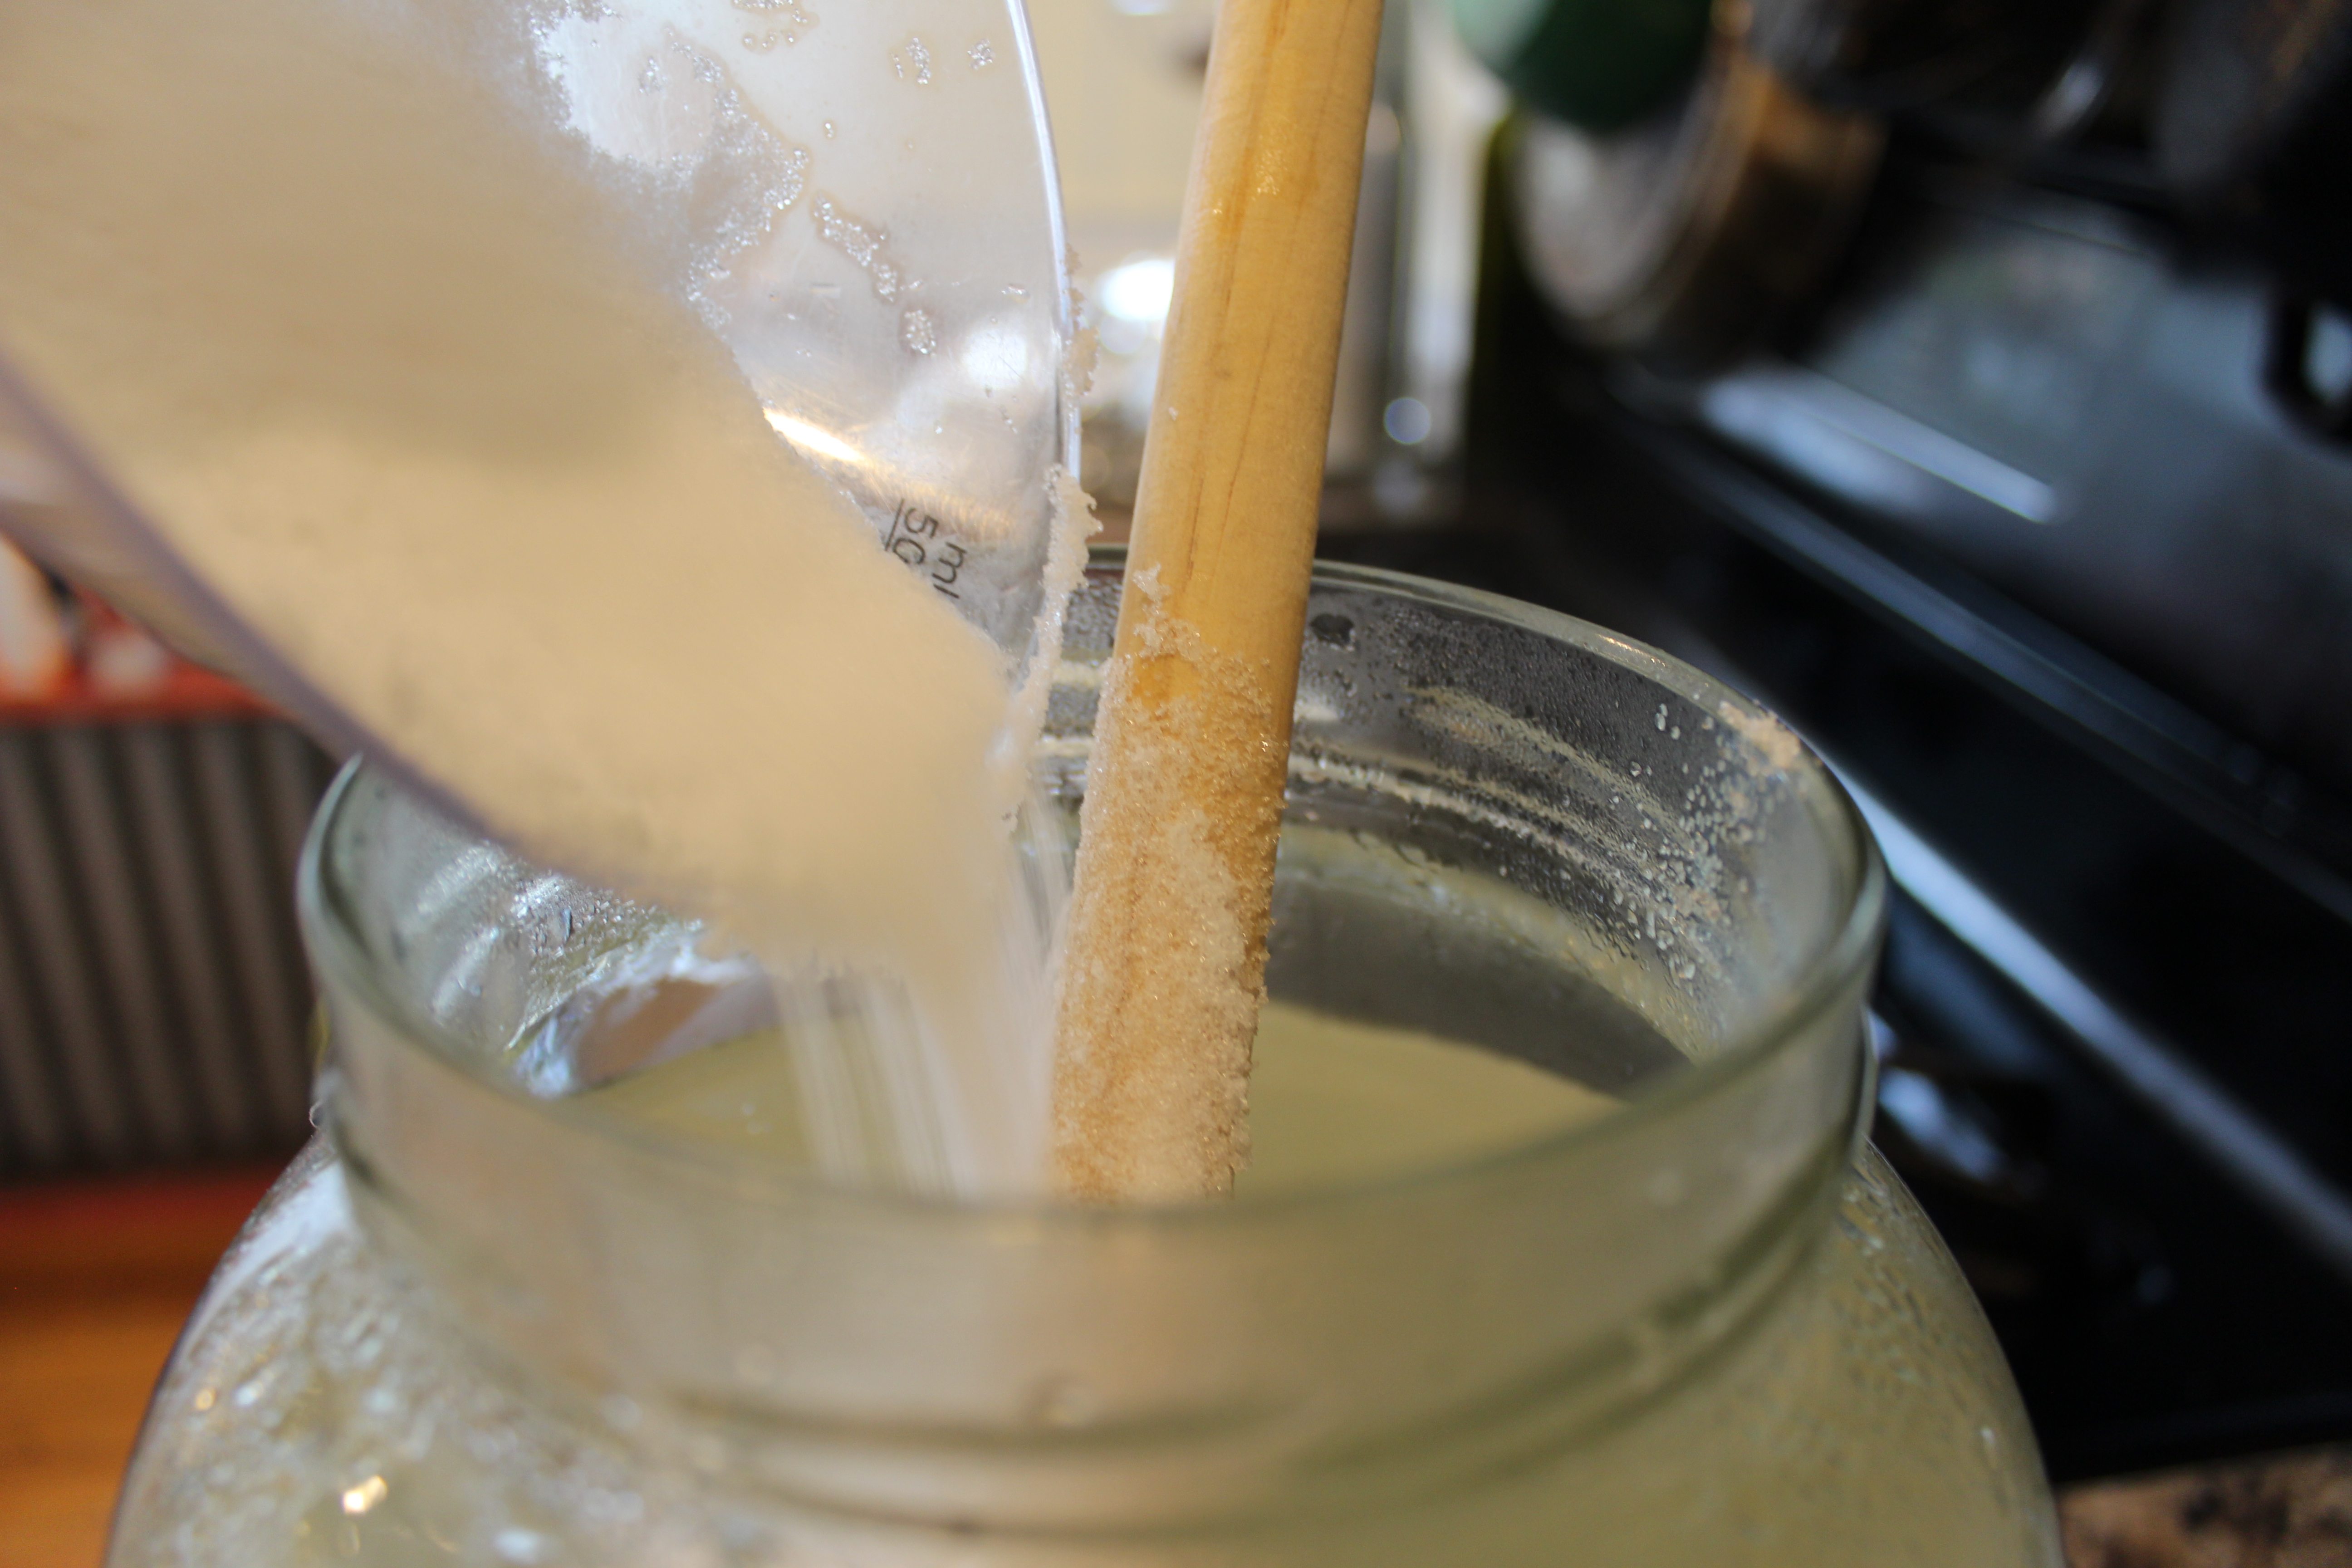
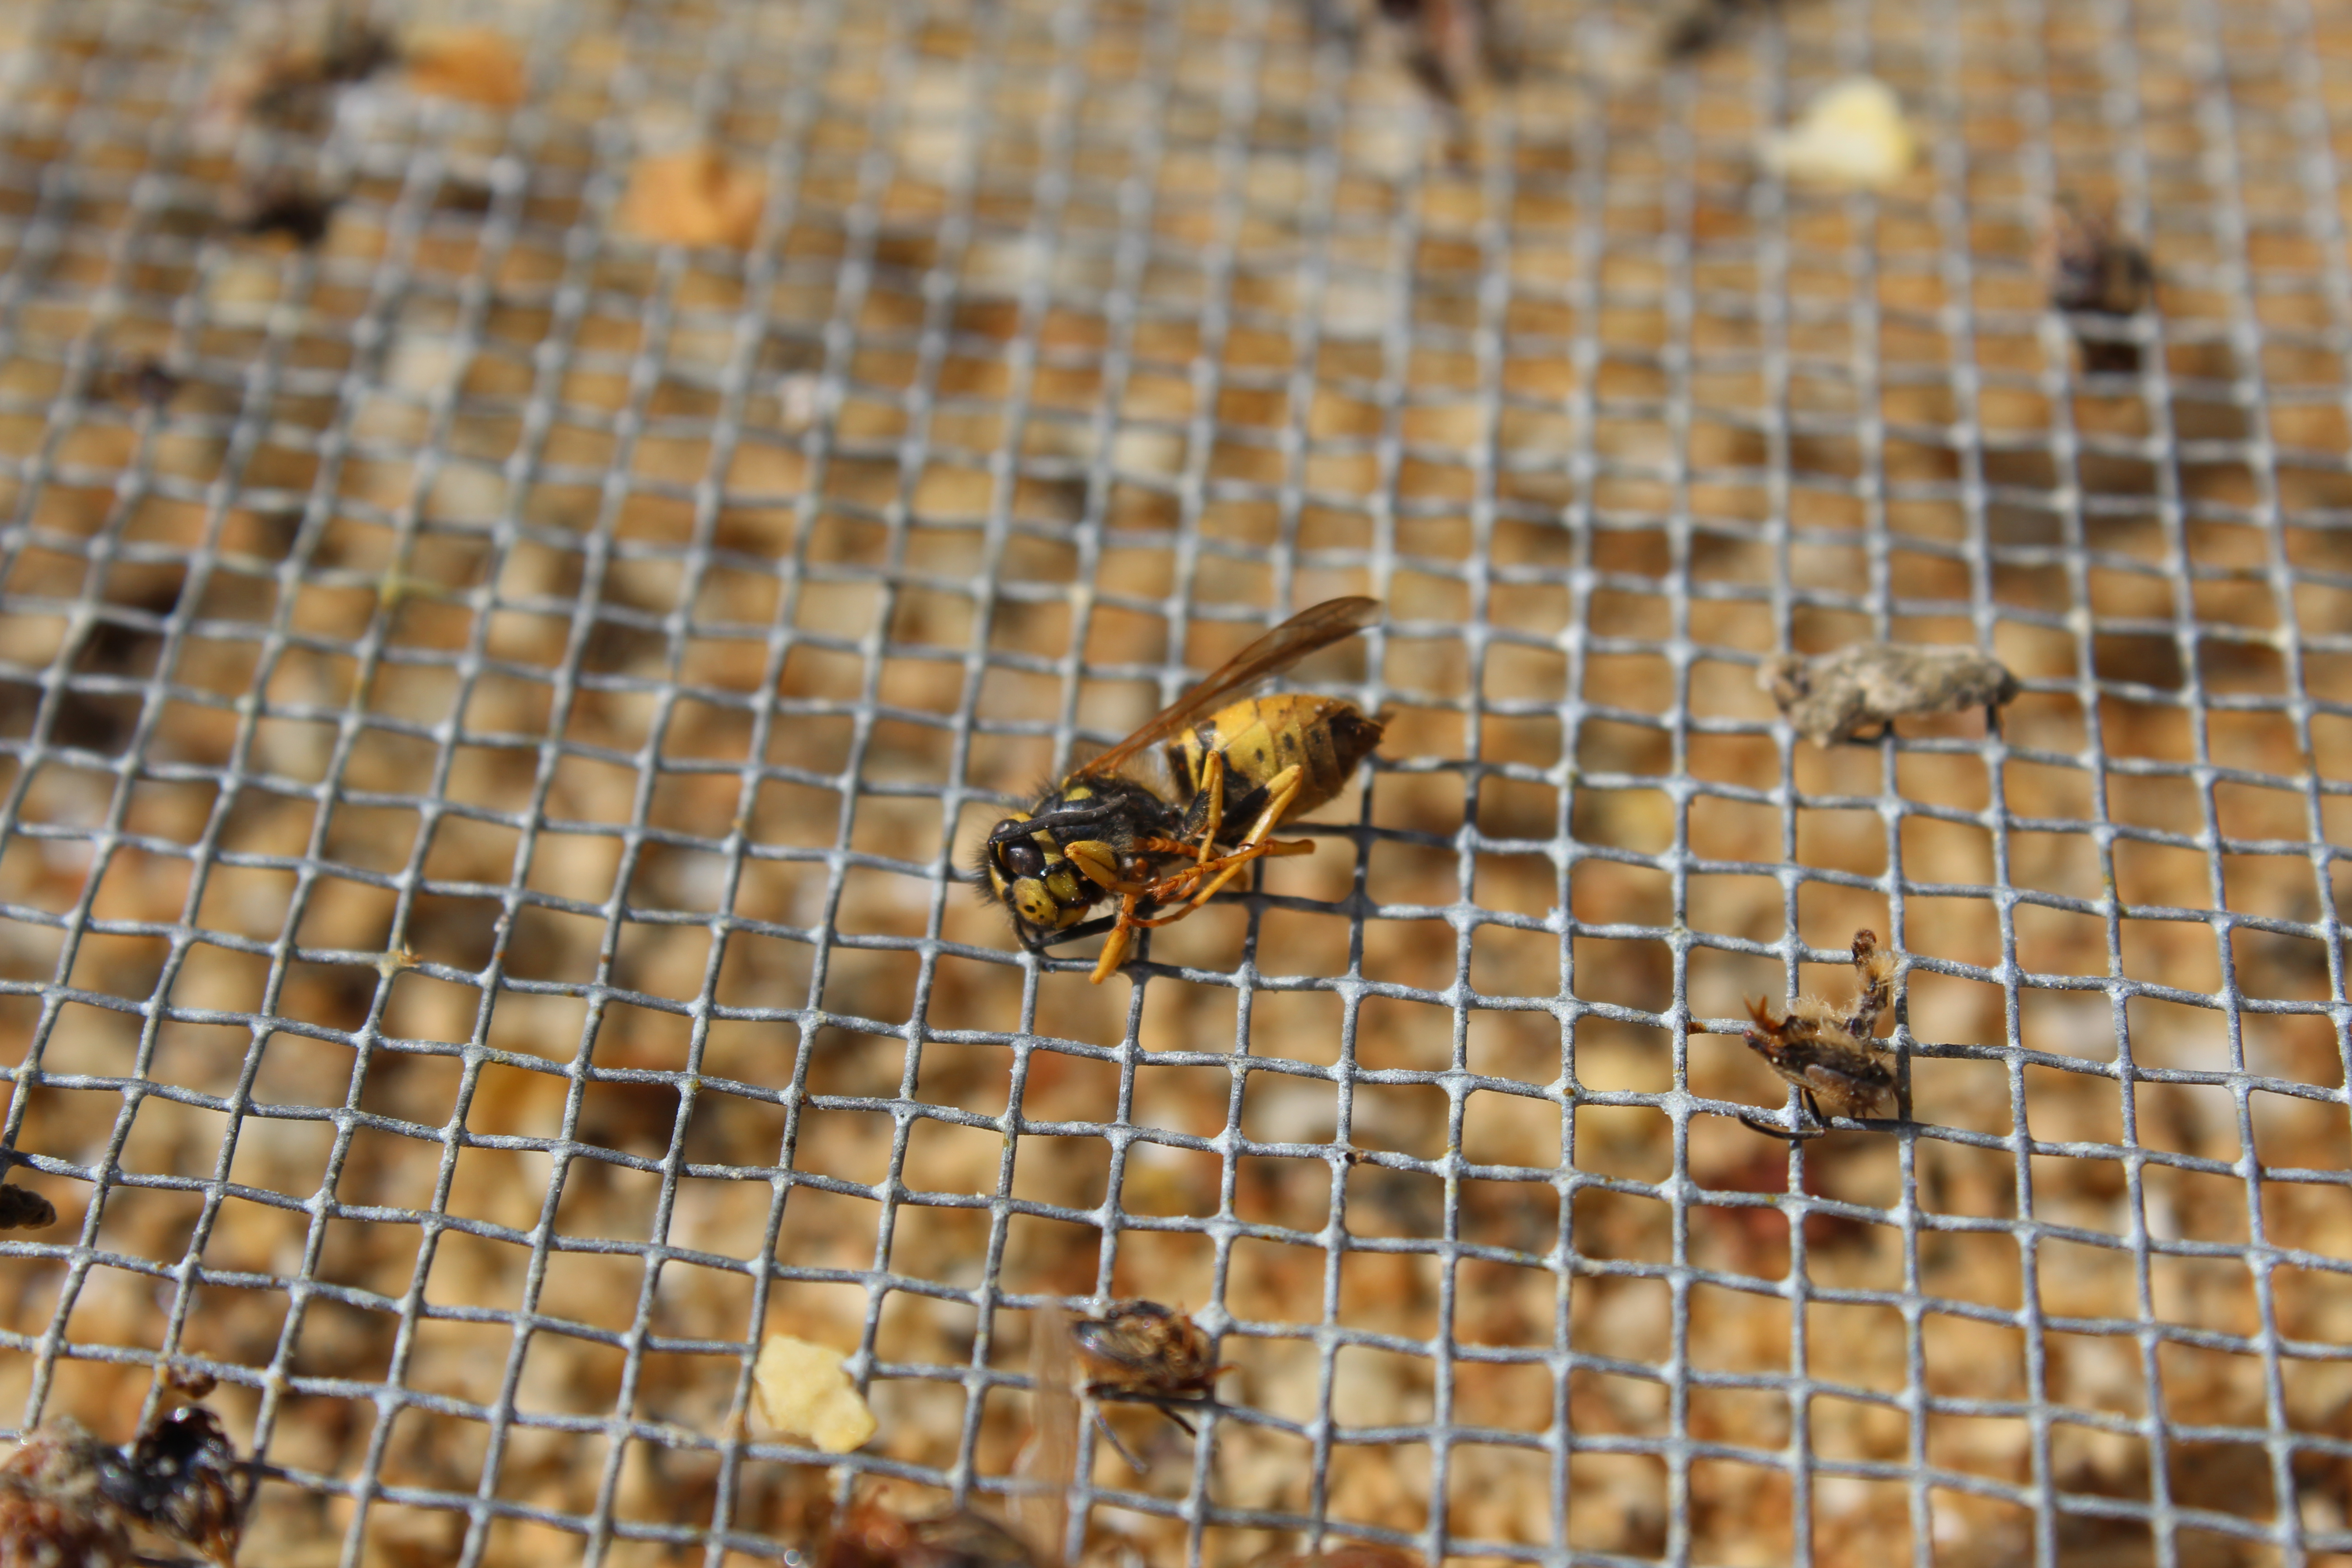
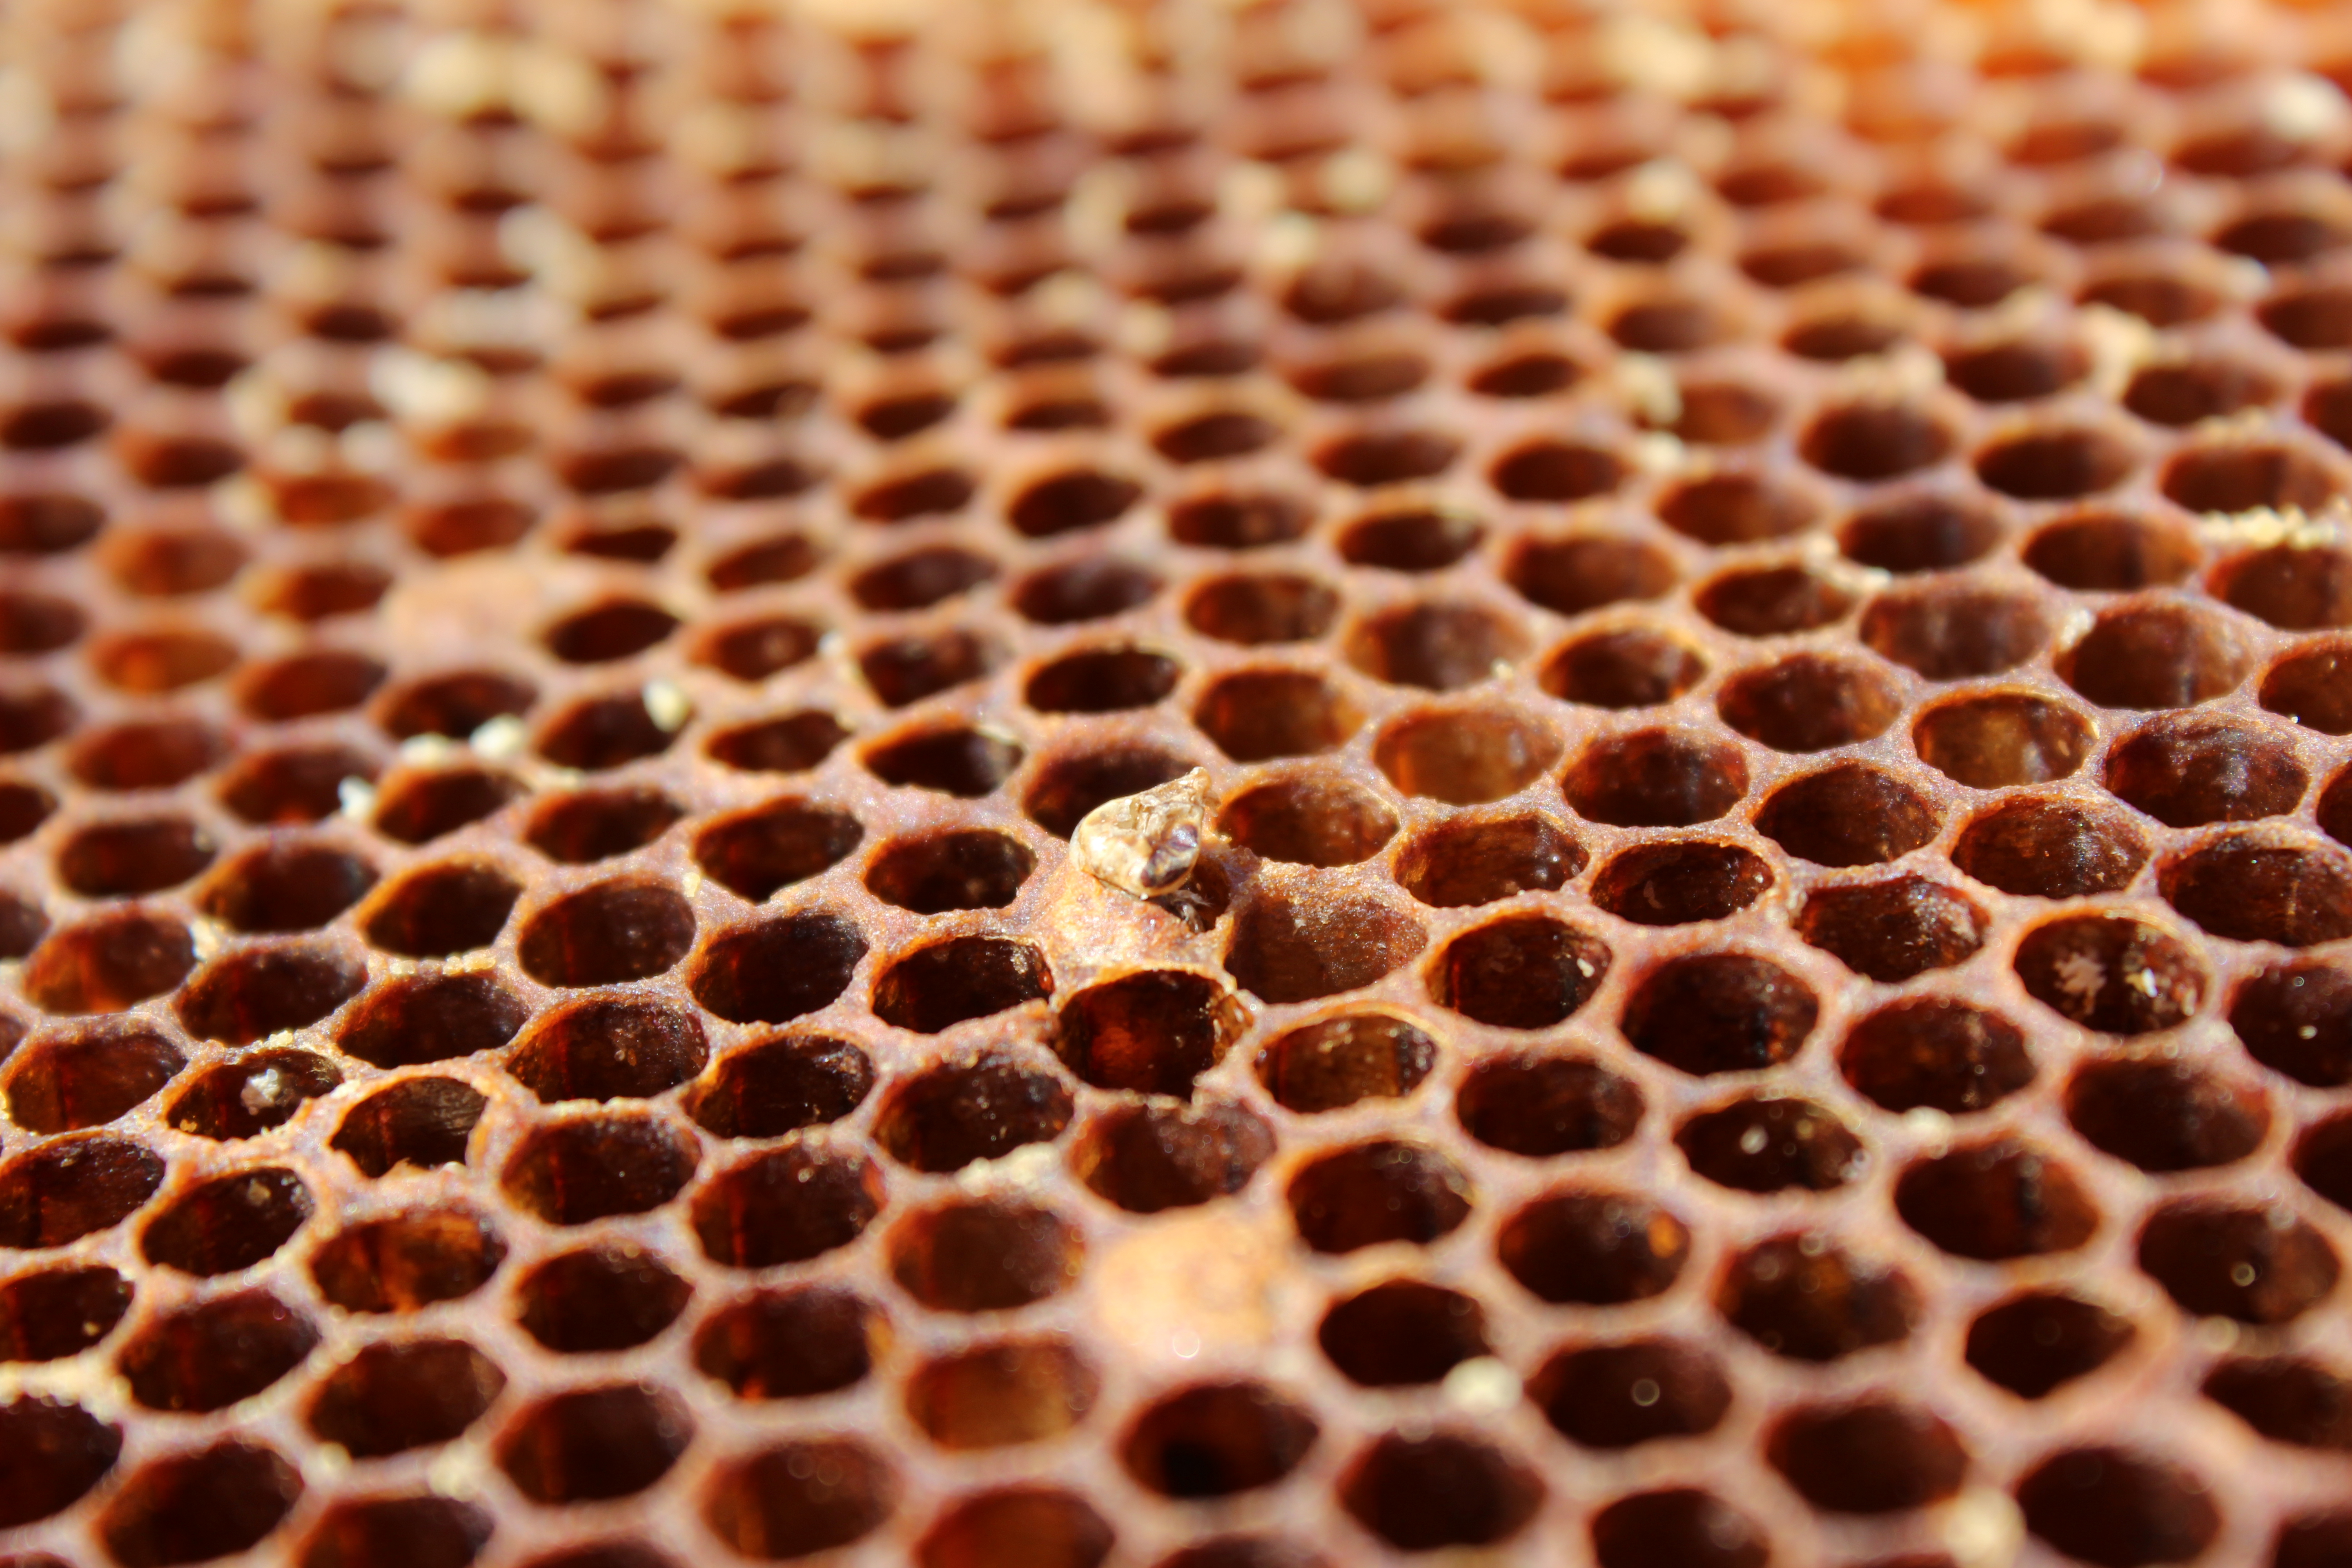
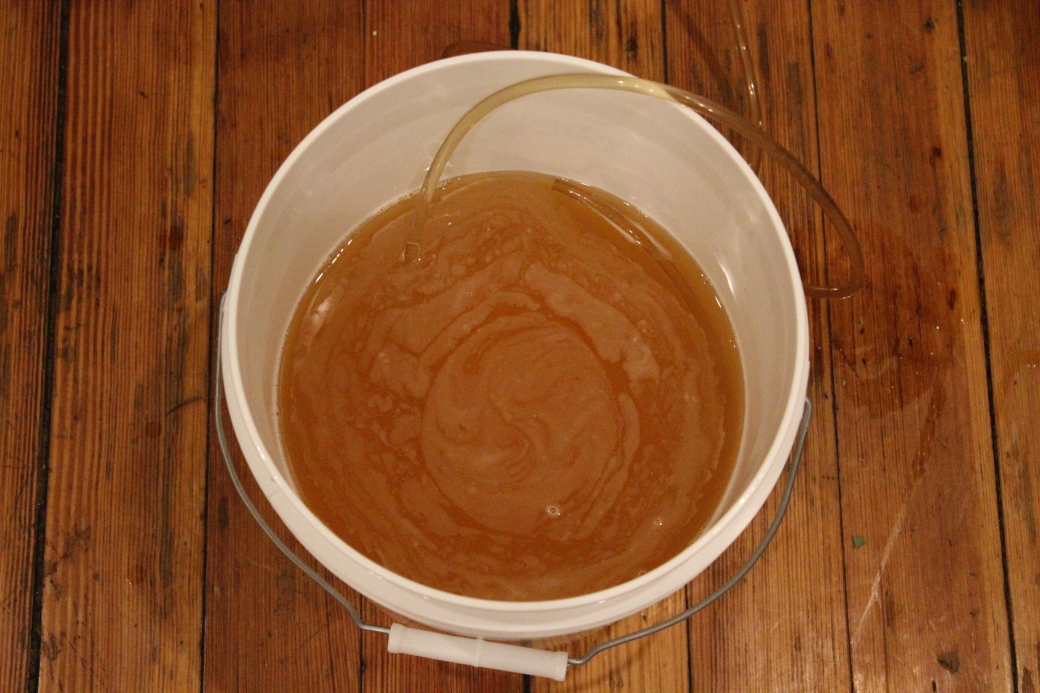
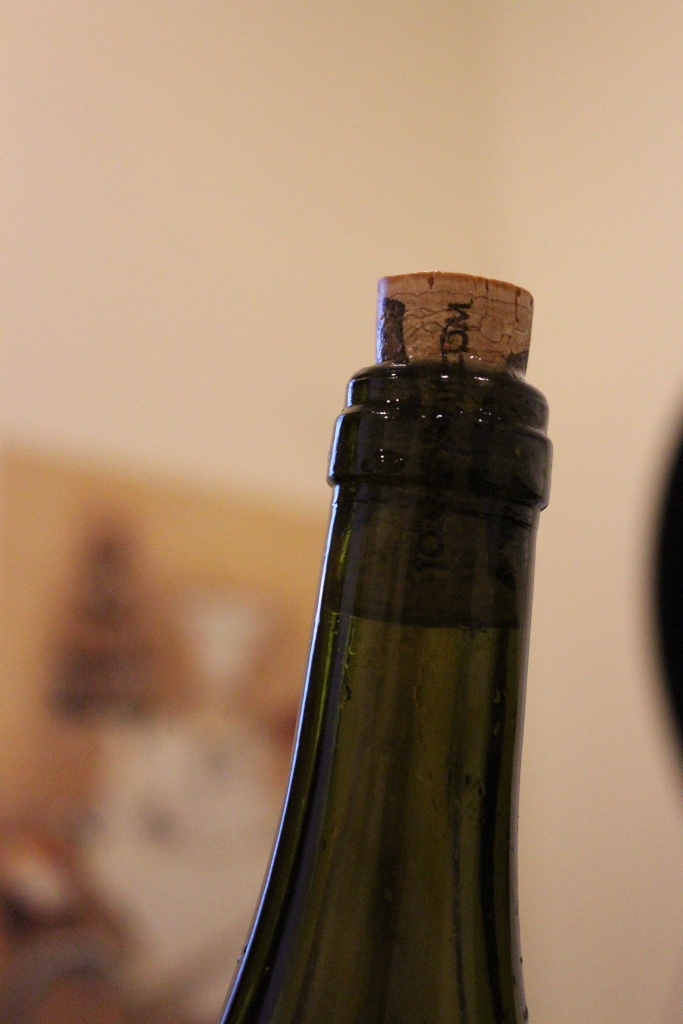
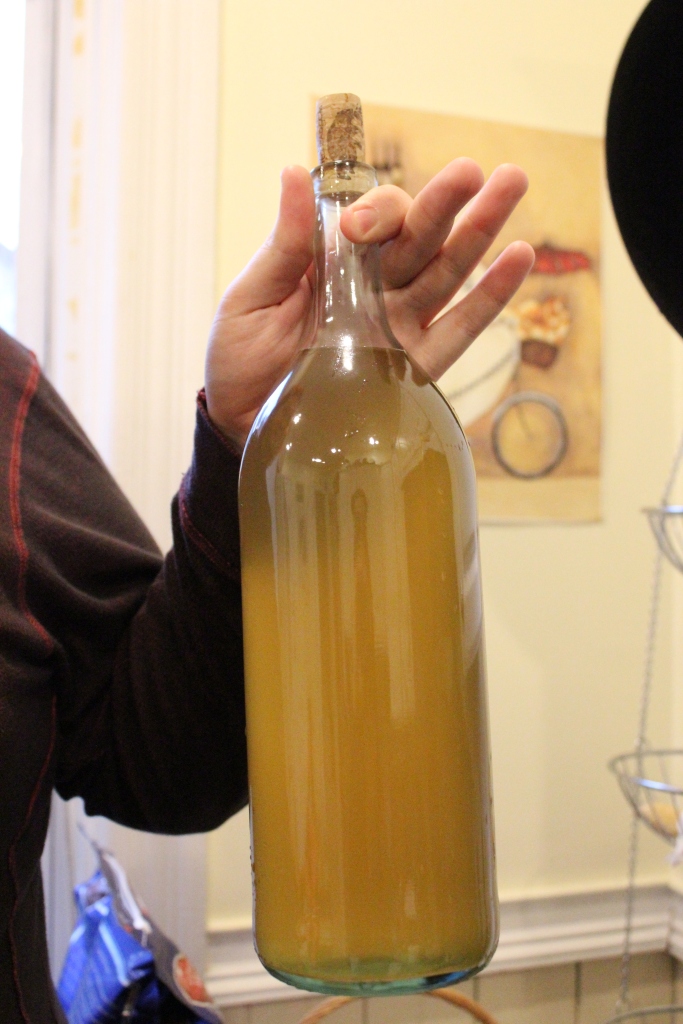
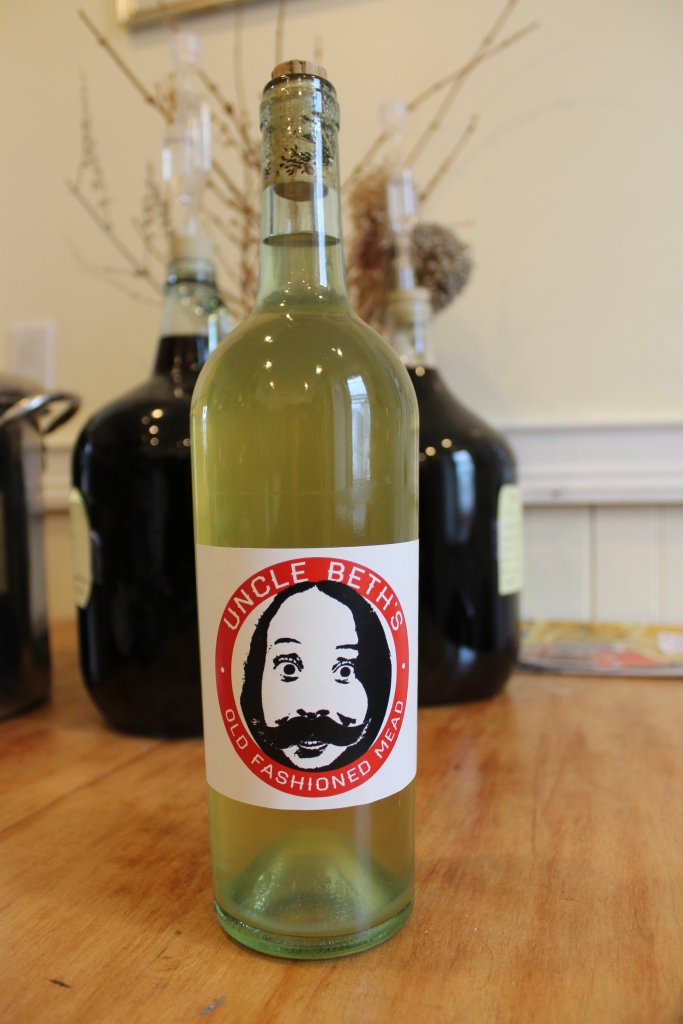
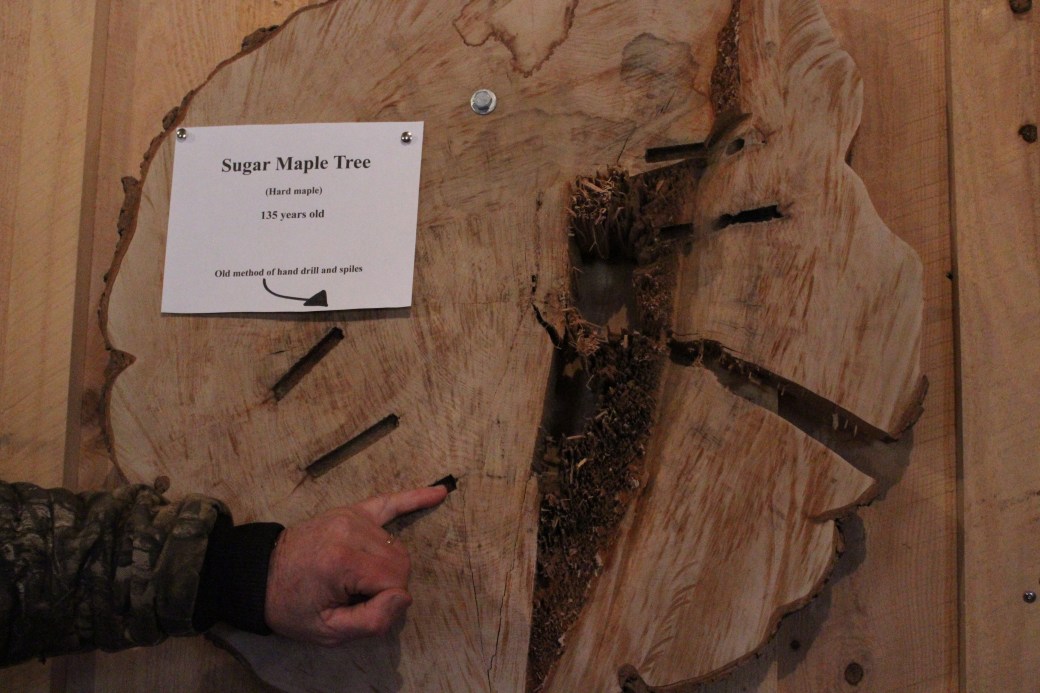
I promise I’ll get back to the normal swing of things soon with the final installment of Maple Syrup on the Baessler Estate, an update on the mead (good) and an update on the bees (not so good). In the meantime, though, please indulge me and check out the highlights from my super cool trip.

We landed in Las Vegas around noon. We stayed in the city long enough to rent a minivan, eat some tacos, and buy $300 worth of essentials at Walmart. We tried to see the Hoover Dam but were turned away at the security checkpoint for reasons that were never revealed. Then we took off northeast for our campsite in Zion National Park.

IMG_2416

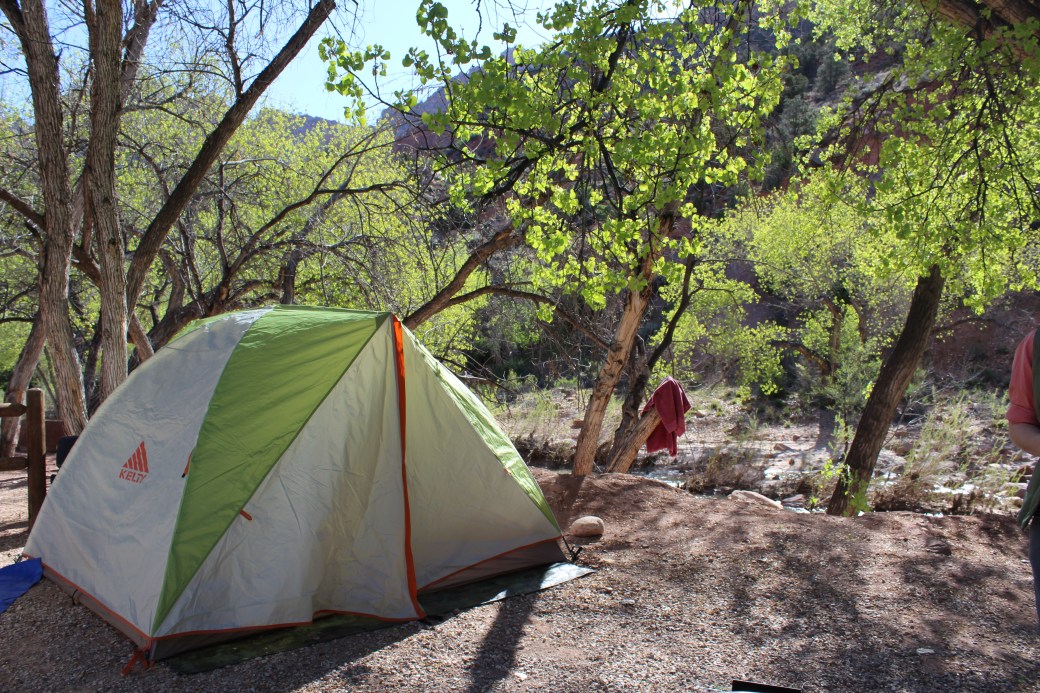
We woke up to the Virgin River and considerably more cold than we’d expected. The temperature in Las Vegas had been heavenly, especially compared to mid-March in New England. The weather in Zion was more familiar. My feet went numb in my sleeping bag. And since we were deep in a canyon, the time between the sun lighting the sky and warming the ground was the span of a couple hours.

IMG_2419

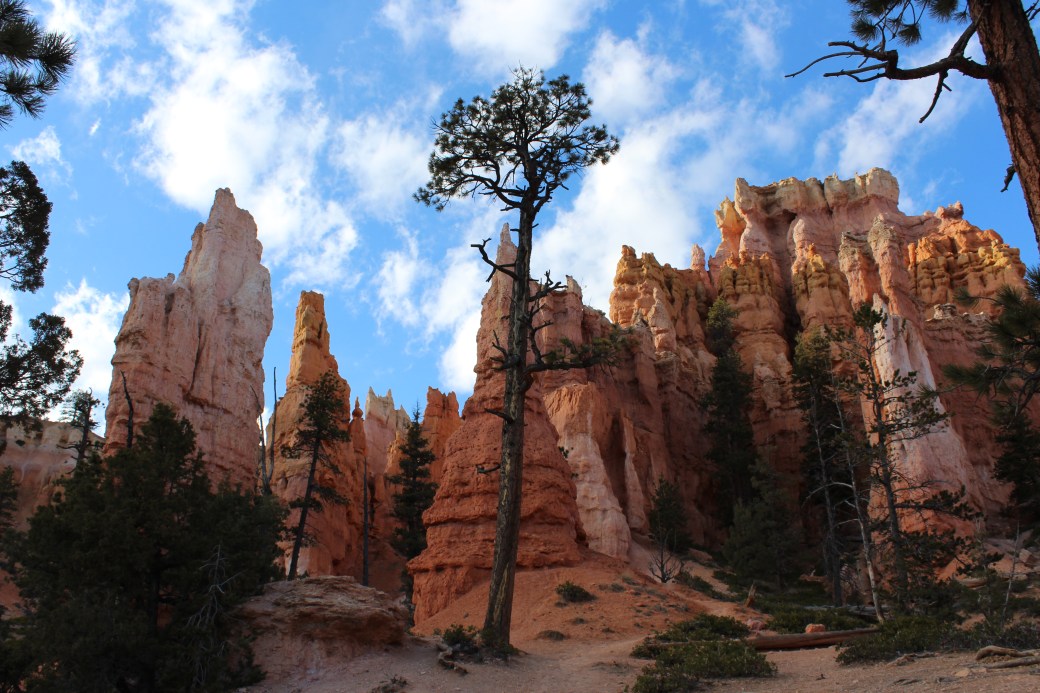
Our route was more or less a loop ending back at Las Vegas, and we wanted to save Zion for the end, so we got back on the road and kept heading east to Bryce Canyon. At the gate we were told we’d be sure to find a campsite, since it was the campground’s very first day open. We quickly found out why – there was a lot of snow still on the ground.

IMG_2502

We found a nice, snowless site and pitched our tents. Then we took a hike down into the canyon.

IMG_2537

IMG_2643

IMG_2640

IMG_2632

IMG_2648

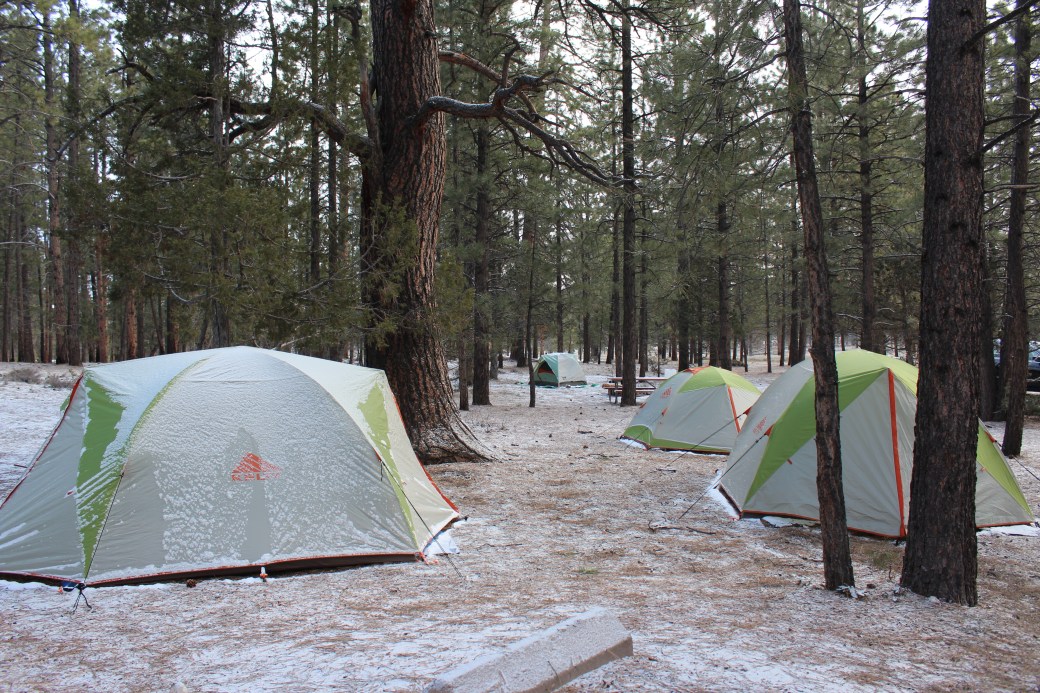
We had a lovely hike and cooked a lovely dinner of pasta and sausages. We went to bed, and I experienced the coldest night of my life. My sleeping bag  wasn’t nearly warm enough, and even wearing two layers of everything, I shivered more than slept.

We woke the next morning to snow on the tents. Three of us, it turned out, were not equipped for the weather. We made for the nearest town and bought extra sleeping bags from a weathered direct descendant of Ebenezer Bryce.

IMG_2703

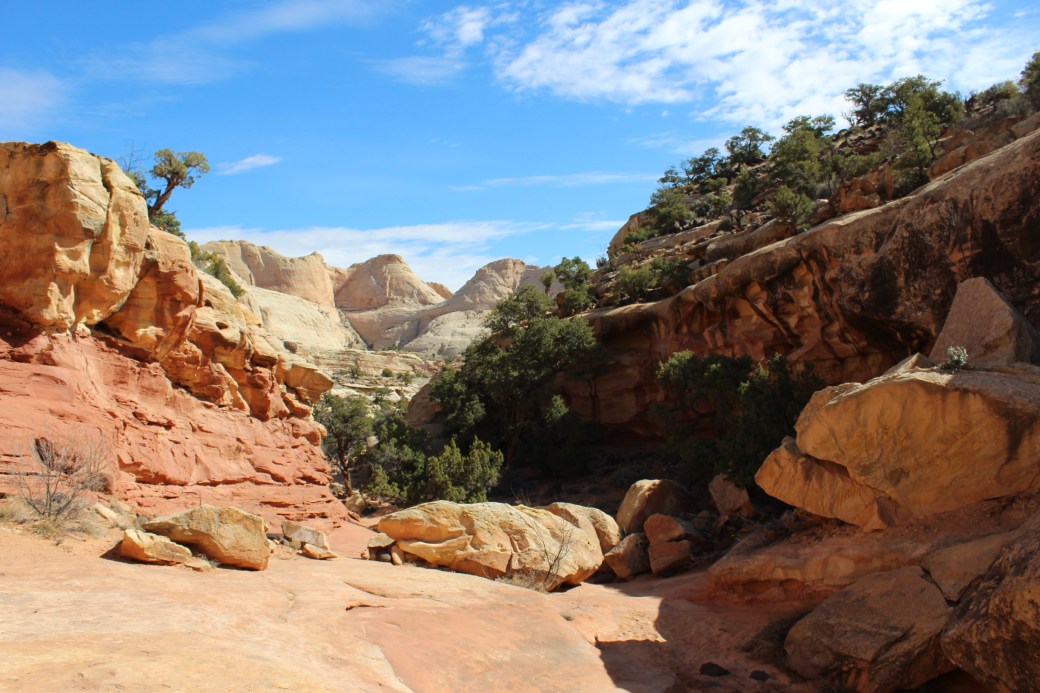
We got back on the road and made our way to Capitol Reef National Park. The campground here is in a place called Fruita, an oasis of fruit trees planted long ago by Mormons. Come in high summer, apparently, and eat all the fruit you can pick. Come in March and see the apricots in bloom.

IMG_2745

This was my favorite place to stay, and I’d gladly come back here. We drove and hiked through the reef and ate some exceptional pie. Night was bitterly cold, but with my extra sleeping bag I slept like a baby.

IMG_2802

IMG_2757

IMG_2936

IMG_2909

IMG_2926

IMG_2955

Next we set off east for Arches. We’d been taking our sweet time to get there because of the Moab Easter Jeep Safari. Every Easter weekend Moab, the city just outside Arches, becomes the Mecca of off-road jeep enthusiasts. It might have been fun to see, but less fun to find room to pitch our tents, so we timed it so that we spent Easter morning eating pie with the Mormons in Capitol Reef. Easter afternoon was spent driving toward Moab, counting the jeeps passing in the opposite direction. Each one meant another possible free campsite.

Campgrounds around national parks have a maddening first-come-first-served policy that leaves planning very up in the air. We drove through a series of campgrounds along a stretch of the Colorado River in search of an unclaimed spot. We came very close to sharing a site with an aggressively friendly family who swore that getting yourself grandfathered in was the only realistic way to go. Would they have murdered us? Or tried to convert us? Maybe they would have just shared their hot dogs. We’ll never know, since we decided to try our luck upriver, and against all odds found a free site.

IMG_3088

The campground was owned by the Bureau of Land Management, a popular purveyor of campsites in the area. There was no running water, but we had a full seven gallon jug. There was an unfortunate smelling toilet.

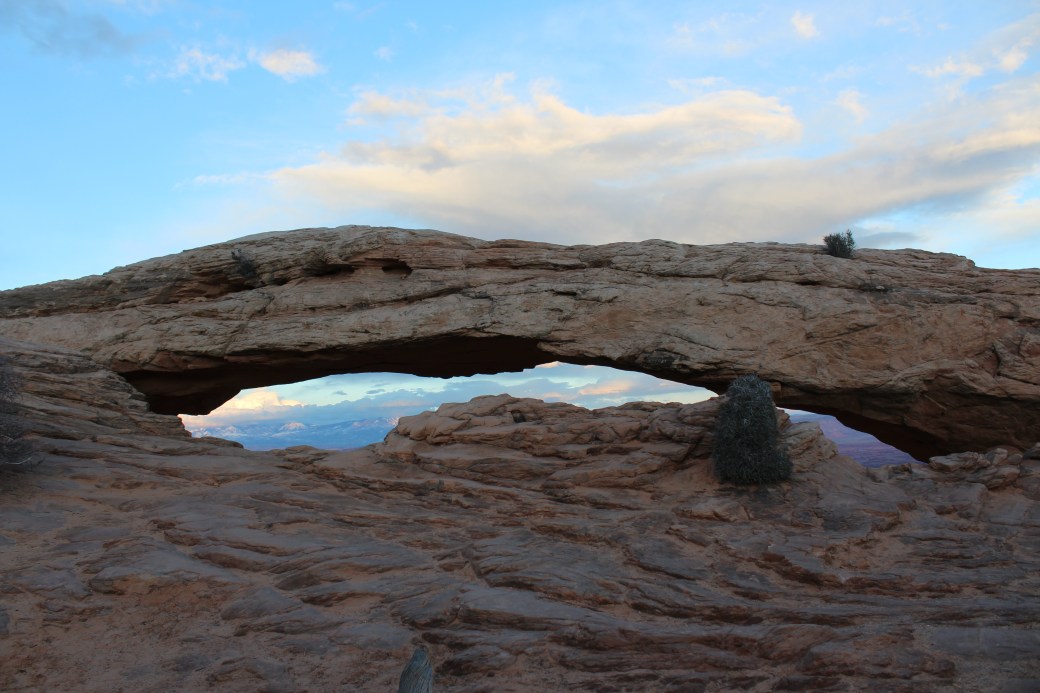
We were right on the Colorado River, though, with a hard-to-beat view of the sunrise on the rocks each morning. And it cost $15 a night.

IMG_3072

We stayed here for three nights – it was nice not to have to pack the tents up each morning, finally. For a while we had a home, toilet smell and all.

IMG_3081

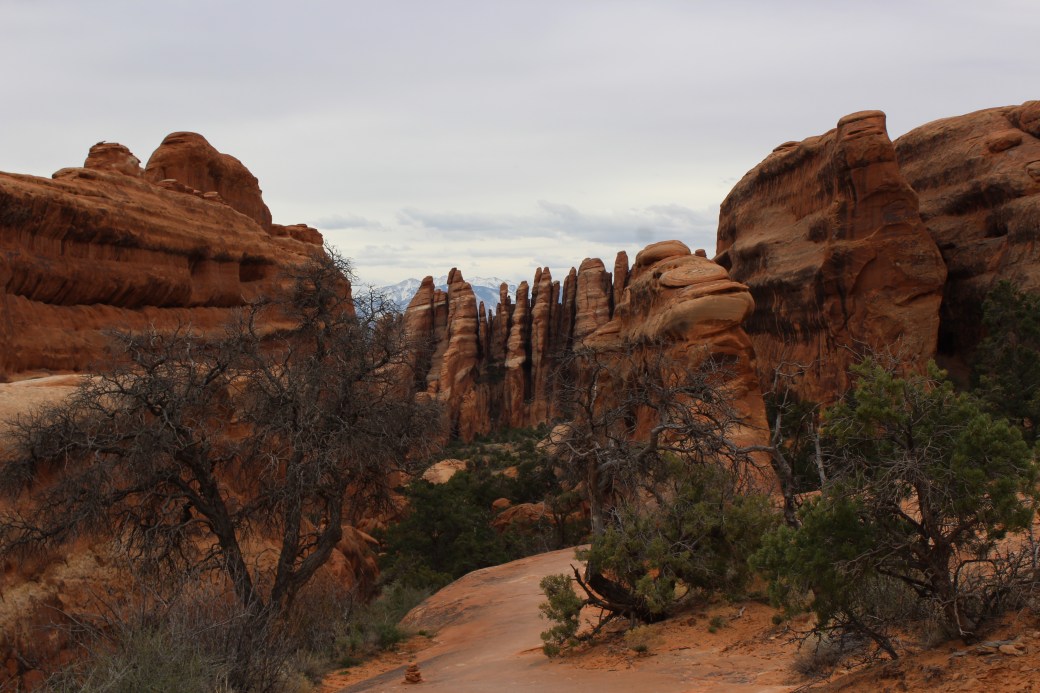
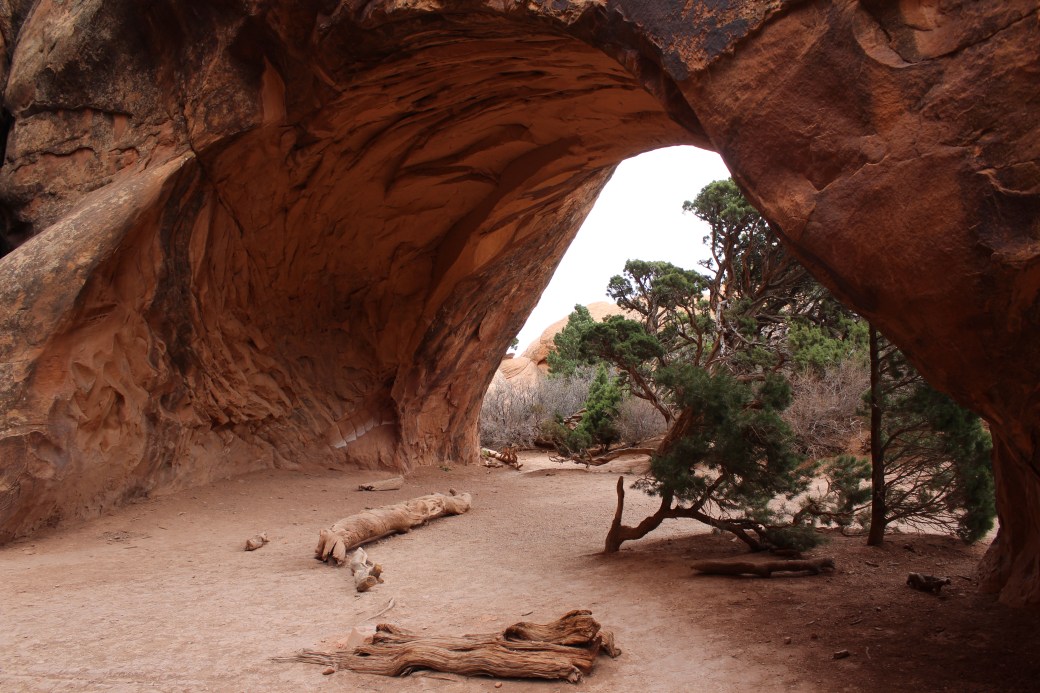
The next morning we hiked through Devil’s Garden in Arches National Park. The arches were impressive, but the real stars are the fins, enormous slats of rock rearing up out of the ground. We ate our lunch on top of one.

IMG_3119

IMG_3116

IMG_3133

IMG_3103
IMG_3132

IMG_3208

IMG_3232

We woke the next morning to cold, hard rain. I thought the desert was supposed to be dry. All plans of hiking and campfires drowned, we ventured into Moab for tacos and a well-deserved shower at the aquatic center. The town was blessedly jeep-free, though Ben overheard two friends in the bathroom complaining that the jeep guys had stolen all the town’s girls. Did the girls ride off on the jeeps? Or were only their hearts taken back to Las Vegas and Colorado Springs? We may never know.

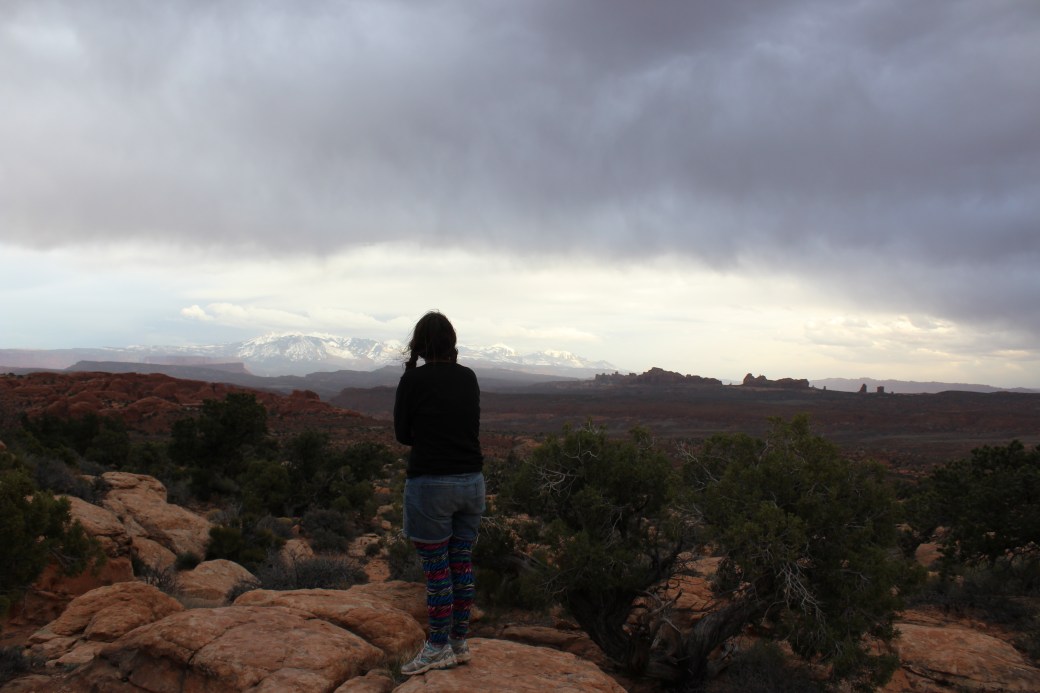
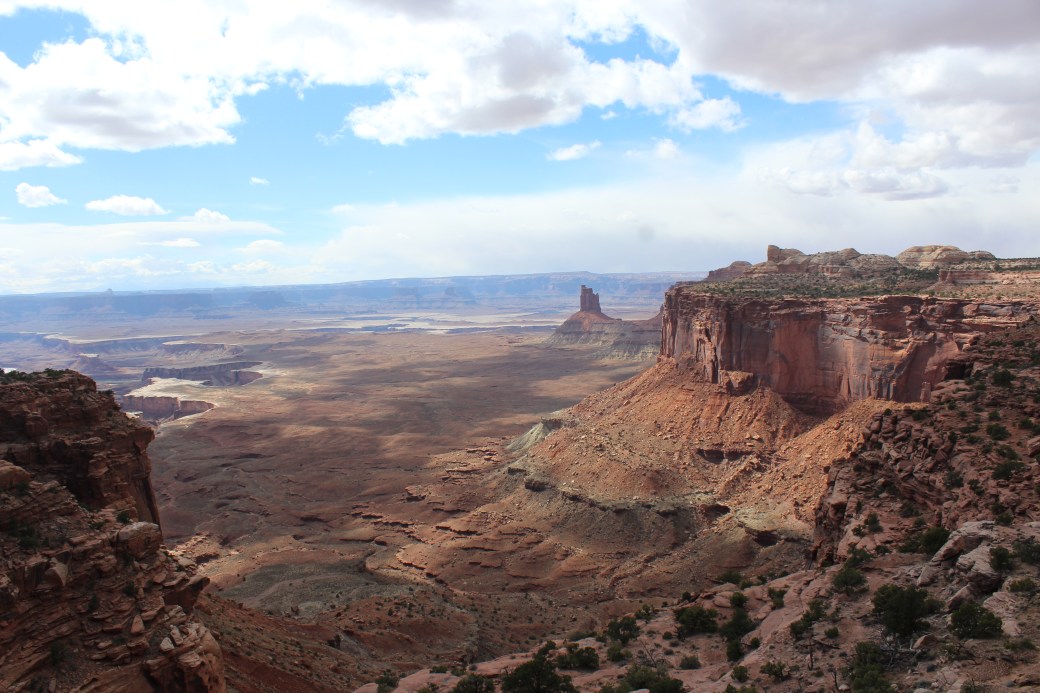
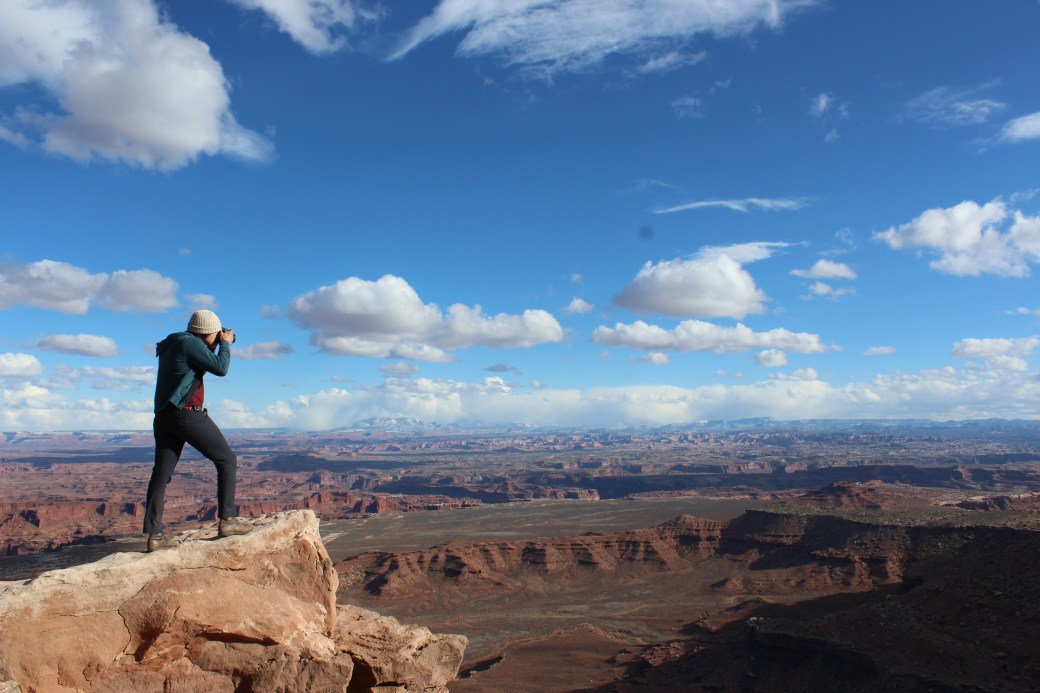
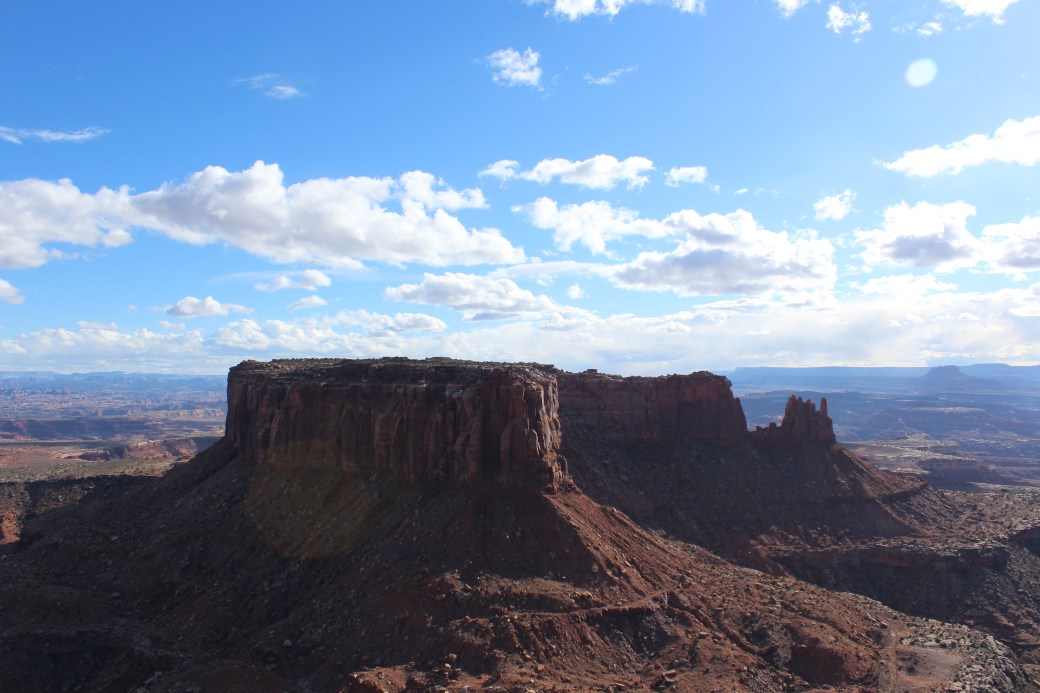
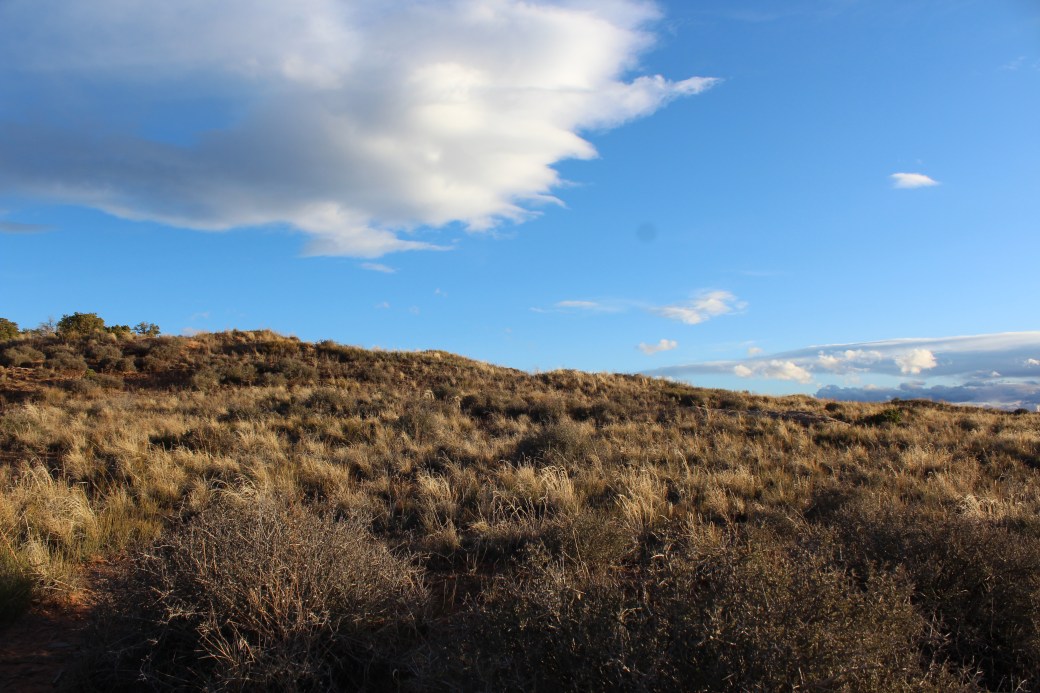
In the early afternoon, after we were all clean and full of good food, the clouds broke and the sun came out. We drove half an hour south to Canyonlands National Park. It was cold, beautiful, and mostly empty. It felt like Arches’ less popular but more interesting younger sister.

IMG_3241

IMG_3315

IMG_3304

IMG_3302

IMG_3284

IMG_3250

IMG_3246

IMG_3332

IMG_3320

IMG_3379

IMG_3333

The next morning we aired out the tents (there’d been a couple breaches to the rain) and packed up.

IMG_3392

We popped into Arches one last time and hiked to the main attraction: Delicate Arch. It’s bigger than I realized. It was also packed. The road to the other access point was flooded, so everyone from babies to grandmas was climbing the narrow trail to see it.

IMG_3407

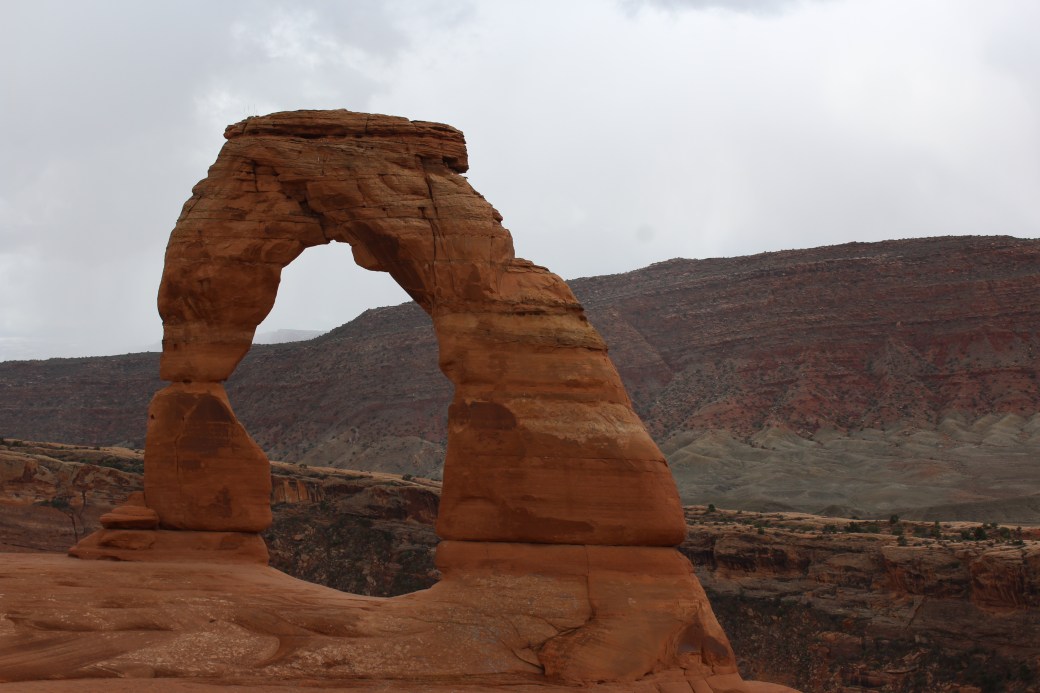
It snowed on us on our way back down, because the weather hadn’t been strange enough.

IMG_3419.JPG

Finished with Arches, we beelined back to Zion. The trip that took days meandering through the parks took five hours on the highway.

We pitched our tents in our trusty campground from the first night of our trip. The next morning we set out to hike Angels Landing. We rode a shuttle up through the valley (no cars allowed) and climbed up this series of switchbacks.

IMG_3451

Then we climbed up another series of switchbacks.

IMG_3460

We reached this overlook and had a very nice lunch. Then we started the actual Angels Landing portion of the hike, which involves scrambling along a narrow path while holding onto chains, like the ones in the bottom right of this picture.

IMG_3471

I don’t have a single photo from this hike, because I spent the whole thing scared out of my mind. However this picture, taken from Pinterest, expresses what’s going on pretty well.

I hated this hike. I’m glad that I did it, but I was much too scared to enjoy it while I was there. The problem was the sheer number of people. There were people everywhere. And the way up was also the way down. Whenever we passed someone going in the opposite direction, we had to figure out how to let them pass. We had to do it for 30 college students. And an entire Boy Scout troop. And a family that had for some reason brought their two toddlers. And we had to do it for the lines of people behind them.

Had it been a straight shot to the top, I might have been fine. But all that jostling and waiting and staring into the abyss got to me. I made it to the top, but I was in something of a state.

IMG_3503 (1)

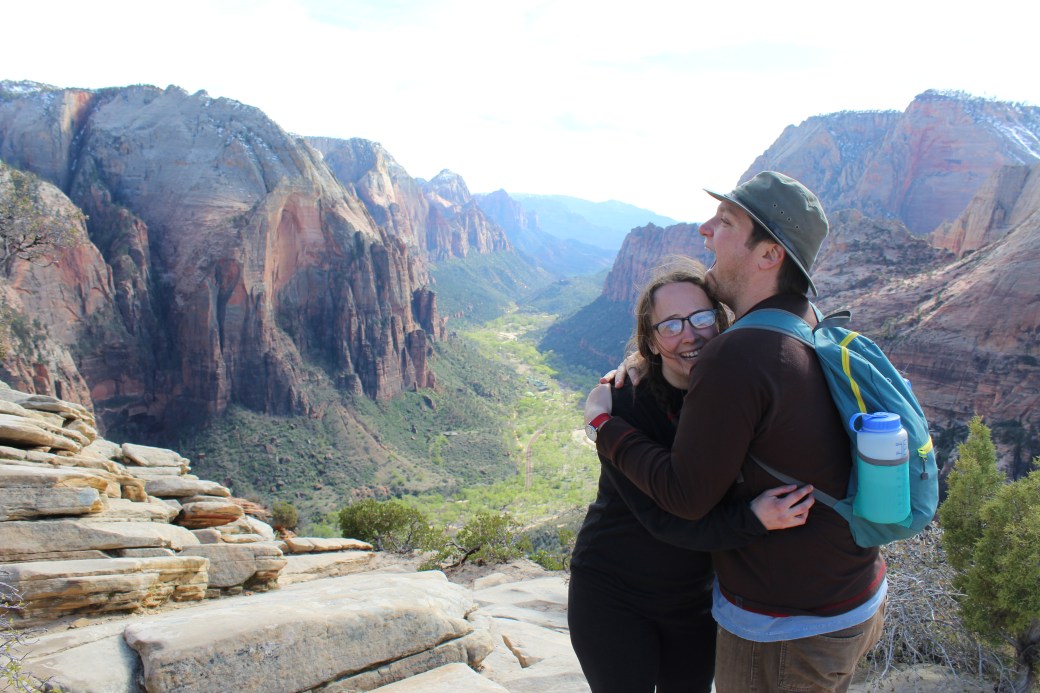
The views were beautiful, as I’ve had confirmed by the pictures everyone else took as I clung to the rocks beneath me.

IMG_3520

The next day’s hike was much more suited to my tastes and closer to the ground. The Narrows is a path that follows the Virgin River as it cuts through the rock at the head of the valley. (Why’s it called the Virgin River, asked the cool grandpa next to me on the shuttle? Because no one’s ever seen its bottom. I laughed more than his grandkids).

I was afraid for my camera and left it behind, but this picture from Caltech Blogs should give you a good idea:

In the summer you can apparently splash up the river with no problem, but in March the water is both high and frigid. We rented ourselves some stylish outfits to keep us warm and dry. The waders are dry pants – mostly impermeable fabric to keep the water out. The shoes are permeable but lined with neoprene socks – essentially wet suits for your feet.

We thought we’d have to tough it out through the cold, but the gear worked so well. The water, when I thought to put my hand it in, was like ice. When I wasn’t testing it, though, I could never have guessed that it wasn’t warm. Thank you, neoprene!

IMG_3535

The next day we moved on to our final stop, the Grand Canyon. We met up here with Phil, who hadn’t been able to get enough time off from work to do the whole trip. We pitched our tents and watched the sun set over the canyon.

IMG_3571

The next morning we set out to hike down into the canyon. We had ambitions to get all the way to the bottom and back, but we were told by a ranger that a hike like that was the work of at least two days. Not wanting to be added to the list of people who get themselves killed in the canyon every year, we chose a more manageable (but still intense) route. We started out at the rim and came all the way down to a campsite at the foot of the sheer walls.

IMG_3645

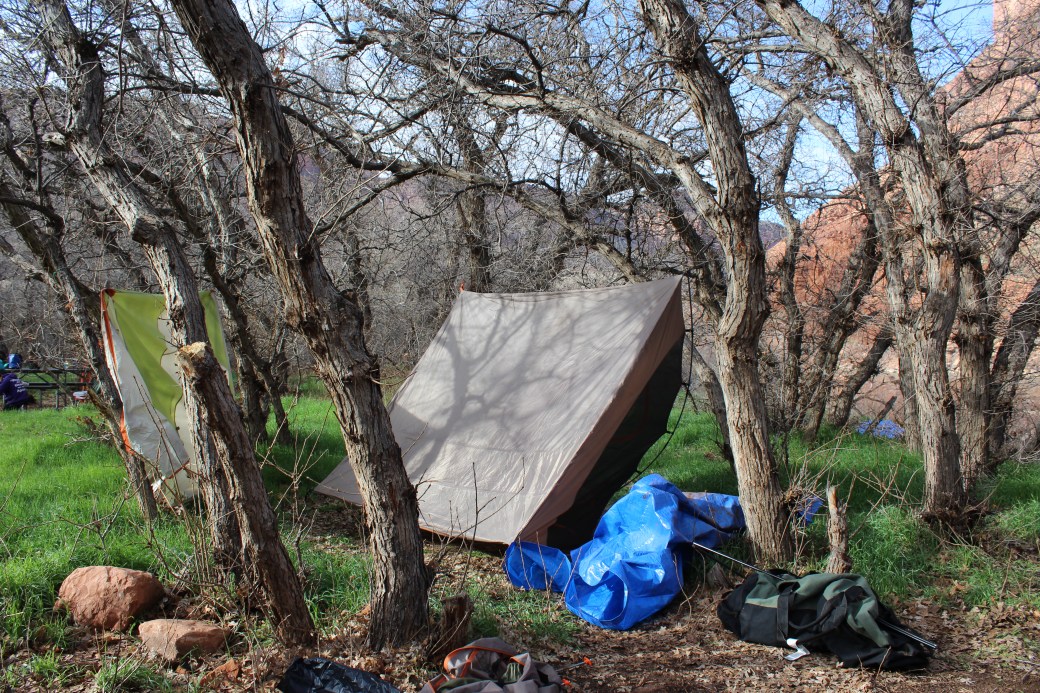
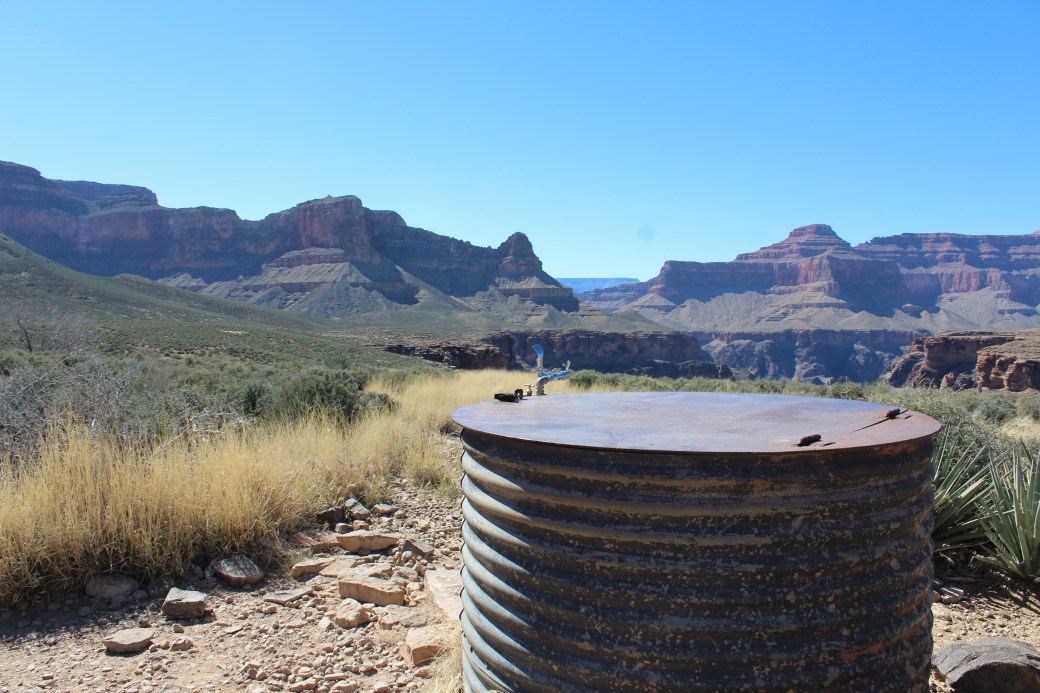
The campground was shockingly green. We stopped for lunch here and refueled on water.

IMG_3751

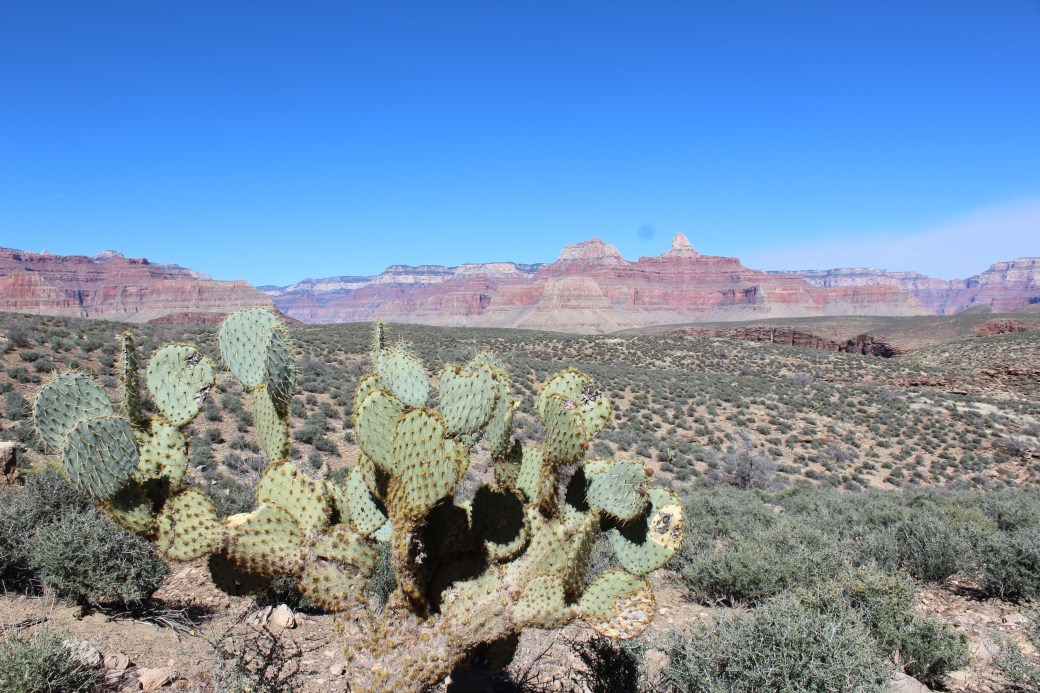
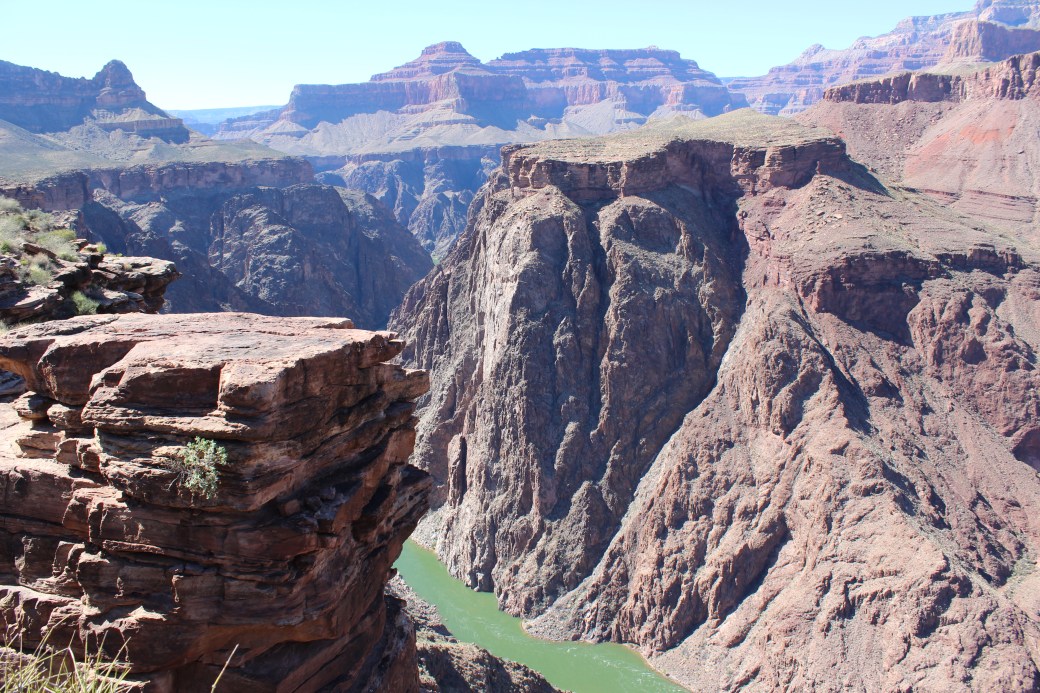
We went another mile and a half along the flat floor of the canyon to see the Colorado River. I couldn’t stop thinking about how god-awful the heat must be in the summer. In early spring the temperature was in the sixties and the cacti were blooming.

IMG_3746

IMG_3735

IMG_3671

We saw the river, then had to whip around and go back the way we’d come to get out of the canyon before sunset. We made it, but gosh it was grueling.

IMG_3717

IMG_3715

IMG_3770

IMG_3734

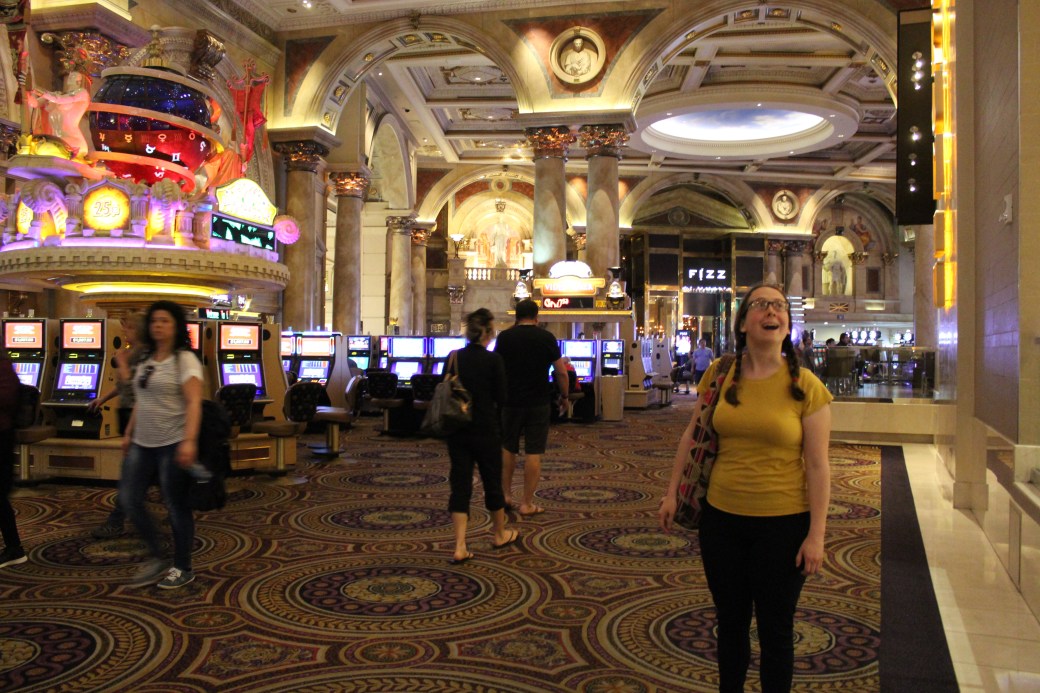
The next day we were due to fly out. We all had In-N-Out Burger for the first time – no one was impressed. We took a tour of the Hoover Dam – it was pretty cool. And we explored the Las Vegas strip – it was horrible. I lost $3 to the slots in Caesar’s Palace and never need to go back. We flew out of Las Vegas at midnight and by noon the next day were welcomed back to Providence by six inches of snow.

IMG_3838.JPG

And that was our trip! Thanks for indulging me. Come back soon to keep up with my less exciting projects and home life.

IMG_3694.JPG

Big Time Syrup

To break up the day and get some extra culture in us, Ben, Phil, Will, and I went on a field trip to my cousin Tom’s professional maple syrup operation.

(If you have no sense of context, go read Maple Syrup on the Baessler Estate first. Or just accept the fact that my friends and I went to Pennsylvania to make syrup with my dad, and carry on).

My cousin Tom lives fifteen minutes outside of town on the ancestral family hill where the Perkinses, my mom’s family, have lived for generations. In the 1940s my grandparents bought this land (down the road from their own families’ properties) to start a dairy farm. Late in her life, my grandma sold the old farm to my cousin. The cows are long gone, but he uses the land to grow Christmas trees and make maple syrup. The old farmhouse (also gone) used to stand roughly where the sugar shack is.

IMG_1393 (1)

It’s actually directly over the house’s old hand-dug well, which they use to draw water for cleaning the equipment.

IMG_1394

It’s also near these four old pine trees, planted by my four uncles when they were kids sixty-some years ago. My poor mom and aunt weren’t born yet and missed the tree boat.

IMG_1411

My cousin Tom was off helping someone else with their syrup and couldn’t give us a tour, but my uncle (also Tom) gave us the rundown on everything.

The real star of the show is the reverse osmosis machine, made by the Amish of all people. The whole point of boiling sap is to release most of the water as vapor, leaving the sugar behind. Syrup is just very concentrated sap. Sap is just 2% sugar, though. There’s a lot of water to be removed, and the reverse osmosis machine can help.

Osmosis occurs when two liquids, one pure water and the other water with dissolved sugar, are separated by a water-permeable membrane. Water naturally wants to equalize the sugar concentration in the two liquids by flowing from the pure side to the sugar side and diluting it.

But wait, you say! Don’t we want concentrated sugar-water? Osmosis is just going to add more water to sap! We don’t want osmosis! We want the revers- oh.

IMG_1322

Reverse osmosis inverts the process by applying a pressure to the sugar side and forcing some of the water backward through the membrane. What’s left on the sugar side is all the original sugar with a lot less of the original water, or something much closer to syrup.

There are practical limits to reverse osmosis, and you have to boil away the rest of the water to get to pure syrup concentration levels. It gets you a whole lot closer, though, and cuts hours off the necessary boiling time.

IMG_1324

After going through the reverse osmosis machine, the highly concentrated sap is moved to the boiler. It’s a whole lot fancier, but at its heart it’s the same as my dad’s setup. The sap goes in the long, flat pan that runs the length of the boiler. (It’s the part with all the mechanisms sticking out of it).

IMG_1402 (1)

Underneath the pan is a wood-fed furnace that heats the syrup, just like with my dad’s operation.

IMG_1346.JPG

After the sap has been boiled, it runs through a filter to clear out any debris that might still be floating around. It did come out of the woods, after all.

IMG_1334.JPG

Next comes the finishing process, where the syrup is boiled in small, controlled batches. Big vats over a wood fire are good for the long haul, but getting it down to just the right concentration takes more precision.

IMG_1335

Finally the syrup’s ready to be packaged. The machine on the left is the bottler, where bottles are filled one at a time by hand. The machine on the right is a candy maker, for crystalizing the syrup into maple sugar candy.

IMG_1337

Depending upon the time of year or just how the trees are feeling, you can see different variants in the color of the syrup. These are samples they keep on hand to demonstrate the color difference.

IMG_1342 (1)

Better than that were the samples kept on hand to demonstrate the taste. Nothing was boiling that day, but there was enough leftover for us each to get a shot glass of syrup.

IMG_1350.JPG

It tasted amazing. I was told I should shift my beer brewing to syrup making, since syrup “actually tastes good.”

IMG_1353 (1)

After checking out the machinery, we went on a broader tour. This is the cross section of a sugar maple that a neighbor cut down, purely by coincidence, in just the right spot to reveal old tree tappings. The tree continued to grow, but the drilled holes stayed exactly where they were. If this tree is 135 years old, it must have been tapped… what? 40 years ago? 50?

IMG_1364

Long ago as it was, the detail is still so sharp. You can clearly see the point from the tip of the drill bit. You can only sort of see, but we could feel very well, the grooves along the length of the hole where the drill turned.

IMG_1365

We wandered the grounds a little to see what else was going on. Another of my uncles, Jim, is an avid beekeeper, and he’s getting my cousin Hannah – the daughter of syrup cousin Tom – into it. (Afterward Will said he’d never heard so many family members’ names thrown around in a single conversation).

Hannah has four hives – the red one is a split, or one colony in the process of being separated into two. She may not have to deal with angry neighbors like we do in the city, but she has her own problems – the whole area is wrapped in electric fence to keep the bears away.

IMG_1371 (1)

Hannah also keeps chickens, and as we were leaving my aunt Marsha slipped me a dozen eggs to take to my parents.

IMG_1414

I was also slipped a bottle of syrup, so in exchange I’ll do a shameless plug. If you’re ever in Northeastern Pennsylvania, please go see my cousin Tom at Stone Crop Farm for maple syrup and Christmas trees!

IMG_1359

The syrup is 100% pure and 100% from the land of my ancestors. What more do you need?