Maple Syrup on the Baessler Estate

Last weekend a pilgrimage was made.

Defying all odds that we wouldn’t get our act together, Ben, Will, Phil, and I drove six hours to Pennsylvania to make maple syrup with my dad.

IMG_1230

When I was young, I loved the Laura Ingalls Wilder books. The first, and arguably the coolest when you’re a little kid, is Little House in the Big Woods. It’s a non-stop festival of rough-hewn timber, smoked hung meats, and maple syrup. One spring my dad and I decided to recreate the maple syrup chapter in our own not so big woods, and a tradition was born.

Of course I got older and too cool for projects. Then I got even older and moved away. My dad has kept on boiling sap, though, tapping the trees every three years or so to replenish supplies.

IMG_1234.JPG

This winter the syrup stash was running dry, and my dad hinted that he’d love some help. There were rumblings of interest among my friends, and by golly four of piled into the car and drove well into the night to help (read: watch) my dad make syrup.

IMG_1271

On Saturday morning we woke up bright and early, but my dad was up much brighter and earlier getting the fire started. He stacks two rows of cinder blocks and builds a fire between them. The fire goes strategically next to the patch of bamboo that’s been trying to take over the garden for the past twenty-five years. It’s part scorched-earth policy and part threat – he throws some dug up bamboo roots on the fire where the rest of the patch can see it.

IMG_1267

The pans are legitimate maple syrup boiling pans, bought off of someone or other when I was a kid. Who knows how old they are. The wider, flatter one on the left is for boiling down new sap. Every now and again the sap on the left is transferred to the deeper pan on the right, where it continues to boil and refine.

IMG_1207.JPG

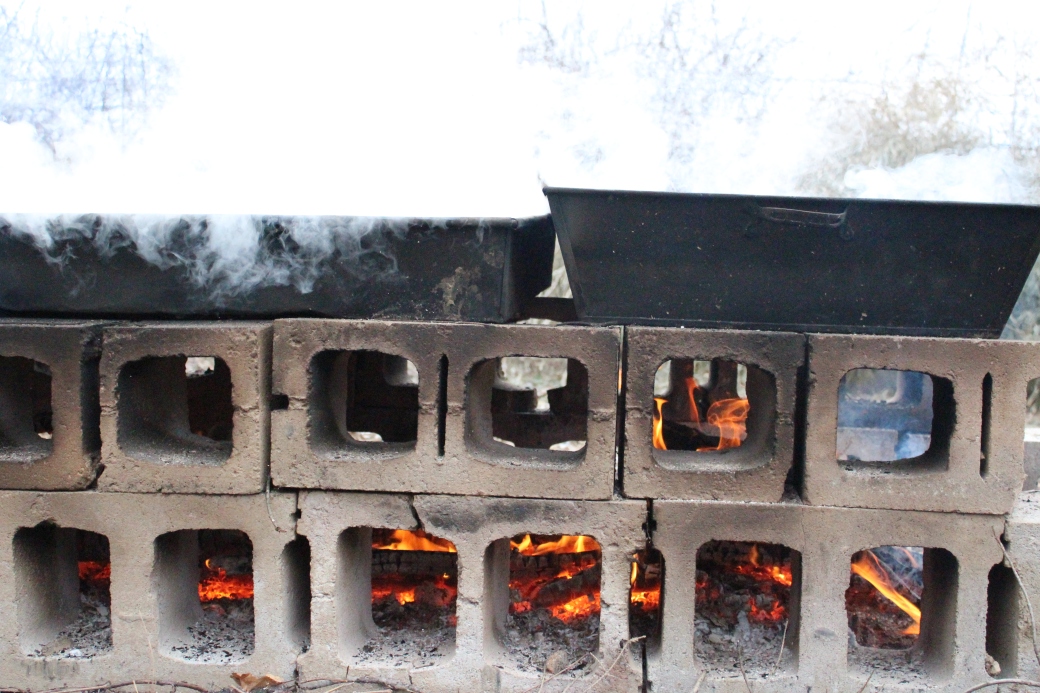
My mom thinks it’s just the right size for a funeral pyre and worries what the passing cars must think.

IMG_1193

With the weather so unseasonably warm, my dad was getting overrun with sap. Late winter and early spring is the time to tap trees, when night temperatures are low but day temperatures are relatively high. This see-sawing is what really gets the sap flowing. Days up in the 50s and 60s really get the sap flowing, apparently, and he was quickly running out of space to store it all. To make way for more sap, he did a boil the weekend before, producing about a gallon of syrup. To build up our strength for the day ahead, we made blueberry pancakes and bacon to enjoy with some of last weekend’s bounty.

IMG_1281

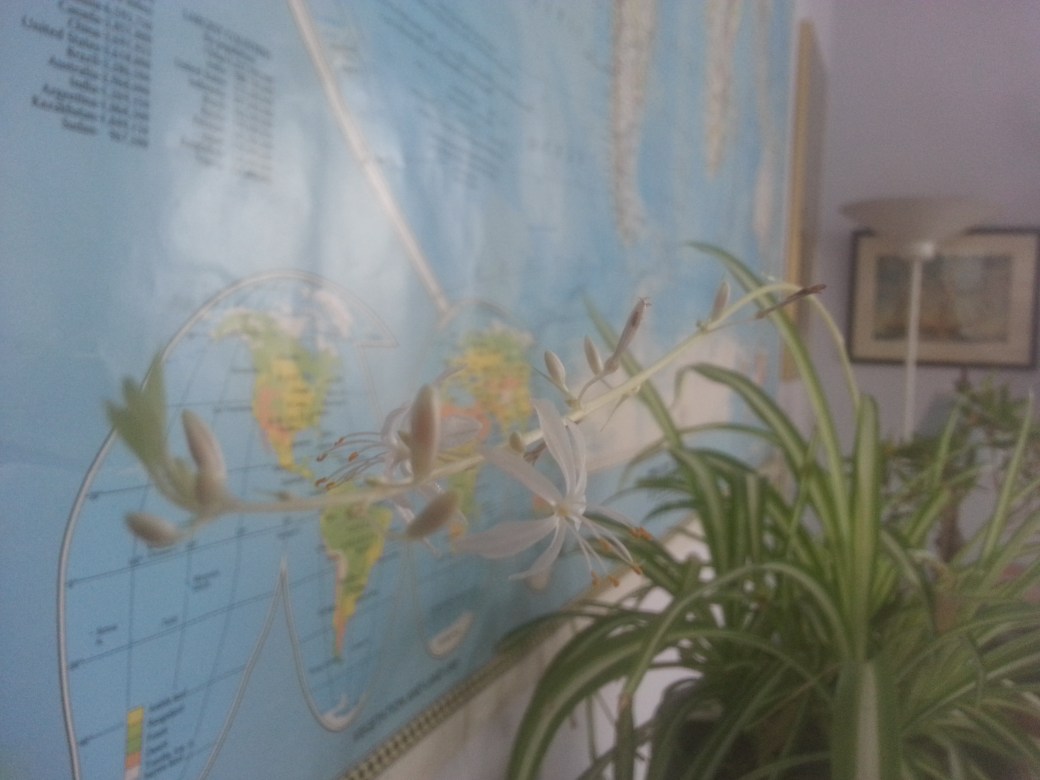
All fueled up, we got to work. The Baessler Estate is about two acres, which is small as Estates go. It’s rich in sugar maples, though, and more than big enough to sustain my parents’ pancake habits. As this was an educational trip, my dad showed us how to tell a sugar maple apart from a regular maple. It’s all in the tips – the buds of a sugar maple end in sharp points, like these. Regular maple sap can be made into syrup, too – it just won’t be as sweet.

IMG_1216 (1)

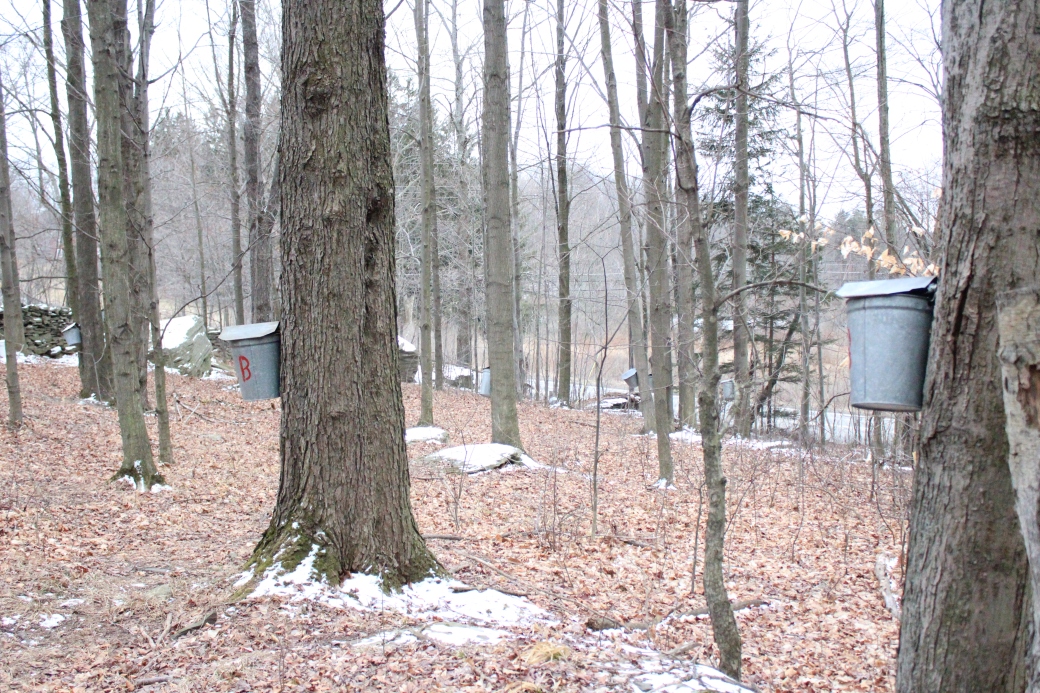
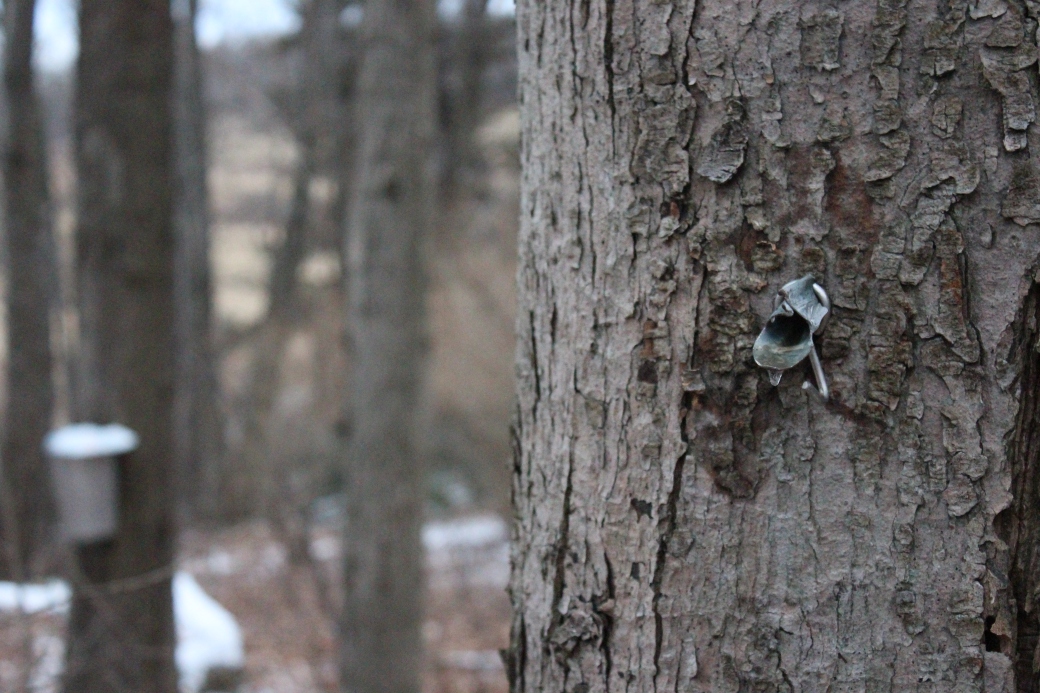
Our lesson learned, we took off into the woods to collect the remaining buckets. This tree has two obvious holes from past harvests. It’s been tapped this year using the hottest new plastic technology.

IMG_1232

Most of the buckets are these old fashioned aluminum ones that hang directly from the spout and have cute little hats to keep the snow out. These too were bought when I was a kid and we wanted an authentic Little House operation.

IMG_1233.JPG

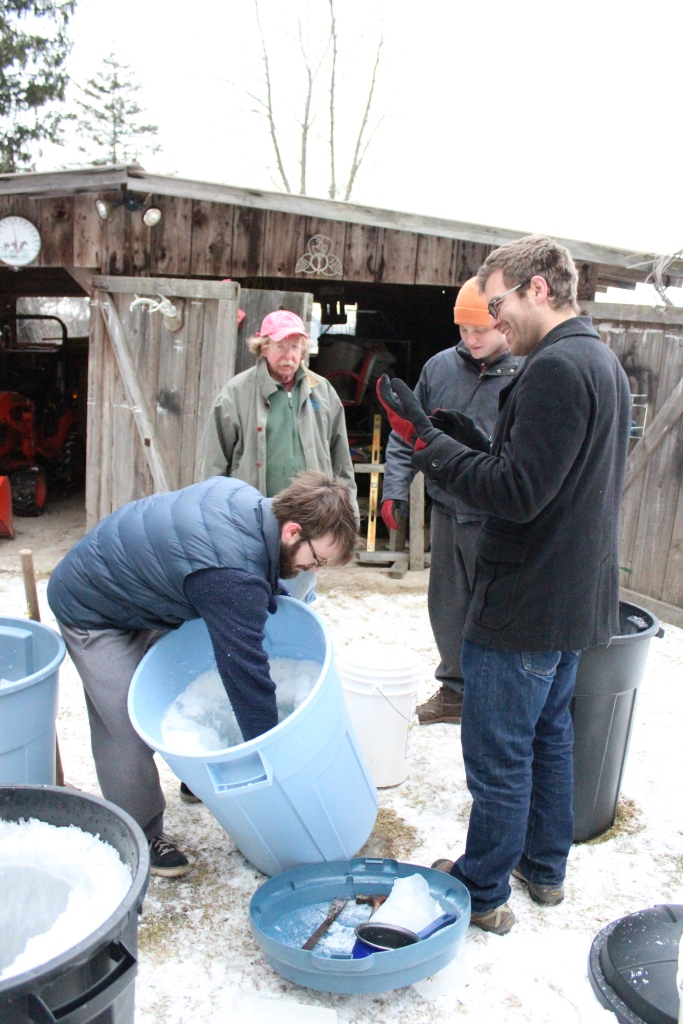
We trooped around collecting buckets. By a stroke of luck, all the sap was frozen solid.

IMG_1296 (1)

This made all the buckets nice and stackable.

IMG_1301 (1).JPG

On top of being frozen, the little buckets weren’t particularly full. They’d all been emptied the week before for the first boiling. Each of these is, then, about a week’s sap production for a single tree.

IMG_1311

We set the buckets by the fire to loosen the ice, then dumped them into the flat wide pan.

IMG_1312 (1)

The real money, however, was in the big trash barrels. A couple of the larger trees were plugged directly into these. They also served as the storage tanks for when the smaller buckets filled up. We had a couple hundred gallons of sap in these barrels, and it was all frozen.

IMG_1255 (1)

The hope was that if we hacked at it long enough with the ax, we’d hit a liquid center of much purer sap. By leaving it out to freeze, we were essentially distilling – separating the frozen water from the liquid sugar.

IMG_1200
After some serious hacking, we did hit liquid. A taste test proved that it was indeed a heck of a lot sweeter than the ice. We scooped the liquid into the pan and threw the frozen to the elements. Did we lose some sugar to the ice? Probably. But we were burning daylight and this felt like a lucky break.

IMG_1260 (1)
With all the sap in the pans, it became a boiling game. So really a waiting and fire-tending game. All in all it’s a process of about ten hours.

IMG_1307.JPG

At my mom’s suggestion, we split up the day with a field trip to my cousin’s commercial maple syrup operation down the road. It was a day packed with educational experiences. Too packed for one blog post. Join us next time for a look inside a real working Pennsylvania maple syrup sugar shack.

IMG_1393

And the time after that for the stunning conclusion to Maple Syrup on the Baessler Estate.

Too Many Seeds

I bought too many seeds.

IMG_1088.JPG

My sciencey friends adore Ali Express. It’s a site where Chinese third-party sellers post things at suspiciously low prices. My friends use it for circuit boards and the like. I discovered recently that they sell seeds at suspiciously low prices, as well. And in very suspicious shapes, such as this “breast melon.” That link is not safe for work, if your work is sensitive about long weirdo boobs hanging from a trellis.

I really considered planting all Ali Express seeds this year. I could easily have filled my garden for a couple dollars, and it would have been awfully interesting to see what actually came up. There was, of course, the risk that I’d be introducing strange invasive species. There was also the very real risk that nothing would come up at all, or at least not the thing I was expecting. If I planted breast melon seeds, pretty much the only thing I could be sure I wouldn’t get would be droopy, uncanny valley breasts.

So I went for the other end of the spectrum. Baker Creek Heirloom Seeds collects interesting ancient seeds from around the world and makes them available to gardeners. I’m a sucker for weirdo vegetables, especially weirdo vegetables with a history. I’ve also written about a few of their offerings for Gardening Know How’s heirloom section, like the Oxheart Carrot and the Golden King of Siberia Tomato.

I did not go for the Golden King of Siberia, but I did get three other tomatoes – a blue, a deep red, and a yellow cherry that supposedly puts out fruit like grapes. I’m also trying a Purple Tomatillo with high hopes of purple salsa.

IMG_1137

I have a soft spot for eggplants. Last year I planted a couple varieties and managed a handful of small fruits, but I’m hoping for more this time. I’m trying Ronde de Valence, a big, spherical French type, and Ping Tung, a super long and skinny Taiwanese type. Maybe I’ll throw in a regular Black Beauty, just for comparison.

IMG_1097

I’m going strange with beans. The Chinese Red Noodle reportedly reach 18 inches long. Dragon Tongue is a Dutch bush bean that’s supposed to be very tasty.

IMG_1099

I’m going a similar route with peas. The Dwarf Blauwschokkers is another compact bush from the Netherlands. The Magnolia Blossom Tendril produces vines, but with a lot more tendrils than leaves. This is supposed to increase airflow and prevent disease. That’s good, but I’m in it more for the aesthetics.

IMG_1105

Gambo and Oda are two sweet peppers that I chose for their bright colors and compact, high-producing plants. There are so many peppers -hot and sweet- that I got a little overwhelmed and just chose what I thought I’d like, which is not necessarily the name of the game here, but it’ll have to do.

IMG_1112

I went a little crazier with roots. De 18 Jours is supposedly ripe in just 18 days, which sounds outrageous even for a radish. We shall see. Opposite that little French radish is the totally wild Pusa Jamuni Radish from India. It looks long and tapered with white skin and deep purple, starbursty flesh. It has no reviews and runs $4 per package. To be honest, I don’t even like radishes that much. I’m just excited to see it.

It’s a similar story with the Pusa Asita Black Carrot. Although I do like carrots, I’m more eager to see these things than eat them. The Crapaudine Beet has me excited, too. I wrote an article about this one for Gardening Know How, though it hasn’t been published yet. It’s thought to be the oldest existent beet, possibly in cultivation for a thousand years. From what I’ve read and seen, it’s something like the missing link of beets – more rootlike and barky than modern varieties. Apparently if you bake it, the skin sloughs right off and it’s delicious.

IMG_1113

Squash is a tough one for me, since my space is so limited. I love a good squash, and the diversity of heirloom varieties is pretty impressive. A line had to be drawn, though. Winter squash was right out, since I can’t justify devoting so much real estate to something that won’t mature for months. I chose this Desi summer squash almost by chance. It’s a prolific bush-type that supposedly stays small. It’s brand new this season, so I’m taking a bit of a risk, but the catalog reviews it well, at least.

I grew melons for the first time last year. In fact, I grew Kazakh Melons from Baker Creek, inherited from a fellow gardener. I planted maybe ten seeds and got six seedlings. They languished for the first half of the summer, and one made it to maturity. I moved it from a pot down to the garden in the middle of the summer, where it absolutely took off. It produced two softball sized melons that slipped the vine before they were fully ripe. So it was mostly a bust. I learned a lot, though, and I’m ready to try again, this time with Kajari. (Now that I’m taking stock, it looks like I’m going to have an Indian garden). It’s supposed to mature very early, and it’s beautiful!

IMG_1120

These are two total weirdos I’d never heard of until I wrote about them. They’re both very old fashioned salad greens that lost the war with Big Spinach somewhere along the way. Strawberry Spinach tastes a lot like spinach but produces brilliant red (and unexpectedly bland) clusters of berries. Red Orach tastes something like spinach but is bright red, heat tolerant, and enormous.  I’m looking forward to it.

IMG_1132

This last bunch didn’t fit into any other groups. The cabbage came complimentary with the order. The Carentan Leeks are for my housemate Will, though I’ll probably plant some too. Leeks are a household favorite. The broccoli is for Ben, who wanted the most basic broccoli money could buy (no ancient, barky beets for him). As a bonus, it’s called Waltham 29, presumably named after Waltham, Massachusetts, where we used to live. I also got myself Beleah Rose Lettuce, a deep, deep red variety that should look interesting.

IMG_1143

And that’s it for now. I hope I can scrounge up the space to try everything. I’ll have to do some serious container planting. I’ll document as I go and keep track of what works and what doesn’t. I’ll write some reviews for the Baker Creek site, as well. The information for quite a few of these is awfully sparse, and more than once I had to sift through reviews for a success story from a climate similar to mine in order to be confident it would grow at all. I’m sure other Zone 6-ers would be happy for the input.

Coffee Soap

I bought a huge tub of coconut oil. It’s popular in soap recipes and, if you read the hype, just about everything else. Cooking, hair care, skin care – and those are just the recommended uses on the tub. Ask the right people online and it also cures sunburn, yeast infections, arthritis, and cold sores. I rubbed some on my hands and hated it. It felt like I’d just covered myself in Crisco. So much for beauty.

That’s alright – I really bought it for its soapiness. I wanted to make coffee soap following a recipe in my book. There’s a strange phenomenon in this book – the more advanced recipes (like coffee) tell you to start with any basic batch (of which there are many). This leads to a dangerous mixing of scents for the uninitiated…

IMG_0614

For my base recipe I chose a simple one from the front of the book that contains 1 lb 5 oz olive oil, 10.5 oz coconut oil, and 1 oz castor oil. Why so little castor oil?  What’s it doing there? No idea.

To get the coffee scent, I replaced the water in the water lye mixture with strong brewed coffee (10 oz to 4.8 oz lye). It did not smell good.

IMG_0629

While I let the lye fumes blow out the window, I heated my oils in the crock pot. When they finally liquefied (I’m lookin’ at you, coconut oil) I added the lye and coffee mixture and went at it with the immersion blender until it traced.

My previous batch of Castile soap came out with a bunch of light-colored chunks that I thought may have come from too much stirring. I’d since read that you really shouldn’t stir unless the soap starts to bubble up, so I made a pact with myself to leave it alone. About twenty minutes in, however, a big eruption came up the side and had to be dealt with. Maybe stirring isn’t such a bad thing.

This is how it looked after the first stirring. It smelled very strange, but it looked beautiful.

IMG_0647

A while later I gave it another stir and discovered that the soap on the bottom was a completely different color. I imagine it was getting a lot more heat.

IMG_0653

After two hours of cooking, I dropped in some Phenolphthalein and it tested neutral. I ground up two tablespoons of coffee beans for grit. God, I love grit in soap.

IMG_0668

After my super ugly Castile soap bars, I splurged and got myself a silicone loaf mold. I spooned the soap in and tried my best to get it down into all the corners. I put it on the kitchen table, squeezed between a box of beer bottles and the wall to keep the sides from bowing out. I left it for a few hours to cool and garner confusion and suspicion among my housemates.

IMG_0677

Once it was cool, I turned it out of the mold. The silicone was perfectly flexible and I was able to more or less peel it back from the soap.

IMG_0843

The loaf mold came with a handy wavy soap cutter. The soap was totally hard, but still just soft enough to slice through cleanly and easily. It makes for a rough top, smooth sides and bottom, and a front and back cross section that looks great with the coffee grounds and those lighter colored globs I thought I could get rid of.

IMG_0854

So is this method better than the individual molds? Absolutely. Does that mean I’m happy with this soap? It does not. It smells weird. It smells really weird, and not especially like coffee. Everyone agrees that it smells kind of like bread dough. Or banana bread batter. Not bananas, mind, but banana bread. A few smellers, including me, came up with that one separately. I don’t know if it’s the mixture of the oils (olive and coffee is not a combination I’d necessarily cook with), or the coffee I used (it had been sitting for a few hours after breakfast – maybe it needed to be fresher). It may have been something else. Or maybe, just maybe, this is what it’s supposed to smell like.

IMG_0860

But I have a hard time believing that.

Six Week Soap

It’s been six whole weeks since I made my cold process Castile soap. Since then it’s been living in a paper bag in my closet, getting turned over whenever I think of it.

But no more! According to my book, the bars ought to have cured to neutrality by now. This is an ordeal that takes only a couple hours using the hot process method, which I did using the exact same Castile recipe two weeks ago. Throwing caution to the wind, we took a bar to the kitchen sink.

IMG_0655

Ben, demonstrating a faith in my abilities I did not know he had, offered to go first. He says he doesn’t believe in acids or bases… I think it’s a joke. Either way, he’s going to have a PhD in science soon.

IMG_0658

Ben seemed unscathed, so I went next. I noticed quite a few differences between this soap and its hot process counterpart. First of all, the color is totally different. When they’re dry, both have an eggshell look to them. As soon as the hot process got wet, though, it deepened to olive green, which makes sense given that it’s made of olives. This bar stayed the same shade, though.

It also seemed to work better as a soap. The hot process bar has a creamy, gloppy consistency that smears across the skin, while this bar maintains its integrity and works up a nice lather on its surface. I may not be being entirely fair, since the hot process soap lives in the shower now and might just be waterlogged. I’ll have to do a comparison with a fresh bar of each.

Lastly, and I don’t think this has to do with where they’re stored, the cold process bar is smooth. It feels great to the touch, like it was poured into its mold as a liquid. The hot process bar, on the other hand, feels like just what it is – a lumpy mess. It’s what marketers call “rustic.”

IMG_0666

So which is better? All things considered, the cold process is a lot more pleasant. It’s prettier, feels better, and seems to have more integrity in its shape. But it does take six weeks, which is a terrible pain.

But what am I saying? I make wine, and I’d be ecstatic if I had a recipe that took only six weeks. And just like with wine, I’m sure that once you get a big enough backlog, you always have something to do. It’s just a matter of getting started.

IMG_0661

And getting over the fear of lye. Ben’s been telling me his hands are tingling, but I think he’s messing with me.


Ugly Soap

I have made the ugliest soap.

IMG_0472

This is Castile soap, just like last time. That batch, however, was cold process. This baby is hot process. Cold process soap needs to cure for six weeks before it’s neutral enough to use on your skin. The first batch still has another week in the closet ahead of it. Hot process soap, on the other hand, is ready to use the day it’s made.

The difference is heat. Setting the lye and oil mixture to low in a crock pot for a few hours cooks it to neutrality. How does it do this? I don’t know. I’m still learning and taking quite a few things on faith.

I bought a special little 2 quart crock pot that’s just the right size for a 2 pound batch of soap. I followed the same recipe for the cold process Castile soap, only double the size. I put two pounds of olive oil into the pot, then separately mixed together 4 oz. of lye and 10 oz. of water. I took a little too deep of a breath during this stage and had to leave the room for minute. Lye ain’t no joke.

Once I’d recovered, I poured the lye and water mixture into the oil and stirred it all up with my immersion blender. In about five minutes it was tracing.

IMG_0429

I put the lid on the crock pot and left it to its devices. Every half hour I gave it a stir. The instructions in my book said to cook for 3 hours, but it was for a 3 pound batch. I guessed that a 2 pound batch would only take 2 hours, and I was right. I bought a little bottle of phenolphthalein, a chemical that lets you easily check pH. It’s clear at neutral levels, and pink at more basic levels. I put a few drops in my soap, and they stayed clear. After stirring and dropping a few more times to be sure, I declared the soap done.

IMG_0463

It turns out that finished hot process soap is a lot gloppier than finished cold process soap. It also turns out that two pounds of soap is a lot more than one pound of soap. I should have been able to tell you one of those things ahead of time.

The only mold I have is this set of 12 2 oz. bars. For those not counting, that’s 24 ounces. Two pounds is 32 ounces. I had far too much soap, and nowhere to put it. Luckily, it was so gloppy that I could just pile the extra on top of the bars and trust it not to slide away. It made for some weird little muffin tops.

IMG_0468

The part inside the mold isn’t winning any beauty contests, either. The gloppiness made it more or less impossible to get a smooth surface. I’m not sure how real soap makers get around this one.

IMG_0469

Ugly as it looks, it is soap!  It works up something of a lather, and it doesn’t burn my skin off. It smells just like olive oil, which is a little strange, but that must be what all Castile soap is like.

IMG_0496

I hope it dissolves quickly. I have a lot of this stuff.


Surprise Carrots

What do you get when you plant carrots in March and dig them up in February?

Carrots, apparently.

IMG_0519

I sowed my carrot seeds last spring with no method to the madness. I picked a carrot spot and just blanketed it in seeds. A thick patch came up, and every now and then, I’d pick the biggest one or two and eat them, making room for the smaller ones to grow.

It was a decent system, but it got away from me. November came, and it got dark and cold. And then my hoop house failed spectacularly. The carrots were still growing, but I wasn’t feeling it anymore.

Then the real cold came, and a few snowstorms. In the back of my mind, I knew those carrots were still down there, but I gave up on them. I didn’t know if they were frozen or mush, but I knew they were beyond help.

Turns out they weren’t!

The weather today was beautiful. I went down just to take stock, and I came back with something like ten pounds of carrots.

Some have split.

IMG_0556

Some have really split.

IMG_0570.JPG

Some are big.

IMG_0573

Some are small.

IMG_0551

And some are strange.

IMG_0520.JPG

But most are basically happy and healthy. I cut off the tops, rubbed off the dirt, and stuffed them in a bag in the crisper.

IMG_0530.JPG

We’re gonna have a heck of a roast one of these days.

All-Grain Madness

I got my big pot. It holds eight gallons, which is huge for a pot. And it’s perfect for brewing five gallons of all-grain beer. I inaugurated it with the grain I bought too many weeks ago at the brew supply shop to make an IPA recipe from my John Palmer book. Milled grain is supposed to be good for about two weeks. I’d had this for… longer. But this was a learning experience, so I let it slide.

IMG_0252

How big is this new pot, you ask? Big enough that I fit inside the box it came in. You can use this picture as a fun reference for size and for the low quality of the pictures I was taking with my phone.

20160118_195740

The pot itself comfortably takes up two burners on the stove. Every pot in the house pitched in for this mission. In the big pot I heated about 5 1/2 gallons for the mash, which is the first mixture of water and grain. Between the two little guys on the right I heated 3 1/2 gallons for the sparge, which is the water flushed through the grain a second time to pick up any sugars the first bunch missed.

IMG_0255

It takes a huge amount of grain to brew 5 gallons of beer. The recipe called for 10 pounds of pale ale malt and half a pound each of crystal malt and Munich malt. I managed to find all of these at the brew shop. In fact I chose this recipe because I could find them all.

IMG_0263

I heated the big pot of water to 165F. It was at this point that I started to realize the shortcomings of my equipment. My book recommends using a big cooler as a mash tun. I don’t have a big cooler. (Strictly speaking, I do, but we use it for camping and it’s seen too many opened packs of days-old hot dogs for my taste).

The purpose of a mash tun is to hold the mash at a temperature of 152F for one hour. I have a gas stove, so keeping a pot at a more or less constant temperature isn’t a problem. But the book specifies that you should add your water to your grain, and not the other way around. Well, I’d just heated my water in the only stove-worthy container big enough to hold it. So I added the grain to the water, and not the other way around. I just hope I didn’t “thermally shock the enzymes,” as the book warns.

IMG_0277

Checking the temperature frequently and strategically turning the burners on and off, I managed to keep the mash at a more or less constant 152F for an hour. After that, it was time to coerce Ben into helping me. Once I had a full batch of all-grain beer in front of me, my worst suspicions were confirmed: There is no way in hell I can move this much weight around on my own. I either have to get to the gym or always brew when someone else is home.

The point of this transfer was to separate the grain from the liquid, which at this point is called wort. I lined my 7.8 gallon bucket with a nylon sack held in place with clothespins. This was an idea hacked together on the spot, and I had no idea if the sack would rip apart or if the clothespins would go flying. Even though I couldn’t lift the pot, I lent a supporting foot.

IMG_0287

Surprisingly enough, the sack and clothespin method worked well. Unfortunately at this point I discovered another big thing I was missing. In home brewing a mash tun usually doubles as a lauter tun, meaning it has a screened false bottom and a spigot. Open up the spigot, and the wort drains out slowly through the grain. My nylon sack served more or less as the false bottom, but what about the spigot? I had no way to drain the wort slowly.

IMG_0294

What I wound up doing was simply lifting the sack out of the bucket. (Thank God it held). This gave me something like 3 gallons of wort. I think this was more or less fine, but it was the next step that did me in. I’d heated an additional 3.5 gallons of sparge water to 165F, because that’s what the book said to do. What you’re supposed to do next is close your spigot, let your grain sit in the sparge water for fifteen minutes, then open your spigot and let the wort drain out. It’s supposed to take as long as an hour. I didn’t have a spigot, though, so I couldn’t let the wort drain out slowly. Instead I let the grain sit in the sparge water for fifteen minutes, and then I lifted the bag of grain straight out. I effectively eliminated an hour’s worth of sugar extraction. Whoops.

IMG_0300

I didn’t realize this, of course, until after I’d combined my first runnings wort with the sparge wort and took a gravity reading with my hydrometer. According to the book, I was to take my gravity points (22), and multiply them by the number of gallons of wort I’d produced (7 – since I’d effectively steeped my grain like tea rather than drip it like coffee, I’d wound up with more than my target 6 gallons). Then I was supposed to divide that number by the pounds of grain I’d used (11).

All this was to determine how much sugar I’d extracted from my grain. According to the book, a good target number was 28, though higher would be better. I got 14. After some initial panic, I remembered that hydrometers are calibrated for 59F. My wort was at about 140F, meaning my reading was something like 12 points lower than it should have been. So if my gravity was actually 34 points, that meant my extraction number was more like 22. Still lower than 28, but not disastrously low.

I still had my big bag of grain, and I probably could have somehow steeped it in the wort for longer. Space was at a real premium, though – I had nothing big enough to hold my seven gallons of wort together with my sack o’ grain. What I did have was some leftover dry malt extract from my last batch. I stirred it gradually into the wort until the hydrometer reached a level that gave me an extraction number of 28. I think I accidentally brewed a partial mash batch.

IMG_0304

The despair of my low gravity behind me, I set the wort to boil on the stove. I boiled it for an hour, adding Nugget and East Kent Golding hops along the way. Once the hour was up, I cooled it in an ice bath in the sink. The beauty of brewing in the winter is that you have an endless ice bath supply right outside. Of course, I chose to do this on the coldest night of the year and had to brave temperatures approaching ten below every time I refilled my little snow bowl.

IMG_0339

The wort chilled, it was time to find someone big to aerate it. I stole my friend Phil away from whatever he was doing and convinced him nothing would bring him more joy than sloshing a bunch of liquid back and forth between a kettle and a bucket.

I think he bought it.

Once the wort was good and bubbly, we moved it to the carboy. It wasn’t until after the fact that a discovered a piece of an airlock wedged in the the base of the funnel. I swear this happens every time. They must get stuck together soaking in the sanitizer. Someday I’ll use a clear funnel and I’ll be shocked at how easy it is.

IMG_0368

I added my rehydrated yeast, stuck the airlock in place, and left it in the middle of the kitchen overnight. By the next morning it was bubbling nicely.

IMG_0389

I asked Ben to move it into our closet, where it will be living until it’s time to bottle. He used the hot new carboy handle I ordered and had a much easier time of it than usual. Now all that’s left is to sit back and wait for the yeasts to do their thing.

IMG_0436

And maybe get myself a lauter tun.

Too Many Bubbles

Remember my swing-top pale ale? I took some glamour shots of it last night with my fancy new camera. And now, about twelve hours later, one of them is bubbling. A lot.

IMG_0191

I bottled these on Monday. They shouldn’t be bubbling like this ever, let alone after five days. I’m heartened by the fact that it’s only the one bottle and not all of them (I have about thirty). Only two of the bottles are swing-top, and I know that I filled those two first. My best guess is that this one was first of all, and it got a little too much trub from the bottom of the fermenter. That trub contained a lot of yeast, and those yeasts are having a field day. That’s what I’m guessing. Because really I have no idea.

IMG_0194

Conveniently, this is a swing-top bottle, so I just opened up the top to relieve some pressure. This brought up a whole lot more bubbles. I’d be lying if I said I wasn’t afraid of this thing and what it means. Are more of these bottles ticking away? What would have happened if I’d taken this down the basement right after its glamour shot? (It would have exploded, that’s what!)

So what’s the plan? I’ve put the delinquent bottle in the fridge to slow it down. I discovered it at 11am, not a time I usually drink a liter of beer, but I’ll try it tonight and see how it is.

IMG_0199

And I guess I’ll do a more thorough inspection of the other bottles and hope for the best. Maybe store them wrapped in bubble wrap. Or outside.

Movin’ Up in the World

I have joined the ranks of the fancy.

IMG_0030

No, I didn’t get a mug. I got a real camera.

Finally, I can take the pictures my cat deserves.

IMG_0072

It’s a Canon Rebel T5, which my friends in the know say is the right speed for a beginner. I bought it refurbished from Canon, because even this mother of all starter models costs about a month’s rent new.

My friend pointed me toward a good basic lens to get when I want expand my repertoire. It’s apparently dirt cheap. It’s $100. I’m used to less expensive hobbies.

This is something like an investment, though. Until now I’ve been taking pictures on my phone. It took decent pictures when I got it in 2013, but its time is past. It couldn’t pick up every little seed on this leek blossom.

IMG_0074

Or show that hair stuck to this onion in such minute detail. Why is there a hair on this onion? Already my perception of the world is opening up.

IMG_0109

Or select such a narrow depth of field on my swing-top bottled Cincinnati Pale Ale. Is this a good picture, or is this a lame abuse of aperture? I don’t know. I barely understand aperture as it is, and I still have a lot to learn.

IMG_0098

At least as I learn it should be easier to stumble across decent pictures.

IMG_0092


Spider Plant Magic

Winter is here with a vengeance. It’s been unseasonably mild, but the honeymoon is over and we’re finally getting some real cold and snow.  This is now the only way I can leave the house.

20160208_113528

My spider plant must not realize this, though, because it’s flowering! I noticed it was putting out a long shoot and thought for sure it would make another baby spider. I was excited, since all the previous spiders had been ripped off by the cat.

20160208_132111_HDR

Instead I’ve got a long series of buds, two of which have already opened. There are a couple grassy strands at the end, too, and I won’t be surprised if they do turn into a baby spider.

20160208_131933

I’ve had this plant since I was a sophomore in college, and I can’t recall it ever flowering before! Whether this is a special event or I’ve just never looked at the right time, I don’t know. Nor do I know if spider plants are self pollinating, but I’m going to go at it with a Q-tip regardless and hope for the best.

20160208_132014

These are exciting times we live in.